

如何使用香草JavaScript編寫原子包裝

>本文是由Vildan Softic審查的。感謝SitePoint所有的同行評審員製作SitePoint內容的最佳狀態!
>利用babel進行跨越JavaScript代碼,以確保與Atom基於鉻的環境的兼容性,從而增強ES2015功能的使用,同時保持未來的適應性。
>像npm模塊一樣,將您的原子包構建。- >實現必需軟件包生命週期方法,例如`activate()`,`deactivate()```''和`serialize()`在您的主javaScript文件中,在包裝的使用周期內管理狀態和行為。
- >採用Atom的序列化系統來維護跨會話的軟件包狀態,以確保保留用戶數據和設置並準確地恢復。
> 通過創建自定義視圖並利用Atom的API添加可配置的設置,菜單和keymaps,可以增強用戶交互,從而使您的軟件包既通用又有用戶。 - 理解原子 ATOM是一個基於github的電子框架編寫的節點。 JS和基於鉻的應用。這意味著從技術上講,它是在桌面上運行的Web應用程序。原子的內部功能分為微小的核心軟件包;它們的開發方式與社區的任何其他軟件包相同。儘管它們都是用CoffeeScript編寫的,但可以用簡單的JavaScript編寫它們,或者通過Babel將其寫入。
- >激活全埃斯2015支持babel Babel是源代碼編譯器;將Ecmascript 2015(以前稱為ES6)代碼變成Ecmascript 5代碼。由於環境是鉻,因此已經有許多支持的ES2015功能可用。但是,我建議使用Babel傳輸您的代碼,而不是總是查找哪些實施。在後來的版本中 - 當鉻在ES2015中得到更好的支持時,您可以再次停用Babel並保持代碼庫(幾乎)未觸及的代碼。
- 要激活用babel進行轉移,每個文件都需要一個“使用babel”;一開始的語句,類似於Ecmascript 5中的嚴格模式。這還使您能夠決定要轉錄哪些文件,而不是通過省略語句。
package.json
>它有助於將Atom軟件包視為NPM模塊。您對API的訪問與在Node.js上運行的任何工具相同。因此,可以添加所需的任何NPM依賴性。還需要一個軟件包。包含您項目的所有元數據。基本文件應如下:
<span>{ </span> <span>"name": "your-package", </span> <span>"main": "./lib/main", </span> <span>"version": "0.1.0", </span> <span>"description": "A short description of your package", </span> <span>"keywords": [ </span> <span>"awesome" </span> <span>], </span> <span>"repository": "https://github.com/<your-name>/<package>", </span> <span>"license": "MIT", </span> <span>"engines": { </span> <span>"atom": ">=1.0.0 <2.0.0" </span> <span>}, </span> <span>"dependencies": { </span> <span>} </span><span>} </span>登入後複製登入後複製登入後複製重要的密鑰是主要的 - 定義軟件包的主要入口點(默認為index.js/index.coffee)和引擎 - 講述了您的軟件包運行哪個版本的原子。還有一組可選的鍵可用,在“ WordCount”軟件包文檔>(extact package.json)>中記錄
軟件包源代碼
>您的所有軟件包代碼都屬於頂級目錄lib/。我建議還將您的入口點放在此文件夾中,因為它可以使結構保持清潔並更容易掃描項目。>您的主文件必須是一個單身對象,該對象維護包裝的整個生命週期。即使您的軟件包僅由單個視圖組成,它也將從此對象進行管理。您的入口點需要一個激活方法,但也應具有
>可選deactivate()和serialize()。 激活您的軟件包
acivate()函數是唯一必需的方法。在此處初始化所有模塊,視圖或助手。它通過一個對象,其中包含包裝的先前序列化狀態。如果您不在包裝中序列化任何內容,則將是一個空的對象。這意味著,這完全取決於您和您的軟件包架構。<span>// lib/main.js </span><span>'use babel'; </span> <span>// This is your main singleton. </span><span>// The whole state of your package will be stored and managed here. </span><span>const YourPackage = { </span> <span>activate (state) { </span> <span>// Activates and restores the previous session of your package. </span> <span>}, </span> <span>deactivate () { </span> <span>// When the user or Atom itself kills a window, this method is called. </span> <span>}, </span> <span>serialize () { </span> <span>// To save the current package's state, this method should return </span> <span>// an object containing all required data. </span> <span>} </span><span>}; </span> <span>export default YourPackage; </span>登入後複製登入後複製登入後複製停用
>事件訂閱 一個軟件包通常會訂閱多個事件,例如添加自定義命令,收聽更改或修改文件。可以將它們捆綁到CompositedIsable()的實例中,因此,它們都可以立即被處置。
>
序列化所有內容!>
序列化是一個功能強大但又可選的原子軟件包功能。當窗口從上一個會話中關閉,刷新或還原時,會序列化/避難所化。您可以定義哪些組件以及多少組件應序列化數據。重要的是它返回JSON。如果您有視圖,並且希望能夠刷新它,則需要使其與序列化和挑選化兼容。>
這個非常基本的組件採用一個對象,該對象將用作組件的內部數據。然後,您的組件可能會與數據進行一些工作,並且可以通過serialize()方法序列化其狀態。
><span>{ </span> <span>"name": "your-package", </span> <span>"main": "./lib/main", </span> <span>"version": "0.1.0", </span> <span>"description": "A short description of your package", </span> <span>"keywords": [ </span> <span>"awesome" </span> <span>], </span> <span>"repository": "https://github.com/<your-name>/<package>", </span> <span>"license": "MIT", </span> <span>"engines": { </span> <span>"atom": ">=1.0.0 <2.0.0" </span> <span>}, </span> <span>"dependencies": { </span> <span>} </span><span>} </span>登入後複製登入後複製登入後複製為了使所有這些有用,必須在包裝中調用和序列化此組件。
您要序列化的所有對像都需要序列化()方法。它必須返回一個“可序列化對象”,以及帶有註冊供應儀名稱的Deserializer鍵。根據Atom的說法,“通常是班級本身的名稱”。除此之外,一個類還需要靜態求解方法。此方法將對像從以前的狀態轉換為真實對象。<span>// lib/main.js </span><span>'use babel'; </span> <span>// This is your main singleton. </span><span>// The whole state of your package will be stored and managed here. </span><span>const YourPackage = { </span> <span>activate (state) { </span> <span>// Activates and restores the previous session of your package. </span> <span>}, </span> <span>deactivate () { </span> <span>// When the user or Atom itself kills a window, this method is called. </span> <span>}, </span> <span>serialize () { </span> <span>// To save the current package's state, this method should return </span> <span>// an object containing all required data. </span> <span>} </span><span>}; </span> <span>export default YourPackage; </span>登入後複製登入後複製登入後複製> 為了使所有這些都成為可能,您必須使用Atom.deserializers.add()。
窗格和視圖
窗格是原子中的單個窗口。它包含所有稱為“項目”的打開選項卡。這些窗格存儲在Atom.workspace對像中。使用atom.workspace.getactivepane()您請求當前的活動窗格。窗格對像不包含任何DOM元素,而是Atom內部組件的所有實例(例如TextEditor,GutterContainer,NotificationManager)。了解這些窗格對於為您的軟件包創建自定義視圖至關重要。您必須使用JavaScript創建您要添加的任何其他自定義UI元素的視圖或任何其他自定義UI元素。 Atom完全由Web組件構建,但是您不必這樣做。自定義模式的一個非常基本的示例可以如下。
>atom.workspace.addmodalpanel()方法在Atom的工作區中添加了模態元素。如果要向窗格添加自定義視圖(例如,對於設置頁面),則需要更多的工作。
>製作包裝可配置<span>// lib/main.js </span><span>import <span>{ CompositeDisposable }</span> from 'atom'; </span> <span>const YourPackage = { </span> <span>subscriptions: null, </span> <span>activate (state) { </span> <span>// Assign a new instance of CompositeDisposable... </span> <span>this.subscriptions = new CompositeDisposable(); </span> <span>// ...and adding commands. </span> <span>this.subscriptions.add( </span> atom<span>.commands.add('atom-workspace', { </span> <span>'your-package:toggle': this.togglePackage </span> <span>}) </span> <span>); </span> <span>}, </span> <span>// When your package get's deactivated, all added </span> <span>// subscriptions will be disposed of at once. </span> <span>deactivate () { </span> <span>this.subscriptions.dispose(); </span> <span>}, </span> <span>togglePackage () { </span> <span>// Code to toggle the package state. </span> <span>} </span><span>}; </span>登入後複製登入後複製<span>// lib/fancy-component.js </span><span>class FancyComponent { </span> <span>constructor (configData) { </span> <span>this.data = configData; </span> <span>} </span> <span>// This method will be called when the class </span> <span>// is restored by Atom. </span> <span>static deserialize (config) { </span> <span>return new FancyComponent(config); </span> <span>} </span> <span>// The returned object will be used to restore </span> <span>// or save your data by Atom. </span> <span>// The "deserializer" key must be the name of your class. </span> <span>serialize () { </span> <span>return { </span> <span>deserializer: 'FancyComponent', </span> <span>data: this.data </span> <span>}; </span> <span>} </span> <span>doSomethingWithData () {} </span><span>} </span> <span>// Add class to Atom's deserialization system </span>atom<span>.deserializers.add(FancyComponent); </span> <span>export default FancyComponent; </span>登入後複製登入後複製>軟件包配置應在JSON模式中描述。要添加設置,您的軟件包對象需要帶有數據的配置密鑰。另外,您可以將配置移至config-schema.json文件並導入。這樣可以使您的配置分開並組織結構。
>這將在包裝的設置頁面上自動創建配置。所有受支持類型的列表可以在Atom API文檔的“配置”頁面上找到。您的設置對像以及所有其他軟件包配置都存儲在atom.config對像中。
>獲得和設置<span>// lib/main.js </span><span>import <span>FancyComponent</span> from './fancy-component'; </span><span>import <span>SomeView</span> from './some-view'; </span> <span>const YourPackage = { </span> <span>fancyComponent: null, </span> <span>someView: null, </span> <span>activate (state) { </span> <span>// If the component has been saved at a previous session of Atom, </span> <span>// it will be restored from the deserialization system. It calls your </span> <span>// your components static 'deserialize()' method. </span> <span>if (state.fancy) { </span> <span>this.fancyComponent = atom.deserializers.deserialize(state.fancy); </span> <span>} </span> <span>else { </span> <span>this.fancyComponent = new FancyComponent({ otherData: 'will be used instead' }); </span> <span>} </span> <span>// More activation logic. </span> <span>}, </span> <span>// As well as your component, your package has a serialize method </span> <span>// to save the current state. </span> <span>serialize () { </span> <span>return { </span> <span>fancy: this.fancyComponent.serialize(), </span> <span>view: this.someView.serialize() </span> <span>}; </span> <span>} </span><span>}; </span>登入後複製登入後複製>您可以使用get()和set()方法獲取並設置配置的任何鍵。也可以獲取Atom的一般設置或其他軟件包的設置。如果您想與其他軟件包進行互動,則需要提供和消費服務。<span>// lib/custom-view-element.js </span><span>export default class YourPackageView { </span> <span>constructor (state) { </span> <span>this.data = state; </span> <span>this.element = document.createElement('div'); </span> <span>this.message = document.createElement('span'); </span> <span>this.textNode = document.createTextNode(this.data.content); </span> <span>this.element.classList.add('your-package'); </span> <span>this.message.classList.add('your-package-message'); </span> <span>this.message.appendChild(this.textNode); </span> <span>this.element.appendChild(this.message); </span> <span>} </span> <span>serialize () { </span> <span>return { </span> <span>data: this.data </span> <span>}; </span> <span>} </span> <span>destroy () { </span> <span>this.element.remove(); </span> <span>} </span> <span>getElement () { </span> <span>return this.element; </span> <span>} </span> <span>doSomethingWithData () {} </span><span>} </span>登入後複製>
<span>{ </span> <span>"name": "your-package", </span> <span>"main": "./lib/main", </span> <span>"version": "0.1.0", </span> <span>"description": "A short description of your package", </span> <span>"keywords": [ </span> <span>"awesome" </span> <span>], </span> <span>"repository": "https://github.com/<your-name>/<package>", </span> <span>"license": "MIT", </span> <span>"engines": { </span> <span>"atom": ">=1.0.0 <2.0.0" </span> <span>}, </span> <span>"dependencies": { </span> <span>} </span><span>} </span>登入後複製登入後複製登入後複製聆聽更改
要聆聽更改,您可以觀察更改的配置,或者將偵聽器(稱為ondidchange())到關鍵路徑。他們倆都返回一個可用於.dispose()退訂的一次性。
> 再次,將它們添加到Compositedisposable的實例中,您可以立即處理多個事件:>
或單獨處置它們:<span>// lib/main.js </span><span>'use babel'; </span> <span>// This is your main singleton. </span><span>// The whole state of your package will be stored and managed here. </span><span>const YourPackage = { </span> <span>activate (state) { </span> <span>// Activates and restores the previous session of your package. </span> <span>}, </span> <span>deactivate () { </span> <span>// When the user or Atom itself kills a window, this method is called. </span> <span>}, </span> <span>serialize () { </span> <span>// To save the current package's state, this method should return </span> <span>// an object containing all required data. </span> <span>} </span><span>}; </span> <span>export default YourPackage; </span>登入後複製登入後複製登入後複製用菜單和keymaps進行微調
進行微調>菜單和keymaps使您的包裝功能可在原子環境中訪問用戶。它們鏈接到您界面的特定命令。如果您的軟件包可以切換,打開視圖,執行一些自定義操作或其他任何操作,則應向用戶使用。<span>// lib/main.js </span><span>import <span>{ CompositeDisposable }</span> from 'atom'; </span> <span>const YourPackage = { </span> <span>subscriptions: null, </span> <span>activate (state) { </span> <span>// Assign a new instance of CompositeDisposable... </span> <span>this.subscriptions = new CompositeDisposable(); </span> <span>// ...and adding commands. </span> <span>this.subscriptions.add( </span> atom<span>.commands.add('atom-workspace', { </span> <span>'your-package:toggle': this.togglePackage </span> <span>}) </span> <span>); </span> <span>}, </span> <span>// When your package get's deactivated, all added </span> <span>// subscriptions will be disposed of at once. </span> <span>deactivate () { </span> <span>this.subscriptions.dispose(); </span> <span>}, </span> <span>togglePackage () { </span> <span>// Code to toggle the package state. </span> <span>} </span><span>}; </span>登入後複製登入後複製>
添加菜單
>菜單定義可以作為JSON文件存儲在菜單/頂級目錄中,也可以在包裝的菜單鍵中存儲。以下示例將命令添加到“軟件包”菜單欄和編輯器的上下文菜單中。右鍵單擊編輯器內部時出現上下文菜單。>
keymaps
>使用keymaps,您為軟件包命令定義快捷方式。它們與特定範圍綁定,其中範圍是諸如Atom-Text-編輯器,Atom-Text-編輯器:NOT([mini])或Atom-workspace之類的CSS選擇器。當匹配選擇器的元素焦點並使用擊鍵模式時,發出了您的自定義操作。<span>// lib/fancy-component.js </span><span>class FancyComponent { </span> <span>constructor (configData) { </span> <span>this.data = configData; </span> <span>} </span> <span>// This method will be called when the class </span> <span>// is restored by Atom. </span> <span>static deserialize (config) { </span> <span>return new FancyComponent(config); </span> <span>} </span> <span>// The returned object will be used to restore </span> <span>// or save your data by Atom. </span> <span>// The "deserializer" key must be the name of your class. </span> <span>serialize () { </span> <span>return { </span> <span>deserializer: 'FancyComponent', </span> <span>data: this.data </span> <span>}; </span> <span>} </span> <span>doSomethingWithData () {} </span><span>} </span> <span>// Add class to Atom's deserialization system </span>atom<span>.deserializers.add(FancyComponent); </span> <span>export default FancyComponent; </span>登入後複製登入後複製>
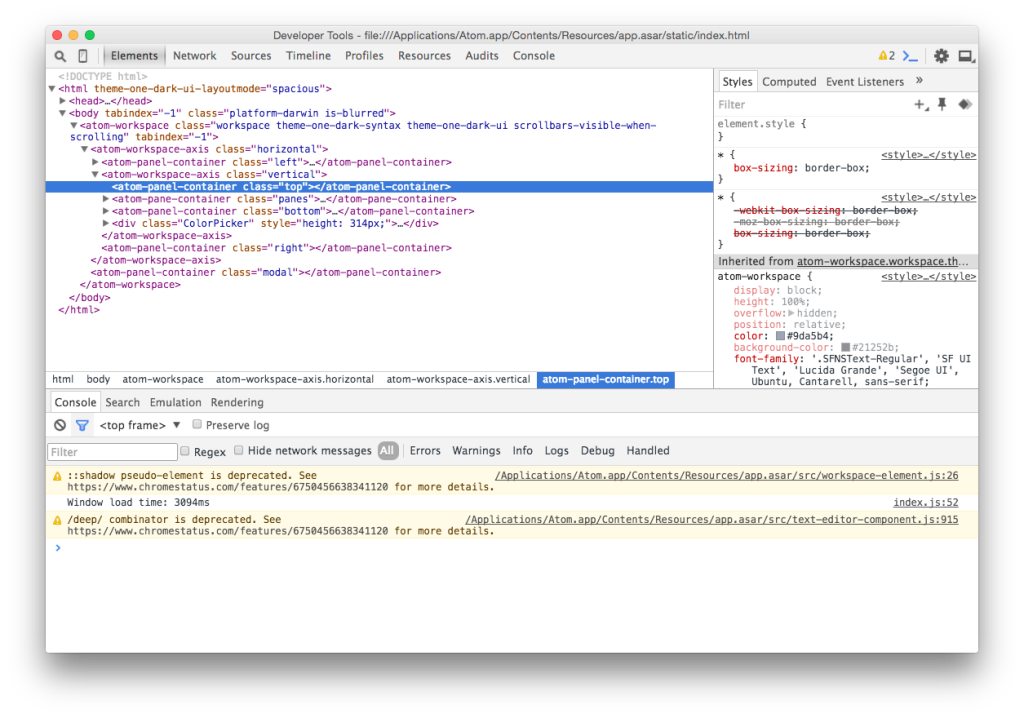
請記住,這些命令必須已在您的入口點中註冊(atom.commands.add())。> 使用Chrome Developer Tools進行調試
在原子中調試與在網絡上調試沒有什麼不同。您可以在View>“開發人員”下激活Chrome Developer工具>切換開發人員工具以查看丟棄的錯誤,從代碼中登錄或了解Atom的標記。<span>// lib/main.js </span><span>import <span>FancyComponent</span> from './fancy-component'; </span><span>import <span>SomeView</span> from './some-view'; </span> <span>const YourPackage = { </span> <span>fancyComponent: null, </span> <span>someView: null, </span> <span>activate (state) { </span> <span>// If the component has been saved at a previous session of Atom, </span> <span>// it will be restored from the deserialization system. It calls your </span> <span>// your components static 'deserialize()' method. </span> <span>if (state.fancy) { </span> <span>this.fancyComponent = atom.deserializers.deserialize(state.fancy); </span> <span>} </span> <span>else { </span> <span>this.fancyComponent = new FancyComponent({ otherData: 'will be used instead' }); </span> <span>} </span> <span>// More activation logic. </span> <span>}, </span> <span>// As well as your component, your package has a serialize method </span> <span>// to save the current state. </span> <span>serialize () { </span> <span>return { </span> <span>fancy: this.fancyComponent.serialize(), </span> <span>view: this.someView.serialize() </span> <span>}; </span> <span>} </span><span>}; </span>登入後複製登入後複製>
用茉莉
進行單位測試原子使用茉莉框架進行測試。測試放置在規格/頂級目錄中,並且必須以-spec(例如花式component-spec.js)結束文件。不需要測試或發布包裹,但是它們是備份代碼質量並確保添加新功能時沒有破壞的好方法。 >
要運行測試,您可以使用窗口:Run-Package-Specs命令或轉到View>“開發人員”> Run Package Specs。 如果您想在Travis CI上運行軟件包規格,則在Atom的博客上有一個簡短的文章,涉及如何設置它。
軟件包流量
這是很多輸入。原子的實際流量或執行順序大致如下(注意:測試不是軟件包流的一部分)。-
- 菜單,keymaps,樣式表和所有其他配置
- 如果定義了激活程序,則將運行
- >
主入口點(即激活())執行
-
- >您的軟件包魔術(例如,對用戶輸入做出反應,創建視圖,修改文件)
-
Atom啟動並閱讀您的軟件包。 原子序列化包裝狀態
您將開發哪個包裝?>
使用香草JavaScript編寫原子軟件包的經常詢問問題(常見問題解答)什麼是香草javaScript,為什麼在編寫原子包中它很重要?這在編寫原子軟件包方面很重要,因為它允許使用輕巧,高效且高度可定制的代碼。使用Vanilla JavaScript,開發人員可以創建更快,更安全且更易於調試和維護的軟件包。它還確保包裝不依賴任何第三方庫,從而使它們更可靠,更健壯。使用香草JavaScript的Atom軟件包,您首先需要設置開發環境。這包括安裝Node.js和Atom。安裝了這些安裝後,您可以使用Atom軟件包生成器創建一個新軟件包。之後,您可以使用香草JavaScript開始編寫軟件包。請記住要遵循原子包指南,以確保您的軟件包與Atom編輯器兼容。
//在module.js
中導出一個函數,導出函數myfunction(){// function code eke>}
//導入導入來自'./ module.js';
>如何調試用Vanilla Javascript編寫的原子軟件包? atom提供一個內置的開發人員工具面板您可以用來調試包裹。您可以通過查看>開發人員>切換開發人員工具來打開此面板。在這裡,您可以檢查代碼,設置斷點,並監視變量和網絡活動。此外,您可以在代碼中使用Console.log()語句將其輸出值以調試目的輸出值。
>>如何使我的原子包與不同版本的原子兼容?為了確保您的原子包與不同版本的原子兼容,您應該遵循原子API指南,避免使用不推薦使用的API。您還應該在不同版本的原子上測試包裝,以識別和解決任何兼容性問題。此外,您可以在軟件包的包裝文件中指定最低所需的原子版。可以使用APM Publish命令將其發佈到Atom軟件包存儲庫。在發布之前,您需要使用APM版本命令創建軟件包的新版本。您還需要為您的軟件包創建一個GitHub存儲庫,然後將代碼推向其。
我可以在用Vanilla Javascript編寫的Atom軟件包中使用ES6功能嗎? ATOM包中的ES6功能。 Atom的基礎node.js運行時間支持大多數ES6功能,包括let and and const聲明,箭頭功能,模板文字等。但是,您應該確保使用ES6功能不會引起與舊版本的Atom的兼容性問題。
>如何處理用Vanilla JavaScript編寫的Atom軟件包中的錯誤?這使您可以捕獲和處理在執行代碼期間可能發生的異常。您也可以使用Atom.Notifications API向用戶顯示錯誤消息。此API提供了顯示不同類型的通知的方法,包括錯誤通知。
> -
以上是如何使用香草JavaScript編寫原子包裝的詳細內容。更多資訊請關注PHP中文網其他相關文章!

熱AI工具

Undresser.AI Undress
人工智慧驅動的應用程序,用於創建逼真的裸體照片

AI Clothes Remover
用於從照片中去除衣服的線上人工智慧工具。

Undress AI Tool
免費脫衣圖片

Clothoff.io
AI脫衣器

Video Face Swap
使用我們完全免費的人工智慧換臉工具,輕鬆在任何影片中換臉!

熱門文章
熱工具

記事本++7.3.1
好用且免費的程式碼編輯器

SublimeText3漢化版
中文版,非常好用

禪工作室 13.0.1
強大的PHP整合開發環境

Dreamweaver CS6
視覺化網頁開發工具

SublimeText3 Mac版
神級程式碼編輯軟體(SublimeText3)


 神秘的JavaScript:它的作用以及為什麼重要
Apr 09, 2025 am 12:07 AM
神秘的JavaScript:它的作用以及為什麼重要
Apr 09, 2025 am 12:07 AM
JavaScript是現代Web開發的基石,它的主要功能包括事件驅動編程、動態內容生成和異步編程。 1)事件驅動編程允許網頁根據用戶操作動態變化。 2)動態內容生成使得頁面內容可以根據條件調整。 3)異步編程確保用戶界面不被阻塞。 JavaScript廣泛應用於網頁交互、單頁面應用和服務器端開發,極大地提升了用戶體驗和跨平台開發的靈活性。
 誰得到更多的Python或JavaScript?
Apr 04, 2025 am 12:09 AM
誰得到更多的Python或JavaScript?
Apr 04, 2025 am 12:09 AM
Python和JavaScript開發者的薪資沒有絕對的高低,具體取決於技能和行業需求。 1.Python在數據科學和機器學習領域可能薪資更高。 2.JavaScript在前端和全棧開發中需求大,薪資也可觀。 3.影響因素包括經驗、地理位置、公司規模和特定技能。
 如何實現視差滾動和元素動畫效果,像資生堂官網那樣?
或者:
怎樣才能像資生堂官網一樣,實現頁面滾動伴隨的動畫效果?
Apr 04, 2025 pm 05:36 PM
如何實現視差滾動和元素動畫效果,像資生堂官網那樣?
或者:
怎樣才能像資生堂官網一樣,實現頁面滾動伴隨的動畫效果?
Apr 04, 2025 pm 05:36 PM
實現視差滾動和元素動畫效果的探討本文將探討如何實現類似資生堂官網(https://www.shiseido.co.jp/sb/wonderland/)中�...
 JavaScript的演變:當前的趨勢和未來前景
Apr 10, 2025 am 09:33 AM
JavaScript的演變:當前的趨勢和未來前景
Apr 10, 2025 am 09:33 AM
JavaScript的最新趨勢包括TypeScript的崛起、現代框架和庫的流行以及WebAssembly的應用。未來前景涵蓋更強大的類型系統、服務器端JavaScript的發展、人工智能和機器學習的擴展以及物聯網和邊緣計算的潛力。
 如何使用JavaScript將具有相同ID的數組元素合併到一個對像中?
Apr 04, 2025 pm 05:09 PM
如何使用JavaScript將具有相同ID的數組元素合併到一個對像中?
Apr 04, 2025 pm 05:09 PM
如何在JavaScript中將具有相同ID的數組元素合併到一個對像中?在處理數據時,我們常常會遇到需要將具有相同ID�...
 JavaScript引擎:比較實施
Apr 13, 2025 am 12:05 AM
JavaScript引擎:比較實施
Apr 13, 2025 am 12:05 AM
不同JavaScript引擎在解析和執行JavaScript代碼時,效果會有所不同,因為每個引擎的實現原理和優化策略各有差異。 1.詞法分析:將源碼轉換為詞法單元。 2.語法分析:生成抽象語法樹。 3.優化和編譯:通過JIT編譯器生成機器碼。 4.執行:運行機器碼。 V8引擎通過即時編譯和隱藏類優化,SpiderMonkey使用類型推斷系統,導致在相同代碼上的性能表現不同。
 前端開發中如何實現類似 VSCode 的面板拖拽調整功能?
Apr 04, 2025 pm 02:06 PM
前端開發中如何實現類似 VSCode 的面板拖拽調整功能?
Apr 04, 2025 pm 02:06 PM
探索前端中類似VSCode的面板拖拽調整功能的實現在前端開發中,如何實現類似於VSCode...
