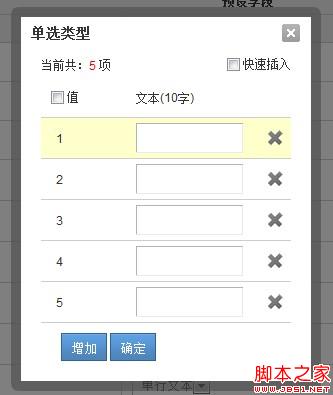
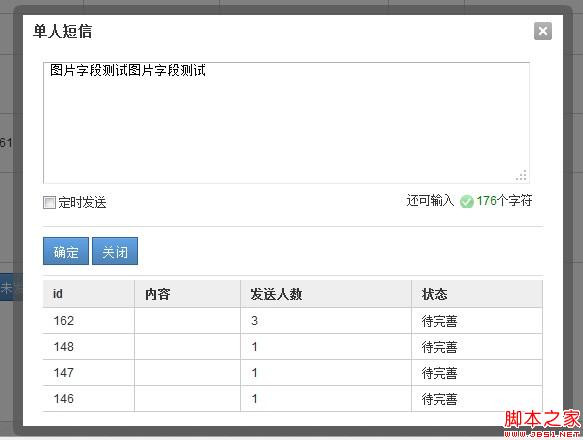
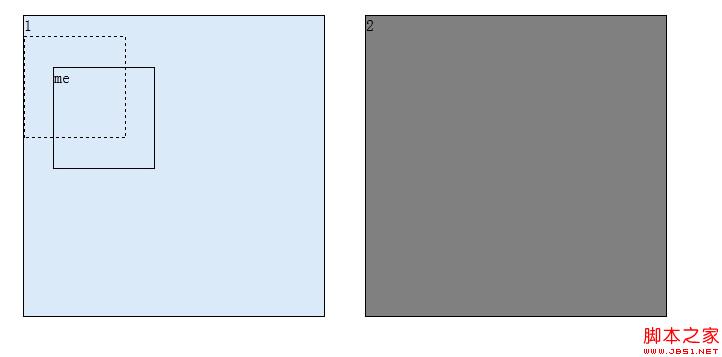
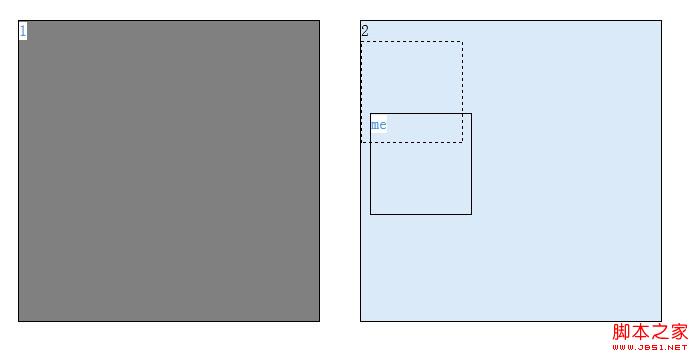
//弹出层剧中
function popup(popupName) {
var _scrollHeight = $(document).scrollTop(); //获取当前窗口距离页面顶部高度
_windowHeight = $(window).height(); //获取当前窗口高度
_windowWidth = $(window).width(); //获取当前窗口宽度
_popupHeight = popupName.height(); //获取弹出层高度
_popupWeight = popupName.width(); //获取弹出层宽度
// _posiTop = (_windowHeight - _popupHeight) / 2 + _scrollHeight - 50;
_posiTop = _scrollHeight + 120;
_posiLeft = (_windowWidth - _popupWeight) / 2;
popupName.css({ "left": _posiLeft + "px", "top": _posiTop + "px", "display": "block" }); //设置position
}
function dragFunc(dragDiv, dragBody) {
if (dragDiv[0] && dragBody[0]) {
var dragAble = false;
var x1 = 0;
var y1 = 0;
var l = 0;
var t = 0;
var divOffset = dragBody.offset();
dragDiv.mousedown(function (e) {
var ss = this;
// var rootId =
dragDiv.css("cursor", "move");
dragAble = true;
// 当前鼠标距离div边框的距离
// 当前鼠标坐标,减去div相对左边的像素
l = parseInt(dragBody.css("left"));
t = parseInt(dragBody.css("top"));
x1 = e.clientX - l;
y1 = e.clientY - t;
x1 = x1 > 0 ? x1 : 0;
y1 = y1 > 0 ? y1 : 0;
this.setCapture && this.setCapture();
});
dragDiv.mousemove(function (e) {
if (!dragAble)
return;
// 当前div左边的坐标
// 当前鼠标坐标,减去鼠标拖动量
var x2 = 0;
var y2 = 0;
//需要考虑滚动条问题!!!
var top = $(document).scrollTop() ? $(document).scrollTop() - 15 : 0;
var left = $(document).scrollLeft() ? $(document).scrollLeft() - 15 : 0;
x2 = e.clientX - x1 + left;
y2 = e.clientY - y1 + top;
x2 = x2 > 0 ? x2 : 0;
y2 = y2 > 0 ? y2 : 0;
//要移动一定数量才移动
if (Math.abs(l - x2) > 10 || Math.abs(t - y2) > 10) {
dragBody.css("left", x2 + "px");
dragBody.css("top", y2 + "px");
}
});
dragDiv.mouseup(function (event) {
if (!dragAble)
return;
dragAble = false;
// dragDiv.css("position", "relative");
this.releaseCapture && this.releaseCapture();
});
}
}
var MyDialog = function (cfg) {
this.config = {
id: (new Date()).getTime().toString(),
el: null,
bodyId: null,
cover: true,
boxHtm: '
' +
'
' +
' ' +
' ' +
' | ' +
' ' +
' | ' +
' ' +
' | ' +
'
' +
' ' +
' ' +
' ' +
' | ' +
' ' +
' ' + ' ' +
' 请输入标题 ' +
' ' + '
' ' +
' 请输入内容 ' +
' ' +
' | ' +
' ' +
' | ' +
'
' +
' ' +
' ' +
' | ' +
' ' +
' ' +
' | ' +
' ' +
' | ' +
'
' +
'
' +
'
'
};
var scope = this;
if (cfg) {
$.each(cfg, function (key, value) {
scope.config[key] = value;
});
}
this.box = null;
this.cover = null;
this.tmpBody = null;
}
MyDialog.prototype.show = function () {
var scope = this;
var cover = null;
var box = null;
if (this.config.cover) {
if (this.config.id && $('#' + this.config.id + '_cover')[0]) {
cover = $('#' + this.config.id + '_cover');
cover.show();
} else {
cover = $('
');
$('body').append(cover);
}
scope.cover = 封面;
}
if (!$('#' this.config.id)[0]) {
box = $(this.config.框Htm);
$('body').append(box);
box.attr('id', this.config.id);
if (this.config.title) {
box.find('.title_text').html(this.config.title);
}
if (this.config.bodyId) {
var body = $('#' this.config.bodyId);
var tmp = $('
').append(body);
var initBody = tmp.html();
scope.tmpBody = $(initBody);
tmp = null;
if (body[0]) {
var con = box.find('.main .content');
body.show();
con.html('');
con.append(body);
}
}
if (this.config.el && this.config.el[0]) {
var con = box.find('.main .content');
con.html(this.config.el);
}
//居中
popup(box);
//關閉對話框
box.find('.title .cls').click(function (e) {
scope.close();
e.preventDefault();
返回假;
});
dragFunc($('#' this.config.id ' .main .title'), $('#' this.config.id));
box.show();
this.box = 框;
}
}
MyDialog.prototype.close = function () {
//這裡有問題
var box = this.box;
var tmpBody = this.tmpBody;
var cover = this.cover;
if (tmpBody && tmpBody[0]) {
$('body').append(tmpBody);
}
if (box && box[0]) {
box.remove();
}
if (cover && cover[0]) {
cover.hide();
}
};
標題>
function DragFunc(dragDiv, DragBody, dropBody) {
if (!dropBody[0]) {
dropBody = $(document);
}
if (dragDiv[0] && DragBody[0]) {
var DragAble = false;
var x1 = 0;
var y1 = 0;
var l = 10;
var t = 10;
var init_position = '';
var init_cursor = '';
var tmp_body = null;
dragDiv.mousedown(function (e) {
var ss = this;
init_position = DragBody.css("position"); init_cursor = DragBody.css("init_cursor");
dragBody.css("位置", "絕對");
dragDiv.css("遊標", "移動");
tmp_body = $( '
');
tmp_body.css('寬度', DragBody.css('寬度'));
tmp_body.css('高度', DragBody. css('高度')); >tmp_body.insertAfter(dragBody);
$(document).bind("selectstart", function () { return false; });
dragAble = true;
//目前滑鼠距離div的距離
// 當前滑鼠座標,相對於左側的像素
l = parseInt(dragBody.css("left")) ? parseInt(dragBody.css("left") ) : 10; >t = parseInt(dragBody.css("top")) ? parseInt(dragBody.css("top")) : 10;
var offset = DragBody.offset();
l = parseInt(offset.左);
t = parseInt(offset.top);
y1 = e.clientY - t;
x1 = x1 : 0 ;
y1 > y1 : 0;
this.setCapture();
dragDiv.mousemove(function (e) {
if (!dragAble)
return;
//目前div左側的座標
//目前滑鼠座標,缺少滑鼠座標量
var x2 = 0;
var y2 = 0;
//需要考慮捲軸問題
var top = $(document).scrollTop() $(document) .scrollTop ? () - 15 : 0;
var left = $(document).scrollLeft() ? $(document).scrollLeft() - 15 : 0;
x2 = e.clientX - x1 left; y2 = e.clientY - y1 top;
x2 > 0 ?
y2 > y2 : 0; >if (Math.abs(l - x2) > 10 || Math.abs(t - y2) > 10 ) {
dragBody.css("left", x2 "px"); .css("top", y2 "px");
}
//紅色#993300
//灰#DBEAF9
//移動結束後判斷拖曳
var w = parseInt(dragBody.css('width'))
var h = parseInt(dragBody.css('height'));
$.each(dropBody, function () {
var el = $ (這個);
el.css('背景顏色', '灰色');
var offset = el.offset ();
var _l = offset.left
var _t = offset.top || 0;
var _w = parseInt(el.css('width'));
var _h = parseIntse (el.css('height')); (x2 > _l && x2 w _t && y2 h el.css('背景顏色', '#DBEAF9') ;
el.append(tmp_body);
}
var s = '';
});
});
dragDiv.mouseup(function (event) {
if (!dragAble)
return;
$(document).unbind("selectstart");
//還原位置與遊標
dragBody.css("position", init_position);
dragBody.css("cursor", init_cursor);
//dragBody.css("left", '0'); DragBody.css("top", '0');
if (tmp_body ) {
dragBody.insertAfter(tmp_body);
var offset = tmp_body.offset(); offset.left);
t = parseInt(offset.top);
dragBody.css("left ", l);
dragBody.css("top", t);
}
dragAble =
// DragDiv.css("位置", "相對");
this .releaseCapture && this.releaseCapture(); );
}
}
$(document).ready(function () {
var d1 = $('#d1');
var c = $('.c');
dragFunc(d1, d1, c)
});
腳本>
div
{
寬度:100px;
高度:100px;
邊框:1px純黑;
}
.tmp_div
{
邊框樣式:虛線;
}
#c1
{
背景顏色:灰色;
寬度:300px;
高度:300px;
浮動:左;
邊距:20px;
}
#c2
{
背景顏色:灰色;
寬度:300px;
高度:300px;
浮動:左;
邊距:20px;
}
樣式>
頭>
2
身體>
非同步檔案上傳
我們所謂的AJAX非同步檔案上傳事實上用js技術好像暫時還不能實現,就我所謂的異步上傳事實上還是表單提交,而將form的target指向一
隱藏的iframe,然後成功後回調即可,真是十分坑爹的做法。 。 。 。 。
若是要更好的體驗,便需要藉助flash或XX框架了,但是我也沒有研究過.
document.charset='utf-8';
var form = $ ('#formImg');
var frame = $('#frame_img');
if (!frame[0]) {
frame = $('
');
}
form.append(frame);
form.attr('target', 'frame_img');
form.attr('action', url);
form.submit();
document.charset='gbk';
但是回調會涉及一點跨域的問題,需要在同一大網域下才行。
現況
愛生活,愛工作,今年繼續努力!


 複製程式碼
複製程式碼
 var dia = new MyDialog({ title : 標題,


