

COM Functions in PHP4 (Windows)--里面有例子来讲WORD文档读写的。

window|word
COM Functions in PHP4 (Windows)
Alain M. Samoun
Introduction
The built-in COM functionality of PHP4 is quite attractive for some of us programming in the win32 environment. So far, there is not much documentation on the subject. This short article will explain how to use COM in real PHP4 programming with three examples using MS office 2000 Word and Excel programs and the Adobe Distiller program. The COM technology has been developed by Microsoft for several years, under different names. As far as this article is concerned, the words OLE, OLE Automation, ActiveX and COM are all the same: They designate an encapsulated piece of code (the Object) that performs some functions for a windows application. PHP4 COM connects to the object (Instantiate the object) and uses its methods and properties.
If you want to reproduce the following examples, here is my configuration:
Windows 98 - MS Office 2000
Apache 1.3.9 Windows
PHP4.02 Dev (08-20-00) Running as CGI
COM tags in PHP4
Lets start with the specific information to use the COM functions with PHP4. To instantiate a component, one needs the "new" operator and the "OLE programmatic identifiers" of the object:
$instance = new COM("$identifier");
?>
Since COM is a reserved class name in PHP4, it passes the object's identifier to the constructor. Now that we have instantiated the component, we can easily reach its methods and properties, using the OOP class. For example:
$instance->[Object]->[method1]->[method2]->..->[property];
?>
It's that simple!
There are two tag functions for PHP4 COM that are used when the OOP construct doesn't work. (In the case of PHP syntax problems, with the names and values of properties with invalid characters, like dot or parenthesis):
bool com_set(class com_object, string property name, string property_value);
mixed com_get(class com_object, string property_name);
?>
Finally, PHP4 also supports DCOM to create an instance of an object on a remote computer:
$Instance = new COM(string "Component name", string "remote_server_address");
?>
Note: there is a DCOM directive to set in the PHP configuration. PHP developers may add DCOM support for Unix in the future. That's all, there are no other functions to remember!
Identifiers, methods and properties.
identifiers are strings like:
For MS Word: "Word.Application" or "Word.Application.9"
MS Excel: "Excel.Application" or "Excel.Sheet"
ADOBE Acrobat: "Exch.application" or "PdfDistiller.PdfDistiller"
As the last identifier name indicates, it is not always easy to know the right name for the object. If you do not have access to a VBA doc, you can look at the windows registry (Start - Run regedit) and look in the HKEY_CLASSES_ROOT folder: Scan down until the end of the extensions list, you will then reach the Application names. The COM Identifiers available in your machine, are the folders with the CLSID subfolders.
The application program should document its COM methods and properties. In the case of Office 2000, start the application, then open the visual basic editor with the
Using PHP4 COM functions with MS Word
Now, we have all we need to start with the first code example:
#*********************************************************
# This example, slightly modified from the Zend site,
# will open an instance of word with a new
# document with the name "Useless test.doc" and the line:
# "This is a test2..." typed inside.
#*********************************************************
#Instantiate the Word component.
$word = new COM("word.application") or die("Unable to instantiate Word");
#Get and print its version
print "Loaded Word, version {$word->Version}
";
#Another way to get the version using com_get
$testversion = com_get($word->application,version);
print "Version using Com_get(): $testversion
";
#Make it visible in a window
$word->Visible = 1;
#Open a new document
$word->Documents->Add();
#Write something
$word->Selection->TypeText("This is a test...");
#Now save the document
$word->Documents[1]->SaveAs("Useless test.doc");
#Comment next line if you want to see the word document,
#then close word manually
$word->Quit();
#Comment if you want to see the word document, then close
?>
If you study this example for a few minutes using the OLE documentation that comes with Word, you will learn practically all you need to write your own program.

熱AI工具

Undresser.AI Undress
人工智慧驅動的應用程序,用於創建逼真的裸體照片

AI Clothes Remover
用於從照片中去除衣服的線上人工智慧工具。

Undress AI Tool
免費脫衣圖片

Clothoff.io
AI脫衣器

Video Face Swap
使用我們完全免費的人工智慧換臉工具,輕鬆在任何影片中換臉!

熱門文章
熱工具

記事本++7.3.1
好用且免費的程式碼編輯器

SublimeText3漢化版
中文版,非常好用

禪工作室 13.0.1
強大的PHP整合開發環境

Dreamweaver CS6
視覺化網頁開發工具

SublimeText3 Mac版
神級程式碼編輯軟體(SublimeText3)


 word自動換行怎麼取消
Mar 19, 2024 pm 10:16 PM
word自動換行怎麼取消
Mar 19, 2024 pm 10:16 PM
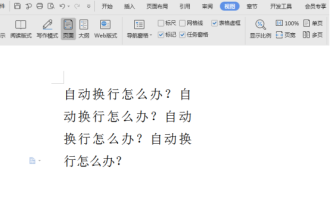
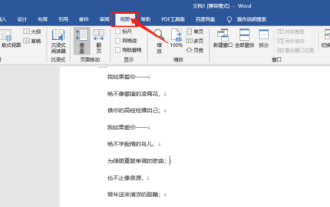
在word文件中進行編輯內容時可能會自動換行,如果這時候不調整的話,對於我們的編輯會帶來很大的影響,讓人十分頭疼,這是怎麼回事呢?其實是標尺的問題,下面小編就介紹word自動換行怎麼取消的解決方法,希望能幫助大家!開啟Word文檔,輸入文字後,嘗試複製並貼上時可能會導致文字跳到新行,這時需調整設定以解決該問題。 2.要解決這個問題,我們首先要知道有這個問題的原因。這時我們點選工具列下的視圖。 3.然後再點選下面的「標尺」選項。 4.這時候我們會發現,文檔的上方出現了一個標尺,標尺上面有幾個錐形標
 Word怎麼顯示標尺以及標尺的操作方法詳解!
Mar 20, 2024 am 10:46 AM
Word怎麼顯示標尺以及標尺的操作方法詳解!
Mar 20, 2024 am 10:46 AM
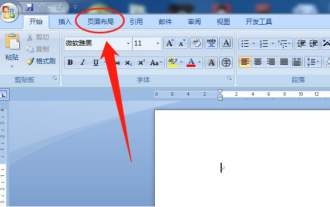
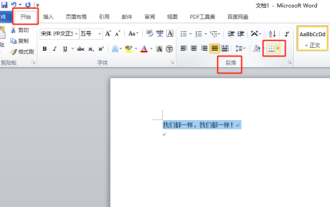
我們在使用Word的時候,為了編輯內容更好美觀,我們常常會使用標尺。要知道,在Word中的標尺包括水平標尺和垂直標尺,用於顯示和調整文件的頁邊距、段落縮排、製表符等。那麼,Word中的標尺怎麼顯示出來的呢?下面,我就來教大家設定標尺的顯示方法。有需要的同學趕快收藏起來吧!步驟如下:1、首先,我們需要把word標尺調出來,預設的word文件是不顯示word標尺的,我們只需要點選word中的【檢視】的按鈕。 2、然後,我們找到【標尺】的選項,勾選就可以了。這樣一來,word標尺就被我們調出來了!是不是
 word文檔怎麼加手寫簽名
Mar 20, 2024 pm 08:56 PM
word文檔怎麼加手寫簽名
Mar 20, 2024 pm 08:56 PM
Word文件由於功能的強大被大家廣泛使用,word裡不但可以插入各種格式,比如圖片和表格等等,現在為了文件的完整性真實性,好多文件都需要在文檔末尾加入手工簽名,聽起來這麼複雜的問題要怎麼解決呢,今天小編就教大家word文檔怎麼加手寫簽名。使用掃描器、相機或手機對手寫簽名進行掃描或拍攝,然後透過PS或其他圖片編輯軟體對圖片進行必要的裁切處理。 2.在要插入手寫簽名的Word文件中選擇“插入—圖片—來自文件”,選擇裁切好的手寫簽名。 3.滑鼠雙擊手寫簽名圖片(或右鍵圖片選擇「設定圖片格式」),彈出「設定圖
 如何為Word設定頁邊距
Mar 19, 2024 pm 10:00 PM
如何為Word設定頁邊距
Mar 19, 2024 pm 10:00 PM
辦公室軟體中Word是我們最常用的軟體之一,我們製作的文字文檔一般都會用Word進行操作,有些文檔按要求還需要提交紙質版,在進行打印之前,一定要把佈局設置好,才能呈現出更好的效果。那麼問題來了,Word設定頁邊距的方法是什麼呢?我們有具體的課程講解為大家解決疑惑。 1.開啟或新建一個word文檔,點選選單列上的「頁面佈局」選單。 2、點選「頁面設定」選項的「頁邊距」按鈕。 3.在清單中選擇常用的頁邊距。 4.如果清單中沒有合適的頁邊距,按一下「自訂邊距」。 5.彈出「頁面設定」對話框,在「頁邊距」選項分別輸
 2 個月不見,人形機器人 Walker S 會摺衣服了
Apr 03, 2024 am 08:01 AM
2 個月不見,人形機器人 Walker S 會摺衣服了
Apr 03, 2024 am 08:01 AM
機器之能報道編輯:吳昕國內版的人形機器人+大模型組隊,首次完成疊衣服這類複雜柔性材料的操作任務。隨著融合了OpenAI多模態大模型的Figure01揭開神秘面紗,國內同行的相關進展一直備受關注。就在昨天,國內"人形機器人第一股"優必選發布了人形機器人WalkerS深入融合百度文心大模型後的首個Demo,展示了一些有趣的新功能。現在,得到百度文心大模型能力加持的WalkerS是這個樣子的。和Figure01一樣,WalkerS沒有走動,而是站在桌子後面完成一系列任務。它可以聽從人類的命令,折疊衣物
 word中底紋設定在哪
Mar 20, 2024 am 08:16 AM
word中底紋設定在哪
Mar 20, 2024 am 08:16 AM
我們平常常使用word來辦公,但是你是否知道word中底紋設定在哪呢?今天就來跟大家分享具體的操作步驟,朋友們快來看看吧! 1.首先,開啟word文檔,選取一段需要新增底紋的文字段落訊息,然後點選工具列上的【開始】按鈕,找到段落區域,點選右側的下拉按鈕,(如下圖紅色圈出部分所示)。 2.點選下拉框按鈕之後,在彈出的選單選項中,點選【邊框和底紋】選項,(如下圖紅色圈出部分所示)。 3.在彈出的【邊框和底紋】對話框中,點選【底紋】的這個選項,(如下圖紅色圈出部分所示)。 4.在填滿的那一欄,選擇顏色
 Word怎麼繪製表格
Mar 19, 2024 pm 11:50 PM
Word怎麼繪製表格
Mar 19, 2024 pm 11:50 PM
word是個很強大的辦公室軟體,相比較wps來說,word細節處理比較有優勢,特別是當文件表述過於複雜,一般使用word會更加省心。所以,當你步入社會以後,一定要學習一些word使用的小技巧。前段時間表弟問我一個這樣的問題,常常看別人使用word時繪製表格呢,感覺挺高大上的。當時我就笑了,看似高大上的內容,其實操作起來只需要3個步驟而已,你知道Word要怎麼繪製表格嗎? 1.開啟word,選取要插入表格的地方,在上方選單列中找到「插入」選項。 2.點選「表格」選項,會出現密密麻麻的小正方體
 word虛線怎麼畫
Mar 19, 2024 pm 10:25 PM
word虛線怎麼畫
Mar 19, 2024 pm 10:25 PM
word是我們辦公室常會用到的軟體,裡邊有很多功能,可以方便我們的操作,例如:大篇文章的話,我們可以使用裡邊的查找功能,知道全文裡邊某個字錯了,可以直接替換不用一個個去更改了;向上級交文檔的時候可以把文檔美化的更好看等等操作,下面小編就來給大家分享word虛線怎麼畫的步驟,大家一起來學習吧! 1.首先,我們打開電腦上的word文檔,如下圖所示:2.然後,在文檔裡邊輸入一串文字,如下圖紅色圈出部分所示:3.接下來,按住【ctrl+A】選取全部文字,如下圖紅色圈出部分所示:4.點選選單列上邊的【開始】
