

如何在兩層伺服器的第二層Nginx上取得用戶IP

如何在兩層伺服器的第二層Nginx上取得使用者IP
一.之前在做nginx的伺服器設定的時候遇到了一個問題,在之前伺服器有用到一個限制客戶端最大並發連線的功能,而且這個功能的實作是依靠在伺服器中做
$remote-addr
這樣的設定來達到的。但在增加了前端一層(負載、CDN、防火牆、安全服務)伺服器之後,拿到的客戶端IP就都變成了前端伺服器的IP,但並非真是真是的用戶IP位址。
二.這樣的問題下,我又重新看了幾次nginx官網的介紹,也發現其中另外一個特別重要的變數
$proxy_add_x_forwarded_for
這個變數是客戶端存取請求中的X-forwarded-for 欄位的值,如果請求中不包含這個字段,則自動用這個變數會等價於remote-addr這個變數。這允許我們獲取HTTP請求中通常情況下前端伺服器保存的客戶真實IP位址的字段,通常就是我們說的X_FORWARDED_FOR字段,然後透過這樣的方法,我們就可以實現各種各樣的功能了。
三.下面我來實際為大家做一個簡單示範。諸多不足,歡迎指正。
首先我們先搭建好Nginx的環境,這裡我們使用1.7 系列的最新版本1.7.9為例,(關於版本的問題請參考FAQ 1)
下載、WGET所需網址http://nginx.org/ download/nginx-1.7.9.tar.gz
1. 下載Nginx
[lugt@localhostmysql]$ wget http://nginx.org/download/nginx-1.7.9.g
[lugt@localhostmysql]$ tar zxvf nginx-1.7.9.tar.gz
3. 直接編譯(需考慮是否需要openssl等外掛程式的支援)
[mydft點🕎 9
[lugt@localhost nginx-1.7.9]$ ./configure
[lugt@localhost nginx-1.7.9]$ make
[lugt@localhost nginx-1.7.9]$ su localhostnginx-1.7.9]$ make install
4. 接著接下來修改nginx.conf設定檔
[lugt@localhost nginx-1.7.9]$ su
[lugt@localhost nginx-1.7.9]$ suhost
/usr/local/nginx[lugt@localhostnginx]$ vi conf/nginx.conf然後在nginx.conf 中找到這裡,加入來設定負載均衡,模仿CDNupstream dnsnginx1 {
server[*.*.*.*/yourhostname]:8080 weight=10000; #填IP、域名
}
server {
listen 80;
server_name
#access_log logs/host.access.log main
location /{
proxy_pass http://dnsnginx1;
proxy_set_header Host $host;
proxy_set_header X-Real-IP $remote_addr;
proxy_set_header X-Forwarded-For $proxy_add_x_forwarded_for;
proxy_set_header HTTP_X_FORWARDED_FOR $remote_addr;
proxy_redirect default;
}
}在設定一個虛擬伺服器在8080端口,
limit_conn_zone $proxy_add_x_forwarded_for zone=addr:10m;  # 并发设置 空间10M
server {
        listen       8080;
        server_name  [*.*.*.*/yourhostname]:8080 weight=10000; #填IP、域名
        limit_conn addr 1; #限制客户端最大并发连接数为 1
            location / {
            root   html;
            index  index.html index.htm;
        }
}[lugt@localhostnginx]$ ./sbin/nginx –t啟動伺服器 [lugt@localhostnginx]$
使用ab 工具查看效果。
[lugt@localhost nginx]$ ab –c 10 –n 100 –v 4 http://127.0.0.1/ | grep HTTP/1.1
這行的意思:透過AB測試工具存取位址,並發連線數為30,總測試300次,顯示HTTP返回頭資訊
透過ab 工具可以測出無論同時發送多少連接,最後成功返回200的只有之前限制nginx的最大並發連接數,所以可以證明對於IP的限制功能已經可以使用了。參考資料請見FAQ2
FAQ 1 版本問題
如果目前正在使用的Nginx版本沒有達到1.7.1版本,很可能nginx還不支援這個功能,
這時候就需要透過一段程式碼夾在limit_conn_handler函數中來從request取得x_forwarded_for 的值。
以1.6.1版本為例,程式碼增加如下。 src/http/modules/ngx_http_limit_conn.c 第184行
hash =ngx_crc32_short(key.data, key.len);
If(“” == &ctx->key){
<span style="white-space:pre">	</span>If(NULL!= r->main->headers_in->x_forwarded_for->elts){
           key.data= *(char*)r->main->headers_in->x_forwarded_for->elts;
         key.len = 4;
hash =ngx_crc32_short(key.data, key.len);
<span style="white-space:pre"> </span>} } 這裡是一份參考數據, 獲取
[lugt@localhost~]$ ab -c 10 -n 100 -v 4 http://127.0.0.1/ | grep HTTP/1.1
HTTP/1.1503 Service Temporarily Unavailable
HTTP/1.1503 Service Temporarily Unavailable
HTTP/1.1503 Service Temporarily Unavailable
HTTP/1.1503 Service Temporarily Unavailable
HTTP/1.1503 Service Temporarily Unavailable
HTTP/1.1503 Service Temporarily Unavailable
HTTP/1.1503 Service Temporarily Unavailable
503 Service Temporarily UnavailableHTTP/1.1 200 OKHTTP/ 1.1503 Service Temporarily UnavailableHTTP/1.1503 Service Temporarily UnavailableHTTP/1.1503 Service Temporarily Unavailable
HTTP/1.1503 Service Temporarily Unavailable
HTTP/1.1503 Service Temporarily Unavailable
HTTP/1.1503 Service Temporarily Unavailable
HTTP/1.1503 Service Temporarily Unavailable
HTTP/1.1503 Service Temporarily Unavailable
HTTP/1.1503 Service Temporarily Unavailable
HTTP/1.1 200 OK
<… repeated 往下均为重复8次HTTP/503 与1次HTTP/200 交替出现>
English Version
How to retrievethe true ip of the client user if there are two layers of servers
Days before, wehave been faced such a difficulty which is we can’t use the variable $remote_addr for gathering the clients’ip address. This problem surfaces when we used a proxy server between the trueserver and client, which is actually a cdn. And that makes our functions oflimiting the maximum connections a client can make to a server at a time. Thissituation can also found if the load balance or any anti-spam service are inuse. So that’s why we can’t use remote_addr variable further.
After I did someresearch on the documentation and the code , I found out that this problem canbe solved by replacing the
$remote_addr
variable with the
$proxy_add_x_forwarded_for
And now I shall makean easy example to practically use this method.
First of all,build up a Nginx server.
Here, I will usethe 1.7.9 version (latest to the written time) for instance, therefore, thereexist some differences between older versions than 1.7.1 (see FAQ 1)
1. Download A Nginx Copy:
[lugt@localhostmysql]$ wget http://nginx.org/download/nginx-1.7.9.tar.gz
2. Decompress the file
[lugt@localhostmysql]$ tar zxvf nginx-1.7.9.tar.gz
3. Compile The Code
[lugt@localhostmysql]$ cd nginx-1.7.9
[lugt@localhostnginx-1.7.9]$ ./configure
[lugt@localhostnginx-1.7.9]$ make
[lugt@localhostnginx-1.7.9]$ su
[lugt@localhostnginx-1.7.9]$ make install
4. And edit the config file nginx.conf
[lugt@localhost nginx-1.7.9]$ su
[lugt@localhostnginx-1.7.9]$ cd /usr/local/nginx
[lugt@localhostnginx]$ vi conf/nginx.conf
There add suchdirectives to the server1 for emulate for an CDN server
upstream dnsnginx1 {
        server[*.*.*.*/yourhostname]:8080 weight=1000; #fill in your ip/hostname
}
server {
        listen       80;
        server_name  [hostname]   #fill your ip/ hostname here
#access_log  logs/host.access.log  main
        location /{
           proxy_pass          http://dnsnginx1;
            proxy_set_header    Host             $host;
            proxy_set_header    X-Real-IP        $remote_addr;
            proxy_set_header    X-Forwarded-For  $proxy_add_x_forwarded_for;
            proxy_set_header    HTTP_X_FORWARDED_FOR $remote_addr;
            proxy_redirect      default;
}
}
After the end ofone server directive, and in the http directive, add so to function the sever2
limit_conn_zone $proxy_add_x_forwarded_for zone=addr:10m;  # sample setting
server {
        listen       8080;
        server_name  [*.*.*.*/hostname]:8080 weight=10000; #fill in ip/hostname here
        limit_conn addr 1; # Enablethe limitation of connection per ip at a time to 1.

            location / {
            root   html;
            index  index.html index.htm;
        }
}And then you cansave , test the config file and run nginx
Test your configfile:
[lugt@localhostnginx]$ ./sbin/nginx –t
Start the nginx server
[lugt@localhostnginx]$ ./sbin/nginx
Now, the serverhas been set and you can run a test at instance.
/* This CommandMeans to run a tool to connect to server as 10conn/once and 10 conns in total*/
[lugt@localhost~]$ ab -c 10 -n 100 -v 4 http://127.0.0.1/ | grep HTTP/1.1
FAQ 1
There is actuallysome little malfunctions when using elder versions than 1.7.1 (Probably the newversion has it for a new feature).So to use this directive in earlier versions,some code need to be added.
As a Example inthe version 1.6.1
In filesrc/http/modules/ngx_http_limit_conn.c Line around 184
hash =ngx_crc32_short(key.data, key.len);
If("" == &ctx->key){
    If(NULL!= r->main->headers_in->x_forwarded_for->elts){
           key.data= *(char*)r->main->headers_in->x_forwarded_for->elts;
         key.len = 4;
hash =ngx_crc32_short(key.data, key.len);
}}<span style="font-family: Arial, Helvetica, sans-serif;"> </span>
FAQ 2 TestingResults
[lugt@localhost~]$ ab -c 10 -n 100 -v 4 http://127.0.0.1/ | grep HTTP/1.1
HTTP/1.1503 Service Temporarily Unavailable
HTTP/1.1503 Service Temporarily Unavailable
HTTP/1.1503 Service Temporarily Unavailable
HTTP/1.1503 Service Temporarily Unavailable
HTTP/1.1503 Service Temporarily Unavailable
HTTP/1.1503 Service Temporarily Unavailable
HTTP/1.1503 Service Temporarily Unavailable
HTTP/1.1503 Service Temporarily Unavailable
HTTP/1.1503 Service Temporarily Unavailable
HTTP/1.1 200 OK
HTTP/1.1503 Service Temporarily Unavailable
HTTP/1.1503 Service Temporarily Unavailable
HTTP/1.1503 Service Temporarily Unavailable
HTTP/1.1503 Service Temporarily Unavailable
503 Service Temporarily UnavailableHTTP/1.1503 Service Temporarily UnavailableHTTP /1.1503 Service Temporarily UnavailableHTTP/1.1503 Service Temporarily UnavailableHTTP/1.1503 Service Temporarily UnavailableHTTP/1.1503 Service Temporarily UnavailableHTTP/1。 time of HTTP/200 and so on>以上就介紹如何在兩層伺服器的第二層Nginx上取得使用者IP,包含了方面的內容,希望對PHP教學有興趣的朋友有所幫助。

熱AI工具

Undresser.AI Undress
人工智慧驅動的應用程序,用於創建逼真的裸體照片

AI Clothes Remover
用於從照片中去除衣服的線上人工智慧工具。

Undress AI Tool
免費脫衣圖片

Clothoff.io
AI脫衣器

Video Face Swap
使用我們完全免費的人工智慧換臉工具,輕鬆在任何影片中換臉!

熱門文章
熱工具

記事本++7.3.1
好用且免費的程式碼編輯器

SublimeText3漢化版
中文版,非常好用

禪工作室 13.0.1
強大的PHP整合開發環境

Dreamweaver CS6
視覺化網頁開發工具

SublimeText3 Mac版
神級程式碼編輯軟體(SublimeText3)


 解決方法:您的組織要求您更改 PIN 碼
Oct 04, 2023 pm 05:45 PM
解決方法:您的組織要求您更改 PIN 碼
Oct 04, 2023 pm 05:45 PM
「你的組織要求你更改PIN訊息」將顯示在登入畫面上。當在使用基於組織的帳戶設定的電腦上達到PIN過期限制時,就會發生這種情況,在該電腦上,他們可以控制個人設備。但是,如果您使用個人帳戶設定了Windows,則理想情況下不應顯示錯誤訊息。雖然情況並非總是如此。大多數遇到錯誤的使用者使用個人帳戶報告。為什麼我的組織要求我在Windows11上更改我的PIN?可能是您的帳戶與組織相關聯,您的主要方法應該是驗證這一點。聯絡網域管理員會有所幫助!此外,配置錯誤的本機原則設定或不正確的登錄項目也可能導致錯誤。即
 Windows 11 上調整視窗邊框設定的方法:變更顏色和大小
Sep 22, 2023 am 11:37 AM
Windows 11 上調整視窗邊框設定的方法:變更顏色和大小
Sep 22, 2023 am 11:37 AM
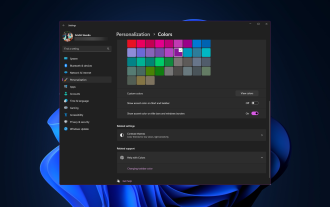
Windows11將清新優雅的設計帶到了最前沿;現代介面可讓您個性化和更改最精細的細節,例如視窗邊框。在本指南中,我們將討論逐步說明,以協助您在Windows作業系統中建立反映您的風格的環境。如何更改視窗邊框設定?按+開啟“設定”應用程式。 WindowsI前往個人化,然後按一下顏色設定。顏色變更視窗邊框設定視窗11「寬度=」643「高度=」500「>找到在標題列和視窗邊框上顯示強調色選項,然後切換它旁邊的開關。若要在「開始」功能表和工作列上顯示主題色,請開啟「在開始」功能表和工作列上顯示主題
 如何在 Windows 11 上變更標題列顏色?
Sep 14, 2023 pm 03:33 PM
如何在 Windows 11 上變更標題列顏色?
Sep 14, 2023 pm 03:33 PM
預設情況下,Windows11上的標題列顏色取決於您選擇的深色/淺色主題。但是,您可以將其變更為所需的任何顏色。在本指南中,我們將討論三種方法的逐步說明,以更改它並個性化您的桌面體驗,使其具有視覺吸引力。是否可以更改活動和非活動視窗的標題列顏色?是的,您可以使用「設定」套用變更活動視窗的標題列顏色,也可以使用登錄編輯程式變更非活動視窗的標題列顏色。若要了解這些步驟,請前往下一部分。如何在Windows11中變更標題列的顏色? 1.使用「設定」應用程式按+開啟設定視窗。 WindowsI前往“個人化”,然
 Windows 11 上啟用或停用工作列縮圖預覽的方法
Sep 15, 2023 pm 03:57 PM
Windows 11 上啟用或停用工作列縮圖預覽的方法
Sep 15, 2023 pm 03:57 PM
工作列縮圖可能很有趣,但它們也可能分散注意力或煩人。考慮到您將滑鼠懸停在該區域的頻率,您可能無意中關閉了重要視窗幾次。另一個缺點是它使用更多的系統資源,因此,如果您一直在尋找一種提高資源效率的方法,我們將向您展示如何停用它。不過,如果您的硬體規格可以處理它並且您喜歡預覽版,則可以啟用它。如何在Windows11中啟用工作列縮圖預覽? 1.使用「設定」應用程式點擊鍵並點選設定。 Windows按一下系統,然後選擇關於。點選高級系統設定。導航至“進階”選項卡,然後選擇“效能”下的“設定”。在「視覺效果」選
 OOBELANGUAGE錯誤Windows 11 / 10修復中出現問題的問題
Jul 16, 2023 pm 03:29 PM
OOBELANGUAGE錯誤Windows 11 / 10修復中出現問題的問題
Jul 16, 2023 pm 03:29 PM
您是否在Windows安裝程式頁面上看到「出現問題」以及「OOBELANGUAGE」語句? Windows的安裝有時會因此類錯誤而停止。 OOBE表示開箱即用的體驗。正如錯誤提示所表示的那樣,這是與OOBE語言選擇相關的問題。沒有什麼好擔心的,你可以透過OOBE螢幕本身的漂亮註冊表編輯來解決這個問題。快速修復–1.點選OOBE應用底部的「重試」按鈕。這將繼續進行該過程,而不會再打嗝。 2.使用電源按鈕強制關閉系統。系統重新啟動後,OOBE應繼續。 3.斷開系統與網際網路的連接。在脫機模式下完成OOBE的所
 Windows 11 上的顯示縮放比例調整指南
Sep 19, 2023 pm 06:45 PM
Windows 11 上的顯示縮放比例調整指南
Sep 19, 2023 pm 06:45 PM
在Windows11上的顯示縮放方面,我們都有不同的偏好。有些人喜歡大圖標,有些人喜歡小圖標。但是,我們都同意擁有正確的縮放比例很重要。字體縮放不良或圖像過度縮放可能是工作時真正的生產力殺手,因此您需要知道如何自訂以充分利用系統功能。自訂縮放的優點:對於難以閱讀螢幕上的文字的人來說,這是一個有用的功能。它可以幫助您一次在螢幕上查看更多內容。您可以建立僅適用於某些監視器和應用程式的自訂擴充功能設定檔。可以幫助提高低階硬體的效能。它使您可以更好地控制螢幕上的內容。如何在Windows11
 10種在 Windows 11 上調整亮度的方法
Dec 18, 2023 pm 02:21 PM
10種在 Windows 11 上調整亮度的方法
Dec 18, 2023 pm 02:21 PM
螢幕亮度是使用現代計算設備不可或缺的一部分,尤其是當您長時間注視螢幕時。它可以幫助您減輕眼睛疲勞,提高易讀性,並輕鬆有效地查看內容。但是,根據您的設置,有時很難管理亮度,尤其是在具有新UI更改的Windows11上。如果您在調整亮度時遇到問題,以下是在Windows11上管理亮度的所有方法。如何在Windows11上變更亮度[10種方式解釋]單一顯示器使用者可以使用下列方法在Windows11上調整亮度。這包括使用單一顯示器的桌上型電腦系統以及筆記型電腦。讓我們開始吧。方法1:使用操作中心操作中心是訪問
 如何修復Windows伺服器中的啟動錯誤代碼0xc004f069
Jul 22, 2023 am 09:49 AM
如何修復Windows伺服器中的啟動錯誤代碼0xc004f069
Jul 22, 2023 am 09:49 AM
Windows上的啟動過程有時會突然轉向顯示包含此錯誤代碼0xc004f069的錯誤訊息。雖然啟動程序已經聯機,但一些運行WindowsServer的舊系統可能會遇到此問題。透過這些初步檢查,如果這些檢查不能幫助您啟動系統,請跳到主要解決方案以解決問題。解決方法–關閉錯誤訊息和啟動視窗。然後,重新啟動電腦。再次從頭開始重試Windows啟動程序。修復1–從終端啟動從cmd終端啟動WindowsServerEdition系統。階段–1檢查Windows伺服器版本您必須檢查您使用的是哪種類型的W
