

Laravel 5文檔閱讀摘要

Laravel 5專案結構分析及中文文件閱讀摘要
7
8
11
12
26
加密
錯誤與日誌
檔案系統 / 雲端儲存
31
32
33
35
35資料驗證
查詢構造器
結構產生器
定義針對不同Http Method
::
match([ 多重方法
Route::any
('foo', function(){ # 所有方法使用方法生成方法
url
: $url = url('foo');
Laravel會自動在每位使用者的session中放置隨機的token。 VerifyCsrfToken 中間件將保存在session中的請求和輸入的token配對。除了尋找CSRF token 作為「POST」參數,中間件也檢查X-XSRF-TOKEN請求頭。 CSRF Token到表單:type. " value=" csrf_token(); ?>">在Blade模板引擎使用 :p _token" value="{{ csrf_token() }}"> 加到X-XSRF-TOKEN
. headers: {
'X-CSRF-TOKEN': $('meta[name="csrf-token"]').. });
...
# 這樣所有
ajax請求中將會帶上該頭資訊:將會帶上該頭資訊
url: "/foo/bar",})
方法欺騙
_method
" value="PUT">
? ; ?>">
路由參數
基礎參數
Route::get('user/
{name?}', function($name = null){ # 'user/{name?}', function(
$name = 'John'){ # 帶預設值的參數){ #
帶預設值的參數 可以定義參數的全局模式,在RouteServiceProvider的boot方法定義模式:
之後,會作用在所有使用這個特定參數的路線上:
Route::get('user/{id
if ($route->input('id') == 1){
也可以透過依賴注入來取得參數:use IlluminateHttpRequest;
(<(He $request, $id ){ if ($request
->route('id')){
->route('id')){ Route::get(' user/profile', ['as' => 'profile'
, function(){
Route ::get('user/profile', [
'as' => 'profile',
'uses'
#
使用命名路由進行重新導向
$url = route('profile'); ()->
route ('profile');
# <# uteName();
路由群組
將共享屬性當作一個陣列當做Route:: 共用中間件
Route::group
(['middleware' => ['foo', 'bar'],
=> ['foo', 'bar'], => ['foo', 'bar'], Route::get('/', function()
{
});
Route::get('user/profile', function()
{ Middleware
});
});
# 上例中
foo和件
自訂的中間件的鍵名與類別名稱映射關係需要在Kernel.php中加入
。
# 共享命名空間
=p unction()
{ // Controllers Within The "AppHttpControllersAdmin" Namespace ute::group(['namespace' => 'User'], function() {
});
});
子網域路由Route::group(['domain' => '
{account}.myapp.com'],
Route::get('user/{id}', function($account
, $
//});
});
});
Route::group([
'prefix'=> 'admin'], function()
{
Route::
// Matches The "/admin/users" URL/admin/users
" URL
});
# 在路由前綴中定義參數
Route::group(['prefix' => 'accounts/
{account_id}'], function()
'], function()Route::get(' detail', function(
$account_id)
Route model binding model Binding provides a convenient way to inject model entities into routes User ID, you can choose to inject User class entities that match the given ID . Define model binding in the RouteServiceProvider::boot method: public function boot(Router $router){ parent::boot($router ; {user} Parameter route: Route::get('profile/{user} AppUser $user){ ) / / }); profile/1 will inject the ID for the 1 entityUser . If the entity does not exist, throw 404. You can pass a closure as the third parameter to define the behavior when it is not found. throws 404 error Two methods: abort (404); # Essentially throws a SymfonyComponentHttpKernelExceptionHttpException with a specific status code. Or: manually throw HttpException
middleware New middleware php artisan make:middleware OldMiddleware # Create a new middlewareThe main function of the middleware is implemented in the handle() class OldMiddleware { public function handle($request, Closure $next){ if (xxx){ return redirect('xx'); 🎙 } Analyzing its structure, we can find that it is basically the execution Make a judgment, and then redirect or continue forward. Global middleware If you want the middleware to be executed by all HTTP requests, just add the middleware class to app/Http/ Kernel.php $middleware property list. Assign middleware to routing After creating the new middleware, go to app/Http/Kernel.php Add middle in $routeMiddleware The mapping relationship between the file key name and the class name, and then you can use this key name in routing to assign routes: Route::get('admin/profile', ['middleware' => 'auth', function(){
Terminable middleware Terminable middleware needs to inherit from TerminableMiddleware and implement terminate() Method. Its purpose is to execute after the HTTP response has been sent to the client. Terminable middleware needs to be added to the global middleware list of app/Http/Kernel.php .
Controller Basic Controller All controllers should extend the base controller class use AppHttpControllers Controller; class UserController extends Controller { # Inherits Controller public function showProfile($id ) # Action { AppHttpControllersController is defined as follows: namespace BorogadiHttpControllers; use IlluminateFoundationBusDispatchesJobs; use as BaseController;use IlluminateFoundationValidationValidatesRequests; abstract class Controller extends BaseController { use DispatchesJobs, ValidatesRequests; }It can be seen that it is ultimately inherited from the IlluminateRoutingController class. # Named controller route Route::get('foo', ['uses' => 'FooController@method', 'as ' => 'name']); # URL pointing to the controller $url = action('AppHttpControllersFooController@ method'); URL::setRootControllerNamespace $url = action('FooController@
Two ways, one is to specify in the controller route: 'middleware'
'uses' => 'UserController@showProfile' ]); The other is Specify directly in the controller constructor: class UserController extends Controller { public function __construct(){ (' auth'); $this->middleware Implicit controller Implicit controller implementation defines a single route to handle each behavior in the controller: Route ::controller('users', 'UserController'); Define the implementation of the controller class: class UserController extends BaseController { Public function getIndex (){ # Response to user public function postProfile(){ # Response to post way user/profile
Public function anyLogin(){ # Response to all methods of user/login It is possible to support multi-word controller behavior by using "-": public function getAdminProfile() {} # Response to users/admin-profile , not user/adminprofile. Pay attention to the camel case naming method used in the action name
RESTfulResource controller is actually a specific application of implicit controller.
Route cache If only controller routing is used in the application, route caching can be used to improve performance. php artisan route:cache The cache route file will be used instead of the app/Http/routes.php file HTTP request Get the request in two ways, one is through the Request facade: use Request; $name = Request::input('name'); or via dependency injection: use type hints on the class in the constructor or method in the controller. The currently requested instance will be automatically injected by the service container: use IlluminateHttpRequest; use IlluminateRoutingController; class UserController extends Controller { public function store(Request$request){ $name ; request, $id Get input data $name = Request::input('name') ; # Get specific input data $name = Request::input('name', 'Sally'); # Get specific input data, if not, get the default value if (Request::has('name')){ # Confirm whether there is input data $input = Request::all # Get all input data$input = Request::only # Get some input data $input = Request::except # Get partial input data exclusion method$input = Request::input('products.0.name'); # Get data in array form old input data Request::flash(); # Save the current input data into session中 Request:: flashOnly('username', 'email'); # Save some data into session Request:: ('password'); # Save some data as session, elimination method withInput(); # Redirect and cache the current input data to session return redirect('form')->withInput(Request::except('password')); # Redirect and cache part of the current input data to session $username = Request::old('username'); # Get the one-time Session {{ old(' username') }} # Showing old input data in bladetemplate Cookies L cookie created by aravel Encrypt and add authentication mark. $value = Request::cookie('name'); # Get the Cookievalue #In response Add Cookies $response = new IlluminateHttpResponse('Hello World'); $response->withCookie (cookie('name', 'value' , $minutes)); $response->withCookie(cookie()->forever('name', 'value')); # Add Permanent Cookie # Add Cookie in queue mode, that is, set Cookie before actually sending the response Cookie::queue ('name', 'value'); return response('Hello World'); $file = Request: ; :file('photo')->isValid()) # Confirm whether the uploaded file is valid
Request::file('photo')->move($destinationPath); # Move Uploaded file Request::file('photo')->move($destinationPath, $fileName); # Move the uploaded file and rename it Other request information $uri = Request::path(); # Get request if (Request::ajax()) # Determine whether a request uses AJAX
# Method to determine the request $method = Request::method(); if (Request::isMethod('post')) if (Request::is('admin/*')) # $url = Request::url(); # Get request
HTTP response Basic responseRoute ::get('/', function(){ # return 'Hello World';
# Return to complete Responses
return Responses object: use IlluminateHttpResponse; return (new Response ($content, $status)) - ->header('Content-Type', $value); or use response auxiliary Method:
return response($content, $status)->header('Content-Type', $value);
# Return to view return response()-> return response($content)-> withCookie( cookie('name', 'value')); Redirect return redirect('user/login'); # Use redirect method return redirect ('user/login')-> ;with('message', 'Login Failed'); # Redirect and save the current data to Sessionreturn redirect()->back () ; # Redirect to previous locationreturn redirect()-> route('login'); # Redirect to specific route # Redirect to a specific route with parameters return redirect()->route('profile', [1]); # The URI profile/{id} return redirect()->route('profile', ['user' => 1]); # routed URI is: profile/{user} # Redirect based on controller actionreturn redirect()->action ('AppHttpControllersHomeController@index'); return redirect()->action('AppHttpControllersUserController@profile', ['user' => 1]); # With parameters Other responses # returnjson
return response()-> ;json(['name' => 'Abigail', 'state' => 'CA']); >json([' name' => 'Abigail', 'state' => 'CA']) - ->setCallback($request->input('callback')); #
return response()->download($pathToFile, $name, $headers); Response Macro # Define the response macro, usually defined in the Provider method
Response::macro ('caps', function($value) use ($response){ # PHP use use will copy a copy of the variable into the closure, and also supports reference forms, such as return $response->make(strtoupper( $value)); });# Call the response macroreturn response()- >caps(' foo'); ViewBasic view
# View definition File path and file name: resources/views/greeting.php
# View call Route::get('/', function() { return view( 'greeting' 'name' => 'James']); The parameter passed to the view is an array of key-value pairs}); Subfolder view call Definition location: resources/views/
return view(' admin.profile ', $data); # Other ways to pass data to the view $view = view('greeting')-> ( 'name', 'Victoria'); # Traditional method $view = view('greeting')->withName('Victoria'); # Magic Method $view = view('greetings', $data); # Directly pass the array $data is an array of key-value pairs # Share data to all views Customize a Provider boot method of AppServiceProvider view( )->share('data', [1, 2, 3]); or: View::share('data', [1, 2 , 3]);
# Confirm whether the view exists if (view()->exists ('emails .customer')) # Generate a view from a file path return view()->file ($pathToFile, $data); View componentView component is a closure or class method that is called before the view is rendered.
#
use View; use IlluminateSupportServiceProvider; View:: ('profile', 'AppHttpViewComposersProfileComposer'); #指 Use a class to specify the view component View :: composer ('dashboard', function ($ view) { # Use closure to specify the view component ... Use classes to specify view components, The method named compose of the specified class will be called before the view is rendered. As in the above example, the class is defined as: use IlluminateContractsViewView; use IlluminateUsersRepository as UserRepository; class ProfileComposer { protected $users; public function __construct(UserRepository $users){ # service container will automatically parse the required parameters Public function compose(View $view){ # The compose method is passed an instance of View, where parameters can be passed to View $ view->with('count', $this->users->count());
}
}
#
Using wildcards within the view component
View::composer('*', function($view){ # is equivalent to defining it for all views
#
Attach view components to multiple views at the same time
View::composer(['profile', 'dashboard'], 'AppHttpViewComposersMyViewComposer');
#
Many definitions View components
View::composers([
'AppHttpViewComposersAdminComposer' => ['admin.index', 'admin.profile'],
'AppHttpViewComposersUserComposer ' => 'user',
'AppHttpViewComposersProductComposer' => 'product'
]);
Service Providers
Each custom Provider must inherit from
IlluminateSupportServiceProvider and be registered in the Providers array in config/app.php. The custom Provider must define the register() method, which is used to define the behavior during registration. In addition, there are two optional methods and an optional attribute: the boot() method will not be called until all Provider have been loaded, and the provides()method Used in conjunction with the $defer optional attribute to provide the buffering function. The idea of providing services through service providers: implement a class that completes the actual work, define a Provider, and use it in the
register()method of Provider Methods to register the actual work class with the system container and obtain the actual work class instance. Then register this Provider in the application configuration. In this way, the register() method of all Provider will be called when the application is initialized to indirectly register the way to obtain the actual working class instance. #
Define a basicProvider
use RiakConnection;
use IlluminateSupportServiceProvider ) # Register a class in the container and obtain its instance Method
Return new Connection($app['config' ]['riak']);
; Service Container
Basic usage
in Inside the
Provider, the service container can be accessed through
$this->app.
There are two main ways to register dependencies: callback interface method and binding instance interface.
# The way of closure callback$this->app->bind('FooBar', function($app){
Return new FooBar($app['SomethingElse']);
});
# Registered as a singleton, subsequent calls will return the same instance
$this->app->singleton('FooBar', function($app){
return new FooBar($app['SomethingElse']);
});
#
Bind to an existing instance
$fooBar = new FooBar(new SomethingElse);
$this ->app->instance('FooBar', $fooBar);
There are two ways to resolve the instance from the container:
$fooBar = $this-> ;app->make('FooBar');# Use the make()
method to parse
$fooBar = $this->app['FooBar'];
# Because the container implements the ArrayAccess
interface, you can use the array access form After defining the registration and parsing information, you can directly use it in the constructor of the class Specify the required dependencies via type-hint
, and the container will automatically inject all the required dependencies.
use IlluminateRoutingController; AppUsersRepository as UserRepository;class UserController extends Controller {
protected $users;
public function __construct(
UserRepository $users){
# type-hint$users;
}
public function show($id){
}
}Binding interface
interface
EventPusher{
Public function push($event, array $data);
}
class
PusherEventPusherimplements EventPusher {
...
}
Because the PusherEventPusher
class implements EventPusher Interface, so you can directly register this interface and bind it to a class that implements this interface: $this->app->
bind('AppContractsEventPusher', 'AppServicesPusherEventPusher ');
When a class requires the EventPusher interface, it will tell the container that it should inject
PusherEventPusher.
Context binding$this->app->when
('AppHandlersCommandsCreateOrderHandler') needs('AppContractsEventPusher') tPusher'); tag $this->app->bind('SpeedReport', function(){ }); $this->app->bind ('MemoryReport', function (){ }); reports'); Tag the class registered in the previous two steps as 'reports' Parse them properly:
$this->app->bind('ReportAggregator', function($app){ ) return new ReportAggregator($app->tagged ('reports'));
}); Container events The container will trigger an event when parsing each object. You can use the resolving method to listen for this event (the parsed object will be passed into the closure method): $this->app->resolving(function($object, $app){ # Called when the container resolves any type of dependency
... });$this->app- >resolving(function(FooBar $fooBar, $app){ # 'FooBar' ... });
main component implementations , you can see it under the Contracts
directory The directory structure is the same as inIlluminate.
Contractsis the interface definition,
Illuminateis the specific implementation. Each concrete implemented class in Illuminate
extends its corresponding interface inContracts. This separation of interface and implementation can make dependency injection low-coupling. /laravel/framework/src
/Illuminate
/Auth
/Broadcasting
/Bus
...
/Contracts
/Auth
/Broadcasting
/Bus
...
FacadesBasic usage
Facades provide a static interface to classes that can be accessed in the application's
service container. (An application of "decoration mode" in design pattern mainly uses class_alias
to create category names, and also uses__callStatic() to provide a static proxy, which is ultimately simulated using a mock object
PHPobject and call the object's method)
Laravel's facades and any custom facades you create, will inherit the base class Facade and only need to implement one method: getFacadeAccessor() .
Such as CacheThis facade is called: $value = Cache::get( 'key');
Look at the implementation of the class:
class Cache extends Facade {
protected static function getFacadeAccessor() { return 'cache'; } # This The function of the method is to return the name of the service container binding
}
When the user executes any static method on the Cache's facade, Laravel Will resolve the bound cache from the service container and execute the requested method (in this example, get)
on that object All facades exist in the global namespace. When used in a nested namespace, you need to import the facade class into the namespace:
use Cache; # ImportCache facade
class PhotosController extends Controller {
public function index(){
$ photos = Cache::get('photos');
}
}

熱AI工具

Undresser.AI Undress
人工智慧驅動的應用程序,用於創建逼真的裸體照片

AI Clothes Remover
用於從照片中去除衣服的線上人工智慧工具。

Undress AI Tool
免費脫衣圖片

Clothoff.io
AI脫衣器

Video Face Swap
使用我們完全免費的人工智慧換臉工具,輕鬆在任何影片中換臉!

熱門文章
熱工具

記事本++7.3.1
好用且免費的程式碼編輯器

SublimeText3漢化版
中文版,非常好用

禪工作室 13.0.1
強大的PHP整合開發環境

Dreamweaver CS6
視覺化網頁開發工具

SublimeText3 Mac版
神級程式碼編輯軟體(SublimeText3)


 解決方法:您的組織要求您更改 PIN 碼
Oct 04, 2023 pm 05:45 PM
解決方法:您的組織要求您更改 PIN 碼
Oct 04, 2023 pm 05:45 PM
「你的組織要求你更改PIN訊息」將顯示在登入畫面上。當在使用基於組織的帳戶設定的電腦上達到PIN過期限制時,就會發生這種情況,在該電腦上,他們可以控制個人設備。但是,如果您使用個人帳戶設定了Windows,則理想情況下不應顯示錯誤訊息。雖然情況並非總是如此。大多數遇到錯誤的使用者使用個人帳戶報告。為什麼我的組織要求我在Windows11上更改我的PIN?可能是您的帳戶與組織相關聯,您的主要方法應該是驗證這一點。聯絡網域管理員會有所幫助!此外,配置錯誤的本機原則設定或不正確的登錄項目也可能導致錯誤。即
 Windows 11 上調整視窗邊框設定的方法:變更顏色和大小
Sep 22, 2023 am 11:37 AM
Windows 11 上調整視窗邊框設定的方法:變更顏色和大小
Sep 22, 2023 am 11:37 AM
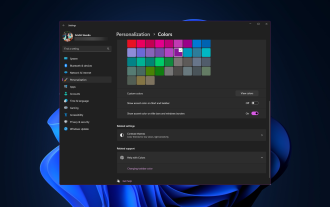
Windows11將清新優雅的設計帶到了最前沿;現代介面可讓您個性化和更改最精細的細節,例如視窗邊框。在本指南中,我們將討論逐步說明,以協助您在Windows作業系統中建立反映您的風格的環境。如何更改視窗邊框設定?按+開啟“設定”應用程式。 WindowsI前往個人化,然後按一下顏色設定。顏色變更視窗邊框設定視窗11「寬度=」643「高度=」500「>找到在標題列和視窗邊框上顯示強調色選項,然後切換它旁邊的開關。若要在「開始」功能表和工作列上顯示主題色,請開啟「在開始」功能表和工作列上顯示主題
 如何在 Windows 11 上變更標題列顏色?
Sep 14, 2023 pm 03:33 PM
如何在 Windows 11 上變更標題列顏色?
Sep 14, 2023 pm 03:33 PM
預設情況下,Windows11上的標題列顏色取決於您選擇的深色/淺色主題。但是,您可以將其變更為所需的任何顏色。在本指南中,我們將討論三種方法的逐步說明,以更改它並個性化您的桌面體驗,使其具有視覺吸引力。是否可以更改活動和非活動視窗的標題列顏色?是的,您可以使用「設定」套用變更活動視窗的標題列顏色,也可以使用登錄編輯程式變更非活動視窗的標題列顏色。若要了解這些步驟,請前往下一部分。如何在Windows11中變更標題列的顏色? 1.使用「設定」應用程式按+開啟設定視窗。 WindowsI前往“個人化”,然
 Windows 11 上啟用或停用工作列縮圖預覽的方法
Sep 15, 2023 pm 03:57 PM
Windows 11 上啟用或停用工作列縮圖預覽的方法
Sep 15, 2023 pm 03:57 PM
工作列縮圖可能很有趣,但它們也可能分散注意力或煩人。考慮到您將滑鼠懸停在該區域的頻率,您可能無意中關閉了重要視窗幾次。另一個缺點是它使用更多的系統資源,因此,如果您一直在尋找一種提高資源效率的方法,我們將向您展示如何停用它。不過,如果您的硬體規格可以處理它並且您喜歡預覽版,則可以啟用它。如何在Windows11中啟用工作列縮圖預覽? 1.使用「設定」應用程式點擊鍵並點選設定。 Windows按一下系統,然後選擇關於。點選高級系統設定。導航至“進階”選項卡,然後選擇“效能”下的“設定”。在「視覺效果」選
 OOBELANGUAGE錯誤Windows 11 / 10修復中出現問題的問題
Jul 16, 2023 pm 03:29 PM
OOBELANGUAGE錯誤Windows 11 / 10修復中出現問題的問題
Jul 16, 2023 pm 03:29 PM
您是否在Windows安裝程式頁面上看到「出現問題」以及「OOBELANGUAGE」語句? Windows的安裝有時會因此類錯誤而停止。 OOBE表示開箱即用的體驗。正如錯誤提示所表示的那樣,這是與OOBE語言選擇相關的問題。沒有什麼好擔心的,你可以透過OOBE螢幕本身的漂亮註冊表編輯來解決這個問題。快速修復–1.點選OOBE應用底部的「重試」按鈕。這將繼續進行該過程,而不會再打嗝。 2.使用電源按鈕強制關閉系統。系統重新啟動後,OOBE應繼續。 3.斷開系統與網際網路的連接。在脫機模式下完成OOBE的所
 Windows 11 上的顯示縮放比例調整指南
Sep 19, 2023 pm 06:45 PM
Windows 11 上的顯示縮放比例調整指南
Sep 19, 2023 pm 06:45 PM
在Windows11上的顯示縮放方面,我們都有不同的偏好。有些人喜歡大圖標,有些人喜歡小圖標。但是,我們都同意擁有正確的縮放比例很重要。字體縮放不良或圖像過度縮放可能是工作時真正的生產力殺手,因此您需要知道如何自訂以充分利用系統功能。自訂縮放的優點:對於難以閱讀螢幕上的文字的人來說,這是一個有用的功能。它可以幫助您一次在螢幕上查看更多內容。您可以建立僅適用於某些監視器和應用程式的自訂擴充功能設定檔。可以幫助提高低階硬體的效能。它使您可以更好地控制螢幕上的內容。如何在Windows11
 10種在 Windows 11 上調整亮度的方法
Dec 18, 2023 pm 02:21 PM
10種在 Windows 11 上調整亮度的方法
Dec 18, 2023 pm 02:21 PM
螢幕亮度是使用現代計算設備不可或缺的一部分,尤其是當您長時間注視螢幕時。它可以幫助您減輕眼睛疲勞,提高易讀性,並輕鬆有效地查看內容。但是,根據您的設置,有時很難管理亮度,尤其是在具有新UI更改的Windows11上。如果您在調整亮度時遇到問題,以下是在Windows11上管理亮度的所有方法。如何在Windows11上變更亮度[10種方式解釋]單一顯示器使用者可以使用下列方法在Windows11上調整亮度。這包括使用單一顯示器的桌上型電腦系統以及筆記型電腦。讓我們開始吧。方法1:使用操作中心操作中心是訪問
 華為GT3 Pro和GT4的差異是什麼?
Dec 29, 2023 pm 02:27 PM
華為GT3 Pro和GT4的差異是什麼?
Dec 29, 2023 pm 02:27 PM
許多用戶在選擇智慧型手錶的時候都會選擇的華為的品牌,其中華為GT3pro和GT4都是非常熱門的選擇,不少用戶都很好奇華為GT3pro和GT4有什麼區別,下面就給大家介紹一下二者。華為GT3pro和GT4有什麼差別一、外觀GT4:46mm和41mm,材質是玻璃鏡板+不鏽鋼機身+高分纖維後殼。 GT3pro:46.6mm和42.9mm,材質是藍寶石玻璃鏡+鈦金屬機身/陶瓷機身+陶瓷後殼二、健康GT4:採用最新的華為Truseen5.5+演算法,結果會更加的精準。 GT3pro:多了ECG心電圖和血管及安
