Vue.js建立Calendar日曆效果
使用 Vue.js 進行資料與視圖的綁定,資料更新會讓視圖自動進行更新,類似 Android 裡面的 DataBinding。
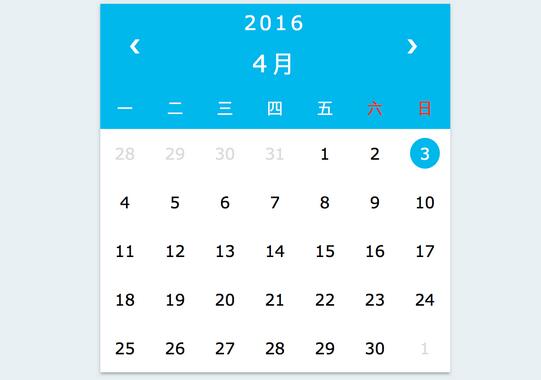
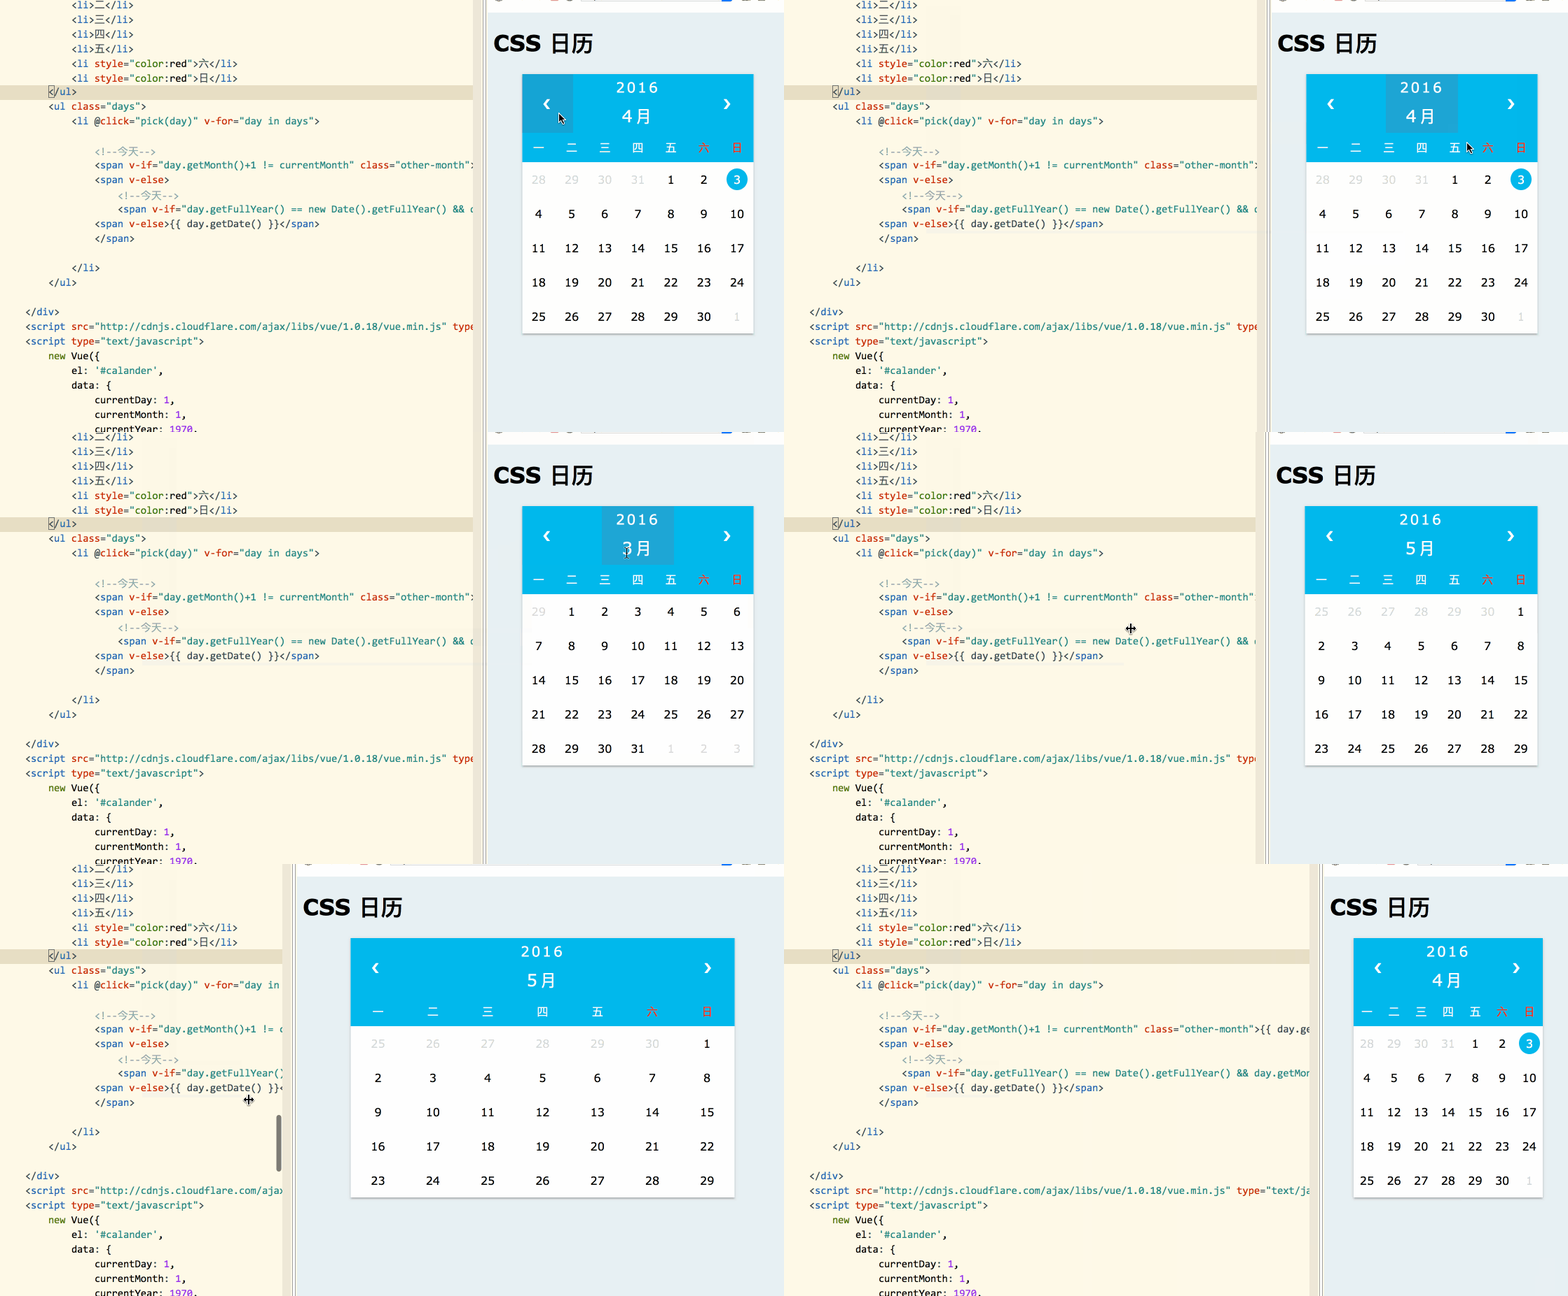
實作一個HTML的日曆效果。


html 部分
<p id="calendar">
 <!-- 年份 月份 -->
 <p class="month">
 <ul>
  <li class="arrow" @click="pickPre(currentYear,currentMonth)">❮</li>
  <li class="year-month" @click="pickYear(currentYear,currentMonth)">
  <span class="choose-year">{{ currentYear }}</span>
  <span class="choose-month">{{ currentMonth }}月</span>
  </li>
  <li class="arrow" @click="pickNext(currentYear,currentMonth)">❯</li>
 </ul>
 </p>
 <!-- 星期 -->
 <ul class="weekdays">
 <li>一</li>
 <li>二</li>
 <li>三</li>
 <li>四</li>
 <li>五</li>
 <li style="color:red">六</li>
 <li style="color:red">日</li>
 </ul>
 <!-- 日期 -->
 <ul class="days">
 <li @click="pick(day)" v-for="day in days">
  <!--本月-->
  <span v-if="day.getMonth()+1 != currentMonth" class="other-month">{{ day.getDate() }}</span>
  <span v-else>
  <!--今天-->
<span v-if="day.getFullYear() == new Date().getFullYear() && day.getMonth() == new Date().getMonth()
&& day.getDate() == new Date().getDate()" class="active">{{ day.getDate() }}</span>
  <span v-else>{{ day.getDate() }}</span>
  </span>
 </li>
 </ul>
</p>id 為 calendar 對應的建立一個 Vue 對象,設定 el 為 ‘#calendar'。
<script type="text/javascript">
new Vue({
el: '#calendar',
data: {
currentDay: 1,
currentMonth: 1,
currentYear: 1970,
currentWeek: 1,
days: [],
},
created: function() {
this.initData(null);
},
methods: {
initData: function(cur) {
var date;
if (cur) {
date = new Date(cur);
} else {
date = new Date();
}
this.currentDay = date.getDate();
this.currentYear = date.getFullYear();
this.currentMonth = date.getMonth() + 1;
this.currentWeek = date.getDay(); // 1...6,0
if (this.currentWeek == 0) {
this.currentWeek = 7;
}
var str = this.formatDate(this.currentYear , this.currentMonth, this.currentDay);
console.log("today:" + str + "," + this.currentWeek);
this.days.length = 0;
// 今天是周日,放在第一行第7个位置,前面6个
for (var i = this.currentWeek - 1; i >= 0; i--) {
var d = new Date(str);
d.setDate(d.getDate() - i);
console.log("y:" + d.getDate());
this.days.push(d);
}
for (var i = 1; i <= 35 - this.currentWeek; i++) {
var d = new Date(str);
d.setDate(d.getDate() + i);
this.days.push(d);
}
},
pick: function(date) {
alert(this.formatDate( date.getFullYear() , date.getMonth() + 1, date.getDate()));
},
pickPre: function(year, month) {
// setDate(0); 上月最后一天
// setDate(-1); 上月倒数第二天
// setDate(dx) 参数dx为 上月最后一天的前后dx天
var d = new Date(this.formatDate(year , month , 1));
d.setDate(0);
this.initData(this.formatDate(d.getFullYear(),d.getMonth() + 1,1));
},
pickNext: function(year, month) {
var d = new Date(this.formatDate(year , month , 1));
d.setDate(35);
this.initData(this.formatDate(d.getFullYear(),d.getMonth() + 1,1));
},
pickYear: function(year, month) {
alert(year + "," + month);
},
// 返回 类似 2016-01-02 格式的字符串
formatDate: function(year,month,day){
var y = year;
var m = month;
if(m<10) m = "0" + m;
var d = day;
if(d<10) d = "0" + d;
return y+"-"+m+"-"+d
},
},
});
</script>完整程式碼:
<!DOCTYPE html>
<html lang="en">
<head>
<meta charset="UTF-8">
<title>日历</title>
<style type="text/css">
* {
box-sizing: border-box;
}
ul {
list-style-type: none;
}
body {
font-family: Verdana, sans-serif;
background: #E8F0F3;
}
#calendar{
width:80%;
margin: 0 auto;
box-shadow: 0 2px 2px 0 rgba(0,0,0,0.14), 0 3px 1px -2px rgba(0,0,0,0.1), 0 1px 5px 0
rgba(0,0,0,0.12);
}
.month {
width: 100%;
background: #00B8EC;
}
.month ul {
margin: 0;
padding: 0;
display: flex;
justify-content: space-between;
}
.year-month {
display: flex;
flex-direction: column;
align-items: center;
justify-content: space-around;
}
.year-month:hover {
background: rgba(150, 2, 12, 0.1);
}
.choose-year {
padding-left: 20px;
padding-right: 20px;
}
.choose-month {
text-align: center;
font-size: 1.5rem;
}
.arrow {
padding: 30px;
}
.arrow:hover {
background: rgba(100, 2, 12, 0.1);
}
.month ul li {
color: white;
font-size: 20px;
text-transform: uppercase;
letter-spacing: 3px;
}
.weekdays {
margin: 0;
padding: 10px 0;
background-color: #00B8EC;
display: flex;
flex-wrap: wrap;
color: #FFFFFF;
justify-content: space-around;
}
.weekdays li {
display: inline-block;
width: 13.6%;
text-align: center;
}
.days {
padding: 0;
background: #FFFFFF;
margin: 0;
display: flex;
flex-wrap: wrap;
justify-content: space-around;
}
.days li {
list-style-type: none;
display: inline-block;
width: 14.2%;
text-align: center;
padding-bottom: 15px;
padding-top: 15px;
font-size: 1rem;
color: #000;
}
.days li .active {
padding: 6px 10px;
border-radius: 50%;
background: #00B8EC;
color: #fff;
}
.days li .other-month {
padding: 5px;
color: gainsboro;
}
.days li:hover {
background: #e1e1e1;
}
</style>
</head>
<body>
<h1 id="CSS-nbsp-日历">CSS 日历</h1>
<p id="calendar">
<p class="month">
<ul>
<li class="arrow" @click="pickPre(currentYear,currentMonth)">❮</li>
<li class="year-month" @click="pickYear(currentYear,currentMonth)">
<span class="choose-year">{{ currentYear }}</span>
<span class="choose-month">{{ currentMonth }}月</span>
</li>
<li class="arrow" @click="pickNext(currentYear,currentMonth)">❯</li>
</ul>
</p>
<ul class="weekdays">
<li>一</li>
<li>二</li>
<li>三</li>
<li>四</li>
<li>五</li>
<li style="color:red">六</li>
<li style="color:red">日</li>
</ul>
<ul class="days">
<li @click="pick(day)" v-for="day in days">
<!--今天-->
<span v-if="day.getMonth()+1 != currentMonth" class="other-month">{{ day.getDate() }}</span>
<span v-else>
<!--今天-->
<span v-if="day.getFullYear() == new Date().getFullYear() && day.getMonth() == new
Date().getMonth() && day.getDate() == new Date().getDate()" class="active">{{ day.getDate() }}</span>
<span v-else>{{ day.getDate() }}</span>
</span>
</li>
</ul>
</p>
<script src="http://cdnjs.cloudflare.com/ajax/libs/vue/1.0.18/vue.min.js" type="text/javascript"
charset="utf-8"></script>
<script type="text/javascript">
new Vue({
el: '#calendar',
data: {
currentDay: 1,
currentMonth: 1,
currentYear: 1970,
currentWeek: 1,
days: [],
},
created: function() {
this.initData(null);
},
methods: {
initData: function(cur) {
var date;
if (cur) {
date = new Date(cur);
} else {
date = new Date();
}
this.currentDay = date.getDate();
this.currentYear = date.getFullYear();
this.currentMonth = date.getMonth() + 1;
this.currentWeek = date.getDay(); // 1...6,0
if (this.currentWeek == 0) {
this.currentWeek = 7;
}
var str = this.formatDate(this.currentYear , this.currentMonth, this.currentDay);
console.log("today:" + str + "," + this.currentWeek);
this.days.length = 0;
// 今天是周日,放在第一行第7个位置,前面6个
for (var i = this.currentWeek - 1; i >= 0; i--) {
var d = new Date(str);
d.setDate(d.getDate() - i);
console.log("y:" + d.getDate());
this.days.push(d);
}
for (var i = 1; i <= 35 - this.currentWeek; i++) {
var d = new Date(str);
d.setDate(d.getDate() + i);
this.days.push(d);
}
},
pick: function(date) {
alert(this.formatDate( date.getFullYear() , date.getMonth() + 1, date.getDate()));
},
pickPre: function(year, month) {
// setDate(0); 上月最后一天
// setDate(-1); 上月倒数第二天
// setDate(dx) 参数dx为 上月最后一天的前后dx天
var d = new Date(this.formatDate(year , month , 1));
d.setDate(0);
this.initData(this.formatDate(d.getFullYear(),d.getMonth() + 1,1));
},
pickNext: function(year, month) {
var d = new Date(this.formatDate(year , month , 1));
d.setDate(35);
this.initData(this.formatDate(d.getFullYear(),d.getMonth() + 1,1));
},
pickYear: function(year, month) {
alert(year + "," + month);
},
// 返回 类似 2016-01-02 格式的字符串
formatDate: function(year,month,day){
var y = year;
var m = month;
if(m<10) m = "0" + m;
var d = day;
if(d<10) d = "0" + d;
return y+"-"+m+"-"+d
},
},
});
</script>
</body>
</html>以上就是Vue.js創建Calendar日曆效果的內容,更多相關內容請關注PHP中文網(www.php.cn)!

熱AI工具

Undresser.AI Undress
人工智慧驅動的應用程序,用於創建逼真的裸體照片

AI Clothes Remover
用於從照片中去除衣服的線上人工智慧工具。

Undress AI Tool
免費脫衣圖片

Clothoff.io
AI脫衣器

Video Face Swap
使用我們完全免費的人工智慧換臉工具,輕鬆在任何影片中換臉!

熱門文章

熱工具

記事本++7.3.1
好用且免費的程式碼編輯器

SublimeText3漢化版
中文版,非常好用

禪工作室 13.0.1
強大的PHP整合開發環境

Dreamweaver CS6
視覺化網頁開發工具

SublimeText3 Mac版
神級程式碼編輯軟體(SublimeText3)
 深入探討vite是怎麼解析.env檔的
Jan 24, 2023 am 05:30 AM
使用vue框架開發前端專案時,我們部署的時候都會部署多套環境,往往開發、測試以及線上環境呼叫的介面網域都是不一樣的。如何能做到區分呢?那就是使用環境變數和模式。
 圖文詳解如何在Vue專案中整合Ace程式碼編輯器
Apr 24, 2023 am 10:52 AM
Ace 是一個用 JavaScript 寫的可嵌入程式碼編輯器。它與 Sublime、Vim 和 TextMate 等原生編輯器的功能和效能相符。它可以很容易地嵌入到任何網頁和 JavaScript 應用程式中。 Ace 被維護為Cloud9 IDE的主要編輯器 ,並且是 Mozilla Skywriter (Bespin) 專案的繼承者。
 vue中組件化和模組化有什麼區別
Dec 15, 2022 pm 12:54 PM
組件化和模組化的區別:模組化是從程式碼邏輯的角度進行劃分的;方便程式碼分層開發,確保每個每個功能模組的職能一致。元件化是從UI介面的角度進行規劃;前端的元件化,方便UI元件的重複使用。
 探討如何在Vue3中撰寫單元測試
Apr 25, 2023 pm 07:41 PM
在當今前端開發中,Vue.js 已經成為了一個非常流行的框架。隨著 Vue.js 的不斷發展,單元測試變得越來越重要。今天,我們將探討如何在 Vue.js 3 中編寫單元測試,並提供一些最佳實踐和常見的問題及解決方案。
 聊聊vue3怎麼使用高德地圖api
Mar 09, 2023 pm 07:22 PM
在我們使用高德地圖的時候,官方給我們推薦了很多案例,demo,但是這些案例都是使用原生方法接入,並沒有提供vue或者react 的demo,vue2的接入網上也很多人都有寫過,以下這篇文章就來看看vue3怎麼使用常用的高德地圖api,希望對大家有幫助!
 怎麼查詢目前vue的版本
Dec 19, 2022 pm 04:55 PM
查詢目前vue版本的兩種方法:1、在cmd控制台內,執行「npm list vue」指令查詢版本,輸出結果就是vue的版本號資訊;2、在專案中找到並開啟package.json文件,查找「dependencies」項目即可看到vue的版本資訊。
 淺析vue怎麼實現檔案切片上傳
Mar 24, 2023 pm 07:40 PM
在實際開發專案過程中有時候需要上傳比較大的文件,然後呢,上傳的時候相對來說就會慢一些,so,後台可能會要求前端進行文件切片上傳,很簡單哈,就是把比如說1個G的檔案流切割成若干個小的檔案流,然後分別請求介面傳遞這個小的檔案流。
 Vue中JSX語法和模板語法的簡單比較(優劣勢分析)
Mar 23, 2023 pm 07:53 PM
在Vue.js中,開發人員可以使用兩種不同的語法來建立使用者介面:JSX語法和範本語法。這兩種文法各有優劣,以下就來探討它們的差異和優劣勢。


