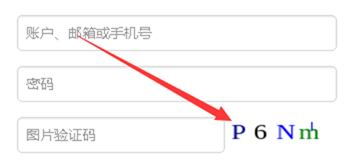
.Net Core 下使用ZKWeb.System.Drawing實作驗證碼功能
本文介紹.Net Core下用第三方ZKWeb.System.Drawing實現驗證碼功能。
通過測試的系統:
Windows 8.1 64bit
Ubuntu Server 16.04 LTS 64bit
Fedora 24 64bit
CentOS 7.2 64bit
Resize image
Draw graphics with brush and penOpen font and draw string
以上是官方給的資料。
No.1 專案引進ZKWeb.System.Drawing
NuGet引入包,不會的自己百度。
No.2 簡單的驗證碼產生
int codeW = 80;
int codeH = 30;
int fontSize = 16;
Random rnd = new Random();
//颜色列表,用于验证码、噪线、噪点
Color[] color = { Color.Black, Color.Red, Color.Blue, Color.Green, Color.Orange, Color.Brown, Color.Brown, Color.DarkBlue };
//字体列表,用于验证码
string[] font = { "Times New Roman" };
//验证码的字符集,去掉了一些容易混淆的字符
//写入Session、验证码加密
//WebHelper.WriteSession("session_verifycode", Md5Helper.MD5(chkCode.ToLower(), 16));
//创建画布
Bitmap bmp = new Bitmap(codeW, codeH);
Graphics g = Graphics.FromImage(bmp);
g.Clear(Color.White);
//画噪线
for (int i = 0; i < 1; i++)
{
int x1 = rnd.Next(codeW);
int y1 = rnd.Next(codeH);
int x2 = rnd.Next(codeW);
int y2 = rnd.Next(codeH);
Color clr = color[rnd.Next(color.Length)];
g.DrawLine(new Pen(clr), x1, y1, x2, y2);
}
//画验证码字符串
for (int i = 0; i < chkCode.Length; i++)
{
string fnt = font[rnd.Next(font.Length)];
Font ft = new Font(fnt, fontSize);
Color clr = color[rnd.Next(color.Length)];
g.DrawString(chkCode[i].ToString(), ft, new SolidBrush(clr), (float)i * 18, (float)0);
}
//将验证码图片写入内存流,并将其以 "image/Png" 格式输出
MemoryStream ms = new MemoryStream();
try
{
bmp.Save(ms, ImageFormat.Png);
return ms.ToArray();
}
catch (Exception)
{
return null;
}
finally
{
g.Dispose();
bmp.Dispose();
}
No.3 發布部署運行
直接上圖,不會的看這裡.Net Core 之Ubuntu 14.04 部署過程詳情
(詳圖) 注意:驗證碼Windows下產生無壓力,我用的Ubuntu 14,需要安裝gdi包,運行日誌中會有提示。 安裝方法: Ubuntu 16.04:
apt-get install libgdiplus
cd /usr/lib
ln -s libgdiplus.so gdiplus.dll
Fedora 23:
以上所述是小編給大家介紹的.Net Core下使用ZKWeb.System.Drawing實現驗證碼功能(圖形驗證碼),希望對大家有幫助,如果大家有任何疑問請給我留言,小編會及時回覆大家的。在此也非常感謝大家對PHP中文網的支持!

熱AI工具

Undresser.AI Undress
人工智慧驅動的應用程序,用於創建逼真的裸體照片

AI Clothes Remover
用於從照片中去除衣服的線上人工智慧工具。

Undress AI Tool
免費脫衣圖片

Clothoff.io
AI脫衣器

Video Face Swap
使用我們完全免費的人工智慧換臉工具,輕鬆在任何影片中換臉!

熱門文章

熱工具

記事本++7.3.1
好用且免費的程式碼編輯器

SublimeText3漢化版
中文版,非常好用

禪工作室 13.0.1
強大的PHP整合開發環境

Dreamweaver CS6
視覺化網頁開發工具

SublimeText3 Mac版
神級程式碼編輯軟體(SublimeText3)
 c#.net的持續相關性:查看當前用法
Apr 16, 2025 am 12:07 AM
C#.NET依然重要,因為它提供了強大的工具和庫,支持多種應用開發。 1)C#結合.NET框架,使開發高效便捷。 2)C#的類型安全和垃圾回收機制增強了其優勢。 3).NET提供跨平台運行環境和豐富的API,提升了開發靈活性。
 從網絡到桌面:C#.NET的多功能性
Apr 15, 2025 am 12:07 AM
C#.NETisversatileforbothwebanddesktopdevelopment.1)Forweb,useASP.NETfordynamicapplications.2)Fordesktop,employWindowsFormsorWPFforrichinterfaces.3)UseXamarinforcross-platformdevelopment,enablingcodesharingacrossWindows,macOS,Linux,andmobiledevices.
 C#作為多功能.NET語言:應用程序和示例
Apr 26, 2025 am 12:26 AM
C#在企業級應用、遊戲開發、移動應用和Web開發中均有廣泛應用。 1)在企業級應用中,C#常用於ASP.NETCore開發WebAPI。 2)在遊戲開發中,C#與Unity引擎結合,實現角色控制等功能。 3)C#支持多態性和異步編程,提高代碼靈活性和應用性能。
 c#.net適合您嗎?評估其適用性
Apr 13, 2025 am 12:03 AM
c#.netissutableforenterprise-levelapplications withemofrosoftecosystemdueToItsStrongTyping,richlibraries,androbustperraries,androbustperformance.however,itmaynotbeidealfoross-platement forment forment forment forvepentment offependment dovelopment toveloperment toveloperment whenrawspeedsportor whenrawspeedseedpolitical politionalitable,
 .NET中的C#代碼:探索編程過程
Apr 12, 2025 am 12:02 AM
C#在.NET中的編程過程包括以下步驟:1)編寫C#代碼,2)編譯為中間語言(IL),3)由.NET運行時(CLR)執行。 C#在.NET中的優勢在於其現代化語法、強大的類型系統和與.NET框架的緊密集成,適用於從桌面應用到Web服務的各種開發場景。
 C#.NET與未來:適應新技術
Apr 14, 2025 am 12:06 AM
C#和.NET通過不斷的更新和優化,適應了新興技術的需求。 1)C#9.0和.NET5引入了記錄類型和性能優化。 2).NETCore增強了雲原生和容器化支持。 3)ASP.NETCore與現代Web技術集成。 4)ML.NET支持機器學習和人工智能。 5)異步編程和最佳實踐提升了性能。
 將C#.NET應用程序部署到Azure/AWS:逐步指南
Apr 23, 2025 am 12:06 AM
如何將C#.NET應用部署到Azure或AWS?答案是使用AzureAppService和AWSElasticBeanstalk。 1.在Azure上,使用AzureAppService和AzurePipelines自動化部署。 2.在AWS上,使用AmazonElasticBeanstalk和AWSLambda實現部署和無服務器計算。
 C#和.NET運行時:它們如何一起工作
Apr 19, 2025 am 12:04 AM
C#和.NET運行時緊密合作,賦予開發者高效、強大且跨平台的開發能力。 1)C#是一種類型安全且面向對象的編程語言,旨在與.NET框架無縫集成。 2).NET運行時管理C#代碼的執行,提供垃圾回收、類型安全等服務,確保高效和跨平台運行。


