Android使用ViewDragHelper實作仿QQ6.0側滑介面(一)
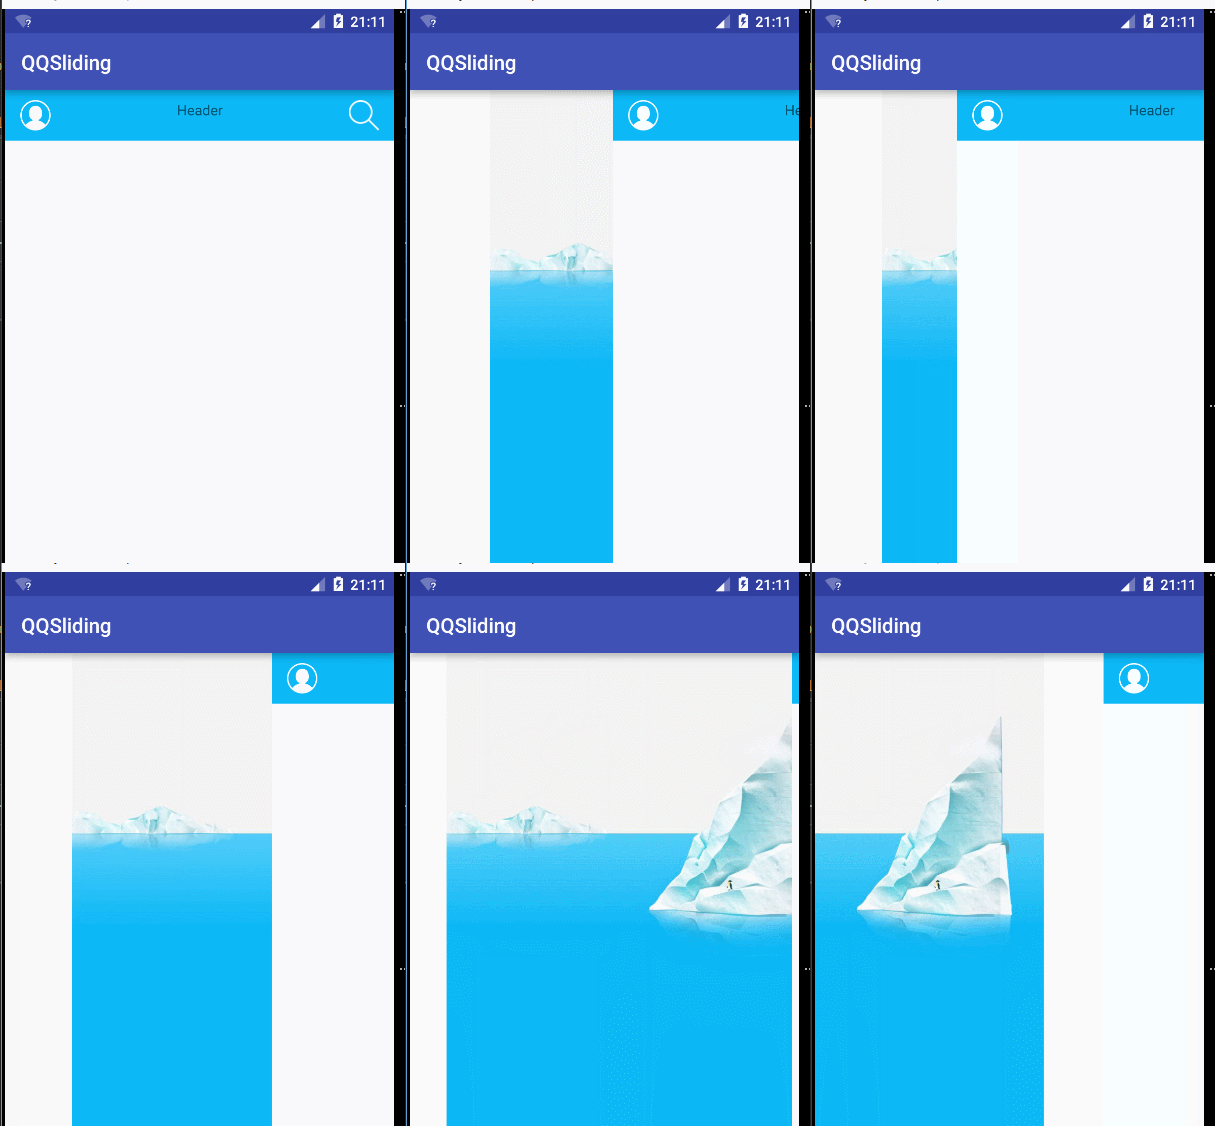
QQ是大家離不開的聊天工具,方便既實用,自從qq更新至6.0之後,側滑由原來的劃出後主面板縮小變成了左右平滑,在外觀上有了很大的提升,於是我就是嘗試理解裡面的各種邏輯,結合相關資料,研究研究。
知道這裡面的一個主要類是ViewDragHelper,那麼首先我們要先來了解一下這個ViewDragHelper類,正所謂打蛇打七寸,我們就先來看看官方文檔怎麼介紹的,有什麼奇特的功能。
首先繼承:
java.lang.Object
android.support.v4.widget.ViewDragHelper
直接父類別是Object。
類概述
ViewDragHelper is a utility class for writing custom ViewGroups. It offers a number of useful operations and state tracking for allowing a user to dView and reposition viewsful operations and state tracking for allowing a user to dView工具類,本省提供了許多有用的方法和狀態允許使用者去拖曳和繪製他們在父ViewGroup中的軌跡和位置。
Nested Classes(巢狀類別)
ViewDragHelper.Callback
A Callback is used as a communication channel with the ViewDragHelper back to the parent view communication channel with the ViewDragHelper back to the parent view using it.ragview通訊的介面
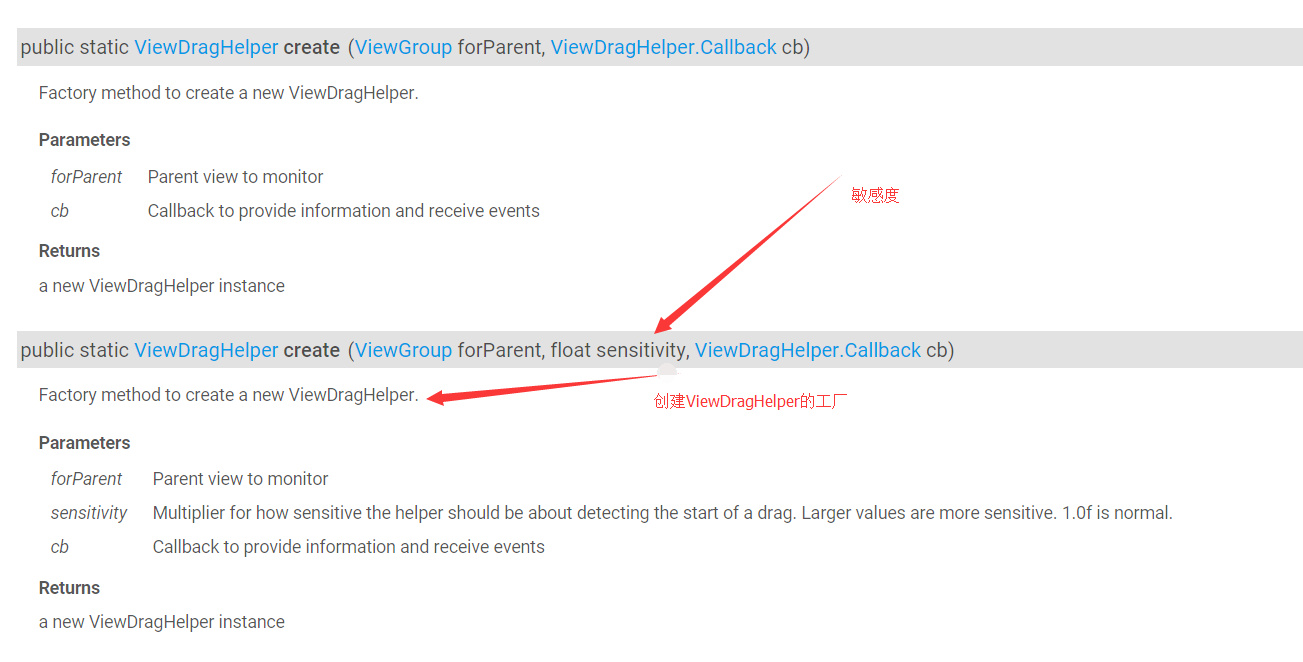
一個公開靜態方法:
我們可以知道,ViewDragHelper是透過create()方法建構出來。這個在後面會有詳細介紹。
讓我們在來看下需要用到的裡面的幾個方法:
public boolean tryCaptureView(View child, int pointerId) {}
public int getViewHorizontalDragRange(View child) {}
public int clampViewPositionHorizontal(View child, int left, int dx) {}
public void onViewPositionChanged(View changedView, int left, int top, int dx, int dy) {}
public void onViewReleased(View releasedChild, float xvel, float yvel) {}好了哈,說了這麼多,我們就先來個簡單的,就是可以實現拖曳(相信當你的兩個view可以拖曳的時候,你會發現,哦這麼簡單幾步麼):
第一步實現拖曳功能(簡單3步驟實現)
//1、通过静态方法初始化操作
mDragHelper = ViewDragHelper.create(this, mCallback);
/**
* 2、传递触摸事件
*
* @param ev
* @return
*/
@Override
public boolean onInterceptTouchEvent(MotionEvent ev) {
//让自己的控件自行判断是否去拦截
return mDragHelper.shouldInterceptTouchEvent(ev);
}
@Override
public boolean onTouchEvent(MotionEvent event) {
try {
//自己去处理触摸事件
mDragHelper.processTouchEvent(event);
} catch (Exception e) {
e.printStackTrace();
}
//返回true,这样才能持续接收,要不然我们不会传递而是被拦截了
return true;
}

ViewDragHelper.Callback mCallback = new ViewDragHelper.Callback() {
/**
* 根据返回结果决定当前child是否可以拖拽
* 尝试捕获的时候调用,如果返回的是主面板,那么负面版是不能被调用的
* @param child 当前被拖拽的view
* @param pointerId 区分多点触摸的id
* @return 返回true 是都可以拖拽
* 返回child == mLeftContent 左侧可以移动
* 返回child == mMainContent 右侧可以移动
*/
@Override
public boolean tryCaptureView(View child, int pointerId) {
//这里要返回true,要不然不能拖拽
return true;
}
/**
* 根据建议值修正将要移动的位置 此时并没有发生真正的移动(左右)
*
* @param child 当前拖拽的view
* @param left 新的位置的建议值 oldLeft + dx
* @param dx 变化量 和变化之前位置的差值
* @return
*/
@Override
public int clampViewPositionHorizontal(View child, int left, int dx) {
//返回的拖拽的范围,不对拖拽进行真正的限制,仅仅决定了动画执行的速度
return left;
}
};但是,你要是做成這樣提交任務,是不是不想幹活了哈,好了下面我們就來控制一下拖曳位置,不能讓他亂拖曳了哈。 、
第二步,控制拖曳範圍
/**
* Finalize inflating a view from XML. This is called as the last phase
* of inflation, after all child views have been added.
* 当xml填充完的时候去掉用,在这里我们可以找到我们要去操控的那两个布局
* <p>Even if the subclass overrides onFinishInflate, they should always be
* sure to call the super method, so that we get called.
*/
@Override
protected void onFinishInflate() {
super.onFinishInflate();
/**
* 根据索引来找
*/
/**
* 得到左边的布局
*/
mLeftContent = (ViewGroup) getChildAt(0);
/**
* 得到主main布局
*/
mMainContent = (ViewGroup) getChildAt(1);
}
/**
* 当尺寸变化的时候去调用
* This is called during layout when the size of this view has changed
* @param w
* @param h
* @param oldw
* @param oldh
*/
@Override
protected void onSizeChanged(int w, int h, int oldw, int oldh) {
super.onSizeChanged(w, h, oldw, oldh);
/**
* 屏幕的宽度和高度
*/
mHeight = getMeasuredHeight();
mWidth = getMeasuredWidth();
/**
* 自定义左侧view拖拽出来的距离
*/
mRange = (int) (mWidth * 0.7);
}if (child == mMainContent) {
left = fixLeft(left);
}
/**
* 修正方法
* 根据范围去修正左侧的view的可见
*
* @param left
* @return
*/
private int fixLeft(int left) {
if (left < 0) {
return 0;
} else if (left > mRange) {
return mRange;
}
return left;
}/**
* 当view位置改变的时候,处理要做的事情,更新状态,伴随动画,重绘界面
*
* 此时view已经发生了位置的改变
*
* @param changedView 改变的位置view
* @param left 新的左边值
* @param top
* @param dx 水平变化量
* @param dy
*/
@Override
public void onViewPositionChanged(View changedView, int left, int top, int dx, int dy) {
super.onViewPositionChanged(changedView, left, top, dx, dy);
int newLeft = left;
//如果我们拖拽的是左面板
if (changedView == mLeftContent) {
//新的左侧位置是我们的主面板的左侧加上水平变化量
newLeft = mMainContent.getLeft() + dx;
}
//进行修正(不能超出我们的规定的范围)
newLeft = fixLeft(newLeft);
if (changedView == mLeftContent) {
//当左面板移动之后,在强制放回去
mLeftContent.layout(0, 0, 0 + mWidth, 0 + mHeight);
mMainContent.layout(newLeft, 0, newLeft + mWidth, 0 + mHeight);
}
//兼容低版本 强制重绘
invalidate();
}<?xml version="1.0" encoding="utf-8"?> <com.example.qqsliding.DragLayout xmlns:android="http://schemas.android.com/apk/res/android" xmlns:tools="http://schemas.android.com/tools" android:layout_width="match_parent" android:layout_height="match_parent" tools:context="com.example.qqsliding.MainActivity"> <LinearLayout android:layout_width="match_parent" android:layout_height="match_parent" android:background="@mipmap/sidebar_bg"> </LinearLayout> <LinearLayout android:layout_width="match_parent" android:layout_height="match_parent" android:background="#FFFFFF"> <RelativeLayout android:layout_width="match_parent" android:layout_height="50dp" android:background="#0CB8F6" android:gravity="center_vertical"> <ImageView android:layout_width="30dp" android:layout_height="30dp" android:layout_marginLeft="15dp" android:src="@mipmap/icon_avatar_white"/> <TextView android:layout_width="wrap_content" android:layout_height="wrap_content" android:layout_centerHorizontal="true" android:text="Header"/> <ImageView android:layout_width="30dp" android:layout_height="30dp" android:layout_alignParentRight="true" android:layout_marginRight="15dp" android:src="@mipmap/icon_search"/> </RelativeLayout> </LinearLayout> </com.example.qqsliding.DragLayout>

熱AI工具

Undresser.AI Undress
人工智慧驅動的應用程序,用於創建逼真的裸體照片

AI Clothes Remover
用於從照片中去除衣服的線上人工智慧工具。

Undress AI Tool
免費脫衣圖片

Clothoff.io
AI脫衣器

Video Face Swap
使用我們完全免費的人工智慧換臉工具,輕鬆在任何影片中換臉!

熱門文章

熱工具

記事本++7.3.1
好用且免費的程式碼編輯器

SublimeText3漢化版
中文版,非常好用

禪工作室 13.0.1
強大的PHP整合開發環境

Dreamweaver CS6
視覺化網頁開發工具

SublimeText3 Mac版
神級程式碼編輯軟體(SublimeText3)
 公司安全軟件導致應用無法運行?如何排查和解決?
Apr 19, 2025 pm 04:51 PM
公司安全軟件導致部分應用無法正常運行的排查與解決方法許多公司為了保障內部網絡安全,會部署安全軟件。 ...
 如何將姓名轉換為數字以實現排序並保持群組中的一致性?
Apr 19, 2025 pm 11:30 PM
將姓名轉換為數字以實現排序的解決方案在許多應用場景中,用戶可能需要在群組中進行排序,尤其是在一個用...
 如何使用MapStruct簡化系統對接中的字段映射問題?
Apr 19, 2025 pm 06:21 PM
系統對接中的字段映射處理在進行系統對接時,常常會遇到一個棘手的問題:如何將A系統的接口字段有效地映�...
 IntelliJ IDEA是如何在不輸出日誌的情況下識別Spring Boot項目的端口號的?
Apr 19, 2025 pm 11:45 PM
在使用IntelliJIDEAUltimate版本啟動Spring...
 如何優雅地獲取實體類變量名構建數據庫查詢條件?
Apr 19, 2025 pm 11:42 PM
在使用MyBatis-Plus或其他ORM框架進行數據庫操作時,經常需要根據實體類的屬性名構造查詢條件。如果每次都手動...
 Java對像如何安全地轉換為數組?
Apr 19, 2025 pm 11:33 PM
Java對象與數組的轉換:深入探討強制類型轉換的風險與正確方法很多Java初學者會遇到將一個對象轉換成數組的�...
 如何利用Redis緩存方案高效實現產品排行榜列表的需求?
Apr 19, 2025 pm 11:36 PM
Redis緩存方案如何實現產品排行榜列表的需求?在開發過程中,我們常常需要處理排行榜的需求,例如展示一個�...
 電商平台SKU和SPU數據庫設計:如何兼顧用戶自定義屬性和無屬性商品?
Apr 19, 2025 pm 11:27 PM
電商平台SKU和SPU表設計詳解本文將探討電商平台中SKU和SPU的數據庫設計問題,特別是如何處理用戶自定義銷售屬...


