自訂JPanel面板背景
一、前言
1.GUI全名為Graphical User Interface,就是圖形使用者介面。 JAVA的GUI應用廣泛在我們生活中也很常見。許多應用程式使用該GUI程式設計,像是點擊QQ圖示彈出對應的登入窗體。

一般程式與使用者之間的互動都基於對應程式的運作介面。
2.JPanel面板是SWING下的一個面板容器類別。此面板支援嵌套,可設定佈局方式,設定不同的佈局管理器可新增其他控制項像JButton按鈕,JTextField文字方塊等。來設計完善一個程式介面窗體。
作為繪製面板支援setBackground()設定背景顏色的方法還遠遠不夠。這裡實作自訂為JPanel設定圖片背景。
二、平台工具
1.MyEclipse
此處示範使用myeclipse2014
的效果
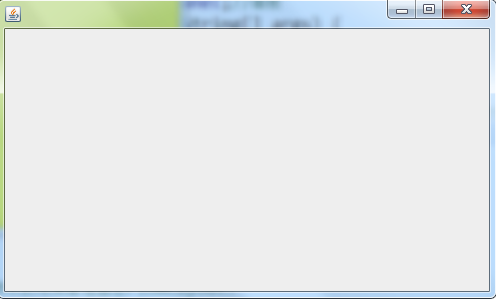
(1)先建立一個不修飾的窗體,一般一般的一般預設jpanel介面效果如下:
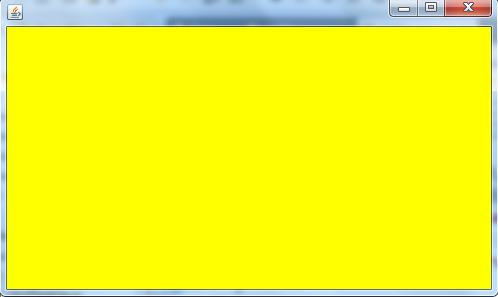
(2)簡單的設定背景色彩效果:
 (
(
( )後的JPanel下的窗體效果:
2.程式碼實作
自訂JPanel背景處理,圖片為bg.PNG,與測試類別在同一路徑下,使用圖片注意使用相對路徑
import java.awt.Graphics;
import javax.swing.ImageIcon;
import javax.swing.JFrame;
import javax.swing.JPanel;

public class GUITest {
   private static JFrame jframe; //声明一个窗体
   private JPanel jpanel;     //声明一个画板

   public GUITest(){       //构造方法
     jframe = new JFrame();
     init();
   }

   private void init(){
     jframe.setTitle("测试");
     jpanel = new JPanel(){//关键代码,就是重写了paint的一个方法
        @Override
        protected void paintComponent(Graphics g) {
          super.paintComponent(g);
          ImageIcon img = new ImageIcon(GUITest.class.getResource("bg.png"));
         /**
          * bg.PNG这个地方换成自己的图片
          * 此处使用的相对路径,bg.png跟该测试类在同一路径下
          * 不过建议使用相对路径避免使用绝对路径
          */
          img.paintIcon(this, g, 0, 0);
        }
     };
     jpanel.setOpaque(true);
     jframe.setBounds(200, 200, 500, 400); //设置显示位置距离左边200像素距离上边200像素及屏幕大小500*400

     jframe.add(jpanel); //添加画板到窗体

     jframe.setVisible(true); //设置显示界面
   }

   public static void main(String[] args) {
      new GUITest();      // 实例化对象
   }
} 四、拓展佈局管理器
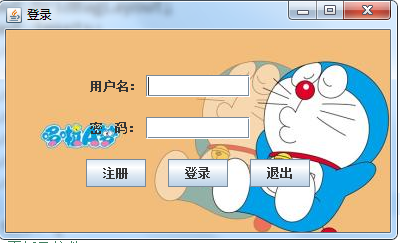
下面簡單寫個登入窗體:
基於自訂的JPanel背景,設定GridBagLayout佈局,新增按鈕文字方塊等基本說明實作的簡單登入窗體。
(1)程式碼如下:import java.awt.Graphics;
import java.awt.GridBagConstraints;
import java.awt.GridBagLayout;
import java.awt.Insets;
import javax.swing.ImageIcon;
import javax.swing.JButton;
import javax.swing.JFrame;
import javax.swing.JLabel;
import javax.swing.JPanel;
import javax.swing.JPasswordField;
import javax.swing.JTextField;
public class GUIT {
//声明窗体,面板及控件
private static JFrame jframe;
private JLabel jlabel,jlabel1;
private GridBagLayout gridbag;
private GridBagConstraints constraints;
private JTextField jtfield1;
private JPasswordField jpfield1;
private JButton jbutton1,jbutton2,jbutton3;
private JPanel jpanel;
public GUIT(){
jframe = new JFrame();
jlabel = new JLabel();
jlabel1 = new JLabel();
jtfield1 = new JTextField();
jpfield1 = new JPasswordField();
gridbag = new GridBagLayout();
jbutton1 = new JButton();
jbutton2 = new JButton();
jbutton3 = new JButton();
init();
}
/**
* init()初始化并显示界面
*/
private void init(){
jframe.setTitle("登录");
/**
* 设置JPanel背景
*/
jpanel = new JPanel(){
@Override
protected void paintComponent(Graphics g) {
super.paintComponent(g);
ImageIcon img = new ImageIcon(GUITest.class.getResource("ddmbg.jpg"));
img.paintIcon(this, g, 0, 0);
}
};
//为JLabel,JButton初始化文本
jlabel.setText("用户名:");
jlabel1.setText("密 码:");
jbutton1.setText("登录");
jbutton2.setText("退出");
jbutton3.setText("注册");
//设置显示位置及屏幕大小500*400
jframe.setBounds(450, 240, 400, 240);
//jpanel采用GridBagLayout布局管理器
jpanel.setOpaque(false);
jpanel.setLayout(gridbag);
//初始化用户名label,并添加该控件到画板
constraints = getGridBagConstraints(0,0,1,1,0,0,GridBagConstraints.CENTER,GridBagConstraints.NONE,new Insets(10,0,10,0),0,0);
gridbag.setConstraints(jlabel, constraints);
jpanel.add(jlabel);
//初始化用户名文本框,并添加该组件到画板
constraints = getGridBagConstraints(1,0,1,1,0,0,GridBagConstraints.CENTER,GridBagConstraints.NONE,new Insets(10,0,10,0),100,0);
gridbag.setConstraints(jtfield1, constraints);
jpanel.add(jtfield1);
//初始化密码label
constraints = getGridBagConstraints(0,1,1,1,0,0,GridBagConstraints.CENTER,GridBagConstraints.NONE,new Insets(10,0,10,0),0,0);
gridbag.setConstraints(jlabel1, constraints);
jpanel.add(jlabel1);
//初始化密码文本框
constraints = getGridBagConstraints(1,1,1,1,0,0,GridBagConstraints.CENTER,GridBagConstraints.NONE,new Insets(10,0,10,0),100,0);
gridbag.setConstraints(jpfield1, constraints);
jpanel.add(jpfield1);
//初始化注册按钮,并添加该控件到画板
constraints = getGridBagConstraints(0,2,1,1,0,0,GridBagConstraints.CENTER,GridBagConstraints.NONE,new Insets(10,0,10,0),0,0);
gridbag.setConstraints(jbutton3, constraints);
jpanel.add(jbutton3);
//初始化登录按钮
constraints = getGridBagConstraints(1,2,1,1,0,0,GridBagConstraints.CENTER,GridBagConstraints.NONE,new Insets(10,0,10,0),0,0);
gridbag.setConstraints(jbutton1, constraints);
jpanel.add(jbutton1);
//初始化退出按钮
constraints = getGridBagConstraints(2,2,1,1,0,0,GridBagConstraints.CENTER,GridBagConstraints.NONE,new Insets(10,0,10,0),0,0);
gridbag.setConstraints(jbutton2, constraints);
jpanel.add(jbutton2);
//添加画板到窗体
jframe.add(jpanel);
//窗体初始化完成
}
private static GridBagConstraints getGridBagConstraints(int gridx,int gridy,int gridwidth,int gridheight,double weightx,double weighty,int anchor,int fill,Insets insets,int ipadx,int ipady){
return new GridBagConstraints(gridx, gridy, gridwidth, gridheight, weightx, weighty, anchor, fill, insets, ipadx, ipady);
}
public static void main(String[] args) {
new GUIT();
jframe.setVisible(true);
}
} (2)實現效果如圖所示:


