作為編碼者,美工基礎是偏弱的。我們可以參考一些成熟的網頁PS教程,提升自身的設計能力。套用一句話,「熟讀唐詩三百首,不會作詩也會吟」。
本系列的教程來自網路上的PS教程,都是國外的,全英文的。本人嘗試翻譯這些優秀的教學。因為翻譯能力有限,翻譯的細節上還有待推敲,希望廣大網友不吝賜教。
約定:
1、本文的軟體是Photoshop CS5版本
2、原教程的截圖是英文的,本人在重新製作的基礎上,重新截了中文版的圖
3、原文中有些操作沒有給定參數。本人在反覆測試的情況下測定了一些參數,以紅色的文字顯示。有些錯誤的參數,直接以紅色文字顯示正確的參數
例如:(90,22,231,77),表示矩形的左上角的座標是(90,22),寬231,高77
例如:(90,22),表示矩形的左上角的座標是(90,22),矩形的其他兩個參數教程裡已經指定
4、在教程的最後會附上本人的心得。有些是對教程中的一些步驟的最佳化等。
In this web design tutorial, we will create a beautiful and colorful portfolio layout using Photoshop. I'll show you many techniques for creating different things like bended paper corners, dashed lines, image carousels, 3D bars, and more! I'll walk you through each step in exact detail so you won't be left guessing how to do a certain technique. We will use the 960 Grid System to create this layout (which I'll cover at the start).在本教程中,我們要在PS中創建美麗多彩的作品集。我會告訴你許多技術用於創建不同的東西,如彎曲的紙角,虛線,圖像跑馬燈,3D的橫幅,和更多!我將指導您完成每個步驟,精確的細節,你沒必要去猜測用了什麼特別的技術。我們將使用960網格系統來建立這個佈局(一開始就使用)。
Step 1: Understanding the grid
Download the 960 Grid and unzip the archive. Inside the Photoshop template folder, you will findfileee .P SD. 16, and 24). For this layout, we will use the 16-column grid. So, open the file
960_grid_16_col.psdfile in Photoshop. As you can see, you have 16 red (alpticalstalpver document. We will create the layout within these red vertical stripes.In the Layers Panel you have two groups: “16 Col Grid” (which contains all the red vertical stripes) and “Layer 1″ (we don) need layer, so you can delete it).
To show or hide the grid, click on the eye icon of the “16 Col Grid” group in the Layers Panel to toggle its visibility. All the elements of the layout this group, so it has to be on top all the time. The .PSD file contains guidelines as well, which will be very helpful. To show or hide the guidelines go to View > Show > Guides (or press Ctrl/Cmd ; ).
This is pretty much everything you need to know about the grid.
Before we begin, make sure that your Info Panel is opened (Window > Info). During the pestor 到certain size and you will be able to see the exact width and height of your shapes in the Info panel while you are creating them.
壓縮步驟1:了解網格
網格並下載網格的解檔。在Photoshop範本資料夾內,你會發現三個PSD檔。每一個都有一定數目的列(12,16,和24)的網格。在這種佈局中,我們將使用16列的網格。所以,在Photoshop中開啟該文件,960_grid_16_col.psd文件。你可以看到,你有16個紅色(幾乎是粉紅色的)在你的文件中的垂直條紋。我們將在這些紅色的垂直條紋上建立網頁佈局。 在圖層面板中有兩組:「16 Col Grid」(包含所有的紅色垂直條紋)和「圖層1」(我們並不需要這一層,這樣你可以刪除它)。
要顯示或隱藏網格,按一下眼睛圖示的「16 Col Grid」群組在圖層面板中切換它的可見性。網頁佈局的左右元素都在這個群組的下方創建的,所以它總是在最上面。 PSD檔案包含的參考線,這將是非常有益的。要顯示或隱藏的指引去查看“>”顯示“>”參考線“(或按Ctrl / Cmd的+ ;)。 這是幾乎所有你需要知道的關於網格。
在我們開始之前,請確保您開啟資訊面板(「視窗」>「資訊」)。寬度和高度。
基本的知識點,了解佈局系統的基本情況。本翻譯教學不使用佈局系統。
Step 2: Modifying the size of the canvas
To give us more ?
步驟2:修改畫布的尺寸
為了讓我們有更多的空間在高度方向上,我們需要增加我們的畫布的大小。點選:圖片 > 畫布大小,高度為1920px。
由於不使用960佈局系統,本步改成新建文檔,尺寸:1020px*1920px
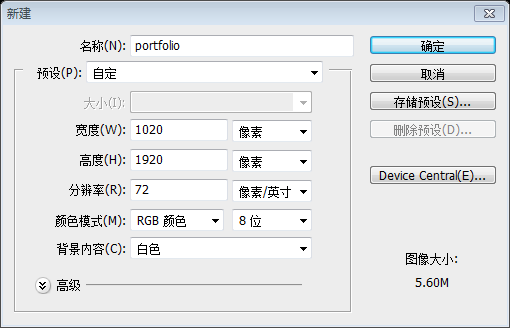
tangle Tool (U) and create a white rectangle with the size
940px by 1920px
. Make sure that Photoshop's Guides are activated (Ctrl/Cmd + ;) so that you can create the tanivated (Ctrl/Cmd + ;) so that you can create the click on it to open the Layer Style window and use the settings from the following image to apply anOuter Glow and Stroke layer長方形工具建立一個白色的矩形(40,0),尺寸:940px*1920px。確信PS的參考線是啟動的(Ctrl/Cmd + ;),這樣你創建這樣的矩形是很簡單的。命名圖層為bg,雙擊開啟圖層樣式窗口,依照下圖的設定為它加上外發光描邊的圖層樣式描邊的顏色: #1f1907


Step 4: Creating the header
Create a new group and name it “header“. Then select the Rectangle Tool (U) and create a rectangle using the color 「, double-click on it, and use the settings from the following image for a Gradient Overlay layer style.
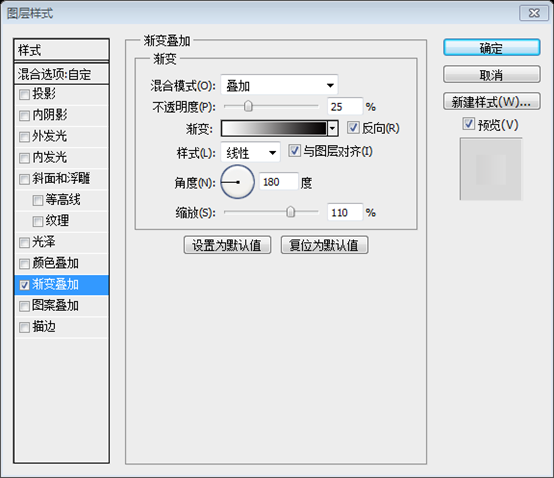
。然後選擇矩形工具建立一個矩形(40,0,940,96),顏色: #aedee1。命名為header bg,雙擊該圖層,依照下圖設定加入漸層疊圖樣式


(M未來)525:007p 5 月) and write the name of your layout using the color #93b9bb. I have used the font Museo 700 for the word “creative” and Museo 300 for “folio”.
Now we式。 a more detailed tutorial on this technique, check out Jacob's Inset Typography tutorial on Six Revisions (which uses a different technique).
步驟5:網站名稱的凹型處理 現在,我們將建立一個凹型處理,使用Photoshop的圖層樣式。雙擊您的文字圖層,開啟圖層樣式視窗按照下圖的設定內陰影、內發光、斜面和浮雕圖層樣式。順便說一下,如果你想知道一個更詳細的這種技術教程,檢視Six Revisions上的Jacob’s Inset Typography tutorial(使用不同的技術)。 ating a small clo遠 Then select the Ellipse Tool (U), hold down the Shift key to maintain the proportions and create a few white circles with different sizes. 80% 步驟6:建立一個頭部區域中的一小片雲 建立新群組,並將其命名為cloud。 然後使用移動工具(V)安排這些圓形成雲。將cloud組的不透明度設定為80%。 Step 7: Creating a “hire me” banner Now we are going to create a willall the Rectangle Tool (U) and create a small rectangle in the right side of the header using the color .Name this layer “paper“, double-click on 集形物” use the settings from the following image. 現在,我們要創建一個小的一張召喚紙,在上面寫一個號召性文字去吸引潛在客戶。強調的號召性文字對作品集網站是非常重要的,因為它鼓勵有僱用設計師意願的去點擊它去聯繫網站的所有者。 建立一個新群組hire me。然後選擇矩形工具(U),在頭部區域的右側建立一個小的矩形 ,顏色: #f7efda。 命名此圖層為paper,雙擊開啟圖層樣式窗口,並依照下圖設定樣式。 Step 8: Bending a corner of the paper paper click on the vector mask of the “paper” layer to make it active. Then select the Pen Tool (P), make sure that the “Shape layers” button is activated and select the Subtract from shape area button from the Options bar.🜎 Pen Tool (P) to create a triangle over the upper right corner of the yellow rectangle as you see in the following image. 現在Photoshop中創造一個折曲的角落效果。首先,對paper層啟動向量蒙版。 然後選擇鋼筆工具(P),確保模式是“形狀圖層”,並在選項列中選擇“從形狀區域減去”按鈕。 現在使用鋼筆工具(P)建立一個三角形在黃色矩形的右上角,你在下面的圖片中看到。 這一步是非常有意思的步驟,在之前的教程中從未出現過,因此在這裡補充詳細的過程,由於不善於使用鋼筆工具,在說明過程中用矩形工具替代 首先激活paper的向量蒙版,點選圖層面板上的paper圖層的向量蒙版(paper圖層上的兩個矩形中的右邊的那個)。 然後選擇矩形工具,點中是「形狀圖層」和「從形狀區域減去」按鈕 在paper層上的正方形的正方形正方形的正方形(按住Shift鍵) 再用直接選取工具選取小矩形的右下角的控制點 按鍵盤上的deleteete三角形 滑鼠點擊其餘圖層,完成此步驟 Step 9: Apply a Gradient Overlay on the bended paper Create a new layer and use the Pen Tool (PooloCreate a new layer and use the Pen Tool (P) to create the unkage #f1e9d3 Name this layer “corner“, double-click on it and use the settings from the following image for Gradient Overlay 9紙張上 建立一個新圖層,使用鋼筆工具(P)建立一個三角形,顏色: #f1e9d3,就像下面的圖片中看到的一個三角形。 對於不善於使用鋼筆工具的,可以用矩形工具加上直接選擇工具選擇一個控制點後刪除的方法來實現三角形
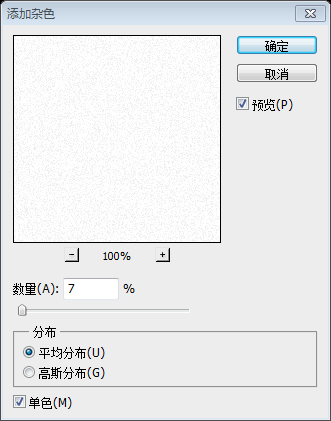
tosper Create a new layer beneath the “corner” layer.Select the Pen Tool (P) and create a black triangle like the one from the following image.🜎 . Then go to Filter > Blur > Gaussian Blur and use a radius.Add a mask to this layer (Layer > Layer Mask > Reveal All), select a mask to this layer (Layer > Layer Mask > Reveal All), select a small ) and paint with it over the shadow from the right side of the paper corner to erase it. Name this layer “shadow” and set its opacity to . 15%.。的折角添加陰影 這一步還是用複製conner層比較好 可能由於PS版本的原因,在CS5版本中,為了完成後面的步驟,這一步應該是柵格化圖層。 然後點選:濾鏡 > 模糊 > 高斯模糊,並使用一個2px半徑。 命名此層為shadow,並設定其不透明度為15% tobit ) using the Paint Bucket Tool (G). Convert this layer into a smart object, then go to Filter > Noise > Add Noise and use the settings from the following image.iseoise "inole" Name this this" and set its blending mode to Multiply and layer opacity to .In the following steps, we will add noise to other elements of the layout as wing and I will refer the mfer the mfer as as s , refer as 300, refer as 0 keep in mind this method. 步驟11:將雜色加到紙張 現在我們要添加一點點的雜色在紙張上,以使它看起來更逼真。按Ctrl / Cmd+Click在paper層的向量蒙版上,作出紙張的選區。在該組所有其他圖層的上方中建立一個新圖層,選擇油漆桶工具(G)以白色(#FFFFFF)填滿選取範圍。 這層轉換為智慧型對象,然後點選:濾鏡 > 雜色 > 新增雜色,依照下圖設定。 命名此層為“noise”,並設定其混合模式為正片疊底,圖層不透明度改為15%。 在下面的步驟中,我們將添加其他元素的雜色,我也會重複這一步,所以你可能要牢記這種方法。 Step 12: Adding a text over the paper Now it's text over the paper #514c3f 步驟12:在紙上添加文字 Step 13: Adding a paper airplane Go to Filter > Noise > Add No. the settings from the following image.Then name this layer “paper airplane 步驟13:新增一個紙飛機 Step 14: Creating a dashed line behind the airplaneStep 14: Creating a dashed line behind the airplaneStep 我使用 Adobe Illustrator(是的,我只是作弊了一點,但你也可以使用 Photoshop 來實現這一點 - 只是不會那麼容易)在平面後面創建一條虛線。如果您沒有 Illustrator,您可以下載並使用我的名為 dashed_line.png 的虛線 PNG 映像(Windows 使用者提示:右鍵單擊其中一個連結並選擇另存為)。在 Photoshop 中開啟它,並使用移動工具 (V) 將其放置在畫布上。 如果您擁有 Adobe Illustrator 並且知道如何使用它,您可以按照以下步驟操作。開啟一個新文件(Ctrl/Cmd + N)並使用矩形工具(M)建立一個大的灰色矩形。然後選擇鋼筆工具 (P) 並建立一條如下圖所示的路徑。使用1pt白色(#ffffff)描邊和無填充。然後開啟描邊面板(視窗 > 描邊)並使用下圖中的設定。 使用選取工具(V)選擇虛線,複製它(Ctrl/Cmd + C),返回 Photoshop,然後將其貼上為智慧型物件(Ctrl/Cmd + V)。 將此圖層命名為「line」並將其放在「紙飛機」圖層下方。使用自由變換(Ctrl/Cmd + T)按照你想要的方式旋轉這條線。 步驟14:創建紙飛機後面的虛線 我用了Adobe Illustrator中(是的,我只是一個有點)有點被騙了,但可以使用Photoshop解決這件事- 它不會那麼解決這件事容易)創建一個飛機後面的虛線。如果你沒有Illustrator中,你可以下載並使用我的虛線dashed_line.png(Windows用戶:右鍵)點擊鏈接,選擇「另存為」)的 PNG 圖片。在 Photoshop 中打開它,並將其放置在您的勞動力中,使用移動工具(V)。 任選:Adobe Illustrator 的使用者 如果您有Adobe Illustrator和知道如何使用它,你可以按照下面的步驟。開啟一個新檔案(按Ctrl / Cmd+ N),使用曲線工具(M)建立一個大的測量曲線。然後選擇鋼筆工具(P),就像一個從下面的圖片中建立一個路徑。使用1點白色(#FFFFFF)描邊並且不填滿。然後開啟「筆觸」面板(點選:視窗>描邊),從下面的圖片中使用的設定。 使用選取工具(V)選取您的虛線,將其複製(按Ctrl / Cmd+ C),返回Photoshop中,作為智慧型物件(按Ctrl / Cmd+ V),貼上其貼上。 源自此層為線,並將其放在紙飛機層的下方。使用自由變換(Ctrl / Cmd+ T),把這條虛線的移動到你想要的位置。 步驟15: 建立導覽列 在「header」群組下建立新群組,並將其命名為「Hbar」。 940px的矩形40px 和顏色#c0e332。將此圖層命名為“navigation bar bg”,雙擊它並使用下圖中的設定。 步驟15:建立導覽列 (40,96),尺寸:940px*40px,顏色:#c0e332。命名此圖層為導覽列bg,側面它按照下圖進行設定。 第16步:為細節製作1px的線條 。將此圖層命名為「1px 暗線」。 按 Ctrl/Cmd + J 複製此圖層並將新線移到導覽列底部。 步驟16:新增細節部分的1px線條 選擇直線工具(U)的權重設定為1px,並在導覽列的頂部建立一個水平線(40,96,940,1),顏色: # 7e961d。命名此圖層為「1px dark line」。 按Ctrl/ Cmd+ J複製這個圖層,並移動新的水平線到導覽列的底部(40,135,940,1)。 Step 17: Give the 1px lines some depth Create a new line with the weight of Create a new line with the weight of ? . Name this layer “1px light line” and put it beneath the first dark line. Duplicate this layer (Ctrl/Cmd + J) and put the new one above the second dark line.1757p的線看起來有深度感 命名此層為“1px light line”,並把它移到第一條暗線的下方(40,97,940,1) (40,134,940,1)。 . 步驟18:輸入導覽選單項目 選擇文字工具(T)及輸入導覽功能表項目的名稱。使用字體museo700,顏色: #336600。
Step 19: Creating the featured content area Create a new group above thegroupigation bar Create a new group above thegroupigation bar (U) and create a rectangle with the dimensions 940px 450px using the color #e6b633 Name this layer “1. 9:創建特色內容區域在navigation bar組上方建立一個新組featured。 然後選擇矩形工具(U)建立一個矩形(40,136),尺寸:940px*450px,顏色: #e6b633。 命名此層為featured area bg
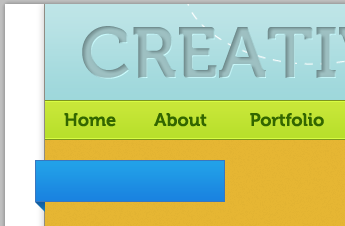
Step 20: Add 1px lines for detail weight at the bottom of the yellow rectangle. #755c18 1px d755c18 and name the layer」1px darkline darklined ffdf87 1px light line「. 步驟20:新增細節部分的1px線條 對於暗線(40,585,960,1),使用顏色: #755c18,圖層命名為1px dark line。 (40,584,960,1) Step 21: Adding noise to the featured content background Now we will add some noise to the background of the minatured beam. mask of the “featured area bg” layer to select the yellow rectangle. Then create a new layer and fill the selection with white (#ffffff) using the Paint Bucket Tool (G). Multiply, lower the layername to 5% noise「. 現在我們將在特色內容區域加入一些雜色,就像我們之前紙張的背景一樣。按Ctrl / Cmd+click點選featured area bg的向量遮罩,出線黃色矩形的選取範圍。然後建立一個新圖層,使用油漆桶工具(G)用白色(#FFFFFF)填滿選取範圍。 將這層轉換為智慧型物件。 然後點擊:濾鏡 > 雜色 > 加入雜色,從下面的圖片中使用的設定。 設定這層的混合模式為正片疊底,圖層的不透明度降低到25%,並命名為noise。 Then select the Rectangle Tool (U) and create a rectangle like the one you see in the following image using the color .Name this layer “ ” as s , double-clicker “blue. from the following image to add a Gradient Overlay Stroke layer style to it.Then select the Move Tool (V) and move your rectangle 10p8 at left 20px from the navigation bar. 步驟22:建立標題行的一個藍條 (30,156,190,42),顏色: #1e92e4,像下圖一樣。
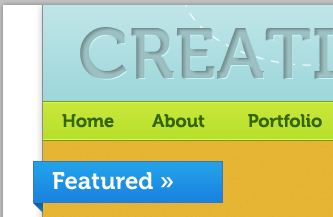
描邊的顏色: #3a77be Name this layer 「triangle「, double-click on it and use the settings from the following image for Gradient Overlay. .選擇鋼筆工具(P),並建立一個小的三角形在矩形的藍條左下角的下方, ,看起來像它的3D陰影。 命名此圖層為triangle,雙擊圖層並依照下圖設定漸層疊加。 Step 24: Add the text on the blue bar #ffffff. 步驟24:在藍色條上加上文字 選擇文字工具(T),並寫上Featured »在藍條上,使用的:Museo 700,顏色字體: #FFFFFF。 Step 25: Adding images to the featured content area Create 一個each one to the dimensions 290px 260px. I just used some random images and screengrabs from Six Revisions and from my site PSDBURN.語Move below. Add an Inner Glow and a Stroke to each image using the settings from the following image to create a double stroke effect. image to create a double stroke effect. 新組iamges然後在Photoshop打開你喜歡的圖像,每個都是260px*290px的尺寸。我只是用了一些隨機圖像和從Six Revisions上的screengrabs,和從我的網站PSDBURN。 在你的畫布上使用移動工具(V),排列他們,就像你看到下面的圖像。 每個圖像按照下圖添加內發光和描邊的設置,創建一個雙描邊效果。
buttons and create a rounded rectangle using the color Then select the Type Tool (T) and write “Read more »” on your button using the font Museo 500 and the color #3d382a. 建立一個新群組buttons。 然後選擇圓角矩形工具(U),設定半徑為6px的,顏色: #f8c539,建立一個圓角矩形 。 雙擊層開啟圖層樣式窗口,依照下圖設定。 然後選擇文字工具(T),並在按鈕上寫上Read more »,使用的字體Museo 500和顏色: #3d382a。 view gle layer which you have created at the previous step (Ctrl/Cmd + J) and move the new rounded rectangle to the right. Then change its color to #dfd7c0, and the stroke color to .Use the Type Tool (T), the color #3d382a to write “ ” on your button. 步驟27:建立一個view portfolio按鈕 ”上一步圓角矩形的右邊(522,524) Step 28: Creating a lamp Now we will create a lamp that will light the middle image from the featured content area. Create a new group and name it “lamp“. Then select the Rounded Rectangle Tool (U), set the radius to 7px and create a small color #8f631e Double-click on this layer to open the Layer Style window and use the settings from the following image to apply Inner Shadow, 郵件 layer styles.Name this layer “wood“. Add a little bit of noise to the wood part of the lamp just like you did with the paper at the Step 11. Use an amount of uni 5% monochromatic noise.Set the blend mode of this noise layer to Multiply . 步驟28:創建一盞燈 的燈。建立一個新群組lamp。然後選擇圓角矩形工具(U),設定半徑為7px的,並建立一個小的圓角矩形 ,顏色: #8f631e。 雙擊開啟圖層樣式窗口,使用下圖設定內陰影、內發光、漸層疊加、描邊的圖層樣式。 命名此層為wood。 對燈的木質部分添加一點點的雜點就像你在第11步對紙一樣。使用5%的平均分佈和單色。 設定noise層的混合模式的為正片疊底,不透明度為35%。 描邊的顏色:#634513 建立一個如下圖所示的圓角矩形。 確保選擇了該圖層的向量蒙版,點擊排除重疊形狀區域 選項列中的按鈕,然後將新矩形拖曳到第一個矩形的下半部以擦除該區域。請看下圖作為參考。 接著雙擊該圖層,並使用下圖的設定加入內發光、 、漸層疊加和 圖層樣式.我們的燈創建燈罩我們將按順序創建一盞燈,照亮我們的特色工作,這不僅僅是在特色區域的符號,也希望帶來更多的關注這部分的網絡佈局。選擇圓角幾何工具(U)建立一個圓角幾何(439,168,141,39),半徑設定為15px,下面像的圖片,顏色:#9ce340。 和之前做的紙片折角的做法是一樣的。 然後上面這一層,從下面的圖像中添加內發光,斜面和浮雕,漸變漸變描邊和邊的圖層樣式。
描邊的顏色: #84b93d : 0%. Right-click on this layer and select Clear Layer Style Then double-click on it and .Then double-click on it and Then double-click on it 和. 步驟30:給我們的燈一個漂亮的漸變疊加 Step 31: Add another gradient overlay on the lampade settings from the following image for Gradient Overlay 步驟31:為燈罩增加另一個漸變疊加 複製上一步的圖層(依Ctrl / Cmd+ J),並依照下圖設定漸層。 Step 32: Add noise to the lamps shade Step 32: Add no? used for the paper at the Step 11. Set the blend mode of this noise layer to Multiply and set the layer opacity to . 它一點的質地,就像在第11步中對紙張所使用的技術的技術一樣。這種雜色層設定混合模式為正片疊底,並設定圖層不透明度為15%。 Step 33: Giving the lamp shade some depth Duplicate the layer which you have created at the Step 29 (“Shah 189). layer style and change the color of this shape to .Go to Edit > Free Transform (Ctrl/Cmd + T) and decrease the width of the shape as you see in the image below. to this layer (Layer > Layer Mask > Reveal All), select the Gradient Tool (G) and drag a black to transparent gradient from the bottom to the middle of this shape. Name this layer 「 Overlay 20%. 步驟33:給燈罩一些深度 nonocise nonocise 。 Step 34: Creating a light bulb What would a lamp be without a 13 月 b U) and create a circle (hold down the Shift key to create a perfect circle) using the color #f6f3a2 Name this layer “light bulb Inner Glow, Gradient Overlay, and Stroke layer styles. 步驟34:創建一個燈泡的燈 步驟34:創建一個燈泡的燈 命名此層為light bulb Then select the Pen Tool (P) and create a white shape like the one you see in the following image. Convert this layer into a smart object. Then this layer into a smart object.Then go to Filurius > go to Filter .Name this layer “light” and set its opacity to . 光層。 然後選擇鋼筆工具(P),並創建一個白色的形狀像一個你看到下面的圖片。 新建一個矩形(377,193,266,304),顏色:#f6f3a2 變換,右鍵選擇透視,拖曳左上角的控制點到適當的位置,如下圖: 把這層轉換為智慧型物件。 然後去點選:濾鏡 > 模糊 > 高斯模糊,設定半徑為7px。 命名此層為light,並設定其不透明度為25%。 . Name this layer 「 「. 燈36:創建馬走式的圖片。選擇橢圓工具(U)可建立一個圓圈,在特色內容區域的右部中間的位置。使用顏色: #e6b633。命名此圖層為circle。 Step 37: Add noise to the right arrow Add some noise over the yellow circle using the sametechnique 1 some noise the whichpa sellow circle using the sametechn 1 same 3. 給黃色的圓形加上一些雜色,和步驟11中為紙張添加雜色的技術一樣。 圖層混合模式是正片疊底,不透明度為25%
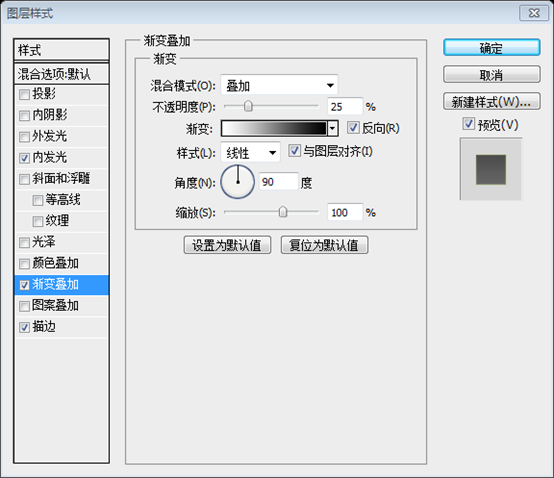
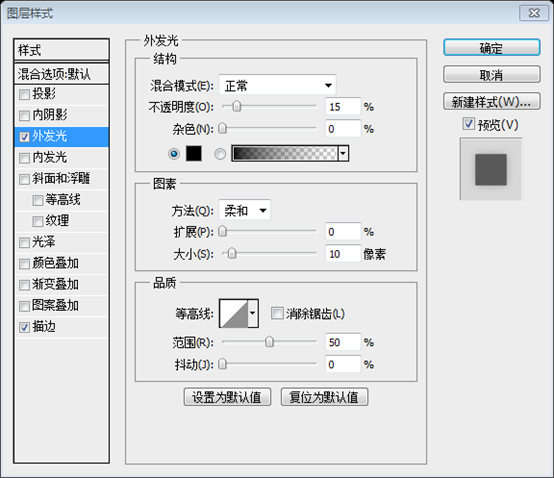
Double-click on this layer and use the settings from the following image to add an Outer Glow Stroke (Layer > Layer Mask > Reveal All). 」. 步驟38:為圓形增加描邊 複製circle圖層(Ctrl / Cmd+ J),並把新的圖層放到circle圖層的下方。 雙擊圖層,依照下圖設定外發光和描邊圖層樣式。 接著加入蒙版圖層(點選:圖層 > 圖層蒙版 > 顯示全部)。 選擇漸變工具(G),並拖曳水平的黑色到透明的漸變,從圓的左側拖曳到右側(實際上應該是圓的中左側拖曳到右側)。來看看下面的圖片,以供參考。 命名此層為stroke。 Step 39: Create the actual #fbf2db. The custom shape used below is called Arrow 2 (it comes as a default shape in Photoshop as part of the Arrows custom shape group the I chose this shape beca rows custom shape group the I chose this shape beca giving us some repeating design elements in the layout. 步驟39:建立真實的箭頭 選擇自訂形狀工具(U)在你的園中建立真實的箭頭 Step 40: Creating the left arrow of the image carousel Flip Horizontal and use the Move Tool (V) to move it in the left side of the layout. Name this group “ “. Step 41: Adding the name of the images 5px and create a white (#ffffff) rounded rectangle at the bottom of each image from the featured content area. Stroke layer style 工具 fo. Then select the Type Tool (T) and write the name of your images inside these rectangles using the font Verdana #38352c. 步驟41:添加圖像的名稱 創建一個新群組image names。 (410,475,200,32)和(710,475,200,32)。 依照下圖為每個圓角矩形設定描邊圖層樣式。 然後選擇文字工具(T)和書寫每個圖像的名字,使用的字體:Verdana,顏色: #38352c。 描邊的顏色: #999382 Step 42: Creating theservices” area Step 42: Creating theservices” area Select the Rectangle Tool (U) and create a rectangle with the height using the color #e6e2d5.Name this layer “ . Name this layer “services bg 步驟42 :建立服務區域 (40,586,940,340) 命名此層為“services bg”,並設定其不透明度為25%。
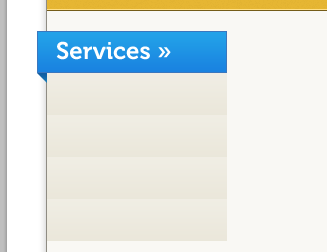
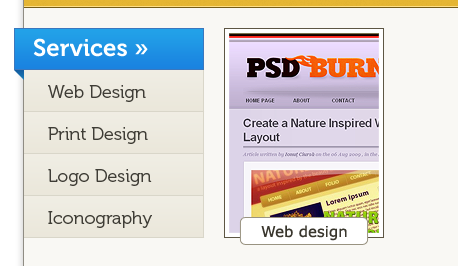
Step 43: Add the “Services” blue bar Services 步驟43:新增服務區域的藍條 Step 44: Adding a list of services #edeadf. Gradient Overlay.💎 Tool (V). 步驟44:新增一個服務清單 建立一個新群組navigation (40,648,180, ) 雙擊開啟圖層樣式窗口,依照下圖設定漸層疊加。 Step 45: Create separators Select the Line Tool (U) and separators Select the Line Tool (U) and separatorsSelect the Line Tool (U) and separators with the 1% ated at the previous step. Use the color #d9d6c9. Then group all these layers (Ctrl/Cmd + G) and name the group 「separators 步驟 選擇直線工具(U)所建立的粗細1px的線,分隔你在上一個步驟所建立的長方形。顏色: #d9d6c9。然後選取所有這些層歸併到一組(按Ctrl / Cmd+ G),並將其命名為separators。 這五條直線分別是(40,689,180,1)和(40,731,180,1)和(40,773,180,1)和(40,815,180,1)和(219 ,648,1,168) Step 46: Write out services you offer Muscolor the Type Tool (T) andyou offer 3f3d36 步驟46:提供服務的列表 Step 47: Adding an image for each service Now we will add a representative image for Now we will add a representative image for listed. image cropped to the dimensions 160px by . Copy the layer style from one of the images from the featured content area and paste it to this image to get the samese douatured content area and paste it to this image to get the samese double strokeeffect. create a white rounded rectangle at the bottom of this image. Then add a 1px #999381 stroke to this layer. Select the Type Tool (T.T) and wgle name the facside name the facside list the fmeside list using the font Verdana and the color #38352c. 步驟47:為每個服務添加圖像 現在我們將給每個服務添加代表圖像。建立一個新組images。然後加入一個圖片(240,606),裁剪的尺寸160px*210px。複製特色內容區域的圖像的圖層樣式,並將其貼到該圖像以獲得相同的雙描邊效果。 使用圓角矩形工具(U)在圖片的底部建立一個白色圓角矩形。 對這一層加上1px的描邊,顏色:#999381 用文字工具在長方形中書寫服務清單中的第一個服務的名字,字體:Verdana,顏色: #38352c Step 48: Add more images Add three more images and repeat the previous step for each one. Then move the second and the fourth imalect one.Then move the second and the fourth imalect age down7pselect. , hold down the Shift key and hit the down arrow key twice). This looks a little bit more interesting than having every image aligned the same way. 圖像,並為每一個重複前面的步驟。 Step 49: Adding two call-to-action buttons Duplicate the two buttons from the featured content boven ovem the moveus the two。 change the text of the yellow button into “Hire me today! Now the visitors/potential clients who like the works presented in the portfolio site have two options here: to hire the designer or to view more of his work. Through these call-to-action buttons, wemet to enentialclis to ense call-to-action buttons, weedm to enentialclicents to enentials, wepotr. take action and get in touch with us for a new project. Since “Hire me today!” is our most desired call-to-action, we use a more prominent color for it, as well as position it to the left, which for left-to-right English language readers, would be the first thing they would see. 步驟49:新增兩個功能按鈕 按鈕,複製特色內容區域的兩個按鈕將其移動到服務區域的影像下。然後更改黃色按鈕的文字為Hire me today!,並在前面寫了句話。來看看下面的圖片,以供參考。 喜歡呈現在作品集網站中的作品的潛在客戶有兩種選擇:,聘請設計師或查看他的工作。透過這些功能按鈕,我們要鼓勵潛在客戶主動與我們聯繫,並得到一個新的專案。由於Hire me today!是我們最想要的行動,我們使它使用更突出的顏色,以及左邊的位置,從左到右的英文讀者,將是他們看到的第一個的按鈕。 Step 50: Adding two separators Create two lines with the weight of s11pxCreate two lines with the weight of s11pxx the first line and #ffffff for the second one. 步驟50:新增2條分隔符號 在服務區域的底部建立2條粗細為1px的水平直線。第一條直線(40,925,940,1) (40,924,940,1)顏色: #ffffff Creating a background for the blog area “. This will feature excerpts from blog posts, which many portfolios thingy portt. U) and create a rectangle with the height using the color #f8f5ec. Name this layer “blog bg” and set blog bg.步驟51:創建的部落格區域的背景在services群組下方,建立一個新群組blog。這將有部落格文章的摘要,我們現在已經有很多的部落格文章。 選擇矩形工具(U)建立一個矩形(40,926,940,345),顏色: #f8f5ec。 命名此層為blog bg,並設定其不透明度為25%。 Step 52: Adding a blue bar to the blog area Duplicate the “blue bar” group from the servicesrea and s text “Services” into “Blog 複製服務區域的blue bar組,並往下移到適當位置用文字Services改為Blog Duplicate the “navigation” group from the 💎 V) to move the rectangles beneath the blue bar of the blog area. We'll use this list for the blog's categories. Select the Type Tool (T) and change the text of the list. If necessary, add more rectangles by duplicating one of these layers as many times as you need. 複製服務區域的navigation群組,並把它移到blog群組。 然後使用移動工具(V)移動到部落格區域的藍色條矩形下方。我們將使用這個書寫部落格的分類清單。 選擇文字工具(T)和更改文字的清單。如果有必要,很多時候,你需要透過複製這些圖層以便添加更多的矩形。 Step 54: Adding twoblog posts Step 54: Adding twoblog posts Step 54: Adding two blogs 340px by 140px. Verdana #222222 for headlines and #44444444222 for headlines and #4444444423 for b兩個部落格文章 然後選擇文字工具(T),在您的圖片下方寫一些文字。標題的顏色:#222222,文字區塊的顏色:#444444,字體:Verdana。 add a button next to this question with the text “Read the blog“. Note: you can duplicate this button from the “services” group. 使用文字工具(T)在你部落格文章的下方寫Want more articles and tutorials?。然後加入一個按鈕,加入回答這個問題的文字Read the blog。 注意:您可以從services群組複製此按鈕。
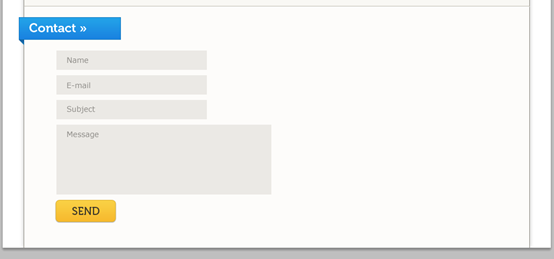
Step 56: More separators 複製服務區域底部的分隔符圖層並用移動工具移動它們到博客區域的底部 Step 57: Creating the “About me” area about Select the Rectangle Tool (U) and create a rectangle with the height . Name this layer “about bg” and set its opacity to .Duplicate a blue bar group which you have created at the prev steps, mper it inwreds the text into “About me”. Write a couple of sentences beneath the blue bar using the Type Tool (T). Then you can add some social icons beneath this text. The ones which I Ium unction and from can Function and from can Function and from can have unction and from can Function and from can unction them for free. Finally, add two lines with the weight 1px at the bottom of this area. 步驟57:創建的關於我區域 步驟57:創建的關於我區域 的組下方。 選擇矩形工具(U)建立一個矩形 ,顏色: #e6e2d5。命名此層為“about bg”,並設定其不透明度為25%。 複製你在前面的步驟中創建的藍條,並移動到這個區域的左上角並更改文字About me。 使用文字工具(T)在藍條下面的寫一段句子。然後你可以添加一些社群媒體圖示。我都用的是Function上的,可以免費下載。 最後,在此區域的底部添加兩條1px的直線( )。 Create a new group beneath the 「about」 group and name 450px and the color #f8f5ec. Name this layer “contact bg” and set its opacity to 25% groupo.” and set its opacity to 25% 寫三. Contact 下面建立一個新組contact。 使用矩形工具(U)建立一個矩形(40,1271,940,449),顏色:#f8f5ec。命名此層為contact bg,並設定其不透明度為25%。 複製你在前面的步驟中創建的藍條複製你在前面的步驟中創建的藍條。 將這個新的藍條放聯繫區域的左上角,並使用文字工具(T)更改文字為Contact。 Step 59: Create the contact form send button Use the Rectangle Tool (U) to create a conacte #8c8a86 to write the name of each field of the contact form inside it. You can can dupate of the 集 have one the can hhvhated can can dupate and you the can have one the can hcayated and the can hhv. change the text to “Send“. 步驟59:建立的聯絡表單和發送按鈕 您可以複製您先前建立的按鈕並變更文字為Send按鈕,並移動到適當的位置。 Name表單:(100,1553,280,36) E-mail表單:(100,1599,280,36) Message表單:(100,1691,400,130)
:com this tutorial, so keep at it! Create a new group and name it “footer“. Then use the Rectangle Tool (U) to create a rectangle with the height of and the color 30px 」 and set its opacity to .Add two lines with the weight at the top of the footer.Then select the Type Tool select the 類型 Use the font Verdana and the color #595753. 步驟60:創建頁腳 我們本教程的最後一步,堅持下去!建立一個新群組footer。然後使用矩形工具(U)建立一個矩形(40,1888,940,32),顏色: #e6e2d5。 命名此層為「footer bg」和設定其不透明度為25%。 在頁腳的頂部加上兩條1px的水平線(可以複製部落格區域底部的兩個分隔符號)。 然後選擇文字工具(T),寫一個版權聲明。 使用字體:Verdana字體,顏色: #595753。 最終的結果: 後記: 這也是一個非常詳盡的教程,一共有60。本片教學的亮點有,透過「從形狀區域減去」達到某些特殊的效果,例如紙的折角效果,燈罩的效果等。二是大量的運用了漸層疊加的效果,來達到美觀的效果。教學中的燈的製作也是一個亮點,就是這幾步單獨拿出來也是一個不錯的教學。 更多PS網頁設計教程XV——如何在Photoshop中創建一個充滿活力的作品集的網頁設計 相關文章請關注PHP中文網!
選擇文字工具(T)的寫你的網站名字,顏色:#93b9bb。對文字creative使用字體:Museo 700,對文字folio使用字體:Museo 300。 


然後選擇橢圓工具(U),按住Shift鍵,以保持比例,並創建了幾個不同大小的白色圓圈。 (具體地說,本翻譯教程用的是5個圓)


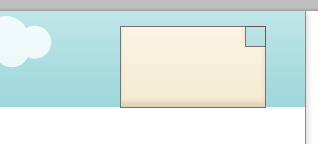


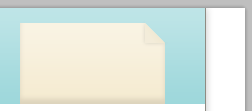 make it look more realistic. Ctrl/Cmd-click on the vector mask of the “paper” layer to make a selection of the paper. Create a new layer above all the other ones from this group and fill the selection with white (


可選:適用於 Adobe Illustrator 用戶


 Step 18: Type out the navigation menu items




 er, select the Pen Tool (P) and create a small triangle beneath the lower left corner of the rectangle to make the blue bar look like it's 3D.

 Then select the Rounded Rectangle Tool (U), set the radius to
  #f8c539




 號
號 我們將製作一盞燈這闡明了我們的特色工作,這不僅象徵著特色區域的含義,也讓人們更專注於網頁佈局的這一部分。選擇圓角矩形工具(U)並使用顏色






Step 36: Creating the right arrow of the image carousel Create a new group and 名稱right edge of the featured content area. Use the color

 Name this layer 「


 選擇自訂形狀工具(U)在你的園中建立2個箭頭,顏色: #fbf2db。這個自訂形狀被稱為Arrow 2它(作為一個預設的形狀在Photoshop中的箭頭自訂形狀群組的一部分)。我選擇了這個形狀,因為它最相似在「特色」藍色欄的文字中的箭頭,這給我們在佈局中只使用一些重複的設計元素。
  這組命名為left arrow

 ,高度340px,顏色: #e6e2d5。
  然後使用文字工具(T)把Featured改為Services。




 Create a new group beneath the “services” group and name it “


 Duplicate the two separator layers from the bottom of the services area and blog the two separator layers from the bottom of the services area and the move.
  ” and move it beneath the “blog” group.

 and the color


