PS網頁設計教學-小貼士:五步驟在PS中建立倒數數字牌
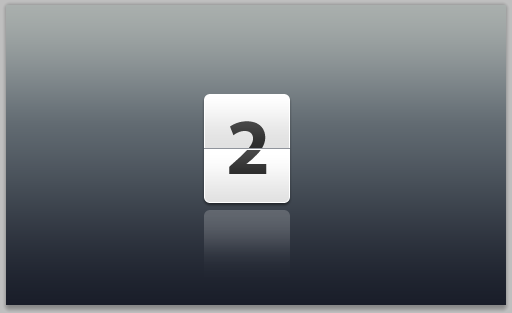
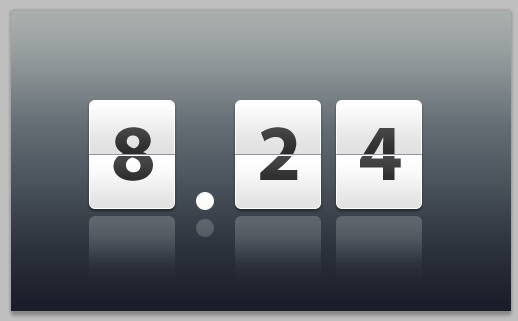
本教學展示如何在PS中設計倒數數字牌,如下圖所示
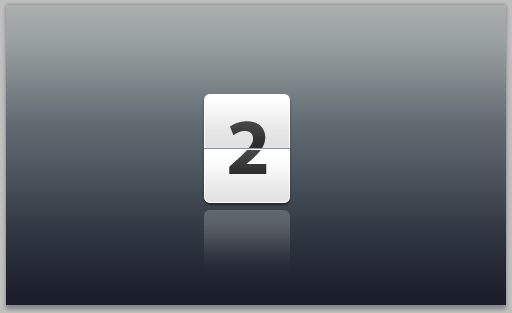
這種數字牌目前在很多場合都能看到,尤其是現在很流行的Android手機系統上也能看到一二
1. Setting up the Photoshop file
1、設定Photoshop檔案
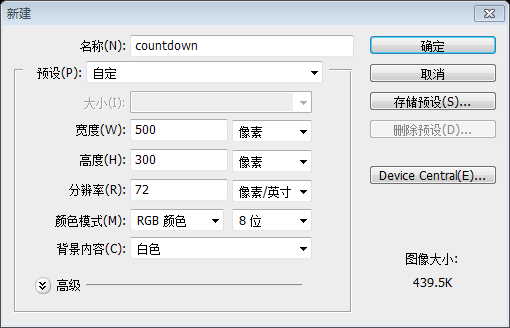
1.1.1. Width and Height units to pixels (if it isn't already). Set the width to 500 and the height to 300 pixels. We're creating a graphic element for web, as mentioned above, so set the Resolution to 72 , color mode to RGB color, 8 bit and background contents to white.
1.1新建檔案(Ctrl+N)。在新建檔案的視窗上,設定寬度和高度的單位為pixels(如果不是pixels的話)。設定寬度為500,高度為300。要建立網頁上使用的圖片元素,如上提及,解析度設定為72像素/英寸,顏色模式設定為RGB顏色,8位。背景內容為白色
1.2. To unlock the layer, currently titled "background", double click on it and on appearance of titled "background", double click on it and on appearance of dialogo.解鎖該圖層,目前的標題“背景”,雙擊該圖層,在出現的對話視窗上顯示的標題改為“圖層”,按確定

2、增加背景顏色(圖層)
2.1. Select Layer 0 (if not already selected) and go to Layer > Layer Style > Gradient Overyle. (如果沒有被選中),然後點選:圖層> 圖層樣式> 漸層疊加
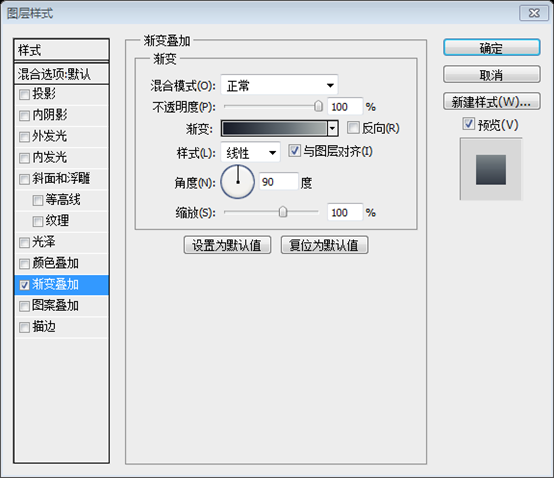
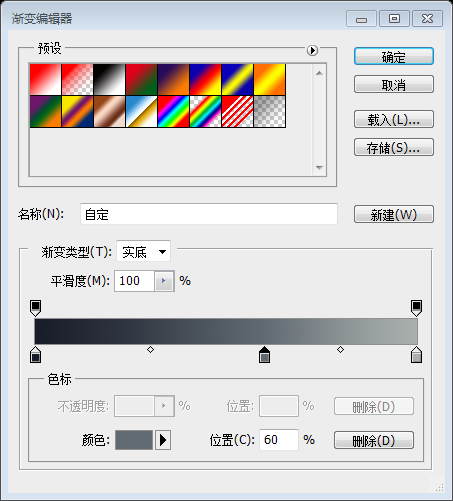
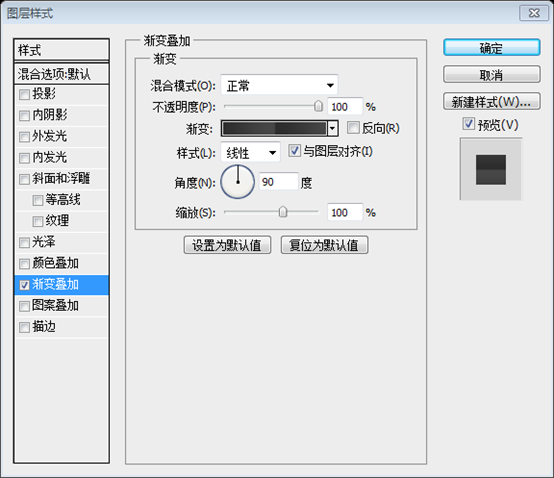
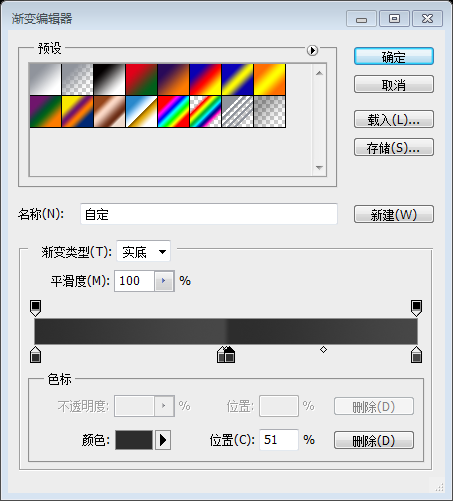
2.2. Make sure the opacity is 100%, style is linear and angle is 90 degrees. Click on the gradient and in the Gra the Gra the Gra the Gra the Graper the Graper the Graent on the grient Editor, add color stops in this order: #191d29 at 0% location, #616a71 at 60% and #a9afab at 100% location.
2.2如下圖設定圖層樣式,不透明度100%,選擇樣式為線性,角度設定圖層樣式為90度。點擊漸變,在漸變編輯器視窗裡,依序設定顏色:在0%的位置上為#191d29,在60%的位置上為#616a71,在100%的位置上為#a9afab
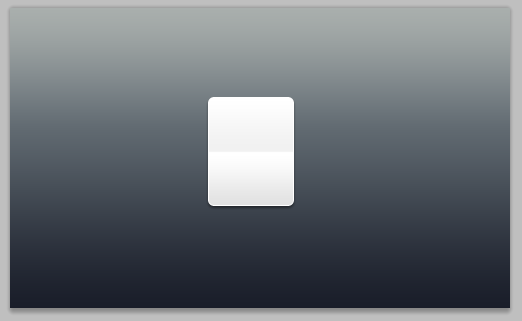
3.2. Choosing radius as 6 px, as shown above, create a rectangular box like the one shown below and rename it as "wterh-xex" the "shape 1” layer.
3.2設定半徑為6px,如上所示,創建一個圓角矩形(198,89,86,109),如下所示,改名為“白色方塊”,在雙擊形狀1層之後
3.3. With white box as selection, go to gradient overlay (as explained in step 2.1). Again, make sure the opacity is 100%, style is linear and angle is 90 degrees. Click on the grients. add color stops in this order: #e1e1e1 at 0% location, #ffffff at 49%, #e1e1e1 at 51% location and finally, #ffffff at 100% location.
3.3在白色的方塊選中的時候,設定變漸層(像之前的步驟2.1)。再次,不透明度設定為100%,樣式設定為線性,角度為90度。點選漸變,在漸層編輯器視窗裡,依序設定顏色:在0%的位置為#e1e1e1,在49%的位置為#ffffff,在51%的位置為#e1e1e1,在100%的位置上設定為#ffffff。
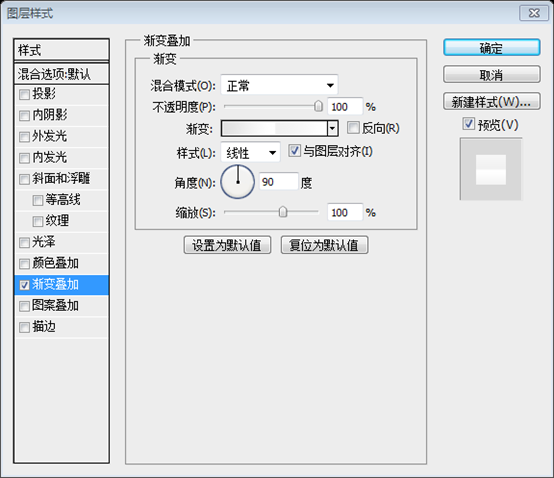
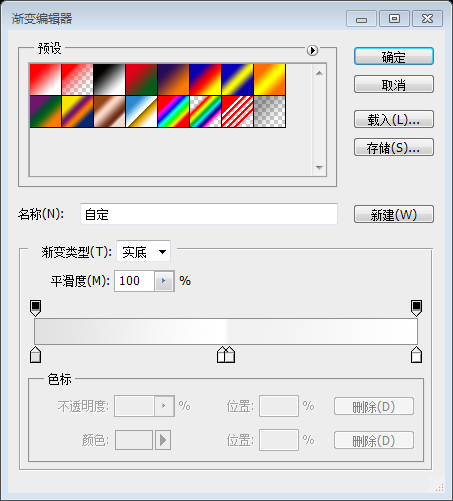
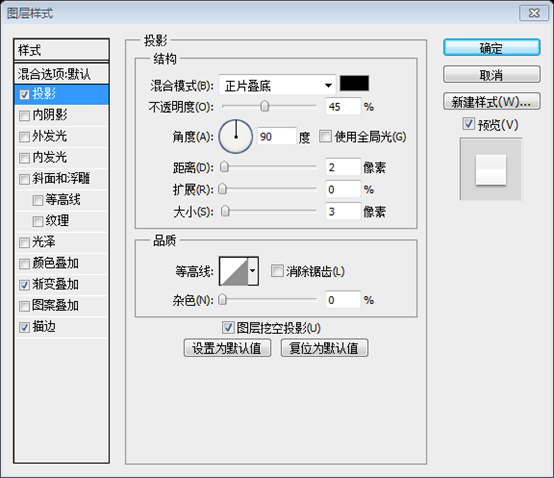
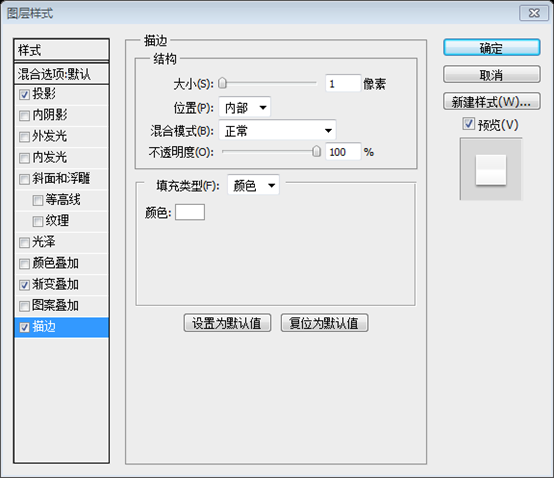
3.4. In the same box as gradient overlay, look for Drop Shadow and Stroke. We have to select them gradient overlay, look for Drop Shadow and Stroke. We have to select them gradient overlay, look for Drop Shadow and Stroke. We have to select them gradient. Drop apasett, f50, 50% - 5, 25% - psmm, 58% - 45% - 5,25%。 0 px and size - 3 px. Stroke settings: Size - 1 px, position - inside and color: #ffffff.
3.4在漸變疊加的視窗上,找到投影和描邊。同樣如下圖設定。投影設定:不透明度為45%,距離為2px,擴展為0,大小為3px。描邊設定:大小為1px,位置為內部,顏色為#ffffff。
4. Adding Separators to the 製造商
4. Adding Separators to the 放在方塊
4.1. Click and hold the Rounded Rectangle Tool to select Line tool.4.1點選並按住圓角矩形工具去選擇直線工具4.2. With weight as 1 px and color #90949c, draw a line horizontally middle across the whitebox, acrossust edge the widthwise, like shown in the pic below. Name it "dark-sep".
(198,143,86,1)
,剛好觸及白色長方形的兩邊,如下圖所示,命名為「深線」
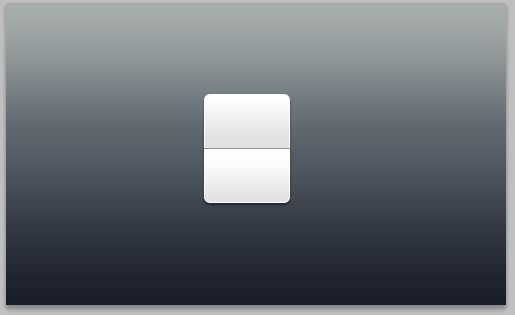
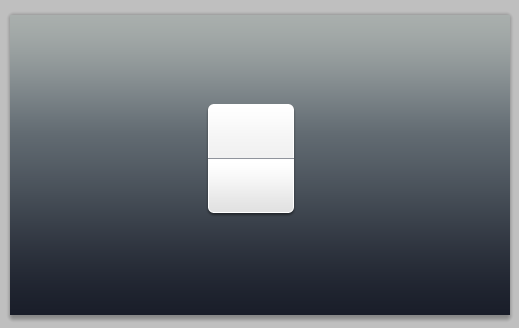 4.3. Right-click (ctrl-click in mac) "dark-sep" layer and select duplicate. Name it "white -sep". Press V on the keyboard to select Move tool, press bottom arrow to move "white-sep" downwards by 1 px and change it color to #ffffff.
4.3右擊「深線」圖層,選擇複製複製圖層。命名為“白線”,按鍵盤上的V選擇移動工具,按下方向鍵移動“白線”圖層下移1px,改變顏色為#ffffff
5. Adding text to complete the countdown
5、新增文字完成倒數數字牌
5.1. Press T on the keyboard to select Text tool. We have chosen "Myriad Probold" in 80 select free fept font here. Select the layer "white-box" and type in a digit or a letter in vertical and horizontal middle. We have typed in a 2.
5.1按鍵盤上的T選擇文字工具。選擇字體Myriad Pro bold,字體大小80pt,或選擇你覺得適合的字體。選擇白色方塊圖層,居中輸入數字或文字。這兒輸入的是2.

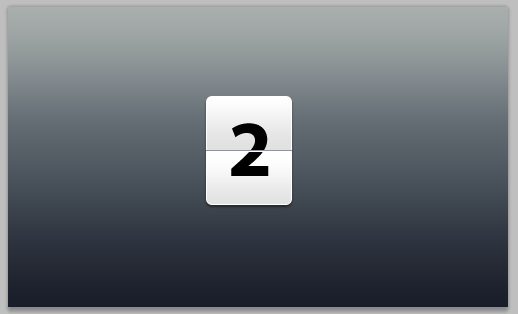
5.2. With text layer as selection, go to gradient overlay (as explained in step 2.1). is 90 degrees. Click on the gradient and in the Gradient Editor, add color stops in this order: #2d2d2d at 0% location, #474747 at 49%, #2d2d2d at 51% location and finally, #4740747%.
5.2選取文字圖層,並加入漸層疊加(像之前的步驟2.1)。再次,不透明度設定為100%,樣式設定為線性,角度為90度。點選漸變,在漸層編輯器視窗裡,依序設定顏色:在0%的位置為#2d2d2d,在49%的位置為#474747,在51%的位置為#2d2d2d,在100%的位置上設定為#474747。
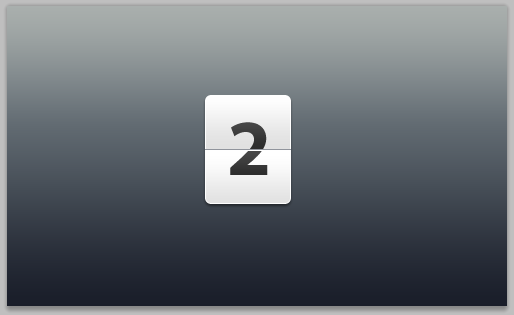
Here we have our countdown ready for usage as an element in broadcasting, collatater intereaals並列的元素,或是使用者介面元素。
Bonus Step - add reflection to the counter
獎勵步驟:加數位牌的倒影
B.1. . Right click (ctrl-click in mac) and first select "rasterize layer" and then, "clear layer style" as shown below.B.1選擇「白色方塊」圖層,並複製該圖層。右鍵選擇“柵格化圖層”,接著選“清除圖層樣式”
B.2. Press M on the keyboard to select Rectangular Marquee Tool and select the box 60% horizontally, from the abbottom, like shown the abbot . Go to Select > Modify > Feather and choose a feather radius of 20 px. We pressed "delete" 3 times to get the desired effect. You may choose as per your preference.
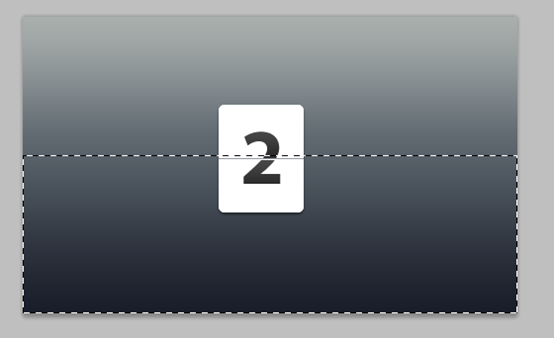
(註:這步好像是多餘的)
。設定不透明度為20%
更多PS網頁設計教學——小貼士:五步在PS中創建倒數數字牌相關文章請關注PHP中文網!

熱AI工具

Undresser.AI Undress
人工智慧驅動的應用程序,用於創建逼真的裸體照片

AI Clothes Remover
用於從照片中去除衣服的線上人工智慧工具。

Undress AI Tool
免費脫衣圖片

Clothoff.io
AI脫衣器

Video Face Swap
使用我們完全免費的人工智慧換臉工具,輕鬆在任何影片中換臉!

熱門文章

熱工具

記事本++7.3.1
好用且免費的程式碼編輯器

SublimeText3漢化版
中文版,非常好用

禪工作室 13.0.1
強大的PHP整合開發環境

Dreamweaver CS6
視覺化網頁開發工具

SublimeText3 Mac版
神級程式碼編輯軟體(SublimeText3)
 高級Photoshop教程:大師修飾和合成
Apr 17, 2025 am 12:10 AM
Photoshop的高級修圖與合成技術包括:1.使用圖層、蒙版和調整層進行基礎操作;2.通過調整圖像像素值實現修圖效果;3.利用多圖層和蒙版進行複雜合成;4.應用“液化”工具調整面部特徵;5.使用“頻率分離”技術進行細膩修圖,這些技術能提升圖像處理水平並實現專業級效果。
 Photoshop的主要特徵:深度潛水
Apr 19, 2025 am 12:08 AM
Photoshop的關鍵功能包括圖層與蒙版、調整工具、濾鏡與效果。 1.圖層與蒙版允許獨立編輯圖像部分。 2.調整工具如亮度/對比度可修改圖像色調和亮度。 3.濾鏡與效果可快速添加視覺效果。掌握這些功能可以幫助創意專業人士實現創意願景。
 使用Photoshop:創意可能性和實際用途
Apr 22, 2025 am 12:09 AM
Photoshop在實際應用中非常實用且具有創造性。 1)它提供基本編輯、修復和合成功能,適合初學者和專業人士。 2)高級功能如內容識別填充和圖層樣式可提升圖像效果。 3)掌握快捷鍵和優化圖層結構能提高工作效率。
 Photoshop免費嗎?了解訂閱計劃
Apr 12, 2025 am 12:11 AM
Photoshop不是免費的,但有幾種方式可以低成本或免費使用:1.免費試用期為7天,期間可體驗所有功能;2.學生和教師優惠可將成本減半,需提供學校證明;3.CreativeCloud套餐適合專業用戶,包含多種Adobe工具;4.PhotoshopElements和Lightroom為低成本替代方案,功能較少但價格更低。
 Photoshop:調查免費試用和折扣選項
Apr 14, 2025 am 12:06 AM
你可以通過以下方式以最經濟的方式獲得Photoshop的使用權:1.利用7天的免費試用期體驗軟件功能;2.尋找學生或教師折扣,以及季節性促銷;3.使用第三方網站上的優惠券;4.訂閱AdobeCreativeCloud的月度或年度計劃。
 Photoshop和數字藝術:繪畫,插圖和合成
Apr 18, 2025 am 12:01 AM
Photoshop在數字藝術中的應用包括繪畫、插圖和圖像合成。 1)繪畫:使用畫筆、鉛筆和混合工具,藝術家可創造逼真效果。 2)插圖:通過矢量和形狀工具,藝術家可精確繪製複雜圖形並添加效果。 3)合成:利用蒙版和圖層混合模式,藝術家可將不同圖像元素無縫融合。
 設計師的Photoshop:創建視覺概念
Apr 13, 2025 am 12:09 AM
在Photoshop中創建視覺概念可以通過以下步驟實現:1.創建新文檔,2.添加背景層,3.使用畫筆工具繪製基本形狀,4.調整顏色和亮度,5.添加文本和圖形,6.使用蒙版進行局部編輯,7.應用濾鏡效果,這些步驟幫助設計師從零開始構建完整的視覺作品。
 使用Photoshop進行圖形設計:品牌和更多
Apr 16, 2025 am 12:02 AM
使用Photoshop進行品牌設計的步驟包括:1.使用鋼筆工具繪製基本形狀,2.通過圖層樣式添加陰影和高光,3.調整顏色和細節,4.使用智能對象和動作自動生成不同版本的設計。 Photoshop通過圖層和蒙版的靈活性,幫助設計師創建和優化品牌元素,從簡單的標誌到復雜的品牌指南,確保設計的一致性和專業性。


