微信小程式開發之實作標籤(視窗頂部TabBar)頁面切換
微信小程式開發中選項卡.在Android中選項卡一般用fragment,到了小程式這裡瞬間懵逼了.
總算做出來了.分享出來看看.
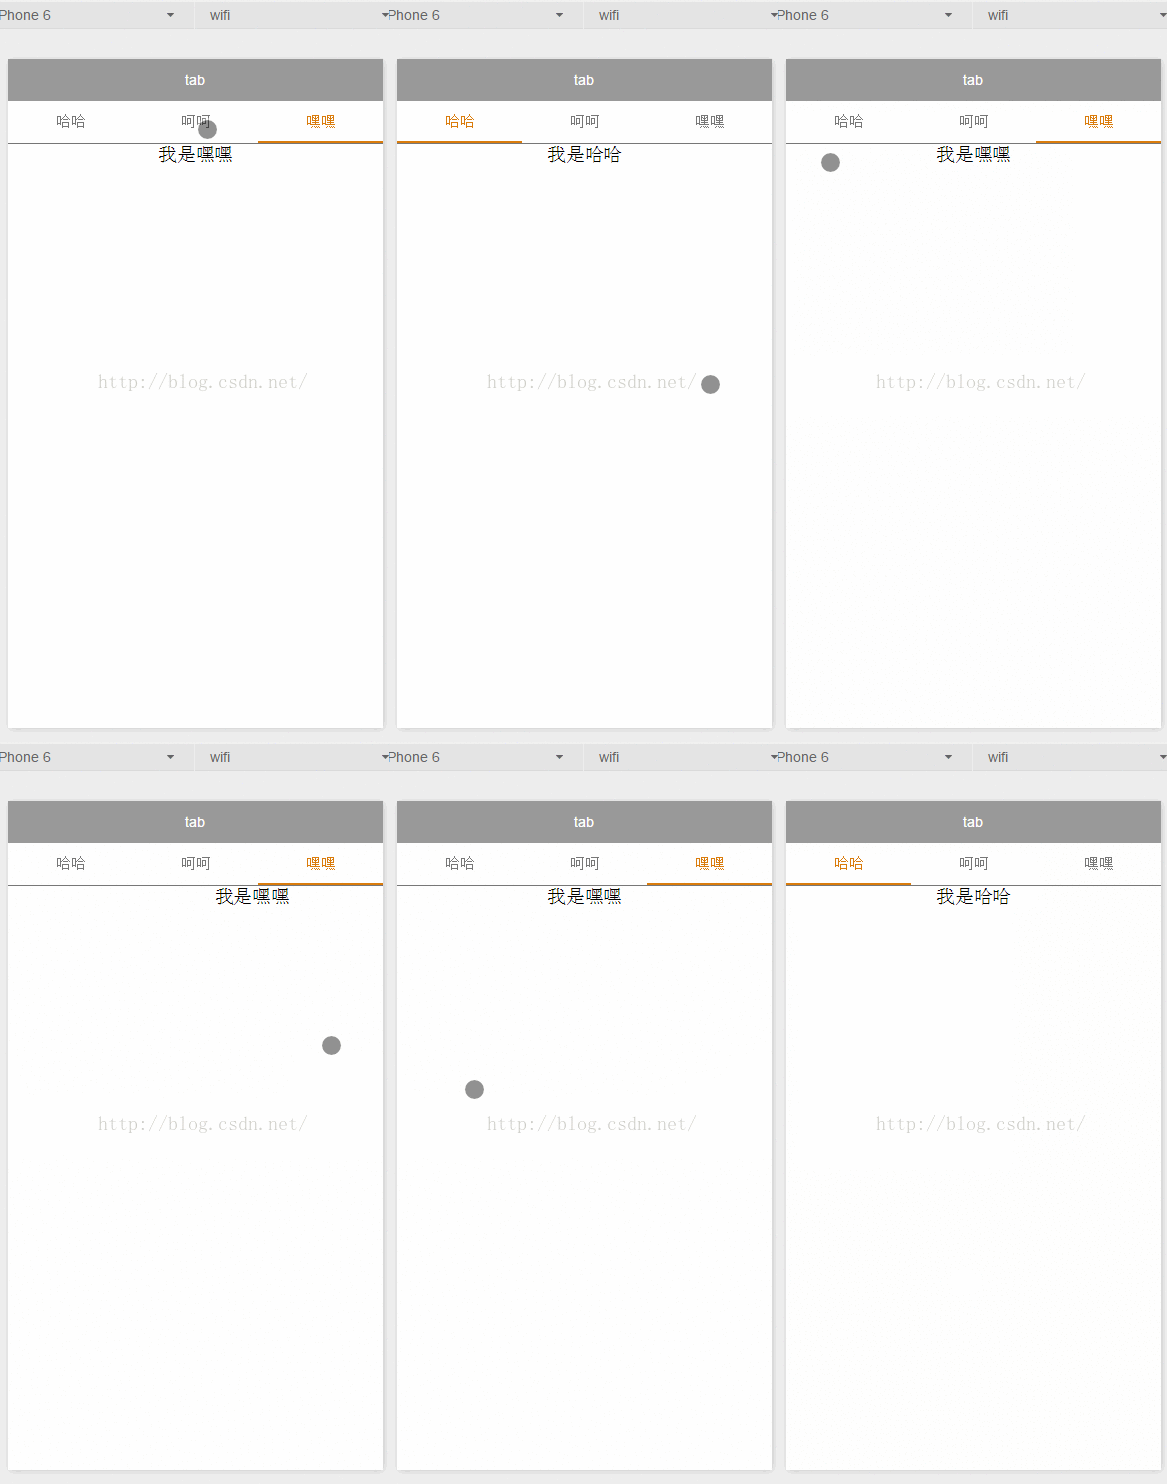
先看效果:
再上程式碼:
1.index.wxml
#<!--index.wxml-->
<view class="swiper-tab">
<view class="swiper-tab-list {{currentTab==0 ? 'on' : ''}}" data-current="0" bindtap="swichNav">哈哈</view>
<view class="swiper-tab-list {{currentTab==1 ? 'on' : ''}}" data-current="1" bindtap="swichNav">呵呵</view>
<view class="swiper-tab-list {{currentTab==2 ? 'on' : ''}}" data-current="2" bindtap="swichNav">嘿嘿</view>
</view>
<swiper current="{{currentTab}}" class="swiper-box" duration="300" style="height:{{winHeight - 31}}px" bindchange="bindChange">
<!-- 我是哈哈 -->
<swiper-item>
<view>我是哈哈</view>
</swiper-item>
<!-- 我是呵呵 -->
<swiper-item>
<view>我是呵呵</view>
</swiper-item>
<!-- 我是嘿嘿 -->
<swiper-item>
<view>我是嘿嘿</view>
</swiper-item>
</swiper>2.indexwxss
/**indexwxss**/
swiper-tab{
  width: 100%;
  border-bottom: 2rpx solid #777777;
  text-align: center;
  line-height: 80rpx;}
swiper-tab-list{ font-size: 30rpx;
  display: inline-block;
  width: 33%;
  color: #777777;
}
on{ color: #da7c0c;
  border-bottom: 5rpx solid #da7c0c;}

swiper-box{ display: block; height: 100%; width: 100%; overflow: hidden; }
swiper-box view{
  text-align: center;
}3.index.js
//index.js
//获取应用实例
var app = getApp()
Page( {
 data: {
  /**
    * 页面配置
    */
  winWidth: 0,
  winHeight: 0,
  // tab切换
  currentTab: 0,
 },
 onLoad: function() {
  var that = this;

  /**
   * 获取系统信息
   */
  wxgetSystemInfo( {

   success: function( res ) {
    thatsetData( {
     winWidth: reswindowWidth,
     winHeight: reswindowHeight
    });
   }

  });
 },
 /**
   * 滑动切换tab
   */
 bindChange: function( e ) {

  var that = this;
  thatsetData( { currentTab: edetailcurrent });

 },
 /**
  * 点击tab切换
  */
 swichNav: function( e ) {

  var that = this;

  if( thisdatacurrentTab === etargetdatasetcurrent ) {
   return false;
  } else {
   thatsetData( {
    currentTab: etargetdatasetcurrent
   })
  }
 }
})這樣一個類似viewpage的頂部選項卡就出來了.
更多微信小程式開發之實現選項卡(視窗頂部TabBar)頁面切換相關文章請關注PHP中文網!

熱AI工具

Undresser.AI Undress
人工智慧驅動的應用程序,用於創建逼真的裸體照片

AI Clothes Remover
用於從照片中去除衣服的線上人工智慧工具。

Undress AI Tool
免費脫衣圖片

Clothoff.io
AI脫衣器

Video Face Swap
使用我們完全免費的人工智慧換臉工具,輕鬆在任何影片中換臉!

熱門文章

熱工具

記事本++7.3.1
好用且免費的程式碼編輯器

SublimeText3漢化版
中文版,非常好用

禪工作室 13.0.1
強大的PHP整合開發環境

Dreamweaver CS6
視覺化網頁開發工具

SublimeText3 Mac版
神級程式碼編輯軟體(SublimeText3)
 小程式開發中的PHP權限管理與使用者角色設定
Jul 04, 2023 pm 04:48 PM
小程式開發中的PHP權限管理與使用者角色設定隨著小程式的普及和應用範圍的擴大,使用者對於小程式的功能和安全性提出了更高的要求,其中權限管理和使用者角色設定是保證小程序安全性的重要一環。在小程式中使用PHP進行權限管理和使用者角色設定能夠有效地保護使用者的資料和隱私,以下將介紹如何實現此功能。一、權限管理的實作權限管理是指依據使用者的身分和角色,授予不同的操作權限。在小
 PHP在小程式開發的頁面跳轉與路由管理
Jul 04, 2023 pm 01:15 PM
PHP在小程式開發的頁面跳轉與路由管理隨著小程式的快速發展,越來越多的開發者開始將PHP與小程式開發結合。在小程式開發中,頁面跳轉和路由管理是非常重要的一部分,它能夠幫助開發者實現頁面之間的切換和導航操作。 PHP作為常用的伺服器端程式語言,可以很好地與小程式互動和資料傳遞,下面我們來詳細了解PHP在小程式中的頁面跳轉與路由管理。一、頁面跳轉基
 如何在uniapp中實現小程式開發和發布
Oct 20, 2023 am 11:33 AM
如何在uni-app中實現小程式開發和發布隨著行動互聯網的發展,小程式成為了行動應用程式開發的重要方向。而uni-app作為一個跨平台的開發框架,可以同時支援多個小程式平台的開發,如微信、支付寶、百度等。以下將詳細介紹如何使用uni-app開發和發布小程序,並提供一些具體的程式碼範例。一、小程式開發前準備在開始使用uni-app開發小程式之前,需要先做一些準備工
 小程式開發中的PHP安全防護與攻擊防範
Jul 07, 2023 am 08:55 AM
小程式開發中的PHP安全防護與攻擊防範隨著行動網路的快速發展,小程式成為了人們生活中重要的一部分。而PHP作為一種強大而靈活的後端開發語言,也被廣泛應用於小程式的開發。然而,安全問題一直是程式開發中需要重視的面向。本文將重點放在小程式開發中PHP的安全防護與攻擊防範,同時提供一些程式碼範例。 XSS(跨站腳本攻擊)防範XSS攻擊是指駭客透過向網頁注入惡意腳本
 小程式開發中的PHP資料快取與快取策略
Jul 05, 2023 pm 02:57 PM
小程式開發中的PHP資料快取與快取策略隨著小程式的快速發展,更多的開發者開始關注如何提高小程式的效能和回應速度。其中一個重要的最佳化手段是使用資料快取來減少對資料庫和外部介面的頻繁存取。而在PHP中,我們可以利用各種快取策略來實現資料快取。本文將介紹PHP中的資料快取原理,並提供幾個常見的快取策略的範例程式碼。一、資料快取原理資料快取是指將資料存放在記憶體中,以
 微信小程式中PHP開發的下拉式選單實作方法
Jun 04, 2023 am 10:31 AM
今天我們來學習微信小程式中PHP開發的下拉式選單實作方法。微信小程序是一種輕量級的應用程序,用戶可以在微信裡直接使用,而且不需要下載安裝,非常方便。而PHP是一種非常流行的後端程式語言,也是與微信小程式配合很好的語言。下面我們就來看看如何在微信小程式中使用PHP開發下拉式選單。首先,我們需要準備好開發環境,包括PHP、微信小程式開發工具和伺服器。然後我們
 小程式開發中的PHP頁面動畫效果與互動設計
Jul 04, 2023 pm 11:01 PM
小程式開發中的PHP頁面動畫效果與互動設計導語:小程式是一種在行動裝置上運行的應用程序,能夠提供類似原生應用程式的體驗。而在小程式開發中,PHP作為常用的後端語言,可以為小程式頁面增添動畫效果與互動設計。本文將介紹一些常用的PHP頁面動畫效果與互動設計,並附上程式碼範例。一、CSS3動畫CSS3提供了豐富的屬性與方法,用於實現各種動畫效果。而在小
 UniApp實作位元組跳動小程式的開發與上線流程解析
Jul 06, 2023 pm 05:01 PM
UniApp實作位元組跳動小程式的開發與上線流程解析位元組跳動小程式作為一種新興的行動應用開發方式,正逐漸在業界流行起來。在開發位元組跳動小程式之前,我們需要了解如何使用UniApp來實現開發和上線的流程。一、UniApp簡介UniApp是一套基於Vue.js開發的以HTML5、App、小程式為多端統一開發的框架,透過編寫一套程式碼,可以同時在多個平台上運行,包括字


