本教學使用 NSXMLParser 物件對 xml 檔案進行解析。解析結果由 Table View 展示。本教程在 Xcode 7.3.1 上基於 iOS 9.3 建置。
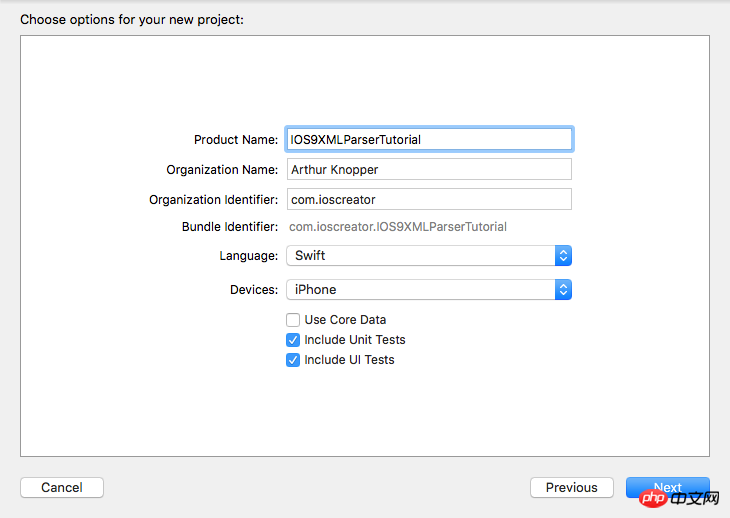
開啟 Xcode 並且新建一個單視窗應用程式。名字就叫 IOS9XMLParserTutorial,組織名字和組織識別自己定。語言選 Swift,裝置只選 iPhone。
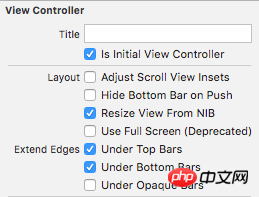
把 View Controller 從 Storyboard 移除,並拖曳一個 Navigation Controller 到空的畫板裡。這個 Navigation Controller 會自動攜帶一個 Table View Controller。當你把初始的 View Controller 刪除時對應的故事板起點也被移除了。所以我們先選取新加入的 Navigation Controller 在 Attribute Inspector 的 "Is Initial View Controller" 複選框打上勾選作為新的故事板起點。
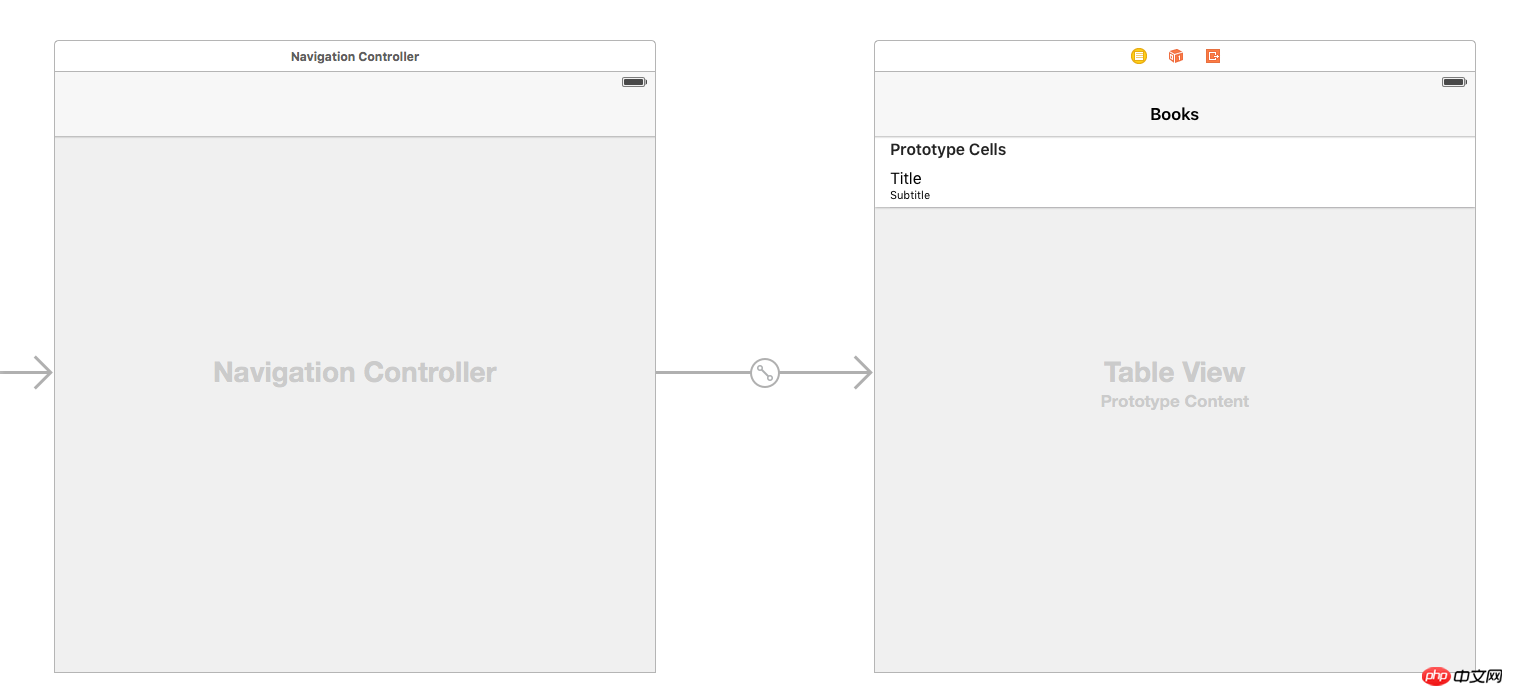
雙擊 able View Controller 的 Title Bar 將其設定為 “Books”。選擇 Table View Cell 然後在 Attributes Inspector 中將它的 Style 屬性設為 Subtitle。

Storyboard 長這樣
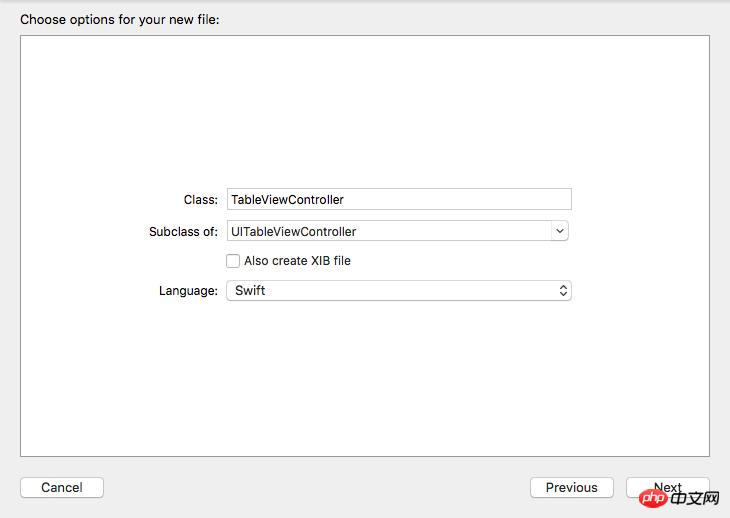
#既然我們刪除了初始 View Controller ,ViewController.swift 也可以一起刪除了。選擇 iOS->Source->Cocoa Touch Class 新增一個新的文件,命名為 TableViewController,並且設定它為 UITableViewController 的子類別。
前往 Storyboard 中選取 Table View Controller,在 Identity inspector 中將 Custom Class 部分設定為 TableViewController。

選擇 iOS->Source->Swift File,新增一個新的檔案。命名為Books.xml
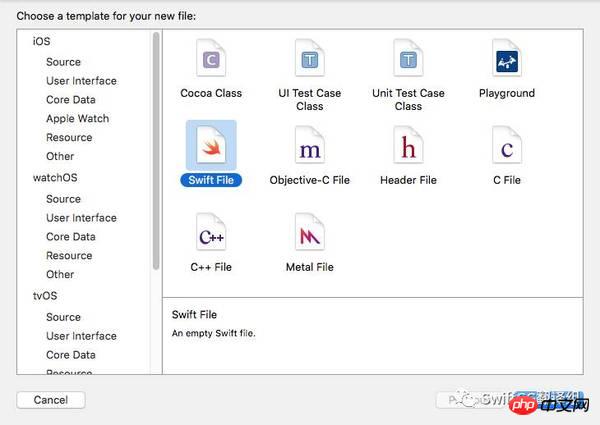
開啟Books.xml 替換成以下程式碼
<?xml version="1.0"?>
<catalog>
    <book id="1">
        <title>To Kill a Mockingbird</title>
        <author>Harper Lee</author>
    </book>
    <book id="2">
        <title>1984</title>
        <author>George Orwell</author>
    </book>
    <book id="3">
        <title>The Lord of the Rings</title>
        <author>J.R.R Tolkien</author>
    </book>
    <book id="4">
        <title>The Catcher in the Rye</title>
        <author>J.D. Salinger</author>
    </book>
    <book id="5">
        <title>The Great Gatsby</title>
        <author>F. Scott Fitzgerald</author>
    </book>
</catalog>選擇iOS->Source->Swift File 新增新的文件作為xml 檔案中不同項的資料模型。我們叫它 Book.swift,並替換成以下程式碼
import Foundation

class Book {
    var bookTitle: String = String()
    var bookAuthor: String = String()
}前往 tableViewController.swift 文件,新增以下變數。
var books: [Book] = []
var eName: String = String()
var bookTitle = String()
var bookAuthor = String()
將 viewDidLoad 方法複寫為
override func viewDidLoad() {
    super.viewDidLoad()

    if let path = NSBundle.mainBundle().URLForResource("books", withExtension: "xml") {
        if let parser = NSXMLParser(contentsOfURL: path) {
            parser.delegate = self
            parser.parse()
        }
    }
}NSXMLParser 物件解析 bundle 中的 books.xml 檔案。新增以下 table View 的資料來源及委託方法
override func numberOfSectionsInTableView(tableView: UITableView) -> Int {
    return 1
}

override func tableView(tableView: UITableView, numberOfRowsInSection section: Int) -> Int {
    return books.count
}

override func tableView(tableView: UITableView, cellForRowAtIndexPath indexPath: NSIndexPath) -> UITableViewCell {
    let cell = tableView.dequeueReusableCellWithIdentifier("Cell", forIndexPath: indexPath)

    let book = books[indexPath.row]

    cell.textLabel?.text = book.bookTitle
    cell.detailTextLabel?.text = book.bookAuthor

    return cell
}所有書籍的標題和作者資料會保存在 books 陣列中並且由 Table View 呈現。接著,實作 NSXMLParser 的委託方法。
// 1
func parser(parser: NSXMLParser, didStartElement elementName: String, namespaceURI: String?,
qualifiedName qName: String?, attributes attributeDict: [String : String]) {
    eName = elementName
    if elementName == "book" {
        bookTitle = String()
        bookAuthor = String()
    }
}

// 2
func parser(parser: NSXMLParser, didEndElement elementName: String, namespaceURI: String?, qualifiedName qName: String?) {
    if elementName == "book" {

    let book = Book()
    book.bookTitle = bookTitle
    book.bookAuthor = bookAuthor

    books.append(book)
    }
}

// 3
func parser(parser: NSXMLParser, foundCharacters string: String) {
    let data = string.stringByTrimmingCharactersInSet(NSCharacterSet.whitespaceAndNewlineCharacterSet())

    if (!data.isEmpty) {
        if eName == "title" {
            bookTitle += data
        } else if eName == "author" {
            bookAuthor += data
        }
    }
}該方法在解析對象碰到"
該方法在解析對象碰到"
這裡解析過程真正執行。標題和作者標籤會被解析並且對應的變數將會初始化。
建置並執行專案。在 TableViewController 中能看到所有書的標題和作者。 
以上是詳細介紹XML解析(圖文)的詳細內容。更多資訊請關注PHP中文網其他相關文章!


