

分享用.Net Core實作圖片上傳下載的實例教學

這篇文章主要為大家詳細介紹了.Net Core實現圖片文件上傳下載功能,具有一定的參考價值,感興趣的小伙伴們可以參考一下
當下.Net Core專案可是如雨後春筍一般發展起來,作為.Net大軍中的一員,我熱忱地擁抱了.Net Core並且積極使用其進行業務的開發,我們先介紹下.Net Core專案下實現文件上傳下載接口。
一、開發環境
##無庸置疑,宇宙第一IDE VisualStudio 2017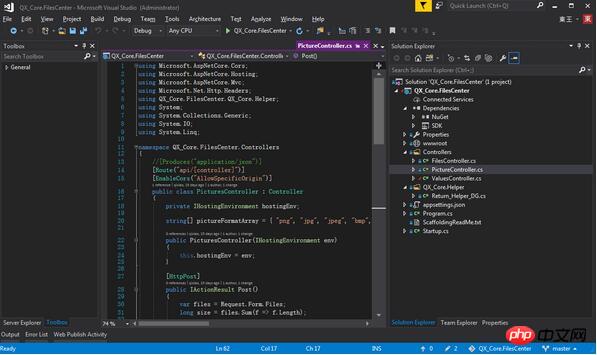
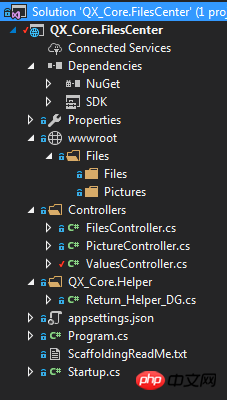 FilesController 檔案上傳下載
# #Return_Helper_DG 回傳值幫助類別
三、關鍵程式碼
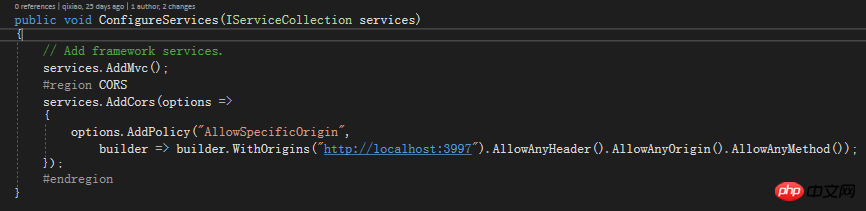
1、首先我們來看Startup.cs 這個是我們的程式啟動組態類,在這裡我們進行一系列的配置。
跨域配置:
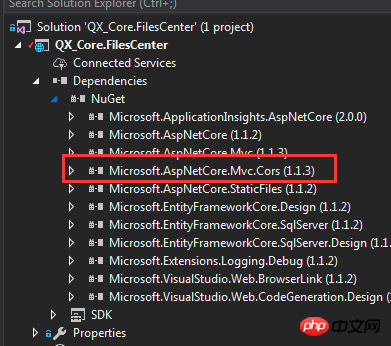
#當然跨域少不了dll的引用,我們使用Nuget引用相關的引用包
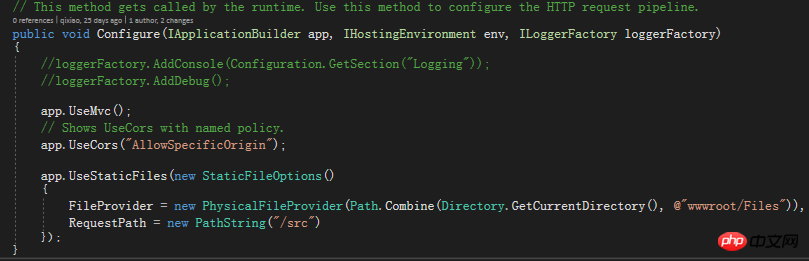
伺服器資源路徑置換,這樣可以防止客戶端猜測服務端檔案路徑,製造一個虛擬的隱射進行訪問,提高了安全性。
Startup.cs的完整程式碼如下:
#
using Microsoft.AspNetCore.Builder;
using Microsoft.AspNetCore.Hosting;
using Microsoft.AspNetCore.Http;
using Microsoft.Extensions.Configuration;
using Microsoft.Extensions.DependencyInjection;
using Microsoft.Extensions.FileProviders;
using Microsoft.Extensions.Logging;
using System.IO;

namespace QX_Core.FilesCenter
{
 public class Startup
 {
 public Startup(IHostingEnvironment env)
 {
  var builder = new ConfigurationBuilder()
  .SetBasePath(env.ContentRootPath)
  .AddJsonFile("appsettings.json", optional: false, reloadOnChange: true)
  .AddJsonFile($"appsettings.{env.EnvironmentName}.json", optional: true)
  .AddEnvironmentVariables();
  Configuration = builder.Build();
 }

 public IConfigurationRoot Configuration { get; }

 // This method gets called by the runtime. Use this method to add services to the container.
 public void ConfigureServices(IServiceCollection services)
 {
  // Add framework services.
  services.AddMvc();
  #region CORS
  services.AddCors(options =>
  {
  options.AddPolicy("AllowSpecificOrigin",
   builder => builder.WithOrigins("http://localhost:3997").AllowAnyHeader().AllowAnyOrigin().AllowAnyMethod());
  });
  #endregion
 }

 // This method gets called by the runtime. Use this method to configure the HTTP request pipeline.
 public void Configure(IApplicationBuilder app, IHostingEnvironment env, ILoggerFactory loggerFactory)
 {
  //loggerFactory.AddConsole(Configuration.GetSection("Logging"));
  //loggerFactory.AddDebug();

  app.UseMvc();
  // Shows UseCors with named policy.
  app.UseCors("AllowSpecificOrigin");

  app.UseStaticFiles(new StaticFileOptions()
  {
  FileProvider = new PhysicalFileProvider(Path.Combine(Directory.GetCurrentDirectory(), @"wwwroot/Files")),
  RequestPath = new PathString("/src")
  });
 }
 }
}Return_Helper_DG類別的程式碼如下:
using System.Net;
/**
* author:qixiao
* create:2017-5-19 15:15:05
* */
namespace QX_Core.FilesCenter.QX_Core.Helper
{
 public abstract class Return_Helper_DG
 {
 public static object IsSuccess_Msg_Data_HttpCode(bool isSuccess, string msg, dynamic data, HttpStatusCode httpCode = HttpStatusCode.OK)
 {
  return new { isSuccess = isSuccess, msg = msg, httpCode = httpCode, data = data };
 }
 public static object Success_Msg_Data_DCount_HttpCode(string msg, dynamic data = null, int dataCount = 0, HttpStatusCode httpCode = HttpStatusCode.OK)
 {
  return new { isSuccess = true, msg = msg, httpCode = httpCode, data = data, dataCount = dataCount };
 }
 public static object Error_Msg_Ecode_Elevel_HttpCode(string msg, int errorCode = 0, int errorLevel = 0, HttpStatusCode httpCode = HttpStatusCode.InternalServerError)
 {
  return new { isSuccess = false, msg = msg, httpCode = httpCode, errorCode = errorCode, errorLevel = errorLevel };
 }
 }
}3、FilesController是我們的檔案上傳控制器接口,這裡定義了對上傳的檔案的接收操作,並且在控制器上啟用跨域配置
using Microsoft.AspNetCore.Cors;
using Microsoft.AspNetCore.Hosting;
using Microsoft.AspNetCore.Mvc;
using Microsoft.Net.Http.Headers;
using QX_Core.FilesCenter.QX_Core.Helper;
using System;
using System.Collections.Generic;
using System.IO;
using System.Linq;
namespace QX_Core.FilesCenter.Controllers
{
//[Produces("application/json")]
[Route("api/[controller]")]
[EnableCors("AllowSpecificOrigin")]
public class FilesController : Controller
{
private IHostingEnvironment hostingEnv;
public FilesController(IHostingEnvironment env)
{
this.hostingEnv = env;
}
[HttpPost]
public IActionResult Post()
{
var files = Request.Form.Files;
long size = files.Sum(f => f.Length);
//size > 100MB refuse upload !
if (size > 104857600)
{
return Json(Return_Helper_DG.Error_Msg_Ecode_Elevel_HttpCode("files total size > 100MB , server refused !"));
}
List<string> filePathResultList = new List<string>();
foreach (var file in files)
{
var fileName = ContentDispositionHeaderValue.Parse(file.ContentDisposition).FileName.Trim('"');
string filePath = hostingEnv.WebRootPath + $@"\Files\Files\";
if (!Directory.Exists(filePath))
{
Directory.CreateDirectory(filePath);
}
fileName = Guid.NewGuid() + "." + fileName.Split('.')[1];
string fileFullName = filePath + fileName;
using (FileStream fs = System.IO.File.Create(fileFullName))
{
file.CopyTo(fs);
fs.Flush();
}
filePathResultList.Add($"/src/Files/{fileName}");
}
string message = $"{files.Count} file(s) /{size} bytes uploaded successfully!";
return Json(Return_Helper_DG.Success_Msg_Data_DCount_HttpCode(message, filePathResultList, filePathResultList.Count));
}
}
} 4、PictureController 圖片上傳控制器接口,類似於文件,不過對上傳的圖片類型進行了校驗和限制
using Microsoft.AspNetCore.Cors;
using Microsoft.AspNetCore.Hosting;
using Microsoft.AspNetCore.Mvc;
using Microsoft.Net.Http.Headers;
using QX_Core.FilesCenter.QX_Core.Helper;
using System;
using System.Collections.Generic;
using System.IO;
using System.Linq;
namespace QX_Core.FilesCenter.Controllers
{
//[Produces("application/json")]
[Route("api/[controller]")]
[EnableCors("AllowSpecificOrigin")]
public class PicturesController : Controller
{
private IHostingEnvironment hostingEnv;
string[] pictureFormatArray = { "png", "jpg", "jpeg", "bmp", "gif","ico", "PNG", "JPG", "JPEG", "BMP", "GIF","ICO" };
public PicturesController(IHostingEnvironment env)
{
this.hostingEnv = env;
}
[HttpPost]
public IActionResult Post()
{
var files = Request.Form.Files;
long size = files.Sum(f => f.Length);
//size > 100MB refuse upload !
if (size > 104857600)
{
return Json(Return_Helper_DG.Error_Msg_Ecode_Elevel_HttpCode("pictures total size > 100MB , server refused !"));
}
List<string> filePathResultList = new List<string>();
foreach (var file in files)
{
var fileName = ContentDispositionHeaderValue.Parse(file.ContentDisposition).FileName.Trim('"');
string filePath = hostingEnv.WebRootPath + $@"\Files\Pictures\";
if (!Directory.Exists(filePath))
{
Directory.CreateDirectory(filePath);
}
string suffix = fileName.Split('.')[1];
if (!pictureFormatArray.Contains(suffix))
{
return Json(Return_Helper_DG.Error_Msg_Ecode_Elevel_HttpCode("the picture format not support ! you must upload files that suffix like 'png','jpg','jpeg','bmp','gif','ico'."));
}
fileName = Guid.NewGuid() + "." + suffix;
string fileFullName = filePath + fileName;
using (FileStream fs = System.IO.File.Create(fileFullName))
{
file.CopyTo(fs);
fs.Flush();
}
filePathResultList.Add($"/src/Pictures/{fileName}");
}
string message = $"{files.Count} file(s) /{size} bytes uploaded successfully!";
return Json(Return_Helper_DG.Success_Msg_Data_DCount_HttpCode(message, filePathResultList, filePathResultList.Count));
}
}
}四、客戶端的實作
客戶端我們很簡單地用jQuery Ajax的方式進行圖片檔案的提交,客戶端程式碼的實作:
#
<!doctype>
<head>
<script src="jquery-3.2.0.min.js"></script>
<script>
$(document).ready(function () {
var appDomain = "http://localhost:53972/";
$("#btn_fileUpload").click(function () {
var fileUpload = $("#files").get(0);
var files = fileUpload.files;
var data = new FormData();
for (var i = 0; i < files.length; i++) {
data.append(files[i].name, files[i]);
}
$.ajax({
type: "POST",
url: appDomain+'api/Pictures',
contentType: false,
processData: false,
data: data,
success: function (data) {
console.log(JSON.stringify(data));
},
error: function () {
console.log(JSON.stringify(data));
}
});
});
//end click
})
</script>
</head>
<title></title>
<body>
<article>
<header>
<h2>article-form</h2>
</header>
<p>
<form id="uploadForm" enctype="multipart/form-data">
<input type="file" id="files" name="files" placeholder="file" multiple>file-multiple属性可以选择多项<br><br>
<input type="button" id="btn_fileUpload" value="fileUpload">
</form>
</p>
</article>
</body> #五、程式碼測試
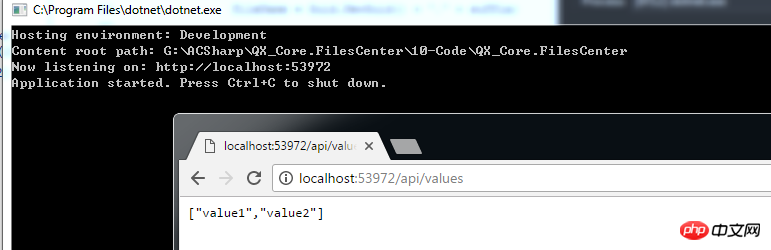
1.啟動伺服器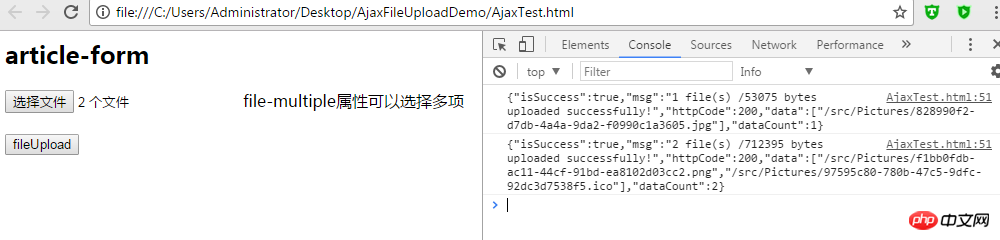

 可以看到,一張圖片上傳成功!
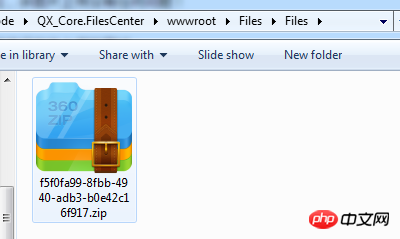
輸入回傳的位址,我們可以看到成功存取到了圖片,特別注意這裡伺服器路徑的改變:
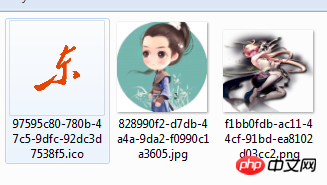
多重圖片上傳:
##################可見,多圖片上傳沒有任何問題! ######同樣進行檔案上傳的測試:#########################同樣,檔案上傳也沒有任何問題! #########六、總結#########至此,我們已經實現了預期的.Net Core圖片檔案上傳的全部功能! ###
以上是分享用.Net Core實作圖片上傳下載的實例教學的詳細內容。更多資訊請關注PHP中文網其他相關文章!

熱AI工具

Undresser.AI Undress
人工智慧驅動的應用程序,用於創建逼真的裸體照片

AI Clothes Remover
用於從照片中去除衣服的線上人工智慧工具。

Undress AI Tool
免費脫衣圖片

Clothoff.io
AI脫衣器

Video Face Swap
使用我們完全免費的人工智慧換臉工具,輕鬆在任何影片中換臉!

熱門文章
熱工具

記事本++7.3.1
好用且免費的程式碼編輯器

SublimeText3漢化版
中文版,非常好用

禪工作室 13.0.1
強大的PHP整合開發環境

Dreamweaver CS6
視覺化網頁開發工具

SublimeText3 Mac版
神級程式碼編輯軟體(SublimeText3)


 小紅書發布自動儲存圖片怎麼解決?發布自動保存圖片在哪裡?
Mar 22, 2024 am 08:06 AM
小紅書發布自動儲存圖片怎麼解決?發布自動保存圖片在哪裡?
Mar 22, 2024 am 08:06 AM
隨著社群媒體的不斷發展,小紅書已經成為越來越多年輕人分享生活、發現美好事物的平台。許多用戶在發布圖片時遇到了自動儲存的問題,這讓他們感到十分困擾。那麼,如何解決這個問題呢?一、小紅書發布自動儲存圖片怎麼解決? 1.清除快取首先,我們可以嘗試清除小紅書的快取資料。步驟如下:(1)開啟小紅書,點選右下角的「我的」按鈕;(2)在個人中心頁面,找到「設定」並點選;(3)向下捲動,找到「清除快取」選項,點擊確認。清除快取後,重新進入小紅書,嘗試發布圖片看是否解決了自動儲存的問題。 2.更新小紅書版本確保你的小
 抖音評論裡怎麼發圖片?評論區圖片入口在哪裡?
Mar 21, 2024 pm 09:12 PM
抖音評論裡怎麼發圖片?評論區圖片入口在哪裡?
Mar 21, 2024 pm 09:12 PM
隨著抖音短影片的火爆,用戶們在留言區互動變得更加豐富多彩。有些用戶希望在評論中分享圖片,以便更好地表達自己的觀點或情感。那麼,抖音評論裡怎麼發圖片呢?本文將為你詳細解答這個問題,並為你提供一些相關的技巧和注意事項。一、抖音評論裡怎麼發圖片? 1.開啟抖音:首先,你需要開啟抖音APP,並登入你的帳號。 2.找到評論區:瀏覽或發布短影片時,找到想要評論的地方,點擊「評論」按鈕。 3.輸入評論內容:在留言區輸入你的評論內容。 4.選擇傳送圖片:在輸入評論內容的介面,你會看到一個「圖片」按鈕或「+」號按鈕,點
 ppt怎麼讓圖片一張一張出來
Mar 25, 2024 pm 04:00 PM
ppt怎麼讓圖片一張一張出來
Mar 25, 2024 pm 04:00 PM
在PowerPoint中,讓圖片逐一顯示是常用的技巧,可以透過設定動畫效果來實現。本指南詳細介紹了實現此技巧的步驟,包括基本設定、圖片插入、新增動畫、調整動畫順序和時間。此外,還提供了進階設定和調整,例如使用觸發器、調整動畫速度和順序,以及預覽動畫效果。透過遵循這些步驟和技巧,使用者可以輕鬆地在PowerPoint中設定圖片逐一出現,從而提升簡報的視覺效果並吸引觀眾的注意力。
 網頁圖片載入不出來怎麼辦? 6種解決辦法
Mar 15, 2024 am 10:30 AM
網頁圖片載入不出來怎麼辦? 6種解決辦法
Mar 15, 2024 am 10:30 AM
有網友發現打開瀏覽器網頁,網頁上的圖片遲遲加載不出來,是怎麼回事?檢查過網路是正常的,那是哪裡出現了問題呢?下面小編就來跟大家介紹一下網頁圖片載入不出來的六種解決方法。網頁圖片載入不出來: 1、網速問題網頁顯示不出圖片有可能是因為電腦的網路速度比較慢,電腦中開啟的軟體比較多, 而我們造訪的圖片比較大,這就可能因為載入逾時,導致圖片顯示不出來, 可以將比較佔網速的軟體將關掉,可以去任務管理器查看一下。 2、造訪人數過多 網頁顯示不出圖片還有可能是因為我們造訪的網頁,在同時段造訪的
 華為手機如何實現雙微信登入?
Mar 24, 2024 am 11:27 AM
華為手機如何實現雙微信登入?
Mar 24, 2024 am 11:27 AM
華為手機如何實現雙微信登入?隨著社群媒體的興起,微信已成為人們日常生活中不可或缺的溝通工具之一。然而,許多人可能會遇到一個問題:在同一部手機上同時登入多個微信帳號。對於華為手機用戶來說,實現雙微信登入並不困難,本文將介紹華為手機如何實現雙微信登入的方法。首先,華為手機自帶的EMUI系統提供了一個很方便的功能-應用程式雙開。透過應用程式雙開功能,用戶可以在手機上同
 wps文檔中兩張圖片怎麼並排
Mar 20, 2024 pm 04:00 PM
wps文檔中兩張圖片怎麼並排
Mar 20, 2024 pm 04:00 PM
在使用wps辦公室軟體時,我們發現不單單只用一種形式,文字裡會加入表格和圖片,表格裡也可以加入圖片等等,這些都是合併使用的,讓整個文件的內容看起來更豐富,如果需要在文件中插入兩張圖片,而且需要並排排列。我們接下來的課程就可以解決這個問題:wps文件中兩張圖片怎麼並排。 1.首先要開啟WPS軟體,找到你想要調整的圖片。左鍵點擊圖片會彈出一個選單欄,選擇「頁面佈局」。 2、在文字環繞中選擇「緊密型環繞」。 3.當需要的圖片都確認設定為「緊密型文字環繞」之後,便可以把圖片隨意拖動到合適的位置,點擊第一張圖片
 PHP程式設計指南:實作斐波那契數列的方法
Mar 20, 2024 pm 04:54 PM
PHP程式設計指南:實作斐波那契數列的方法
Mar 20, 2024 pm 04:54 PM
程式語言PHP是一種用於Web開發的強大工具,能夠支援多種不同的程式設計邏輯和演算法。其中,實作斐波那契數列是一個常見且經典的程式設計問題。在這篇文章中,將介紹如何使用PHP程式語言來實作斐波那契數列的方法,並附上具體的程式碼範例。斐波那契數列是一個數學上的序列,其定義如下:數列的第一個和第二個元素為1,從第三個元素開始,每個元素的值等於前兩個元素的和。數列的前幾元
 如何在華為手機上實現微信分身功能
Mar 24, 2024 pm 06:03 PM
如何在華為手機上實現微信分身功能
Mar 24, 2024 pm 06:03 PM
如何在華為手機上實現微信分身功能隨著社群軟體的普及和人們對隱私安全的日益重視,微信分身功能逐漸成為人們關注的焦點。微信分身功能可以幫助使用者在同一台手機上同時登入多個微信帳號,方便管理和使用。在華為手機上實現微信分身功能並不困難,只需要按照以下步驟操作即可。第一步:確保手機系統版本和微信版本符合要求首先,確保你的華為手機系統版本已更新至最新版本,以及微信App
