

詳解圖片輪播怎麼實現?

今天複習了一下物件導向編程,下面是我的效果圖
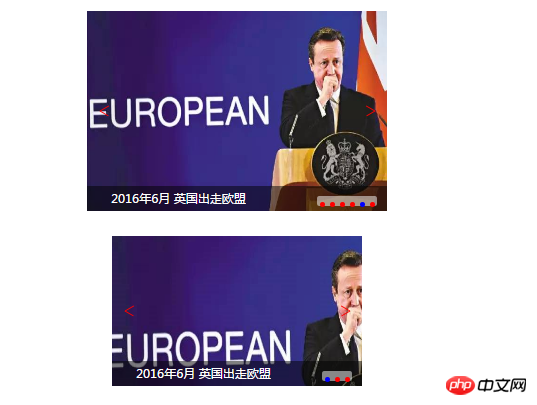
#看著這個圖片你會覺得這沒有什麼,那麼上程式碼:
html部分:
1 <!DOCTYPE html> 2 <html lang="en"> 3 <head> 4 <meta charset="UTF-8"> 5 <title>Document</title> 6 <style> 7 ul,ol,li{padding:0;margin:0;list-style: none;} 8 .container1{ 9 width: 600px;10 height: 400px;11 margin:50px auto;12 position: relative;13 }14 15 .container2{16 width: 500px;17 height: 300px;18 margin:50px auto;19 position: relative;20 }21 22 </style>23 <link rel="stylesheet" href="slider.css?1.1.11">24 <script src="Tq.js?1.1.11"></script>25 <script src="sliderIIFE.js?1.1.11"></script>26 </head>27 <body>28 <div class="container1 slider" id="slide1">29 <ul>30 <li><a href=""><img src="img/1.jpg" alt="2016年6月 英国出走欧盟"></a></li>31 <li><a href=""><img src="img/2.jpg" alt="2016年11月 特朗普当选美国总统"></a></li>32 <li><a href=""><img src="img/1.jpg" alt="2016年6月 英国出走欧盟"></a></li>33 34 <li><a href=""><img src="img/3.jpg" alt="双11"></a></li>35 <li><a href=""><img src="img/1.jpg" alt="2016年6月 英国出走欧盟"></a></li>36 37 <li><a href=""><img src="img/4.jpg" alt="G20峰会"></a></li>38 </ul>39 </div>40 41 42 <div class="container2 slider" id="slide2">43 <ul>44 <li><a href=""><img src="images/1.png" alt="2016年6月 英国出走欧盟"></a></li>45 <li><a href=""><img src="images/2.png" alt="2016年11月 特朗普当选美国总统"></a></li>46 <li><a href=""><img src="images/3.png" alt="双11"></a></li>47 48 </ul>49 </div>50 51 52 <script>53 54 var s1 = new Slider("slide1",{startIndex:0,speed:50});55 var s2 = new Slider("slide2",{startIndex:2});56 console.info(s1);57 console.info(s2);58 59 </script>60 </body>61 </html>必要的css程式碼
.slider ul li a{display: block;width: 100%;height: 100%;}
.slider ul,.slider ul li,.slider ul img{width: 100%;height: 100%;}


.slider ol{position: absolute;bottom:10px;background: rgba(255,255,255,.5);height: 20px;border-radius: 5px;right:20px;z-index:999;}
.slider ol li{margin:0 5px;width:10px;height:10px;border-radius:5px;display: inline-block;line-height:10px;background: red;font-size:0;vertical-align: middle;position:relative;top:-3px;}
.slider .mask{
	position: absolute;
	bottom:10px;
	width: 100%;
	height: 50px;
	line-height: 50px;
	text-align: center;
	background: rgba(0,0,0,.5);
	color:#fff;
}
.slider span{
	width:50px;
	height:50px;
	border-radius : 25px;
	position : absolute;
	top : 50%;
	transform: translateY(-50%);
	transition: background-color .5s;
	background-color: rgba(255,255,255,0);
}
.slider span.btnright{
	right:10px;
}
.slider span.btnleft{
	left:10px;
}
.slider span:hover{
	background-color: rgba(255,255,255,1);
}
.slider span.btnleft:after,span.btnright:after{
	transition: transform .5s;
	position: absolute;
	top:24px;
	left:15px;
	transform-origin: left top;
	transform: rotate(30deg);
	content: "";display: block;width: 20px;height: 2px;background-color: red;
}
.slider span.btnright:after{
	left:auto;
	right:15px;
	transform-origin: right top;

}
.slider .btnleft:before,.btnright:before{
	transition: transform .5s;
	position: absolute;
	top:24px;
	left:15px;
	transform-origin: left top;
	transform: rotate(-30deg);
	content: "";display: block;width: 20px;height: 2px;background-color: red;
}
.slider .btnright:before{
	transform-origin: right top;

	left: auto;
	right:15px;
	transform: rotate(-30deg);
}
.slider .btnleft:hover:after{
	transform: rotate(45deg);
}
.slider .btnleft:hover:before{
	transform: rotate(-45deg);
}
.slider .mask{
	position:absolute;
	bottom:0;
	height:50px;
	line-height:50px;
	color:#fff;
	text-align: left;
	text-indent: 2em;
	background-color:rgba(0,0,0,.5);
}js部分:
function $(id){
	return document.getElementById(id);
}

/**
 * 2.0
 * 在指定的容器中去找某一个TagName的html标签集合
 * containerId 可以是一个字符串,也可以是一个 dom对象。
 * @param  {[type]} containerId [description]
 * @param  {[type]} tagName     [description]
 * @return {[type]}             [description]
 *
 */
function $get(containerId,tagName){
	if(typeof containerId =="string" && $(containerId)){
		return $(containerId).getElementsByTagName(tagName);
	}
	else if(typeof containerId=="object")
	{
		return containerId.getElementsByTagName(tagName);
	}
	else{
		throw ("你写的第一个参数不是一个ID");
	}
}

//<span id="span" className="leftBtn" stlye="width:100px;height:100px;">按钮</span>
function $create(tagName,attr,style){
	var dom = document.createElement(tagName);
	for(var pName in attr){
		dom[pName] = attr[pName];
	}

	for(var pName in style){
		dom.style[pName] = style[pName];
	}
	return dom;
}
function info(obj){
	console.info(obj);
}

function getH(obj){
	//debugger;
	if(obj.currentStyle){
		getH = function(obj){
			return parseInt ( obj.currentStyle.height );
		}
	}else{
		getH=function(obj){
			return parseInt ( window.getComputedStyle(obj, null).height );
		}
	}
	getH(obj) ;


}

//对对象进行拓展
function extend(defaultConf,userConf){
	//对于在defaultConf这个对象中的每一个属性,
	//如果这个属性名在userConf中的也存在,则使用userConf中的那个属性值

	for(var pName in defaultConf){
		if(userConf.hasOwnProperty(pName)){
			defaultConf[pName] = userConf[pName];
		}
	}
}輪播的js
  1 ;(function(window){  2   3     //有问题,请自行改正!!!! 参考slider.js  4     var defaultConf = {  5         "isAuto":true,  6         "speed":"normal",  7         "startIndex":0,  8         "isClickable":true  9     }; 10  11     var speedList={ 12         "faster":2000, 13         "slower":4000, 14         "normal":3000 15     }; 16  17     function Slider(containerId,conf){ 18          19         // if(conf) 20         //     extend(defaultConf,conf); //这一句后,defaultConf这个对象中就会包含用户的设置 21  22         conf && extend(defaultConf,conf); 23  24         this.container = $(containerId); 25         this.slideList = $get($get(this.container,"ul")[0],"li");// 26         //this.indexList = $get($get(this.container,"ol")[0],"li");//数字指示条 27         this.num = this.slideList.length; 28         this.indexList = createIndexList.call(this);//数字指示条 29  30         this.leftBtn = createLinkBtn.call(this,"left"); //创建按钮 31         this.rightBtn = createLinkBtn.call(this,"right"); //创建按钮 32      33         this.txtDiv = createTxtDiv.call(this);//创建文字说明的区域 34          35         this.currentIndex = defaultConf.startIndex;        //当前整个轮播图中显示的 第几 张 36  37         init.call(this,this.currentIndex);                //初始化 把其它的li都隐藏,把第一个显示出来 38  39         this.timer ;
 40  41         if(typeof defaultConf.speed =="string") 42             this.speed = speedList[defaultConf.speed] || 2000; 43         else if (typeof defaultConf.speed =="number") { 44             this.speed = defaultConf.speed; 45         } 46         if( defaultConf.isAuto ) 47             this.auto(); 48  49         bindEvent.call(this);           //绑定事件 50     } 51  52     var createTxtDiv = function (){ 53  54         console.info(this); 55  56         //1.创建div,设置基本属性及样式 57         var div = $create("div",{className:"mask"},{}) 58         div.innerHTML = ""; 59         //2.添加到容器中 60         this.container.appendChild(div); 61         //3.返回 62         return div; 63     } 64  65     Slider.prototype.auto = function(){ 66         var that = this; 67         this.timer = setInterval(function(){ 68             that.rightBtn.onclick(); 69             //that.rightBtn.click(); 70  71         },that.speed); 72  73         console.info("定时器"+this.timer+"开动"); 74     } 75     var createLinkBtn = function(dir){ 76         //1.创建一个dom元素 设置基本的属性,同时设置样式。 77         var span = $create("span",{className:"btn"+dir},{ 78              79         }); 80          81         //3.把它添加到容器中 82         this.container.appendChild(span); 83         //4.返回 84          85         return span; 86     } 87     var createIndexList = function(){    //创建ol li结构 88         //ol>li 89         var ol = $create("ol"); //创建ol 90  91         var lis=[];                //保存所有的ol中的li 92         for (var i = 0; i < this.num; i++) { 93             var li = $create("li"); 94             ol.appendChild(li); 95             lis.push(li);        //加到数组中 96         } 97         this.container.appendChild(ol); 98         return lis; 99     }100 101     Slider.prototype.moveto = function(indexabc){102         for(var i = 0; i< this.num; i++){103             this.slideList[i].style.display = "none";104             this.indexList[i].style.backgroundColor="red";105         }106         this.slideList[indexabc].style.display = "block";107         this.indexList[indexabc].style.backgroundColor="blue";108 109         //更新当前的索引110         this.currentIndex = indexabc;111 112         //更新文字说明113         var txt = $get(this.slideList[indexabc],"img")[0].alt ;114         this.txtDiv.innerHTML = txt;115     //    console.info("当前是:"+this.currentIndex);116     }117     var bindEvent = function(){118         var that = this; /*var 能不能省*/119         //绑定指示条的事件120         121         if( defaultConf.isClickable){122             for (var i = 0; i < this.num; i++) {123                 this.indexList[i].index = i;124                 this.indexList[i].onmouseenter = function(){125                     that.moveto(this.index);126                 }127             }
128 }129 130 this.rightBtn.onclick = function(){131 //向右,显示下一张 当前的索引值要+1132 var i = that.currentIndex + 1;133 // i = (i== that.num) ? 0 : i; 134 i = i % that.num;135 that.moveto(i);136 }137 138 //绑定按钮的事件139 this.leftBtn.onclick = function(){140 //btnLeft 向左,显示上一张141 var i = that.currentIndex - 1; //上一张的编号142 //如果它等于-1,应该要显示最后一张,最后一张的索引值是that.num-1。143 //i = (i==-1) ? that.num-1 : i;144 i = (i+that.num) % that.num;145 //i = i < 0 ? that.num+i : i;146 that.moveto(i);147 }148 if(defaultConf.isAuto) {149 this.container.onmouseenter = function(){150 // console.info("stop");151 clearInterval(that.timer);152 153 }154 this.container.onmouseleave = function(){155 // console.info("go on");156 157 that.auto();158 }159 }160 }161 var init = function(yourlikeIndex){162 if( yourlikeIndex)163 this.moveto(yourlikeIndex);164 else165 this.moveto(0);166 }167 168 window.Slider = Slider;169 170 })(window);希望能幫到大家,還有就是這個不是基於jQuery的,我自己封裝了一個簡單的方法。
以後我們圖片輪播可以使用
1 <div class="container1 slider" id="slide1"> 2 <ul> 3 <li><a href=""><img src="img/1.jpg" alt="2016年6月 英国出走欧盟"></a></li> 4 <li><a href=""><img src="img/2.jpg" alt="2016年11月 特朗普当选美国总统"></a></li> 5 <li><a href=""><img src="img/1.jpg" alt="2016年6月 英国出走欧盟"></a></li> 6 7 <li><a href=""><img src="img/3.jpg" alt="双11"></a></li> 8 <li><a href=""><img src="img/1.jpg" alt="2016年6月 英国出走欧盟"></a></li> 9 10 <li><a href=""><img src="img/4.jpg" alt="G20峰会"></a></li>11 </ul>12 </div>13 <script>14 15 var s1 = new Slider("slide1",{startIndex:0,speed:50});16 17 18 </script>這樣使用於比較多的輪播元件的網站,當然我們這個方法的js可以進一步去封裝的,讓它更強大,如果這裡你最後再壓縮一下,變數名稱再簡單。那麼效果會更好的。
以上是詳解圖片輪播怎麼實現?的詳細內容。更多資訊請關注PHP中文網其他相關文章!

熱AI工具

Undresser.AI Undress
人工智慧驅動的應用程序,用於創建逼真的裸體照片

AI Clothes Remover
用於從照片中去除衣服的線上人工智慧工具。

Undress AI Tool
免費脫衣圖片

Clothoff.io
AI脫衣器

AI Hentai Generator
免費產生 AI 無盡。

熱門文章
熱工具

記事本++7.3.1
好用且免費的程式碼編輯器

SublimeText3漢化版
中文版,非常好用

禪工作室 13.0.1
強大的PHP整合開發環境

Dreamweaver CS6
視覺化網頁開發工具

SublimeText3 Mac版
神級程式碼編輯軟體(SublimeText3)
熱門話題


 使用正規表示式去除 PHP 數組中的重複值
Apr 26, 2024 pm 04:33 PM
使用正規表示式去除 PHP 數組中的重複值
Apr 26, 2024 pm 04:33 PM
使用正規表示式從PHP數組中移除重複值的方法:使用正規表示式/(.*)(.+)/i匹配並取代重複項。遍歷數組元素,使用preg_match檢查匹配情況。如果匹配,請跳過值;否則,將其添加到無重複值的新數組中。
 如何將 MySQL 查詢結果陣列轉換為物件?
Apr 29, 2024 pm 01:09 PM
如何將 MySQL 查詢結果陣列轉換為物件?
Apr 29, 2024 pm 01:09 PM
將MySQL查詢結果陣列轉換為物件的方法如下:建立一個空物件陣列。循環結果數組並為每一行建立一個新的物件。使用foreach迴圈將每一行的鍵值對賦給新物件的對應屬性。將新物件加入到物件數組中。關閉資料庫連線。
 數組和物件在 PHP 中的差異是什麼?
Apr 29, 2024 pm 02:39 PM
數組和物件在 PHP 中的差異是什麼?
Apr 29, 2024 pm 02:39 PM
PHP中,數組是有序序列,以索引存取元素;物件是具有屬性和方法的實體,透過new關鍵字建立。數組存取透過索引,物件存取通過屬性/方法。數組值傳遞,物件參考傳遞。
 PDF轉換成JPG格式(快速)
Apr 19, 2024 am 08:13 AM
PDF轉換成JPG格式(快速)
Apr 19, 2024 am 08:13 AM
PDF格式的文件被廣泛應用於各個領域,在數位化時代、但有時我們需要將其轉換為JPG圖片格式以滿足特定需求。以及常見問題的解決方案、本文將詳細介紹如何利用實用工具將PDF檔案轉換為高品質、無損的JPG圖片。選擇合適的PDF轉JPG工具以及其特點和適用場景,桌面軟體和手機應用、介紹幾種常見的PDF轉JPG工具,包括線上轉換。線上轉換器簡介例如AdobeAcrobatOnline、包括操作步驟、詳細介紹常見的線上轉換器、Smallpdf和Zamzar等、上傳限制和轉換品質等。桌面軟體推薦與使用方法Ni
 C++ 函式回傳物件時有什麼需要注意的?
Apr 19, 2024 pm 12:15 PM
C++ 函式回傳物件時有什麼需要注意的?
Apr 19, 2024 pm 12:15 PM
在C++中,函數傳回物件需要注意三點:物件的生命週期由呼叫者負責管理,以防止記憶體洩漏。避免懸垂指針,透過動態分配記憶體或返回物件本身來確保物件在函數返回後仍然有效。編譯器可能會最佳化傳回物件的副本生成,以提高效能,但如果物件是值語義傳遞的,則無需副本生成。
 程式設計是乾啥的,學了有什麼用
Apr 28, 2024 pm 01:34 PM
程式設計是乾啥的,學了有什麼用
Apr 28, 2024 pm 01:34 PM
1、程式設計可用於開發各種軟體和應用程序,包括網站、手機應用程式、遊戲和數據分析工具等。它的應用領域非常廣泛,幾乎涵蓋了所有行業,包括科學研究、醫療保健、金融、教育、娛樂等。 2.學習程式設計可以幫助我們提升問題解決能力和邏輯思考能力。在程式設計過程中,我們需要分析和理解問題,找出解決方案,並將其轉換為程式碼。這種思維方式能夠培養我們的分析和抽象能力,提升我們解決實際問題的能力。
 PHP 函數如何傳回物件?
Apr 10, 2024 pm 03:18 PM
PHP 函數如何傳回物件?
Apr 10, 2024 pm 03:18 PM
PHP函數可以透過使用return語句後接物件實例來傳回對象,從而將資料封裝到自訂結構中。語法:functionget_object():object{}。這允許創建具有自訂屬性和方法的對象,並以對象的形式處理資料。
 C++ 程式設計謎題片段:激發思維,提升程式設計水平
Jun 01, 2024 pm 10:26 PM
C++ 程式設計謎題片段:激發思維,提升程式設計水平
Jun 01, 2024 pm 10:26 PM
C++程式設計謎題涵蓋斐波那契數列、階乘、漢明距離、陣列最大值和最小值等演算法和資料結構概念,透過解決這些謎題,可以鞏固C++知識,提升演算法理解和程式設計技巧。
