LAMP=Linux+Apache+Mysql+Php
一、目前網路主流web服務
靜態服務:
1.apache---中小型靜態web服務的主流,web伺服器中的老大哥
2.nginx---大型新型網路靜態web服務主流,web伺服器中的初生牛犢
3 .lighttpd---靜態web服務不溫不火,逐漸被淘汰的意味,社群不活躍,效率很高。
動態服務:
1.IIS(Internet information services)---微軟的##web伺服器(asp、aspx)
2.tomcat---中小企業動態web服務主流,網際網路java容器主流(jsp,do)
3.resin---大型動態網站web服務主流,網路 java容器主流(jsp,do)
# 4.php(fcgi)---大中小網站,php 程式的解析容器
a.配合#apache,php不是守護進程,而是mod_php5.so(module)
b.配合nginx,lighttpd,php#守護程式模式,FCGI模式。
二、apache的安裝
#1.首先確定安裝#httpd 服務(yum install httpd -y)
#確定:yum install gcc gcc++ zlib zlib-devel -y
2.安裝apache(位址#上官網路找)
apache原始碼編譯:
./configure --prefix=/application/apache2.2.32 \--enable-expires \--enable-headers \ --enable-modules=most \--enable-so \--with-mpm=worker \--enable- deflate \--enable-rewritemake &&make install3.啟動apache服務:
#1)查看apache語法是否可行:#[root@localhost local]# /application/apache/bin/apachectl -t
2)啟動apache#服務:[root@localhost local]# /application/apache/bin/apachectl start
3)查看是否啟動apache服務:lsof -i:80##或ps -ef|grep apache
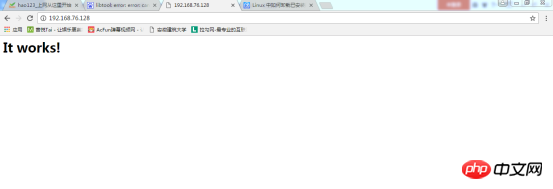
表示成功
#如果不ok檢查端口,防火牆,selinux#,進程
strace追蹤進程的命令
修改編譯內容在/application/apache/htdocs/下有index.html
#三、/application/apache目錄結構
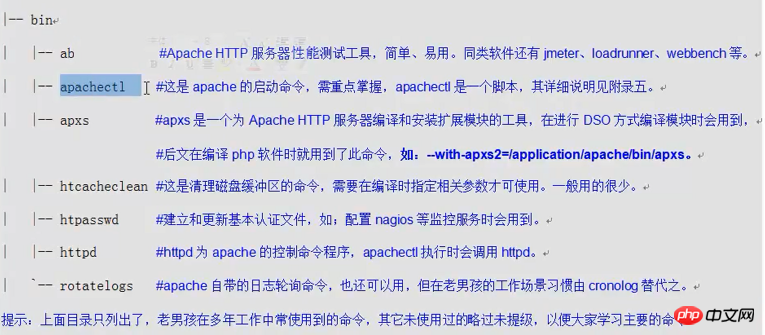


#

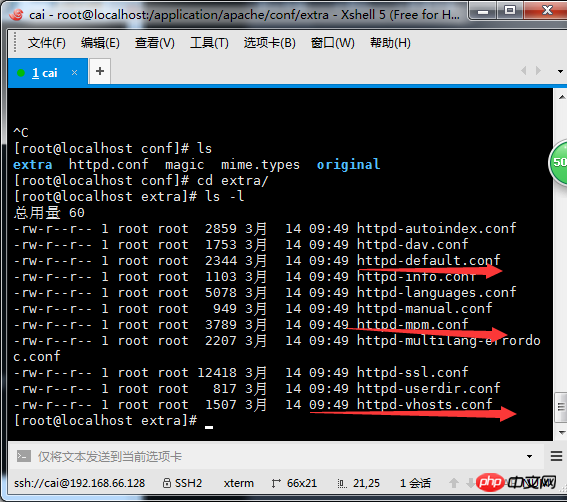
apache優化1.把root@localhost conf]
# apache優化1.把root@localhost conf]# vi httpd.conf 裡的Index前面加-號或直接刪除#
# #
/application/apache/conf/extra三個重點檔案#
四、虛擬主機1.虛擬主機:部署多個站點,每個站點希望用不同的網域名稱和站點目錄,或是不同的端口,不同的
IP的時候需要虛擬主機。
一句話,一個
http服務要配置多個站點,就需要虛擬機器。
虛擬機器分類:a.基於網域名稱b.基於連接埠
c.基於IP
2.搭建虛擬機器(網域名稱)2.搭建虛擬機器(網域名稱)
#
# | www.etiantian.org
/var/html/wwwblog.etiantian.org /var/html/blog##
#建立主頁檔案:[root@localhost apache]# mkdir /var/html/{www,blog,bbs} -p[root@localhost apache]# touch /var/html/{www,blog,bbs}/index.html[root@localhost apache]# for name in www blog bbs;do echo "http://$name.etiantian.org" >/var/html/$name/index.html;done[root@localhost apache]# for name in www blog bbs;do cat /var/html/$name/index.html;done vim /application/apache/conf/extra/httpd-vhosts.conf


[root@localhost extra]# /application/apache /bin/apachectl -t
Syntax OK
檢查語法
[root@localhost extra]# /application/apache/bin/apachectl graceful 重啟apache
vim /application/apache/conf/httpd.conf 在最末行加入下面的內容:
Options FollowSymLinks
AllowOverride None
#Order allow,deny
##Allow from all以上設定是防止403出錯,之後檢查語法是否錯誤(有錯誤檢視
修改windows本地system32 drives hosts (192.168. 76.128 www.etiantian.org blog.etiantian.org bbs.etiantian.org
)[root@localhost extra]# grep "^Include" /application/apache/conf/httpd. confInclude conf/extra/httpd-mpm.confInclude conf/extra/httpd-vhosts.conf#一. mysql
建立mysql:useradd mysql -g mysql -M -s /sbin/nologin
#mysql的編譯:##./configure --prefix=/application/mysql5.1.72 \
--with-unix-socket- path=/application/mysql5.1.72/tmp/mysql.sock \
#--localstatedir=/application/mysql5.1.72/data \
--enable-assembler \
--enable-thread-safe-client \
--with-mysqld-user=mysql \
--with-big-tables \
##-- without-debug \--with-pthread \--enable-assembler \--with-extra-charsets=complex \## --with-readline \--with-ssl \--with-embedded-server \--enable-local-infile \--with-plugins=partition,innobase \--with-mysqld-ldflags=-all-static \
##--with-client-ldflags=-all-static
yum -y install ncurses-devel
(出錯解決方案)
root@localhost application]# cd /home/cai/tools/
[root@localhost tools]# cd mysql-5.1.72/support-files/
[root@localhost support-files]# cp my-small.cnf /etc/my.cnf
cp:是否覆寫"/etc/my.cnf"? y
[root@localhost support-files]# cd /etc/
[root@localhost etc]# less my.cnf
#[root@localhost etc]# mkdir /application/mysql/date -p
[root@localhost etc]# chown -R mysql.mysql /application/mysql
#[root@localhost etc]#/application/mysql/ bin/mysql_install_db --basedir=/application/mysql --datadir=/application/mysql/data/ --user=mysql
Installing MySQL system tables...
#170314 20:15 :22 [Warning] '--skip-locking' is deprecated and will be removed in a future release. Please use '--skip-external-locking' instead.
OK
Filling help tables...
170314 20:15:22 [Warning] '--skip-locking' is deprecated and will be removed in a future release. Please use '--skip-external-locking' instead .
OK
To start mysqld at boot time you have to copy
To start mysqld at boot time you have to copy
support-files/mysql.server to the right place for your system
PLEASE REMEMBER TO SET A PASSWORD FOR THE MySQL root USER !
To do so, start the server, then issue the following commands:
/application/mysql/bin/mysqladmin -u root password 'new-password'
/application/mysql/bin/mysqladmin -u root -h localhost.localdomain password 'new-passwordsqladmin -u root -h localhost.localdomain password 'new-password '
Alternatively you can run:
/application/mysql/bin/mysql_secure_installation
which will also give you the option of removing the test
databases and anonymous user created by default. This is##databases and anonymous user created by default. This is
##databases and anonymous user created by default. This is
strongly recommended for production servers.
See the manual for more instructions.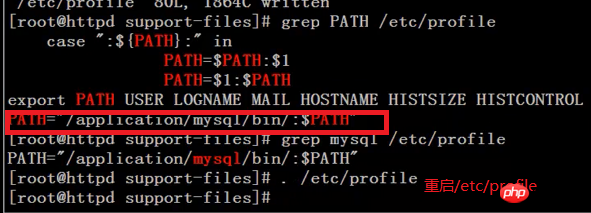
關閉:
mysqladmin shutdown
/application/mysql/bin/ mysqladmin -u root -h localhost.localdomain password 'new-password' 設定密碼
mysql -uroot -p(設定密碼後登入mysql的方法)
#二、php
LAMP下的php
#apache==》libphp5.so
nginx php==》fcgi php-
yum -y install gcc gcc-c++ autoconf libjpeg libjpeg- devel libpng libpng-devel freetype freetype-devel libxml2 libxml2-devel zlib zlib-devel glibc glibc-devel glib2 glib2-devel bzip2 bzip2-devel ncurses ncurses-devel curl curl-devel bzip2 bzip2-devel ncurses ncurses-devel curl curl-devel bzip-m^m openssl-devel openldap openldap-devel nss_ldap openldap-clients openldap-servers(需要安裝的各種函式庫)
yum install zlib libxml libjpeg freetype #
yum install zlib libxml libjpeg 是zlib-devel libxml2-devel libjpeg-devel freetype-devel libpng-devel gd-devel curl-devel -y(oldboy裡的)
libiconv庫需要(編譯安裝)
#php編譯:
./configure \
#--prefix=/application/php5.3.27 \
##--with-apxs2 =/application/apache/bin/apxs \--with-mysql=/application/mysql \--with-xmlrpc \##--with-openssl \
--with-zlib \
--with-freetype-dir \
#--with-gd \
##--with-jpeg -dir \--with-png-dir \--with-iconv=/usr/local/libiconv \--enable-short-tags \ --enable-sockets \--enable-zend-multibyte \--enable-soap \--enable-mbstring \ --enable-static \--enable-gd-native-ttf \--with-curl \--with- xsl \--enable-ftp \##--with-libxml-dir
[root@localhost php]# ll /application/ apache/modules/
總用量23908-rw-r--r-- 1 root root 9262 4月15 09:27 httpd.exp
-rwxr-xr-x 1 root root 24465701 4月15 10:15 libphp5.so
[root@localhost php]# grep libphp5 /application/apache/conf/httpd.conf
#LoadModule php5_module modules/libphp5.so
設定
php #檔:

##
有兩個,一個是生產環境
一個是開發環境(測試環境)
[ root@localhost php-5.3.27]# diff php.ini-development php.ini-production
[root@localhost php-5.3.27]# cp php.ini-production /application/php/lib /php.ini
小結:正式設定檔一般關閉顯示LOG,不輸出LOG
##設定
apache支持phpvim /application/apache/conf/httpd.conf 修改98行ServerName 192.168.76.128:80
vim /application/apache#
vim /application/apache# 
user daemon 修改為其他的底下的也該(預設的大家都知道必須修改)
166行修改為
[root@localhost conf]# diff httpd.conf httpd.conf.ori67,68c67,68
< User www
< Group www---> User daemon##> Group daemon#168c168
< DirectoryIndex index.php index.html
---
> DirectoryIndex index.html
320,321d319
< AddType application/x-httpd-php .php .phtml
#< AddType application/x-httpd-php-source .phps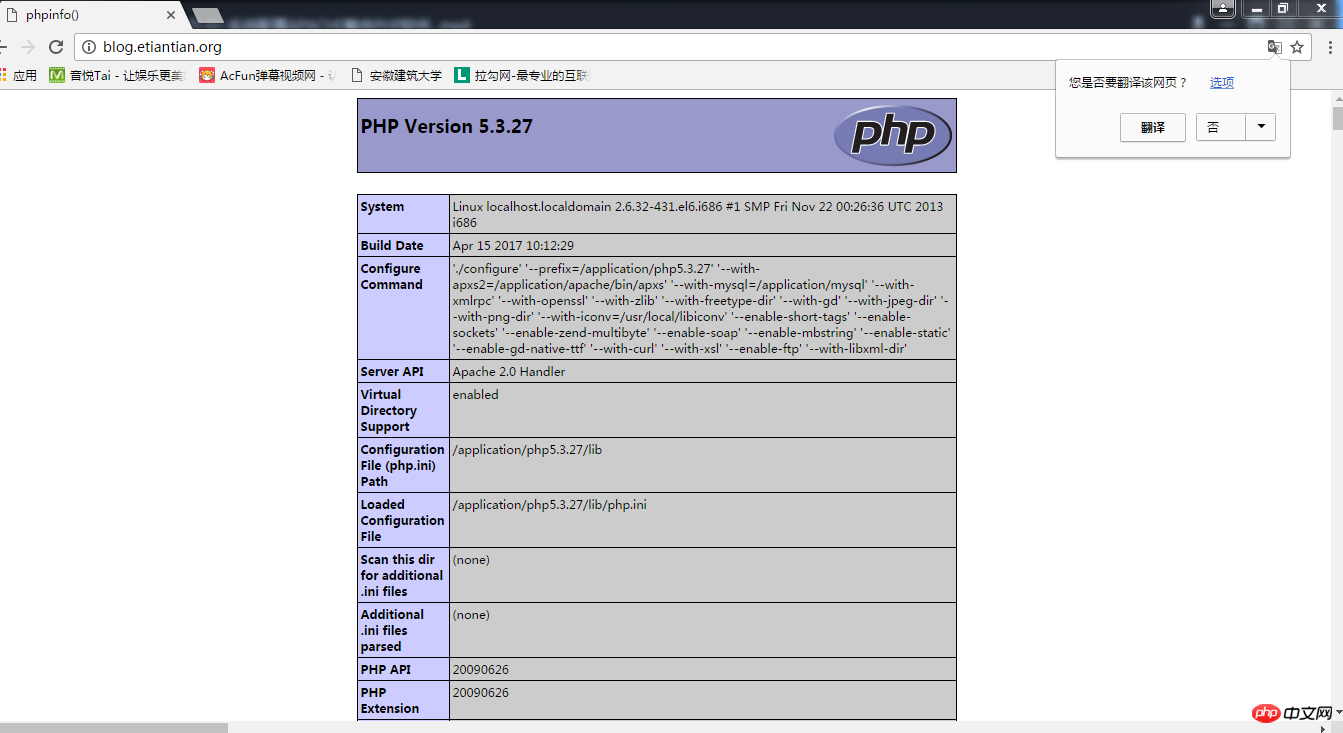
##新增www使用者:useradd www -s /sbin/nologin -M
[root@localhost conf]# /application/apache/bin/apachectl graceful 重新啟動apache服務 ###測試###php 在以建造的虛擬機器/var/html/blog vi index.php###### ######[root@localhost blog]# cat index.php#################### #####################################################。 #### #########出現這個介面表示###php+apache成功####### ######vi /var/html/blog/index.php####
//$link_id=mysql_connect('主機名稱','使用者','密碼');
$link_id=mysql_connect ('localhost','root','oldboy123') or mysql_error();
if($link_id){
#echo "mysql successful by oldboy !" ;
}else{
echo mysql_error();
#}
?>
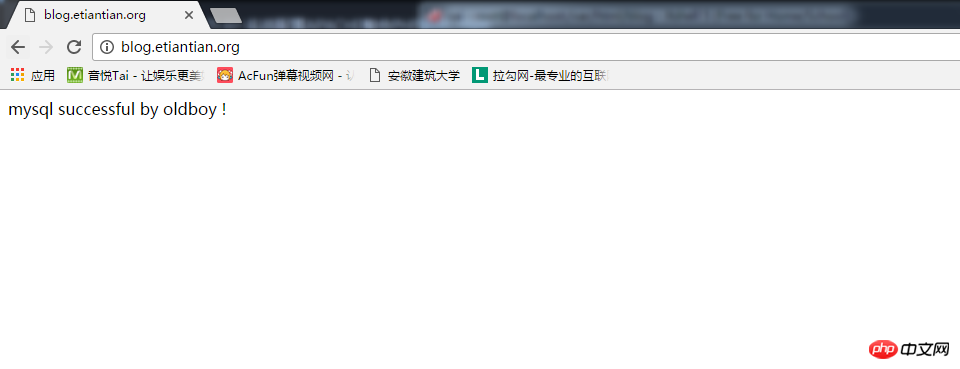
上介面表示
mysql####成功#######以上是LAMP=Linux+Apache+Mysql+Php的詳細內容。更多資訊請關注PHP中文網其他相關文章!

熱AI工具

Undresser.AI Undress
人工智慧驅動的應用程序,用於創建逼真的裸體照片

AI Clothes Remover
用於從照片中去除衣服的線上人工智慧工具。

Undress AI Tool
免費脫衣圖片

Clothoff.io
AI脫衣器

Video Face Swap
使用我們完全免費的人工智慧換臉工具,輕鬆在任何影片中換臉!

熱門文章

熱工具

記事本++7.3.1
好用且免費的程式碼編輯器

SublimeText3漢化版
中文版,非常好用

禪工作室 13.0.1
強大的PHP整合開發環境

Dreamweaver CS6
視覺化網頁開發工具

SublimeText3 Mac版
神級程式碼編輯軟體(SublimeText3)
 適用於 Ubuntu 和 Debian 的 PHP 8.4 安裝和升級指南
Dec 24, 2024 pm 04:42 PM
PHP 8.4 帶來了多項新功能、安全性改進和效能改進,同時棄用和刪除了大量功能。 本指南介紹如何在 Ubuntu、Debian 或其衍生版本上安裝 PHP 8.4 或升級到 PHP 8.4
 如何設定 Visual Studio Code (VS Code) 進行 PHP 開發
Dec 20, 2024 am 11:31 AM
Visual Studio Code,也稱為 VS Code,是一個免費的原始碼編輯器 - 或整合開發環境 (IDE) - 可用於所有主要作業系統。 VS Code 擁有大量針對多種程式語言的擴展,可以輕鬆編寫
 在PHP API中說明JSON Web令牌(JWT)及其用例。
Apr 05, 2025 am 12:04 AM
JWT是一種基於JSON的開放標準,用於在各方之間安全地傳輸信息,主要用於身份驗證和信息交換。 1.JWT由Header、Payload和Signature三部分組成。 2.JWT的工作原理包括生成JWT、驗證JWT和解析Payload三個步驟。 3.在PHP中使用JWT進行身份驗證時,可以生成和驗證JWT,並在高級用法中包含用戶角色和權限信息。 4.常見錯誤包括簽名驗證失敗、令牌過期和Payload過大,調試技巧包括使用調試工具和日誌記錄。 5.性能優化和最佳實踐包括使用合適的簽名算法、合理設置有效期、
 php程序在字符串中計數元音
Feb 07, 2025 pm 12:12 PM
字符串是由字符組成的序列,包括字母、數字和符號。本教程將學習如何使用不同的方法在PHP中計算給定字符串中元音的數量。英語中的元音是a、e、i、o、u,它們可以是大寫或小寫。 什麼是元音? 元音是代表特定語音的字母字符。英語中共有五個元音,包括大寫和小寫: a, e, i, o, u 示例 1 輸入:字符串 = "Tutorialspoint" 輸出:6 解釋 字符串 "Tutorialspoint" 中的元音是 u、o、i、a、o、i。總共有 6 個元
 您如何在PHP中解析和處理HTML/XML?
Feb 07, 2025 am 11:57 AM
本教程演示瞭如何使用PHP有效地處理XML文檔。 XML(可擴展的標記語言)是一種用於人類可讀性和機器解析的多功能文本標記語言。它通常用於數據存儲
 解釋PHP中的晚期靜態綁定(靜態::)。
Apr 03, 2025 am 12:04 AM
靜態綁定(static::)在PHP中實現晚期靜態綁定(LSB),允許在靜態上下文中引用調用類而非定義類。 1)解析過程在運行時進行,2)在繼承關係中向上查找調用類,3)可能帶來性能開銷。
 什麼是PHP魔術方法(__ -construct,__destruct,__call,__get,__ set等)並提供用例?
Apr 03, 2025 am 12:03 AM
PHP的魔法方法有哪些? PHP的魔法方法包括:1.\_\_construct,用於初始化對象;2.\_\_destruct,用於清理資源;3.\_\_call,處理不存在的方法調用;4.\_\_get,實現動態屬性訪問;5.\_\_set,實現動態屬性設置。這些方法在特定情況下自動調用,提升代碼的靈活性和效率。


