

升級openssh的實例詳解

1.下載最新的openssh套件


#
2.升級openssh之前要先開啟伺服器telnet,透過telnet登入伺服器,因為升級過程中會導致ssh暫時不能用
#開啟linux telnet服務:查看telnet是否已安裝:rpm -qa|grep telnettelnet-0.17-48.el6.x86_64telnet-server-0.17-48.el6.x86_64 如果沒有安裝,透過yum安裝[root@leotest ~]# yum install telnet[root@leotest ~]# yum install telnet-server 啟動telnet服務:編輯telnet文件,將disable改成no[root@leotest xinetd.d]# vi /etc/xinetd.d/telnet# default: on# description: The telnet server serves telnet sessions; it uses \ # unencrypted username/password pairs for authentication.service telnet
##{
socket_type = stream wait = no user = /usr/sbin/in.telnetd
log_on_failure += USERID
no
}
#
重啟xinetd服務:
service xinetd restart
or:
/etc/rc.d/init.d/xinetd restart
透過telnet連接伺服器:
[c:\~]$ telnet 192.168.5.5
Connecting to 192.168.5.5:23...
Connection established.
To escape to local shell, press 'Ctrl+Alt+]'.
Red Hat Enterprise Linux Server release 6.8 (Santiago)
Kernel 2.6.32-642.el6. x86_64 on an x86_64login: test#Password:[test@leotest ~]$#由於預設telnet
只能連接一般用戶,所以需要登入普通用戶之後跳到
root用戶
3.備份原openssh相關檔案:cp /usr/sbin/sshd /usr/ sbin/sshd.bak
#cp /etc/ssh/ssh_config /etc/ssh/ssh_config.bakcp /etc/ssh/sshd_config /etc/ssh/sshd_config.bak
cp /etc/ssh/moduli /etc/ssh/moduli.bak
#
Note:刪除掉下面三個文件,否則安裝的時候會報錯:/etc/ssh/ssh_config already exists, install will not overwrite
/etc/ssh/sshd_config already exists, install will not overwrite
##/etc/ssh /moduli already exists, install will not overwrite rm /etc/ssh/ssh_config -fr#rm /etc/ssh/sshd_config -fr##rm /etc/ssh/sshd_config -fr
rm /etc/ssh/moduli -fr
yum install pam-develyum install zlib-develyum install openssl-devel
4.解壓縮並安裝openssh
[root@ leotest softs]# tar -zxvf openssh-7.4p1.tar.gz
[root@leotest softs]# ls
openssh-7.4p1 openssh-7.4p1.tar.gz openssh-7.4 p1-vs-openbsd.diff.gz
[root@leotest softs]# cd openssh-7.4p1
[root@leotest openssh-7.4p1]#./configure --prefix= /usr/local/openssh --sysconfdir=/etc/ssh --with-pam --with-md5-passwords --mandir=/usr/share/man
configure: error: * ** zlib.h missing – please install first or check config.log#yum install zlib-develconfigure: error: *** Can't find recent OpenSSL libcrypto (see config.log for details) ***
yum install openssl openssl-devel
重新編譯:
### 重新編譯前要先清理先前的編譯資訊:######make clean######ldconfig######[root@leotest openssh-7.4p1]# ### ###./configure --prefix= /usr/local/openssh --sysconfdir=/etc/ssh --with-pam --with-md5-passwords --mandir=/usr/share/man######OpenSSH 有 been configured with the following options :###使用者使用中位檔案:/usr/bin
配置檔案:/etc/ssh
Askpass 程式:/usr/ libexec/ ssh-askpass
受手冊頁:/usr/share PID 檔案:/var/run
權限分離chroot 路徑:/var/empty
sshd 預設使用者路徑:/usr/bin:/bin:/usr/sbin:/sbin
PAM 支援:否
OSF SIA 支援:無
KerberosV 支援:無
智慧卡支援:
S/KEY 支援:無
MD5 密碼支援:無
Solaris 專案支援:無
Solaris支援no
隨機數來源:OpenSSL僅限內部
Privsep 沙箱樣式:rlimit
編譯器: gcc
編譯器標誌:-g -O2 -Wall -Wpointer-arith -Wuninitialized -Wsign-compare -Wformat-security -Wno-pointer-sign -fno-strict-aliasing -D_FORTIFY_SOURCE=2 -ftrapv - fno-builtin-memset -fstack-protector -all -fPIE
預處理器標誌:
連結器標誌: -Wl,-z,relro -Wl,-z,now -Wl ,-z,noexecstack -fstack-protector-all - pie
函式庫:-lcrypto -lrt -ldl -lutil -lz -lcrypt -lresolv
## install/etc/init.d d/sshd restart 5.覆寫舊的檔案 #cp -p /softs/openssh-7.4p1 /contrib/redhat/sshd.init /etc/init.d/sshdchmod u+x /etc/init.d/sshdchkconfig --add sshd #cp /usr/local/openssh/sbin/sshd /usr/sbin/sshd[root@pttlstydb openssh-7.4p1]# cp / usr/local/openssh/sbin/sshd /usr/sbin/ sshdcp:覆蓋「/usr/sbin/sshd」? ycp: 無法建立常規檔案`/usr/sbin/sshd':# 文字檔案繁忙
#檔案正在被使用
[root@pttlstydb openssh-7.4p1]# ps -ef|grep sshdroot 14111 1 0 10:05 ? 00:00:00 sshd: root@pts/0root 14865 1 0 10:22 ? 00:00:00 sshd: root@nottyroot 24182 14779 0 10:30 pts/1 00:00:00 grep sshdroot 殺死#17.死-9 14865[root@pttlstydb openssh-7.4p1]# ps -ef|grep sshd
root 24227 14779 0 10:31 pts/1 # 00:00:00 g # 00:00:00 g
重新覆寫:
#cp /usr/local/openssh/bin/ssh /usr/bin/ssh
#[root @leotest openssh-7.4p1]# service sshd restart停止sshd: OK ]ssh-keygen: 非法選項-- A用法: ssh-keygen [選項]選項: cat /etc/init.d/sshdstart(){# 如果需要建立金鑰##/usr/bin/ssh-keygen -A#if [ -x /sbin/restorecon ];然後/sbin/restorecon /etc/ssh/ssh_host_key.pub
/sbin/restorecon /etc/ssh/ssh_host_rsa_key.pub
/sbin/restorecon /etc/ ssh/ssh_host_dsa_key.pub
/sbin/restorecon /etc/ssh/ssh_host_ecdsa_key.pub
fi
#echo -n $"啟動$prog :「
$SSHD $OPTIONS && 成功||失敗
RETVAL=$?
[ $RETVAL -eq 0 ] && touch /var/lock/subsys/sshd
echo
#}
因為預設低版本的
#ssh-keygen沒有-A參數##解決方法:
#cp /usr/local/openssh/bin /ssh-keygen /usr/bin/ssh-keygen#
重啟
sshd
#服務:[root@leotest ssh]# service sshd restart##sshd: ##啟動sshd:/etc/ssh/sshd_config 第81 行:不支援的選項GSSAPIAuthentication
/etc/ssh/sshd_config 第83 行:不支援的選項GSSAPICleanupCredentials
## ##原因:新版本的openssh不支援上述參數,需要修改sshd的設定檔
# [root@leotest openssh-7.4p1]# vi /etc/ssh/sshd_config
##去掉前面的註釋,允許root透過ssh登入PermitRootLogin yes##意見掉下面三個參數GSSAPIAuthentication yesGSSAPICleanupCredentials yes#UsePAM yes ##在文件中補充以下訊息,否則還是無法透過ssh登入linux:
#導致此問題的原因是
ssh
升級後,為了安全,預設不再採用原來的一些加密演算法,我們手動添加進去即可。 -cbc,aes256-cbc, aes128-ctr、aes192-ctr、aes256-ctr、3des-cbc、arcfour128、arcfour256、arcfour、blowfish-cbc、cast128-cbcccfour256、arcfour. 、umac-64@openssh。 -group-exchange-sha1, diffie-hellman-group-exchange-sha256、ecdh-sha2-nistp256、ecdh-sha2-nistp384、ecdh-sha2-nistp521、diffie-hellman-group1-sha1、curve25519-sha256@libssh.
6.重啟sshd
,
測試
ssh
連接伺服器
service sshd restart[c:\~]$ ssh 192.168 .5.5 正在連線至192.168.5.5:22...已建立連線。 Ctrl+Alt+]」。 #上次登入:2016 年12 月27 日星期二00:22:10,來自192.168.5.2#[root@leotest ~ ]# ssh -VOpenSSH_7.4p1, OpenSSL 1.0.1e-fips 2013 年2 月11 日
#7.取消
telnet
#[root@leotest ~]# vi /etc/xinetd.d/telnet ## 預設:on# 說明:telnet 伺服器提供 telnet 會話服務;它使用 \## 未加密的使用者名稱/密碼對進行驗證。flags = REUSE
sock type = no
user = root
## log_on_failure += USERID
disable ##停掉
xinetd服務:
[root@leotest ~]# [ OK ]
停掉開機自啟動:[root@leotest ~]# chkconfig --list xinetdxinetd 0:off 1:off 2 :off 3:on 4:on 5:on ]# chkconfig --list xinetd
xinetd 0:off 4:off 5:off
# 6:off
#升級後問題解決:透過winscp登入linux報錯,解決方法如下:
[root@leotest ~]# vi /etc/ssh/sshd_config
# override default of no subsystems
override default of no subsystems
override default of no subsystems
# sftp /usr/libexec/openssh/
#將原來的註解掉,改成下面的internal-sftp
###重啟sshd服務:######service sshd restart######以上是升級openssh的實例詳解的詳細內容。更多資訊請關注PHP中文網其他相關文章!

熱AI工具

Undresser.AI Undress
人工智慧驅動的應用程序,用於創建逼真的裸體照片

AI Clothes Remover
用於從照片中去除衣服的線上人工智慧工具。

Undress AI Tool
免費脫衣圖片

Clothoff.io
AI脫衣器

AI Hentai Generator
免費產生 AI 無盡。

熱門文章
熱工具

記事本++7.3.1
好用且免費的程式碼編輯器

SublimeText3漢化版
中文版,非常好用

禪工作室 13.0.1
強大的PHP整合開發環境

Dreamweaver CS6
視覺化網頁開發工具

SublimeText3 Mac版
神級程式碼編輯軟體(SublimeText3)
熱門話題


 Conda升級Python版本的幾種方法
Feb 18, 2024 pm 08:56 PM
Conda升級Python版本的幾種方法
Feb 18, 2024 pm 08:56 PM
Conda升級Python版本的幾種方法,需要具體程式碼範例概述:Conda是一個開源的套件管理器和環境管理系統,用於管理Python套件和環境。在使用Python開發過程中,為了使用新版本的Python,我們可能需要從較舊的Python版本升級。本文將介紹使用Conda升級Python版本的幾種方法,並提供具體的程式碼範例。方法一:使用condainstall命
 升級numpy版本:詳細易學的指南
Feb 25, 2024 pm 11:39 PM
升級numpy版本:詳細易學的指南
Feb 25, 2024 pm 11:39 PM
如何升級numpy版本:簡單易懂的教程,需要具體程式碼範例引言:NumPy是一個重要的Python庫,用於科學計算。它提供了一個強大的多維數組物件和一系列與之相關的函數,可用於進行高效的數值運算。隨著新版本的發布,不斷有更新的特性和Bug修復可供我們使用。本文將介紹如何升級已安裝的NumPy函式庫,以取得最新特性並解決已知問題。步驟1:檢查目前NumPy版本在開始
 win10系統升級後無法上網的處理教學課程
Mar 27, 2024 pm 02:26 PM
win10系統升級後無法上網的處理教學課程
Mar 27, 2024 pm 02:26 PM
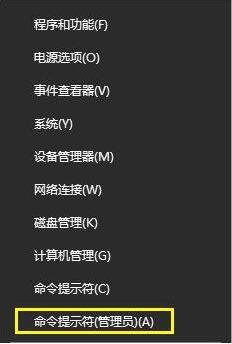
1.使用win+x快速鍵開啟選單,選擇【指令提示字元(管理員)(A)】,如下圖所示:2、進入到指令提示字元介面後,輸入【ipconfig/flushdns】指令按回車,如下圖所示:3、接著輸入【netshwinsockresetcatalog】指令按回車,如下圖所示:4、最後輸入【netshintipreset】指令按回車,重啟電腦就可以上網了,如下圖所示:
 小紅書如何升級為專業號
Mar 01, 2024 pm 04:00 PM
小紅書如何升級為專業號
Mar 01, 2024 pm 04:00 PM
很多朋友表示想知道在小紅書裡怎麼去升級成為專業號,下面為大家介紹一下操作方法,有興趣的朋友和我一起來看看吧。打開手機上的「小紅書」APP,進入後點擊右下方的「我的」選項,接著在我的頁面中找到左上角的「三條橫線」圖示並點擊開啟。 2.這時會彈出一個選單頁,在其中點選選擇「創作中心」這項進入。 3.接下來在進入的頁面裡“創作服務”下的選項中找到“更多服務”,並在上面點擊進入。 4.頁面跳轉後,在「作者能力」下方的選項裡點選「開通專業號「這項。 5.最後在進入的頁面裡會對小紅書專業號進行介紹,在底部點選「
 小藝升級為智能體! HarmonyOS NEXT鴻蒙原生智慧開啟全新AI時代
Jun 22, 2024 am 01:56 AM
小藝升級為智能體! HarmonyOS NEXT鴻蒙原生智慧開啟全新AI時代
Jun 22, 2024 am 01:56 AM
6月21日,華為開發者大會2024(HDC2024)再聚東莞松山湖。本屆大會上,最令人關注的莫過於HarmonyOSNEXT正式面向開發者和先鋒用戶啟動Beta,並全方位展示了HarmonyOSNEXT全場景、原生智能和原生安全三大「王炸」級創新特性。 HarmonyOSNEXT原生智慧:開啟全新AI時代放棄安卓框架之後,HarmonyOSNEXT成為真正獨立於安卓、iOS的作業系統,堪稱是一場史無前例的脫胎換骨。在其眾多新特性中,原生智能無疑是最能帶給用戶直覺感受與體驗升級的新特性
 Windows 上的 OpenSSH:安裝、設定和使用指南
Mar 08, 2024 am 09:31 AM
Windows 上的 OpenSSH:安裝、設定和使用指南
Mar 08, 2024 am 09:31 AM
對於大多數Windows使用者來說,遠端桌面協定(RDP)一直是遠端管理的首選,因為它提供了友善的圖形介面。然而,對於那些需要更精細控制的系統管理員來說,SSH更適合他們的需求。透過SSH,管理員可以透過命令列與遠端設備進行交互,這樣可以讓管理工作更有效率。 SSH的優勢在於其安全性和靈活性,使得管理員能夠更方便地進行遠端管理和維護工作,尤其是在處理大量設備或進行自動化任務時。因此,儘管RDP在使用者友善性方面表現出色,但對於系統管理員來說,SSH的功能和控制力更勝一籌。以前,Windows用戶需要藉
 小米14Pro怎麼升級澎湃OS?
Mar 18, 2024 pm 07:34 PM
小米14Pro怎麼升級澎湃OS?
Mar 18, 2024 pm 07:34 PM
小米14Pro是小米公司最新推出的旗艦手機,而澎湃OS則是小米公司自主研發的全新作業系統,致力於提供更流暢、智慧的使用者體驗。而隨著技術的不斷發展,澎湃OS也不斷進行更新與升級。所以很多第一次使用小米手機的用戶在問小米14Pro用戶如何升級澎湃OS呢?小米14Pro怎麼升級澎湃OS不需要更新,原廠自備澎湃OS。其他支援澎湃OS的機型的更新方法:1、開啟手機的設定應用,找到系統更新選項。 2、系統會自動偵測目前的系統版本,在有新版本可供更新時進行提示。 3.只需要點擊"立即更新",系統就會開始自動下載
 怎麼升級wps版本? wps office怎麼更新版本?
Mar 14, 2024 am 08:43 AM
怎麼升級wps版本? wps office怎麼更新版本?
Mar 14, 2024 am 08:43 AM
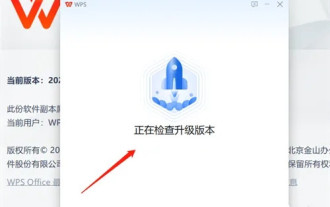
wps是許多使用者必備的電腦軟體,定期更新新版本可以讓使用者獲得更好的使用體驗和更多的功能特性。那麼wps要怎麼升級版本呢? wpsoffice升級主要分為三種方法,以下一起來看看吧。 方法一:從官網下載新版 你可以在WPSOffice官網上下載最新版本的安裝包。進入WPSOffice官網(https://www.wps.cn/)後,點選「下載」按鈕,選擇你需要下載的版本,然後依照指示安裝即可。 注意:安裝新版本時,需要卸載舊版本,否則會導致軟體衝突,無法正常使用。 方法二:在WPSOf
