

vue利用better-scroll實現輪播圖與頁面滾動

在我们日常的项目开发中,处理滚动和轮播图是再常见不过的需求了,本文主要和大家介绍了关于vue利用better-scroll实现轮播图与页面滚动的相关资料,文中给出了详细的示例代码供大家参考学习,需要的朋友们下面来一起看看吧。
前言
better-scroll 也很强大,不仅可以做普通的滚动列表,还可以做轮播图、picker 等等...所以本文主要给大家介绍了关于vue用better-scroll实现轮播图与页面滚动的相关内容,分享出来供大家参考学习,下面话不多说了,来一起看看详细的介绍吧。
1.安装better-scroll
在根目录中package.json的dependencies中添加:
"better-scroll": "^0.1.15"
然后 npm i 安装。
2.封装代码
将better-scroll封装成两个基础组件slider和scroll放于src/base文件夹中。
slider.vue 代码
<template>
<p class="slider" ref="slider">
<p class="slider-group" ref="sliderGroup">
<slot>
</slot>
</p>
<p class="dots">
<span class="dot" :class="{active: currentPageIndex === index }" v-for="(item, index) in dots"></span>
</p>
</p>
</template>
<script>
import {addClass} from '../common/js/dom'
import BScroll from 'better-scroll'
export default{
data() {
return {
dots:[],
currentPageIndex: 0
}
},
props:{
loop:{
type:Boolean,
default:true
},
autoPlay:{
type:Boolean,
default:true
},
interval:{
type: Number,
default:4000
}
},
mounted() {
this._setSliderWidth()
setTimeout(() => {
// 在初始化slider前初始化dot
this._initDots()
this._initSlider()
if (this.autoPlay) {
this._play()
}
}, 20)
// 监听窗口大小改变时间
window.addEventListener('resize', () => {
if (!this.slider) {
return
}
this._setSliderWidth(true)
this.slider.refresh()
})
},
methods:{
_setSliderWidth(isResize) {
this.children = this.$refs.sliderGroup.children
let width = 0
// slider 可见宽度
let sliderWidth = this.$refs.slider.clientWidth
for (let i = 0; i < this.children.length; i++) {
let child = this.children[i]
// 设置每个子元素的样式及高度
addClass(child, 'slider-item')
child.style.width = sliderWidth + 'px'
// 计算总宽度
width += sliderWidth
}
// 循环播放首尾各加一个,因此总宽度还要加两倍的宽度
if (this.loop && !isResize) {
width += 2 * sliderWidth
}
this.$refs.sliderGroup.style.width = width + 'px'
},
_initSlider() {
this.slider = new BScroll(this.$refs.slider, {
scrollX: true,
scrollY: false,
momentum: false,
snap: true,
snapLoop: this.loop,
snapThreshold: 0.3,
snapSpeed: 400,
// click:true
})
// 监听滚动结束时间获取pageX
this.slider.on('scrollEnd', () => {
let pageIndex = this.slider.getCurrentPage().pageX
if (this.loop) {
// 由于bscroll循环播放首尾各加一个,因此索引-1
pageIndex -= 1
}
this.currentPageIndex = pageIndex
if (this.autoPlay) {
this._play()
}
})
this.slider.on('beforeScrollStart', () => {
if (this.autoPlay) {
clearTimeout(this.timer)
}
})
},
_initDots() {
// 长度为n的空数组
this.dots = new Array(this.children.length)
},
_play() {
// currentPageIndex为不含首尾副本的索引,因此若有循环要+2
let pageIndex = this.currentPageIndex + 1
if (this.loop) {
pageIndex += 1
}
this.timer = setTimeout(() => {
this.slider.goToPage(pageIndex, 0, 400)
}, this.interval)
}
},
// 生命周期destroyed销毁清除定时器,有利于内存释放
destroyed() {
clearTimeout(this.timer)
},
}
</script>
<style scoped>
.slider{
min-height: 1px;
position: relative;
}
.slider-group{
position: relative;
overflow: hidden;
white-space: nowrap;
}
.slider-item{
float: left;
box-sizing: border-box;
overflow: hidden;
text-align: center;
height: 150px;
overflow: hidden;
}
.slider-item a{
display: block;
width: 100%;
overflow: hidden;
text-decoration: none;
}
.slider-item img{
display: block;
width: 100%;
}
.dots{
position: absolute;
right: 0;
left: 0;
bottom: 12px;
text-align: center;
font-size: 0;
}
.dot{
display: inline-block;
margin: 0 4px;
width: 8px;
height: 8px;
border-radius: 50%;
background: red;
}
.active{
width: 20px;
border-radius: 5px;
}
</style>该代码引用common/js/dom.js中的addClass()方法为每个轮播图添加一个slider-item类,dom.js代码如下:
export function hasClass (el, className) {
 // 开始或空白字符+类名+空白字符或结束
 let reg = new RegExp('(^|\\s)' + className + '(\\s|$)')
 // 测试元素是否有该类名,返回布尔值
 return reg.test(el.className)
}

export function addClass (el, className) {
 if (hasClass(el, className)) {
 return
 }
// 以空白符为切割位置切割生成新数组
 let newClass = el.className.split(' ')
// 数组中加入新类名
 newClass.push(className)
// 将数组元素放入一个字符串,以空白符间隔
 el.className = newClass.join(' ')
}scroll.vue代码
<template>
<p ref="wrapper">
<slot></slot>
</p>
</template>
<script>
import BScroll from 'better-scroll'
export default {
props: {
probeType: {
type: Number,
default: 1
},
click: {
type: Boolean,
default: true
},
listenScroll: {
type: Boolean,
default: false
},
object: {
type: Object,
default: null
},
data: {
type: Array,
default: null
},
string: {
type: String,
default: ''
},
pullup: {
type: Boolean,
default: false
},
beforeScroll: {
type: Boolean,
default: false
},
refreshDelay: {
type: Number,
default: 20
}
},
mounted() {
setTimeout(() => {
this._initScroll()
}, 20)
},
methods: {
_initScroll() {
if (!this.$refs.wrapper) {
return
}
this.scroll = new BScroll(this.$refs.wrapper, {
probeType: this.probeType,
click: this.click
})
if (this.listenScroll) {
let me = this
// pos为位置参数
this.scroll.on('scroll', (pos) => {
me.$emit('scroll', pos)
})
}
if (this.pullup) {
this.scroll.on('scrollEnd', () => {
if (this.scroll.y <= (this.scroll.maxScrollY + 50)) {
this.$emit('scrollToEnd')
}
})
}
if (this.beforeScroll) {
this.scroll.on('beforeScrollStart', () => {
this.$emit('beforeScroll')
})
}
},
disable() {
this.scroll && this.scroll.disable()
},
enable() {
this.scroll && this.scroll.enable()
},
refresh() {
this.scroll && this.scroll.refresh()
},
scrollTo() {
this.scroll && this.scroll.scrollTo.apply(this.scroll, arguments)
},
scrollToElement() {
this.scroll && this.scroll.scrollToElement.apply(this.scroll, arguments)
}
},
watch: {
data() {
setTimeout(() => {
this.refresh()
}, this.refreshDelay)
},
string() {
setTimeout(() => {
this.refresh()
}, this.refreshDelay)
},
object() {
setTimeout(() => {
this.refresh()
}, this.refreshDelay)
}
}
}
</script>
<style>
</style>3.使用封装组件
使用这两个组件的页面组件home.vue 代码如下:
<template>
<p>
<scroll :data="su" class="scroll">
<p>
<p class="slider-wrapper">
<slider>
<p v-for='item in slider'>
<a href="">
<img :src="item.url" alt="">
</a>
</p>
</slider>
</p>
<ul v-for='item in su'>
<li>{{item}}</li>
</ul>
</p>
</scroll>
</p>
</template>
<script>
import Slider from '../base/slider'
import Scroll from '../base/scroll'
export default {
data () {
return {
slider: [
{url: 'http://upload-images.jianshu.io/upload_images/7932253-54c81df0beed405b.jpg?imageMogr2/auto-orient/strip%7CimageView2/2/w/1080/q/50'},
{url: 'https://y.gtimg.cn/music/photo_new/T003R720x288M000004ERTpn1UBu2f.jpg?max_age=2592000&max_age=2592000'},
{url: 'https://y.gtimg.cn/music/photo_new/T003R720x288M00000077s7P0HaZpc.jpg?max_age=2592000&max_age=2592000'},
{url: 'https://y.gtimg.cn/music/photo_new/T003R720x288M000001QL1Si05yMPq.jpg?max_age=2592000&max_age=2592000'},
{url: 'https://y.gtimg.cn/music/photo_new/T003R720x288M000002ke7OC3ooZ5g.jpg?max_age=2592000&max_age=2592000'},
],
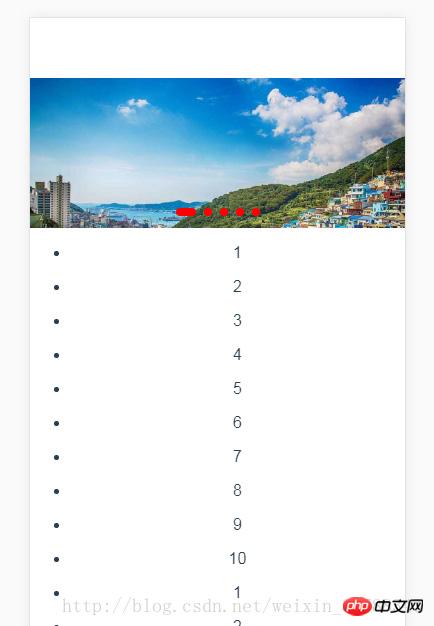
su:[1,2,3,4,5,6,7,8,9,10,1,2,3,4,2,3,5,8,7,4,]
}
},
methods: {
},
components: {
Slider,
Scroll
}
}
</script>
<style>
.slider-wrapper{
width: 100%;
position: relative;
overflow: hidden;
}
.scroll{
height: 500px;
}
</style>注意点:
slider组件的父元素必须给他一个100%的宽度且定义overflow:hidden,否则整个页面会被撑开,整个页面都能横向滚动
scroll组件在引用时必须给他一个固定高度。只有拥有固定高度才会发生滚动。
效果图如下:
相关推荐:
关于JQuery和html+css实现带小圆点和左右按钮的轮播图分享
以上是vue利用better-scroll實現輪播圖與頁面滾動的詳細內容。更多資訊請關注PHP中文網其他相關文章!

熱AI工具

Undresser.AI Undress
人工智慧驅動的應用程序,用於創建逼真的裸體照片

AI Clothes Remover
用於從照片中去除衣服的線上人工智慧工具。

Undress AI Tool
免費脫衣圖片

Clothoff.io
AI脫衣器

AI Hentai Generator
免費產生 AI 無盡。

熱門文章
熱工具

記事本++7.3.1
好用且免費的程式碼編輯器

SublimeText3漢化版
中文版,非常好用

禪工作室 13.0.1
強大的PHP整合開發環境

Dreamweaver CS6
視覺化網頁開發工具

SublimeText3 Mac版
神級程式碼編輯軟體(SublimeText3)
熱門話題


 如何在Word複製頁面
Feb 20, 2024 am 10:09 AM
如何在Word複製頁面
Feb 20, 2024 am 10:09 AM
是否要複製MicrosoftWord中的頁面,並保持格式不變?這是一個聰明的想法,因為當您想要建立特定文件佈局或格式的多個副本時,在Word中複製頁面可能是一種有用的節省時間的技術。本指南將逐步引導您在Word中複製頁面的過程,無論是建立範本還是複製文件中的特定頁面。這些簡單的說明旨在幫助您輕鬆地重新製作頁面,省去從頭開始的麻煩。為什麼要在MicrosoftWord中複製頁面?在Word中複製頁面非常有益的原因有以下幾點:當您有一個具有特定佈局或格式的文件要複製時。與從頭開始重新建立整個頁面不同
 JavaScript 如何實作捲動到指定元素位置的功能?
Oct 22, 2023 am 08:12 AM
JavaScript 如何實作捲動到指定元素位置的功能?
Oct 22, 2023 am 08:12 AM
JavaScript如何實現捲動到指定元素位置的功能?在網頁中,當我們需要將使用者的視線聚焦到某個特定的元素位置時,我們可以使用JavaScript來實現滾動到指定元素位置的功能。本文將介紹如何透過JavaScript實現此功能,並提供對應的程式碼範例。首先,我們需要取得目標元素的位置資訊。可以使用Element.getBoundingClient
 如何在iPhone上自訂和編輯待機模式:iOS 17的新功能
Sep 21, 2023 pm 04:01 PM
如何在iPhone上自訂和編輯待機模式:iOS 17的新功能
Sep 21, 2023 pm 04:01 PM
待機是iOS17更新中的一項新功能,它提供了一種新的增強方式,可以在手機快速閒置時存取資訊。透過StandBy,您可以輕鬆查看時間、查看即將發生的事件、瀏覽日曆、獲取您所在位置的天氣更新等等。啟動後,iPhone在充電時設定為橫向時會直觀地進入待機模式。此功能非常適合床頭櫃等無線充電點,或在日常任務中離開iPhone充電時。它允許您輕掃待機中顯示的各種小部件,以存取來自各種應用程式的不同資訊集。但是,您可能希望根據您的偏好和您經常需要的資訊修改這些小部件,甚至刪除一些小部件。因此,讓我們深入
 如何快速刷新網頁?
Feb 18, 2024 pm 01:14 PM
如何快速刷新網頁?
Feb 18, 2024 pm 01:14 PM
頁面刷新在我們日常的網路使用中非常常見,當我們訪問一個網頁後,有時會遇到一些問題,例如網頁加載不出來或顯示不正常等。這時候我們通常會選擇刷新頁面來解決問題,那麼要如何快速刷新頁面呢?下面我們就來探討頁面刷新的快捷鍵。頁面刷新快捷鍵是一種透過鍵盤操作來快速刷新目前網頁的方法。在不同的作業系統和瀏覽器中,頁面刷新的快捷鍵可能有所不同。下面我們以常見的W
 重新排列、停用和刪除 iPhone 主畫面頁面的方法
Nov 29, 2023 am 08:22 AM
重新排列、停用和刪除 iPhone 主畫面頁面的方法
Nov 29, 2023 am 08:22 AM
在iOS中,Apple允許您停用iPhone上的單一主畫面頁面。還可以重新排列主螢幕頁面的順序,並直接刪除頁面,而不僅僅是停用它們。這是它的工作原理。如何重新排列主畫面頁面觸碰並按住主畫面上的空格以進入抖動模式。輕點代表主螢幕頁面的圓點行。在顯示的主螢幕網格中,輕觸並拖曳頁面以將其相對於其他頁面重新排列。其他人會移動以響應您的拖曳動作。當您對新排列感到滿意時,點擊螢幕右上角的“完成”,然後再次點擊“完成”以退出抖動模式。如何停用或刪除主畫面頁面觸碰並按住主畫面上的空格可進入抖動模式。輕點代表主螢幕
 HTML、CSS和jQuery:製作一個自動滾動的公告欄
Oct 27, 2023 pm 06:31 PM
HTML、CSS和jQuery:製作一個自動滾動的公告欄
Oct 27, 2023 pm 06:31 PM
HTML、CSS和jQuery:製作一個自動滾動的公告欄在現代網頁設計中,公告欄常常被用來重要的訊息傳達和吸引使用者註意。一個自動滾動的公告欄在網頁上受到了廣泛的應用,它能夠讓公告內容以動畫形式在頁面中滾動顯示,提高資訊的展示效果和用戶體驗。本文將介紹如何使用HTML、CSS和jQuery來製作一個自動捲動的公告欄,並提供具體的程式碼範例。首先,我們需要一個HT
 3秒跳轉頁面實作方法:PHP程式指南
Mar 25, 2024 am 10:42 AM
3秒跳轉頁面實作方法:PHP程式指南
Mar 25, 2024 am 10:42 AM
標題:3秒跳轉頁面實作方法:PHP程式設計指南在網頁開發中,頁面跳轉是常見的操作,一般情況下我們使用HTML中的meta標籤或JavaScript的方法進行頁面跳轉。不過,在某些特定的情況下,我們需要在伺服器端進行頁面跳轉。本文將介紹如何使用PHP程式實作一個在3秒內自動跳到指定頁面的功能,同時會給出具體的程式碼範例。 PHP實現頁面跳躍的基本原理PHP是一種在
 監控iframe的滾動行為
Feb 18, 2024 pm 08:40 PM
監控iframe的滾動行為
Feb 18, 2024 pm 08:40 PM
如何監聽一個iframe的滾動,需要具體程式碼範例當我們在網頁中使用iframe標籤嵌入其他網頁時,有時需要對iframe中的內容進行一些特定的操作。其中一個常見的需求是監聽iframe的捲動事件,以便在捲動發生時執行對應的程式碼。以下將介紹如何使用JavaScript來監聽一個iframe的捲動,並提供具體的程式碼範例供參考。在取得iframe元素首先,我們需要
