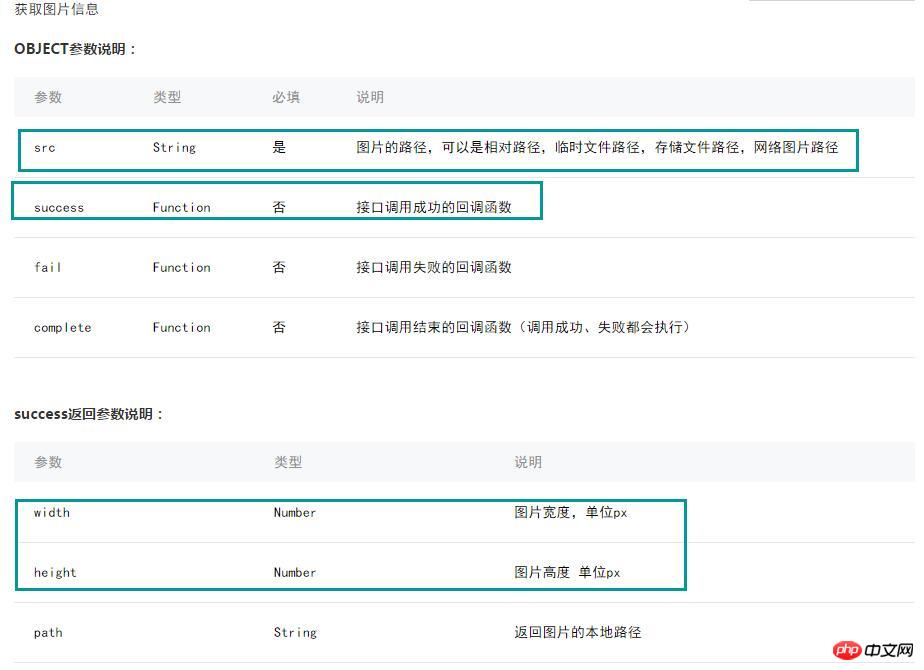
本文主要為大家詳細介紹了微信小程式wx.getImageInfo()如何獲取圖片信息,具有一定的參考價值,感興趣的小伙伴們可以參考一下,希望能幫助到大家。
一.知識點

#二.列子
( 1).載入時
<view class="zn-uploadimg">
  <image src="{{tempFilePaths}}" mode="aspecFill" style="width: 100%; height: 450rpx" />
  <text>图片的大小:{{imgwidth}}px*{{imgheight}}px</text>
</view>var app = getApp()
Page({
data: {
tempFilePaths: '../uploads/foods.jpg',
imgwidth:0,
imgheight:0,
},
onReady:function(){
// 页面渲染完成
var _this = this;
wx.getImageInfo({
src: _this.data.tempFilePaths,
success: function (res) {
_this.setData({
imgwidth:res.width,
imgheight:res.height,
})
}
})
}
})
#(2).上傳圖片時
##
<view class="zn-uploadimg">
  <button type="primary"bindtap="chooseimage">获取图片</button>
  <image src="{{tempFilePaths}}" mode="aspecFill" style="width: 100%; height: 450rpx"/>
  <text>图片的大小:{{imgwidth}}px*{{imgheight}}px</text>
</view>.zn-uploadimg{
padding:1rem;
}
.zn-uploadimg image{
margin:1rem 0;
}var app = getApp()
Page({
data: {
tempFilePaths: '',
imgwidth:0,
imgheight:0,
},
/**
* 上传图片
*/
chooseimage: function () {
var _this = this;
wx.chooseImage({
count: 1, // 默认9
sizeType: ['original', 'compressed'], // 可以指定是原图还是压缩图,默认二者都有
sourceType: ['album', 'camera'], // 可以指定来源是相册还是相机,默认二者都有
success: function (res) {
// 返回选定照片的本地文件路径列表,tempFilePath可以作为img标签的src属性显示图片
_this.setData({
tempFilePaths:res.tempFilePaths
})
wx.getImageInfo({
src: res.tempFilePaths[0],
success: function (res) {
_this.setData({
imgwidth:res.width,
imgheight:res.height,
})
}
})
}
})
}
})
以上是wx.getImageInfo()如何取得圖片訊息的詳細內容。更多資訊請關注PHP中文網其他相關文章!


