這次帶給大家Vue.js的清單渲染v-for 陣列 物件 子元件,使用Vue.js的清單渲染v-for 陣列物件子元件的注意事項有哪些,以下就是實戰案例,一起來看一下。
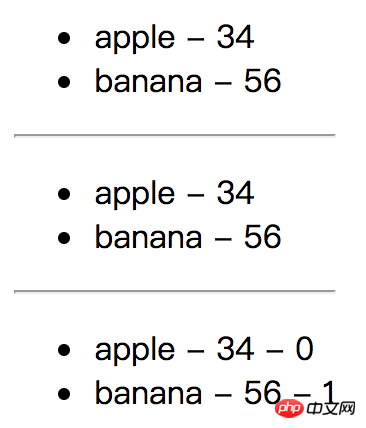
v-for(陣列)
<template>
<p id="myapp">
<!--普通-->
<ul>
<li v-for="item in list">
{{item.name}} - {{item.price}} </li>
</ul>
<hr>
<!--v-text-->
<ul>
<li v-for="item in list" v-text="item.name + ' - ' + item.price"></li>
</ul>
<hr>
<!--带序号 并且给奇数行添加一个class=add-->
<ul>
<li v-for="(item,index) in list" :class="{add:index % 2}">
{{item.name}} - {{item.price}} - {{index}} </li>
</ul>
</p></template><script>
export default { data: function () { return { list: [
{ name: 'apple', price: 34
},
{ name: 'banana', price: 56
}
]
}
}
}</script>執行結果:

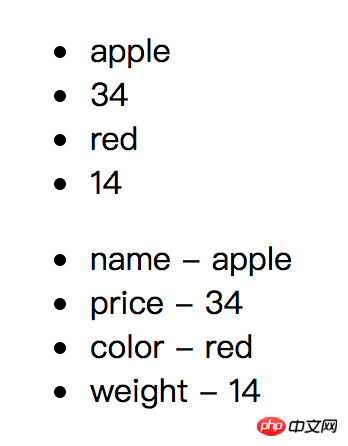
#v-for(物件) 取得key - value
#<template>
<p id="myapp">
<!--v-for 对象-->
<!--只获取value-->
<ul>
<li v-for="value in objList">
{{value}} </li>
</ul>
<!--获取key -value-->
<ul>
<li v-for="(value, key) in objList">
{{key}} - {{value}} </li>
</ul>
</p></template><script>
export default { data: function () { return { objList: { name: 'apple', price: 34, color: 'red', weight: 14
}
}
}
}</script>執行結果:

v-for(子元件)
先建立一個a元件
#程式碼a.vue程式碼如下:
<template>
<p class="hello">
{{ hello }} </p></template><script>
export default {
data () { return { hello: 'I am componnet a'
}
}
}</script>在MyApp.vue中呼叫
<template>
<p id="myapp">
<componentA v-for="(value, key) in objList"></componentA>
</p></template><script>
import componentA from './components/a.vue'
export default {// 注册组件
components: {componentA}, data: function () { return { objList: { name: 'apple', price: 34, color: 'red', weight: 14
}
}
}
}</script>執行結果:
相信看了本文案例你已經掌握了方法,更多精彩請關注php中文網其它相關文章!
推薦閱讀:
以上是Vue.js的列表渲染 v-for 陣列 物件 子元件的詳細內容。更多資訊請關注PHP中文網其他相關文章!


