

VUE對ElTableColumn進行擴展
這次帶給大家VUE對ElTableColumn進行擴展,VUE對ElTableColumn進行擴展的注意事項有哪些,下面就是實戰案例,一起來看一下。
ElTableColumn本來就是這個樣子的:
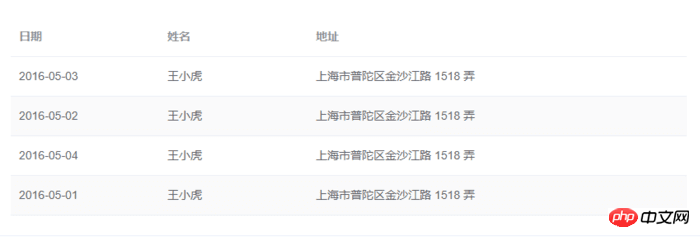
#要做成的是這個樣子:
<!-- ElTableColumnPro.vue -->
<template>
<el-table-column v-if="visible" :formatter="formatter" :align='align' :prop="prop" :header-align="headerAlign" :label="label" :width="width" :render-header="renderHeader" >
<template slot-scope="scope">
<slot :row="scope.row" :$index="scope.$index" >
<span>{{fomatMethod(scope.row[prop])}}</span>
</slot>
</template>
</el-table-column>
</template>
<script>
import moment from "moment";
export default {
name: "el-table-column-pro",
props: {
prop: {
type: String
},
label: {
type: String
},
width: {
type: Number
},
renderType: {
type: String,
validator: value => ["date", "input", "select"].includes(value)
},
placeholder: {
type: String
},
rederWidth: {
type: String,
default: "230px"
},
param: {
type: String,
default: ""
},
startDate: {
type: String
},
endDate: {
type: String
},
selectList: {
type: Array
},
isClear: {
type: Boolean,
default:true
},
visible: {
type: Boolean,
default: true
},
filterIcon: {
type: String,
default: "el-icon-search"
},
callback: {
type: Function
},
formatter: {
type: Function,
default:(row, column, cellValue)=>cellValue
},
align:{
type:String
},
headerAlign:{
type:String
}
},
data() {
return {
formatD:this.filterIcon
};
},
methods: {
fomatMethod(value){
return this.formatter('','',value)
},
renderHeader(createElement, { column, $index }) {
switch (this.renderType) {
case "date":
return this.renderDate(createElement, { column, $index });
case "input":
return this.rederInput(createElement, { column, $index });
case "select":
return this.rederSelect(createElement, { column, $index });
default:
return column.label;
}
},
rederInput(createElement, { column, $index }) {
return createElement(
"p",
{
class: "filters",
style: {
color: column.color
}
},
[
createElement(
"el-popover",
{
props: {
placement: "bottom",
width: "200",
trigger: "click"
}
},
[
createElement("el-input", {
props: {
placeholder: this.placeholder,
value: this.param
},
nativeOn: {
keyup: event => {
if (event.keyCode === 13) {
this.$emit("update:param", event.target.value);
this.callback && this.callback();
}
}
},
on: {
blur: event => {
this.$emit("update:param", event.target.value);
this.callback && this.callback();
}
}
}),
createElement(
"span",
{
slot: "reference"
},
[
column.label,
createElement("i", {
class: this.filterIcon,
style: {
marginLeft: "4px"
}
})
]
)
]
)
]
);
},
rederSelect(createElement, { column, $index }) {
return createElement(
"p",
{
class: "filters",
style: {
color: column.color
}
},
[
createElement(
"el-popover",
{
props: {
placement: "bottom",
width: "200",
trigger: "click"
}
},
[
createElement(
"el-select",
{
props: {
placeholder: this.placeholder,
value: this.param,
clearable: this.isClear
},
on: {
input: value => {
this.$emit("update:param", value);
this.callback && this.callback();
}
}
},
[
this.selectList.map(item => {
return createElement("el-option", {
props: {
value: item.value,
label: item.label
}
});
})
]
),
createElement(
"span",
{
slot: "reference"
},
[
column.label,
createElement("i", {
class: this.filterIcon,
style: {
marginLeft: "4px"
}
})
]
)
]
)
]
);
},
renderDate(createElement, { column, $index }) {
return createElement(
"p",
{
class: "filters"
},
[
createElement(
"el-popover",
{
props: {
placement: "bottom",
width: this.rederWidth,
trigger: "click"
}
},
[
createElement("el-date-picker", {
props: {
placeholder: this.placeholder,
value: this.value,
type: "daterange",
rangeSeparator:"至",
startPlaceholder:"开始日期",
endPlaceholder:"结束日期",
},
style: {
width: this.rederWidth
},
on: {
input: value => {
if (value) {
const startDate = moment(value[0]).format("YYYY-MM-DD");
const endDate = moment(value[1]).format("YYYY-MM-DD");
this.$emit("update:startDate", startDate);
this.$emit("update:endDate", endDate);
this.callback && this.callback();
}
}
}
}),
createElement(
"span",
{
slot: "reference"
},
[
column.label,
createElement("i", {
class: this.filterIcon,
style: {
marginLeft: "4px"
}
})
]
)
]
)
]
);
}
}
};
</script>
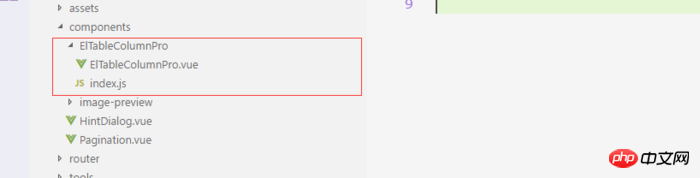
<!-- index.js -->
import ElTableColumnPro from './ElTableColumnPro'
ElTableColumnPro.install = function(Vue) {
Vue.component(ElTableColumnPro.name, ElTableColumnPro);
};
export default ElTableColumnPro;安裝##import ElTableColumnPro from 'components/ElTableColumnPro/index'
...
...
...
Vue.use(ElTableColumnPro)
 <el-table :data="bankFlow" style="width:100%" stripe>
    <el-table-column-pro :visible="showMore" prop="transactionId" label="流水号" :width="120"> </el-table-column-pro>
    <el-table-column-pro prop="clientCode" label="客户代码 " :width="120" placeholder="请输入客户代码" :callback="requestTransactionLogs" renderType="input" :param.sync="request_params.clientCode"> </el-table-column-pro>
    <el-table-column-pro prop="eventTypeName" label="事件 " placeholder="请选择事件"  :selectList="listEventEnum" :callback="requestTransactionLogs" renderType="select" :param.sync="request_params.event" :width="100"> </el-table-column-pro>
    <el-table-column-pro prop="createTime" :callback="requestTransactionLogs" :startDate.sync="request_params.startDate" :endDate.sync="request_params.endDate" :formatter="$timeformat" label="时间" renderType="date" :width="180" ></el-table-column-pro>
 </el-table>
 <el-table :data="lists.content" v-loading="loading" @row-dblclick="detail" >
    <el-table-column-pro :width="120" prop="clientCode" label="客户代码 " align="center" header-align="center" placeholder="请输入客户代码" :callback="getLists" renderType="input" :param.sync="params.clientCode"></el-table-column-pro>
    <el-table-column-pro label="内容 " placeholder="请输入内容" :callback="getLists" renderType="input" :param.sync="params.content">
        <template slot-scope="scope">
           <pre class="brush:php;toolbar:false">{{scope.row.content}}
推薦閱讀:
JS裡如何驗證E-mail正確位址#Vue.js實作自訂登入表單以上是VUE對ElTableColumn進行擴展的詳細內容。更多資訊請關注PHP中文網其他相關文章!

熱AI工具

Undresser.AI Undress
人工智慧驅動的應用程序,用於創建逼真的裸體照片

AI Clothes Remover
用於從照片中去除衣服的線上人工智慧工具。

Undress AI Tool
免費脫衣圖片

Clothoff.io
AI脫衣器

Video Face Swap
使用我們完全免費的人工智慧換臉工具,輕鬆在任何影片中換臉!

熱門文章
熱工具

記事本++7.3.1
好用且免費的程式碼編輯器

SublimeText3漢化版
中文版,非常好用

禪工作室 13.0.1
強大的PHP整合開發環境

Dreamweaver CS6
視覺化網頁開發工具

SublimeText3 Mac版
神級程式碼編輯軟體(SublimeText3)


 php如何使用PHP的SNMP擴充?
Jun 02, 2023 am 10:22 AM
php如何使用PHP的SNMP擴充?
Jun 02, 2023 am 10:22 AM
PHP的SNMP擴充是一種讓PHP能夠透過SNMP協定與網路設備進行通訊的擴充功能。使用此擴展可以方便地獲取和修改網路設備的配置信息,例如路由器、交換器等設備的CPU、內存、網絡接口等信息,也可以進行諸如開關設備端口等控制操作。本文將介紹SNMP協定的基礎知識、PHP的SNMP擴充的安裝方法以及如何在PHP中使用SNMP擴充進行網路設備的監控與控制。一、SN
 從頭到尾:如何使用php擴充cURL進行HTTP請求
Jul 29, 2023 pm 05:07 PM
從頭到尾:如何使用php擴充cURL進行HTTP請求
Jul 29, 2023 pm 05:07 PM
從頭到尾:如何使用php擴充cURL進行HTTP請求引言:在Web開發中,經常需要與第三方API或其他遠端伺服器進行通訊。而使用cURL進行HTTP請求是一種常見且強大的方式。本文將介紹如何使用php擴充cURL來執行HTTP請求,並提供一些實用的程式碼範例。一、準備工作首先,請確保php已安裝cURL擴充。可以在命令列執行php-m|grepcurl查
 PHP 函數的擴充和第三方模組
Apr 13, 2024 pm 02:12 PM
PHP 函數的擴充和第三方模組
Apr 13, 2024 pm 02:12 PM
若要擴充PHP函數功能,可以使用擴充和第三方模組。擴充功能提供附加函數和類,可透過pecl套件管理器安裝和啟用。第三方模組提供特定功能,可透過Composer套件管理器安裝。實作案例包括使用擴充解析複雜JSON資料和使用模組驗證資料。
 CENTOS7下如何安裝mbstring擴充?
Jan 06, 2024 pm 09:59 PM
CENTOS7下如何安裝mbstring擴充?
Jan 06, 2024 pm 09:59 PM
1.UncaughtError:Calltoundefinedfunctionmb_strlen();出現如上錯誤時,說明我們沒裝上mbstring擴展;2.進入PHP安裝目錄cd/temp001/php-7.1.0/ext/mbstring3.啟動phpize(/usr/local/bin /phpize或/usr/local/php7-abel001/bin/phpize)指令來安裝php擴充4../configure--with-php-config=/usr/local/php7-abel
 php如何使用PHP的POSIX擴充?
Jun 03, 2023 am 08:01 AM
php如何使用PHP的POSIX擴充?
Jun 03, 2023 am 08:01 AM
PHP的POSIX擴充是一組允許PHP與POSIX相容作業系統互動的函數與常數。 POSIX(PortableOperatingSystemInterface)是一組作業系統介面標準,旨在允許軟體開發人員編寫可在各種UNIX或UNIX類別作業系統上運行的應用程式。本文將介紹如何使用PHP的POSIX擴展,包括安裝和使用。一、安裝PHP的POSIX擴充在
 php如何使用PHP的ZipArchive擴充?
Jun 02, 2023 am 08:13 AM
php如何使用PHP的ZipArchive擴充?
Jun 02, 2023 am 08:13 AM
PHP是一種流行的伺服器端語言,可以用來開發網頁應用程式和處理檔案。 PHP的ZipArchive擴充功能是一個強大的工具,可以在PHP中操作zip檔。在這篇文章中,我們將介紹如何使用PHP的ZipArchive擴充功能來建立、讀取和修改zip檔。一、安裝ZipArchive擴充功能在使用ZipArchive擴充功能之前,需要確保已經安裝了這個擴充功能。安裝方法如下:1.安
 PHP和WebDriver擴充:如何模擬使用者點擊和輸入操作
Jul 07, 2023 pm 05:10 PM
PHP和WebDriver擴充:如何模擬使用者點擊和輸入操作
Jul 07, 2023 pm 05:10 PM
PHP和WebDriver擴充:如何模擬使用者點擊和輸入操作近年來,隨著Web應用程式的快速發展,自動化測試變得越來越重要。在自動化測試中,模擬使用者操作是一個關鍵的環節,它可以使我們更準確地測試和驗證我們的應用程式。在PHP開發中,我們通常使用SeleniumWebDriver來實現自動化測試。 SeleniumWebDriver是一種強大的工具,它可以模擬
 php如何使用PHP的Phar擴充?
May 31, 2023 pm 11:31 PM
php如何使用PHP的Phar擴充?
May 31, 2023 pm 11:31 PM
隨著PHP的發展和應用場景的不斷擴大,Phar擴展已成為PHP編程中的重要一環。 Phar是PHPArchive的縮寫,它可以將多個PHP文件和資源打包成單一文件,方便進行分發和管理。本文將介紹如何使用PHP的Phar擴充來進行打包和管理。安裝Phar擴充功能首先,我們需要檢查PHP是否已經安裝Phar擴充。在Linux下,透過終端機輸入以下命令:php-m
