vue父元件呼叫子元件實戰案例
這次帶給大家vue父元件呼叫子元件實戰案例,vue父元件呼叫子元件實戰案例的注意事項有哪些,下面就是實戰案例,一起來看一下。
情境:
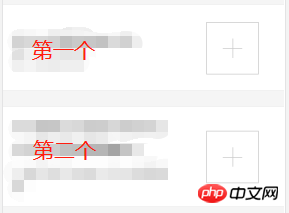
父元件中引入上傳附件的子元件:點選元件可以分別上傳對應要求的圖片,子元件內部循環可建立多個模組.
父元件傳入數組子元件循環來建立不同的元件模組,所有事件都在子元件內部.

父元件頁面的上方同時有一個上傳圖片按鈕上傳圖片後會顯示在第一個模組:

設想想法:點擊父元件中的按鈕觸發子元件中上傳方法:
子元件上定義ref="refName",父元件的方法中用this.$refs .refName.method去呼叫子元件方法
子元件中處理上傳的方法:
 fileClick(index) {
   console.log('子组件的fileClick被调用了')
   console.log('index:  '+index)
   // this.aaa();
   if(!this.fileInfor[index].imgUrl){
   //如果当前框里没有图片,则实现上传
   document.getElementsByClassName('upload_file')[index].click();
  }
},父元件template
<template>
  <x-button type="submit" class="custom-primary" @click.native="xiechengUpload">上传图片</x-button>
  <up-load :fileInformation="fileInformation" ref="uploadRef"></up-load>
</template>
父元件method中定義方法,同時傳入對應的index值.
Upload(){
  // console.log('父组件的xiechengUpload被调用了')
  this.$refs.uploadRef.fileClick(0);
},此時就可以透過上傳按鈕將圖片放到子元件的第一個模組中了.
下面看下Vue父元件呼叫子元件事件
Vue父元件傳遞事件/呼叫事件
#Vue父元件向子元件傳遞事件/呼叫事件
不是傳遞資料(props)哦,適用於Vue 2.0
方法一:子元件監聽父元件傳送的方法
方法二:父元件呼叫子元件方法
子元件:
export default {
  mounted: function () {
   this.$nextTick(function () {
    this.$on('childMethod', function () {
     console.log('监听成功')
    })
   })
  },
  methods {
    callMethod () {
     console.log('调用成功')
    }
  }
}父元件: <child ref="child" @click="click"></child>
export default {
methods: {
click () {
this.$refs.child.$emit('childMethod') // 方法1
this.$refs.child.callMethod() // 方法2
},
components: {
child: child
}
}
以上是vue父元件呼叫子元件實戰案例的詳細內容。更多資訊請關注PHP中文網其他相關文章!

熱AI工具

Undresser.AI Undress
人工智慧驅動的應用程序,用於創建逼真的裸體照片

AI Clothes Remover
用於從照片中去除衣服的線上人工智慧工具。

Undress AI Tool
免費脫衣圖片

Clothoff.io
AI脫衣器

Video Face Swap
使用我們完全免費的人工智慧換臉工具,輕鬆在任何影片中換臉!

熱門文章

熱工具

記事本++7.3.1
好用且免費的程式碼編輯器

SublimeText3漢化版
中文版,非常好用

禪工作室 13.0.1
強大的PHP整合開發環境

Dreamweaver CS6
視覺化網頁開發工具

SublimeText3 Mac版
神級程式碼編輯軟體(SublimeText3)
 如何使用Python呼叫百度地圖API實作地理位置查詢功能?
Jul 31, 2023 pm 03:01 PM
如何使用Python呼叫百度地圖API實作地理位置查詢功能?隨著網路的發展,地理位置資訊的取得和利用越來越重要。百度地圖是一款非常常見且實用的地圖應用,它提供了豐富的地理位置查詢服務。本文將介紹如何使用Python呼叫百度地圖API實作地理位置查詢功能,並附上程式碼範例。申請百度地圖開發者帳號和應用程式首先,你需要擁有一個百度地圖開發者帳號,並建立一個應用程式。登入
 PHP實戰:快速實作斐波那契數列的程式碼範例
Mar 20, 2024 pm 02:24 PM
PHP實戰:快速實現斐波那契數列的程式碼範例斐波那契數列是數學中一個非常有趣且常見的數列,其定義如下:第一個和第二個數為0和1,從第三個數開始,每個數都是前兩個數的和。斐波那契數列的前幾個數字依序為0,1,1.2,3,5,8,13,21,...依此類推。在PHP中,我們可以透過遞歸和迭代兩種方式來實現斐波那契數列的生成。下面我們分別來展示這兩
 Java開發實戰:整合七牛雲雲端儲存服務實作文件上傳
Jul 06, 2023 pm 06:22 PM
Java開發實戰:整合七牛雲端儲存服務實作檔案上傳引言隨著雲端運算和雲端儲存的發展,越來越多的應用程式需要將檔案上傳至雲端進行儲存和管理。雲端儲存服務的優勢在於高可靠性、可擴充性和靈活性。本文將介紹如何使用Java語言開發,整合七牛雲端儲存服務,實現文件上傳功能。七牛雲簡介七牛雲是國內領先的雲端儲存服務供應商,提供了全面的雲端儲存和內容分發服務。使用者可以透過七牛雲提
 PHP相機呼叫技巧:如何實作多鏡頭切換
Aug 04, 2023 pm 07:07 PM
PHP攝影機呼叫技巧:如何實現多攝影機切換攝影機應用已成為許多Web應用的重要組成部分,例如視訊會議、即時監控等等。在PHP中,我們可以使用各種技術來實現對攝影機的呼叫和操作。本文將重點放在如何實現多鏡頭的切換,並提供一些範例程式碼來幫助讀者更好地理解。攝影機呼叫基礎在PHP中,我們可以透過呼叫JavaScript的API來實現攝影機的呼叫。具體來說,我們
 如何解決PHP開發中的外部資源存取和調用
Oct 08, 2023 am 11:01 AM
如何解決PHP開發中的外部資源存取和調用,需要具體程式碼範例在PHP開發中,我們經常會遇到需要存取和調用外部資源的情況,例如API介面、第三方庫或其他伺服器資源。在處理這些外部資源時,我們需要考慮如何進行安全的存取和調用,同時確保效能和可靠性。本文將介紹幾種常見的解決方案,並提供相應的程式碼範例。一、使用curl函式庫進行外部資源呼叫curl是一個非常強大的開源函式庫
 如何透過Python程式呼叫百度地圖API實現地圖展示功能?
Aug 02, 2023 pm 08:27 PM
如何透過Python程式呼叫百度地圖API實現地圖展示功能?隨著網路的快速發展,地圖應用成為了我們生活中不可或缺的一部分。而百度地圖作為國內最大的地圖應用之一,為我們提供了豐富的服務和API接口,可以很方便地實現地圖展示功能。本文將介紹如何透過Python程式呼叫百度地圖API來實現地圖展示功能,並給出對應的程式碼範例。首先,我們需要在百度開放平台上註冊一個
 深入學習 Elasticsearch 查詢文法與實戰
Oct 03, 2023 am 08:42 AM
深入學習Elasticsearch查詢語法與實戰引言:Elasticsearch是一款基於Lucene的開源搜尋引擎,主要用於分散式搜尋與分析,廣泛應用於大規模資料的全文搜尋、日誌分析、推薦系統等場景。在使用Elasticsearch進行資料查詢時,靈活運用查詢語法是提高查詢效率的關鍵。本文將深入探討Elasticsearch查詢語法,並結合實際案例給出
 MySQL表設計實戰:建立一個電商訂單表和商品評論表
Jul 03, 2023 am 08:07 AM
MySQL表設計實戰:建立一個電商訂單表和商品評論表在電商平台的資料庫中,訂單表和商品評論表是兩個非常重要的表格。本文將介紹如何使用MySQL來設計和建立這兩個表格,並給出程式碼範例。一、訂單表的設計與建立訂單表用於儲存使用者的購買訊息,包括訂單編號、使用者ID、商品ID、購買數量、訂單狀態等欄位。首先,我們需要建立一個名為"order"的表格,使用CREATET


