

使用Vue+Flask如何實現登入驗證跳轉(詳細教學)
本篇文章主要介紹了Vue Flask實作簡單的登入驗證跳轉的範例程式碼,現在分享給大家,也給大家做個參考。
本文介紹了Vue Flask實作簡單的登入驗證跳轉,分享給大家,如下:
檔案位置: 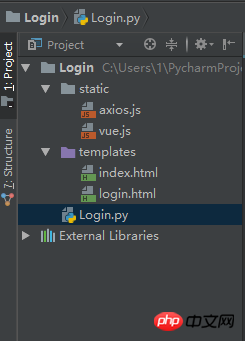
login.html
<!DOCTYPE html>
<html lang="en">
<head>
<meta charset="UTF-8">
<title>Login</title>
<script type="text/javascript" src="../static/vue.js"></script>
<script type="text/javascript" src="../static/axios.js"></script>
</head>
<body>
<p id="login">
<form action="#" novalidate>
<label for="username">Username</label>
<input type="text" name="username" id="username" placeholder="Enter your Name" v-model="username"><br>
<label for="password">Password</label>
<input type="text" name="password" id="password" placeholder="Enter your Password" v-model="password"><br>
<br>
<button type="button" v-on:click="login">Apply</button>
</form>
</p>
<script type="text/javascript">
var login = new Vue({
el: '#login',
data:{
username: '',
password: ''
},
methods: {
login: function () {
axios.post('http://127.0.0.1:5000/login',{
username: this.username,
password: this.password
}).then(function (response) {
console.log(response.status)
// 其实是应该走后台路由
if(parseInt(response.status) === 200){
window.location.href = 'index'
}
}).catch(function (error) {
console.log(error.response)
})
}
}
})
</script>
</body>
</html>index.html
<!DOCTYPE html>
<html lang="en">
<head>
  <meta charset="UTF-8">
  <title>Index</title>
</head>
<body>
  <h1>Hello,This is Index Page!</h1>
</body>
</html>
Login.py
# -*- coding: utf-8 -*-

from flask import Flask, request, session, redirect, url_for, render_template, make_response, jsonify
app = Flask(__name__)


@app.route('/login', methods=('GET', 'POST'))
def login():
  if request.method == 'POST':
    session['username'] = request.json.get('username')
    session['password'] = request.json.get('password')
    # 登录成功,则跳转到index页面
    return jsonify({'code': 200, 'token': "123456"})
  # 登录失败,跳转到当前登录页面
  return render_template('login.html')


@app.route('/index')
def index():
  # 如果用户名和密码都存在,则跳转到index页面,登录成功
  if 'username' in session and 'password' in session:
    return render_template('index.html')
  # 否则,跳转到login页面
  return redirect(url_for('login'))


@app.route('/logout')
def logout():
  session.pop('username', None)
  session.pop('password', None)
  return redirect(url_for('login'))


# set the secret key. keep this really secret:
app.secret_key = 'A0Zr98j/3yX R~XHH!jmN]LWX/,?RT'


if __name__ == '__main__':
app.run(debug=True)上面是我整理給大家的,希望今後會對大家有幫助。
相關文章:
以上是使用Vue+Flask如何實現登入驗證跳轉(詳細教學)的詳細內容。更多資訊請關注PHP中文網其他相關文章!

熱AI工具

Undresser.AI Undress
人工智慧驅動的應用程序,用於創建逼真的裸體照片

AI Clothes Remover
用於從照片中去除衣服的線上人工智慧工具。

Undress AI Tool
免費脫衣圖片

Clothoff.io
AI脫衣器

AI Hentai Generator
免費產生 AI 無盡。

熱門文章
熱工具

記事本++7.3.1
好用且免費的程式碼編輯器

SublimeText3漢化版
中文版,非常好用

禪工作室 13.0.1
強大的PHP整合開發環境

Dreamweaver CS6
視覺化網頁開發工具

SublimeText3 Mac版
神級程式碼編輯軟體(SublimeText3)
熱門話題


 vue怎麼給按鈕添加函數
Apr 08, 2025 am 08:51 AM
vue怎麼給按鈕添加函數
Apr 08, 2025 am 08:51 AM
可以通過以下步驟為 Vue 按鈕添加函數:將 HTML 模板中的按鈕綁定到一個方法。在 Vue 實例中定義該方法並編寫函數邏輯。
 vue中怎麼用bootstrap
Apr 07, 2025 pm 11:33 PM
vue中怎麼用bootstrap
Apr 07, 2025 pm 11:33 PM
在 Vue.js 中使用 Bootstrap 分為五個步驟:安裝 Bootstrap。在 main.js 中導入 Bootstrap。直接在模板中使用 Bootstrap 組件。可選:自定義樣式。可選:使用插件。
 vue.js怎麼引用js文件
Apr 07, 2025 pm 11:27 PM
vue.js怎麼引用js文件
Apr 07, 2025 pm 11:27 PM
在 Vue.js 中引用 JS 文件的方法有三種:直接使用 <script> 標籤指定路徑;利用 mounted() 生命週期鉤子動態導入;通過 Vuex 狀態管理庫進行導入。
 vue中的watch怎麼用
Apr 07, 2025 pm 11:36 PM
vue中的watch怎麼用
Apr 07, 2025 pm 11:36 PM
Vue.js 中的 watch 選項允許開發者監聽特定數據的變化。當數據發生變化時,watch 會觸發一個回調函數,用於執行更新視圖或其他任務。其配置選項包括 immediate,用於指定是否立即執行回調,以及 deep,用於指定是否遞歸監聽對像或數組的更改。
 vue返回上一頁的方法
Apr 07, 2025 pm 11:30 PM
vue返回上一頁的方法
Apr 07, 2025 pm 11:30 PM
Vue.js 返回上一頁有四種方法:$router.go(-1)$router.back()使用 <router-link to="/"> 組件window.history.back(),方法選擇取決於場景。
 vue多頁面開發是啥意思
Apr 07, 2025 pm 11:57 PM
vue多頁面開發是啥意思
Apr 07, 2025 pm 11:57 PM
Vue 多頁面開發是一種使用 Vue.js 框架構建應用程序的方法,其中應用程序被劃分為獨立的頁面:代碼維護性:將應用程序拆分為多個頁面可以使代碼更易於管理和維護。模塊化:每個頁面都可以作為獨立的模塊,便於重用和替換。路由簡單:頁面之間的導航可以通過簡單的路由配置來管理。 SEO 優化:每個頁面都有自己的 URL,這有助於搜索引擎優化。
 怎樣查詢vue的版本
Apr 07, 2025 pm 11:24 PM
怎樣查詢vue的版本
Apr 07, 2025 pm 11:24 PM
可以通過以下方法查詢 Vue 版本:使用 Vue Devtools 在瀏覽器的控制台中查看“Vue”選項卡。使用 npm 運行“npm list -g vue”命令。在 package.json 文件的“dependencies”對像中查找 Vue 項。對於 Vue CLI 項目,運行“vue --version”命令。檢查 HTML 文件中引用 Vue 文件的 <script> 標籤中的版本信息。
 vue的div怎麼跳轉
Apr 08, 2025 am 09:18 AM
vue的div怎麼跳轉
Apr 08, 2025 am 09:18 AM
Vue 中 div 元素跳轉的方法有兩種:使用 Vue Router,添加 router-link 組件。添加 @click 事件監聽器,調用 this.$router.push() 方法跳轉。
