

在three.js中如何實作3D模型展示
本篇文章主要介紹了three.js實作3D模型展示的範例程式碼,現在分享給大家,也給大家做個參考。
由於專案需要展示3d模型,所以對three做了點研究,分享出來希望能幫到大家
#先看看效果:

three.js整體來說不是很難只要你靜下心來研究研究很快就會上手的
首先我們在頁面上需要創建一個能夠放置3D模型的畫布也可以說是初始化Three
var WIDTH,HEIGHT;
  var  renderer;
  function initThree() {
    WIDTH = document.documentElement.clientWidth/2; <!--{foreach from=$recommended_goods item=rgoods}--> <!-- {/foreach} -->
    HEIGHT = document.documentElement.clientHeight/2;
    /* 渲染器 */
    renderer = new THREE.WebGLRenderer();
    renderer.setSize(WIDTH , HEIGHT);
    renderer.setClearColor(new THREE.Color(0x66666));
    renderer.gammaInput = true;
    renderer.gammaOutput = true;

    document.body.appendChild(renderer.domElement);
}透過上面的程式碼不難看出我們設定了在body裡追加了一塊畫布寬高是client的一半顏色為0x66666 這裡要注意的是 renderer = new THREE.WebGLRenderer(); 因為我們所有的設定都是以renderer為物件設定
下來我們需要調整相機即視覺角度
/* 摄像头 */
  var camera;
  function initCamera() {
    var VIEW_ANGLE = 45,
        ASPECT = WIDTH / HEIGHT,
        NEAR = 0.1,
        FAR = 10000;
    camera = new THREE.PerspectiveCamera(VIEW_ANGLE, ASPECT, NEAR, FAR);
    camera.position.set(20, 0, 0);
    //设置视野的中心坐标
    camera.lookAt(scene.position);
}以上程式碼主要是控制視覺角度數值可以在後期根據自己的需求去調整
載入場景:
/* 场景 */
   var scene;
   function initScene() {
     scene = new THREE.Scene();
}載入燈光效果
/* 灯光 */
  var light,light2,light3;
  function initLight() {
    //平行光
    light = new THREE.DirectionalLight(0xFFFFFF);
    light.position.set(0, 99, 0).normalize();
    scene.add(light);
    //环境光
    light2 = new THREE.AmbientLight(0x999999);
    scene.add(light2);
    //点光源
    light3 = new THREE.PointLight(0x00FF00);
    light3.position.set(300, 0, 0);
    scene.add(light3);
}顯示模型物件:
/* 显示对象 */
  var cube;
  function initObject(){
    // ASCII file
    var loader = new THREE.STLLoader();
    loader.addEventListener( 'load', function ( event ) {
      var loading = document.getElementById("Loading");
      loading.parentNode.removeChild(loading);
      var geometry = event.content;
      //砖红色
      var material = new THREE.MeshPhongMaterial( { ambient: 0xff5533, color: 0xff5533, specular: 0x111111, shininess: 200 } );
      //纯黑色
//      var material = new THREE.MeshBasicMaterial( { envMap: THREE.ImageUtils.loadTexture( 'http://localhost:8080/textures/metal.jpg', new THREE.SphericalReflectionMapping() ), overdraw: true } ) ;
      //粉色 带阴影
//      var material = new THREE.MeshLambertMaterial( { color:0xff5533, side: THREE.DoubleSide } );
      //灰色
//      var material = new THREE.MeshLambertMaterial({color: 000000});  //材质设定 (颜色)
      var mesh = new THREE.Mesh( geometry, material );
      var center = THREE.GeometryUtils.center(geometry);
      var boundbox=geometry.boundingBox;
      var vector3 = boundbox.size(null);
      var vector3 = boundbox.size(null);
      console.log(vector3);
      var scale = vector3.length();
      camera.position.set(scale, 0, 0);
      camera.lookAt(scene.position);
      scene.add(camera);
      //利用一个轴对象以可视化的3轴以简单的方式。X轴是红色的。Y轴是绿色的。Z轴是蓝色的。这有助于理解在空间的所有三个轴的方向。
      var axisHelper = new THREE.AxisHelper(800);
      scene.add(axisHelper);

      //周围边框
      bboxHelper = new THREE.BoxHelper();
      bboxHelper.visible = true;
      var meshMaterial = material;
      mainModel = new THREE.Mesh(geometry, meshMaterial);
      bboxHelper.update(mainModel);
      bboxHelper.geometry.computeBoundingBox();
      scene.add(bboxHelper);

      //地板网格
//      var gridHelper = new THREE.GridHelper(500, 40); // 500 is grid size, 20 is grid step
//      gridHelper.position = new THREE.Vector3(0, 0, 0);
//      gridHelper.rotation = new THREE.Euler(0, 0, 0);
//      scene.add(gridHelper);
//      var gridHelper2 = gridHelper.clone();
//      gridHelper2.rotation = new THREE.Euler(Math.PI / 2, 0, 0);
//      scene.add(gridHelper2);
//      var gridHelper3 = gridHelper.clone();
//      gridHelper3.rotation = new THREE.Euler(Math.PI / 2, 0, Math.PI / 2);
//      scene.add(gridHelper3);
//
//      var grid = new THREE.GridHelper(300, 40, 25, [0, 0, 1], 0x000055, 0.2, true, "#FFFFFF", "left");
//      scene.add(grid);
      var x = (boundbox.max.x - boundbox.min.x).toFixed(2);
      var y = (boundbox.max.y - boundbox.min.y).toFixed(2);
      var z = (boundbox.max.z - boundbox.min.z).toFixed(2);
      console.log(x);
      console.log(y);
      console.log(z);
      console.log(boundbox);
      mesh.position.set(0,0,0);
//      mesh.position.x = scene.position.x;
//      mesh.position.y = scene.position.y ;
//      mesh.position.z = scene.position.z;
      scene.add(mesh);
      renderer.clear();
      renderer.render(scene, camera);
    } );
    loader.load( '3dfile/莫比乌斯环.STL' );
}這裡根據檔案類型選擇相對應的js引入即可我載入的是STL模型所以我引入的是STLLoader.js
<script src="js/STLLoader.js"></script>
如果需要顯示網格標尺將網格部分程式碼去掉註解即可
下來是控制方法(雖然我沒有在顯示程式碼裡面寫根據鍵盤按鍵放大縮小但還是提供給大家參考)
//控制
  var effect;
  var controls;
  function initControl(){
    effect = new THREE.AsciiEffect( renderer );
    effect.setSize( WIDTH, HEIGHT );
    controls = new THREE.TrackballControls( camera,renderer.domElement);
}最後就是一個初始調用了
function animate() {
    requestAnimationFrame( animate );
    controls.update();
    effect.render( scene, camera );
  }

  function threeStart() {
    initThree();
    initScene();
    initCamera();
    initLight();
    initObject();
    initControl();
    animate();
}附上完整代碼
WebGL <script src="js/STLLoader.js"></script> <script> var WIDTH,HEIGHT; var renderer; function initThree() { WIDTH = document.documentElement.clientWidth/2; <!--{foreach from=$recommended_goods item=rgoods}--> <!-- {/foreach} --> HEIGHT = document.documentElement.clientHeight/2; /* 渲染器 */ renderer = new THREE.WebGLRenderer(); renderer.setSize(WIDTH , HEIGHT); renderer.setClearColor(new THREE.Color(0x66666)); renderer.gammaInput = true; renderer.gammaOutput = true; document.body.appendChild(renderer.domElement); } /* 摄像头 */ var camera; function initCamera() { var VIEW_ANGLE = 45, ASPECT = WIDTH / HEIGHT, NEAR = 0.1, FAR = 10000; camera = new THREE.PerspectiveCamera(VIEW_ANGLE, ASPECT, NEAR, FAR); camera.position.set(20, 0, 0); //设置视野的中心坐标 camera.lookAt(scene.position); } /* 场景 */ var scene; function initScene() { scene = new THREE.Scene(); } /* 灯光 */ var light,light2,light3; function initLight() { //平行光 light = new THREE.DirectionalLight(0xFFFFFF); light.position.set(0, 99, 0).normalize(); scene.add(light); //环境光 light2 = new THREE.AmbientLight(0x999999); scene.add(light2); //点光源 light3 = new THREE.PointLight(0x00FF00); light3.position.set(300, 0, 0); scene.add(light3); } /* 显示对象 */ var cube; function initObject(){ // ASCII file var loader = new THREE.STLLoader(); loader.addEventListener( 'load', function ( event ) { var loading = document.getElementById("Loading"); loading.parentNode.removeChild(loading); var geometry = event.content; //砖红色 var material = new THREE.MeshPhongMaterial( { ambient: 0xff5533, color: 0xff5533, specular: 0x111111, shininess: 200 } ); //纯黑色 // var material = new THREE.MeshBasicMaterial( { envMap: THREE.ImageUtils.loadTexture( 'http://localhost:8080/textures/metal.jpg', new THREE.SphericalReflectionMapping() ), overdraw: true } ) ; //粉色 带阴影 // var material = new THREE.MeshLambertMaterial( { color:0xff5533, side: THREE.DoubleSide } ); //灰色 // var material = new THREE.MeshLambertMaterial({color: 000000}); //材质设定 (颜色) var mesh = new THREE.Mesh( geometry, material ); var center = THREE.GeometryUtils.center(geometry); var boundbox=geometry.boundingBox; var vector3 = boundbox.size(null); var vector3 = boundbox.size(null); console.log(vector3); var scale = vector3.length(); camera.position.set(scale, 0, 0); camera.lookAt(scene.position); scene.add(camera); //利用一个轴对象以可视化的3轴以简单的方式。X轴是红色的。Y轴是绿色的。Z轴是蓝色的。这有助于理解在空间的所有三个轴的方向。 var axisHelper = new THREE.AxisHelper(800); scene.add(axisHelper); //周围边框 bboxHelper = new THREE.BoxHelper(); bboxHelper.visible = true; var meshMaterial = material; mainModel = new THREE.Mesh(geometry, meshMaterial); bboxHelper.update(mainModel); bboxHelper.geometry.computeBoundingBox(); scene.add(bboxHelper); //地板网格 // var gridHelper = new THREE.GridHelper(500, 40); // 500 is grid size, 20 is grid step // gridHelper.position = new THREE.Vector3(0, 0, 0); // gridHelper.rotation = new THREE.Euler(0, 0, 0); // scene.add(gridHelper); // var gridHelper2 = gridHelper.clone(); // gridHelper2.rotation = new THREE.Euler(Math.PI / 2, 0, 0); // scene.add(gridHelper2); // var gridHelper3 = gridHelper.clone(); // gridHelper3.rotation = new THREE.Euler(Math.PI / 2, 0, Math.PI / 2); // scene.add(gridHelper3); // // var grid = new THREE.GridHelper(300, 40, 25, [0, 0, 1], 0x000055, 0.2, true, "#FFFFFF", "left"); // scene.add(grid); var x = (boundbox.max.x - boundbox.min.x).toFixed(2); var y = (boundbox.max.y - boundbox.min.y).toFixed(2); var z = (boundbox.max.z - boundbox.min.z).toFixed(2); console.log(x); console.log(y); console.log(z); console.log(boundbox); mesh.position.set(0,0,0); // mesh.position.x = scene.position.x; // mesh.position.y = scene.position.y ; // mesh.position.z = scene.position.z; scene.add(mesh); renderer.clear(); renderer.render(scene, camera); } ); loader.load( '3dfile/莫比乌斯环.STL' ); } //控制 var effect; var controls; function initControl(){ effect = new THREE.AsciiEffect( renderer ); effect.setSize( WIDTH, HEIGHT ); controls = new THREE.TrackballControls( camera,renderer.domElement); } function animate() { requestAnimationFrame( animate ); controls.update(); effect.render( scene, camera ); } function threeStart() { initThree(); initScene(); initCamera(); initLight(); initObject(); initControl(); animate(); } </script>Loading...
哦我的文件結構
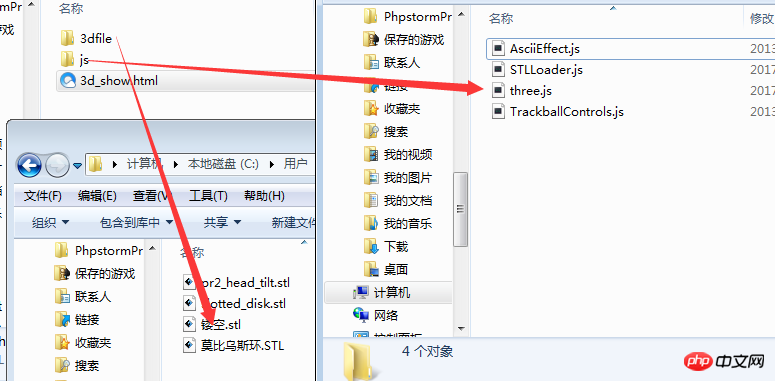
如果想要所有文件的小夥伴給我留言即可
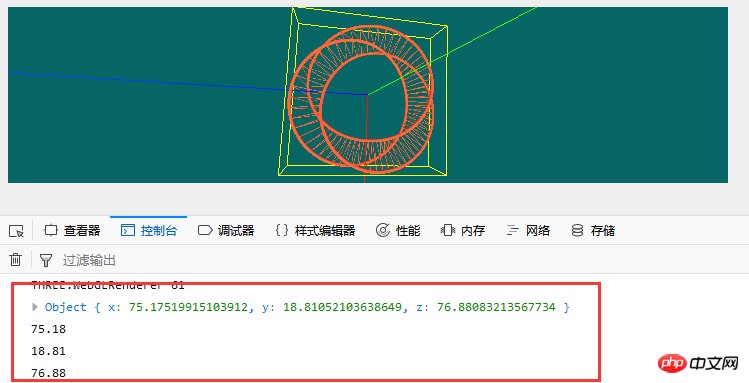
補充一點,由於在顯示模型的方法裡我加入了bboxHelper = new THREE.BoxHelper() 所以我們可以取得到模型的X Y Z三軸的尺寸也可以當作模型的長寬高
上面是我整理給大家的,希望未來會對大家有幫助。
相關文章:
#以上是在three.js中如何實作3D模型展示的詳細內容。更多資訊請關注PHP中文網其他相關文章!

熱AI工具

Undresser.AI Undress
人工智慧驅動的應用程序,用於創建逼真的裸體照片

AI Clothes Remover
用於從照片中去除衣服的線上人工智慧工具。

Undress AI Tool
免費脫衣圖片

Clothoff.io
AI脫衣器

Video Face Swap
使用我們完全免費的人工智慧換臉工具,輕鬆在任何影片中換臉!

熱門文章
熱工具

記事本++7.3.1
好用且免費的程式碼編輯器

SublimeText3漢化版
中文版,非常好用

禪工作室 13.0.1
強大的PHP整合開發環境

Dreamweaver CS6
視覺化網頁開發工具

SublimeText3 Mac版
神級程式碼編輯軟體(SublimeText3)


 Python vs. JavaScript:學習曲線和易用性
Apr 16, 2025 am 12:12 AM
Python vs. JavaScript:學習曲線和易用性
Apr 16, 2025 am 12:12 AM
Python更適合初學者,學習曲線平緩,語法簡潔;JavaScript適合前端開發,學習曲線較陡,語法靈活。 1.Python語法直觀,適用於數據科學和後端開發。 2.JavaScript靈活,廣泛用於前端和服務器端編程。
 JavaScript和Web:核心功能和用例
Apr 18, 2025 am 12:19 AM
JavaScript和Web:核心功能和用例
Apr 18, 2025 am 12:19 AM
JavaScript在Web開發中的主要用途包括客戶端交互、表單驗證和異步通信。 1)通過DOM操作實現動態內容更新和用戶交互;2)在用戶提交數據前進行客戶端驗證,提高用戶體驗;3)通過AJAX技術實現與服務器的無刷新通信。
 JavaScript在行動中:現實世界中的示例和項目
Apr 19, 2025 am 12:13 AM
JavaScript在行動中:現實世界中的示例和項目
Apr 19, 2025 am 12:13 AM
JavaScript在現實世界中的應用包括前端和後端開發。 1)通過構建TODO列表應用展示前端應用,涉及DOM操作和事件處理。 2)通過Node.js和Express構建RESTfulAPI展示後端應用。
 了解JavaScript引擎:實施詳細信息
Apr 17, 2025 am 12:05 AM
了解JavaScript引擎:實施詳細信息
Apr 17, 2025 am 12:05 AM
理解JavaScript引擎內部工作原理對開發者重要,因為它能幫助編寫更高效的代碼並理解性能瓶頸和優化策略。 1)引擎的工作流程包括解析、編譯和執行三個階段;2)執行過程中,引擎會進行動態優化,如內聯緩存和隱藏類;3)最佳實踐包括避免全局變量、優化循環、使用const和let,以及避免過度使用閉包。
 Python vs. JavaScript:開發環境和工具
Apr 26, 2025 am 12:09 AM
Python vs. JavaScript:開發環境和工具
Apr 26, 2025 am 12:09 AM
Python和JavaScript在開發環境上的選擇都很重要。 1)Python的開發環境包括PyCharm、JupyterNotebook和Anaconda,適合數據科學和快速原型開發。 2)JavaScript的開發環境包括Node.js、VSCode和Webpack,適用於前端和後端開發。根據項目需求選擇合適的工具可以提高開發效率和項目成功率。
 C/C在JavaScript口譯員和編譯器中的作用
Apr 20, 2025 am 12:01 AM
C/C在JavaScript口譯員和編譯器中的作用
Apr 20, 2025 am 12:01 AM
C和C 在JavaScript引擎中扮演了至关重要的角色,主要用于实现解释器和JIT编译器。1)C 用于解析JavaScript源码并生成抽象语法树。2)C 负责生成和执行字节码。3)C 实现JIT编译器,在运行时优化和编译热点代码,显著提高JavaScript的执行效率。
 Python vs. JavaScript:比較用例和應用程序
Apr 21, 2025 am 12:01 AM
Python vs. JavaScript:比較用例和應用程序
Apr 21, 2025 am 12:01 AM
Python更適合數據科學和自動化,JavaScript更適合前端和全棧開發。 1.Python在數據科學和機器學習中表現出色,使用NumPy、Pandas等庫進行數據處理和建模。 2.Python在自動化和腳本編寫方面簡潔高效。 3.JavaScript在前端開發中不可或缺,用於構建動態網頁和單頁面應用。 4.JavaScript通過Node.js在後端開發中發揮作用,支持全棧開發。
 從網站到應用程序:JavaScript的不同應用
Apr 22, 2025 am 12:02 AM
從網站到應用程序:JavaScript的不同應用
Apr 22, 2025 am 12:02 AM
JavaScript在網站、移動應用、桌面應用和服務器端編程中均有廣泛應用。 1)在網站開發中,JavaScript與HTML、CSS一起操作DOM,實現動態效果,並支持如jQuery、React等框架。 2)通過ReactNative和Ionic,JavaScript用於開發跨平台移動應用。 3)Electron框架使JavaScript能構建桌面應用。 4)Node.js讓JavaScript在服務器端運行,支持高並發請求。
