這篇文章主要介紹了微信小程式
微信小程式
在
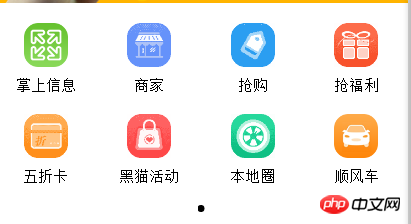
看下效果圖:

遍歷實作方法:wxss省略:
wxml中程式碼:
<!--导航部分轮播图-->
<swiper class="navban" indicator-dots="{{indicatorDots}}" interval="{{interval}}" duration="{{duration}}">
    <swiper-item>
      <block wx:for="{{navs}}">
        <view class="navbox">
          <image class="navimg" src="{{item.navimg}}"></image>
          <text class="navtext">{{item.navtext}}</text>
        </view>
       </block>
    </swiper-item>
</swiper>相對應js裡面的程式碼:
var app = getApp()
Page({
 data: {
  navs:[
   { navimg:'/images/i01.png', navtext:'掌上信息'},
   { navimg:'/images/i02.png', navtext:'商家'},
   { navimg:'/images/i03.png', navtext:'抢购'},
   { navimg:'/images/i04.png', navtext:'抢福利'},
   { navimg:'/images/i05.png', navtext:'五折卡'},
   { navimg:'/images/i06.png', navtext:'黑猫活动'},
   { navimg:'/images/i07.png', navtext:'本地圈'},
   { navimg:'/images/i08.png', navtext:'顺风车'},
  ],
  indicatorDots: true,
  autoplay: true,
  interval: 2000,
  duration: 1000,
 }

})以上就是本文的全部內容,希望對大家的學習有幫助,更多相關內容請關注PHP中文網!
##### #
以上是微信小程式


