

基於cropper.js封裝vue實現線上圖片裁剪組件的功能

這篇文章主要介紹了基於cropper.js封裝vue實現在線圖片裁剪組件功能,非常不錯,具有參考借鑒價值,需要的朋友可以參考下
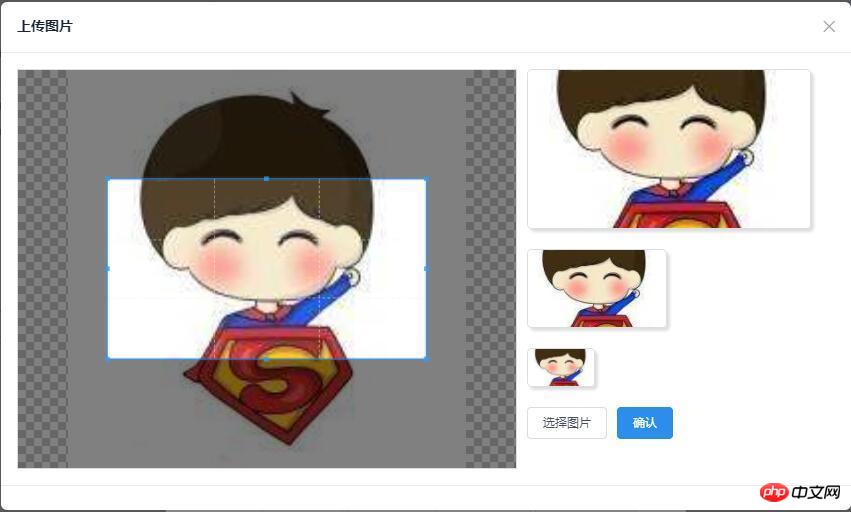
效果圖如下所示,
github:demo下載
cropper.js
github:cropper.js
官網(demo)
cropper.js 安裝
#npm或bower安裝
npm install cropper
# or
bower install cropper
clone下載:下載網址
git clone https://github.com/fengyuanchen/cropper.git
#引用cropper.js
主要引用cropper.js跟cropper.css兩個檔案
<script src="/path/to/jquery.js"></script><!-- jQuery is required -->
<link href="/path/to/cropper.css" rel="external nofollow" rel="stylesheet">
<script src="/path/to/cropper.js"></script>
##注意:必須先引入jquery文件,才能使用cropper.js插件
簡單使用##建立截圖所要用到的p容器
<!-- Wrap the image or canvas element with a block element (container) --> <p>  </p>
新增容器的樣式,讓img填滿整個容器(很重要)
/* Limit image width to avoid overflow the container */
img {
 max-width: 100%; /* This rule is very important, please do not ignore this! */
}調用cropper.js方法,初始化截圖控制項
$('#image').cropper({
 aspectRatio: 16 / 9,
 crop: function(e) {
 // Output the result data for cropping image.
 console.log(e.x);
 console.log(e.y);
 console.log(e.width);
 console.log(e.height);
 console.log(e.rotate);
 console.log(e.scaleX);
 console.log(e.scaleY);
 }
});#其他詳細api請參考:github:cropper.js
##封裝成vue元件
封裝成vue元件中需解決的問題
cropper.js相關
模擬input框點擊選擇圖片並對選擇的圖片進行格式、大小限制
- 非父子元件之間的通訊問題
模擬input框點擊選擇圖片並對選擇的圖片進行格式、大小限制
建立一個隱藏的input標籤,然後模擬點擊此input,從而達到能選擇圖片的功能
<!-- input框 --> <input id="myCropper-input" type="file" :accept="imgCropperData.accept" ref="inputer" @change="handleFile"> //模拟点击 document.getElementById('myCropper-input').click();
# #給input綁定一個監聽內容變化的方法,拿到上傳的文件,並進行格式、大小校驗
#// imgCropperData: {
// accept: 'image/gif, image/jpeg, image/png, image/bmp',
// }
handleFile (e) {
let _this = this;
let inputDOM = this.$refs.inputer;
// 通过DOM取文件数据
_this.file = inputDOM.files[0];
// 判断文件格式
if (_this.imgCropperData.accept.indexOf(_this.file.type) == -1) {
_this.$Modal.error({
title: '格式错误',
content: '您选择的图片格式不正确!'
});
return;
}
// 判断文件大小限制
if (_this.file.size > 5242880) {
_this.$Modal.error({
title: '超出限制',
content: '您选择的图片过大,请选择5MB以内的图片!'
});
return;
}
var reader = new FileReader();
// 将图片将转成 base64 格式
reader.readAsDataURL(_this.file);
reader.onload = function () {
_this.imgCropperData.imgSrc = this.result;
_this.initCropper();
}
}當第一次選擇圖片之後,肯定會面臨需要重選圖片的問題,那麼就會面臨如何替換掉裁切框中的圖片,上面的步驟選擇了圖片後透過FileRender()方法拿到了圖片的主要信息,現在就需要重新構建裁剪框就可以解決問題了,查看cropper.js給出的官方demo,發現官方是使用動態添加裁剪容器的方法,進行操作的,這裡我們仿照官方進行實現。
// 初始化剪切
initCropper () {
let _this = this;
// 初始化裁剪区域
_this.imgObj = $('');
let $avatarPreview = $('.avatar-preview');
$('#myCropper-workspace').empty().html(_this.imgObj);
_this.imgObj.cropper({
aspectRatio: _this.proportionX / _this.proportionY,
preview: $avatarPreview,
crop: function(e) {
}
});
}確認裁切並取得base64格式的圖片資訊
##let $imgData = _this.imgObj.cropper('getCroppedCanvas') imgBase64Data = $imgData.toDataURL('image/png');
#建構用於上傳的資料
// 构造上传图片的数据
let formData = new FormData();
// 截取字符串
let photoType = imgBase64Data.substring(imgBase64Data.indexOf(",") + 1);
//进制转换
const b64toBlob = (b64Data, contentType = '', sliceSize = 512) => {
const byteCharacters = atob(b64Data);
const byteArrays = [];
for(let offset = 0; offset < byteCharacters.length; offset += sliceSize) {
const slice = byteCharacters.slice(offset, offset + sliceSize);
const byteNumbers = new Array(slice.length);
for(let i = 0; i < slice.length; i++) {
byteNumbers[i] = slice.charCodeAt(i);
}
const byteArray = new Uint8Array(byteNumbers);
byteArrays.push(byteArray);
}
const blob = new Blob(byteArrays, {
type: contentType
});
return blob;
}
const contentType = 'image/jepg';
const b64Data2 = photoType;
const blob = b64toBlob(b64Data2, contentType);
formData.append("file", blob, "client-camera-photo.png")
formData.append("type", _this.imgType)#非父子元件之間的通訊問題在先前的專案中,常用到父子元件之間的通訊傳參,一般用兩種方法
在router裡面放置參數,然後透過呼叫route.params.xxx或route.query.xxx進行取得
透過props進行通訊
這裡我們使用eventBus進行元件之間的通訊
步驟
1.宣告一個bus元件用於B元件把參數傳遞給A元件 #//bus.js
import Vue from 'vue';
export default new Vue();
2.在A元件中引用bus元件,並即時監聽其參數變化
// A.vue
import Bus from '../../components/bus/bus.js'
export default {
components: { Bus },
data () {},
created: function () {
Bus.$on('getTarget', imgToken => {
var _this = this;
console.log(imgToken);
...
});
}
}3.B元件中同樣引用bus元件,來把參數傳遞給A元件
// B.vue // 传参 Bus.$emit('getTarget', imgToken);
#參考:
vue-$on
vue-$ emitvue.js之路(4)——vue2.0s中eventBus實作兄弟元件通訊
vue選圖截圖外掛完整程式碼
# 相關推薦: 以上是基於cropper.js封裝vue實現線上圖片裁剪組件的功能的詳細內容。更多資訊請關注PHP中文網其他相關文章!<template>
<p class="myCropper-container">
<p id="myCropper-workspace">
<p class="myCropper-words" v-show="!imgCropperData.imgSrc">请点击按钮选择图片进行裁剪</p>
</p>
<p class="myCropper-preview" :class="isShort ? 'myCropper-preview-short' : 'myCropper-preview-long'">
<p class="myCropper-preview-1 avatar-preview">

</p>
<p class="myCropper-preview-2 avatar-preview">

</p>
<p class="myCropper-preview-3 avatar-preview">

</p>
<input id="myCropper-input" type="file" :accept="imgCropperData.accept" ref="inputer" @change="handleFile">
<Button type="ghost" class="myCropper-btn" @click="btnClick">选择图片</Button>
<Button type="primary" class="myCropper-btn" :loading="cropperLoading" @click="crop_ok">确认</Button>
</p>
</p>
</template>
<script>
var ezjsUtil = Vue.ezjsUtil;
import Bus from './bus/bus.js'
export default {
components: { Bus },
props: {
imgType: {
type: String
},
proportionX: {
type: Number
},
proportionY: {
type: Number
}
},
data () {
return {
imgCropperData: {
accept: 'image/gif, image/jpeg, image/png, image/bmp',
maxSize: 5242880,
file: null, //上传的文件
imgSrc: '', //读取的img文件base64数据流
imgUploadSrc: '', //裁剪之后的img文件base64数据流
},
imgObj: null,
hasSelectImg: false,
cropperLoading: false,
isShort: false,
}
},
created: function () {
let _this = this;
},
mounted: function () {
let _this = this;
// 初始化预览区域
let maxWidthNum = Math.floor(300 / _this.proportionX);
let previewWidth = maxWidthNum * _this.proportionX;
let previewHeight = maxWidthNum * _this.proportionY;
if (previewWidth / previewHeight <= 1.7) {
previewWidth = previewWidth / 2;
previewHeight = previewHeight / 2;
_this.isShort = true;
}
// 设置最大预览容器的宽高
$('.myCropper-preview-1').css('width', previewWidth + 'px');
$('.myCropper-preview-1').css('height', previewHeight + 'px');
// 设置中等预览容器的宽高
$('.myCropper-container .myCropper-preview .myCropper-preview-2').css('width',( previewWidth / 2) + 'px');
$('.myCropper-container .myCropper-preview .myCropper-preview-2').css('height', (previewHeight / 2) + 'px');
// 设置最小预览容器的宽高
$('.myCropper-container .myCropper-preview .myCropper-preview-3').css('width',( previewWidth / 4) + 'px');
$('.myCropper-container .myCropper-preview .myCropper-preview-3').css('height', (previewHeight / 4) + 'px');
},
methods: {
// 点击选择图片
btnClick () {
let _this = this;
// 模拟input点击选择文件
document.getElementById('myCropper-input').click();
},
// 选择之后的回调
handleFile (e) {
let _this = this;
let inputDOM = this.$refs.inputer;
// 通过DOM取文件数据
_this.file = inputDOM.files[0];
// 判断文件格式
if (_this.imgCropperData.accept.indexOf(_this.file.type) == -1) {
_this.$Modal.error({
title: '格式错误',
content: '您选择的图片格式不正确!'
});
return;
}
// 判断文件大小限制
if (_this.file.size > 5242880) {
_this.$Modal.error({
title: '超出限制',
content: '您选择的图片过大,请选择5MB以内的图片!'
});
return;
}
var reader = new FileReader();
// 将图片将转成 base64 格式
reader.readAsDataURL(_this.file);
reader.onload = function () {
_this.imgCropperData.imgSrc = this.result;
_this.initCropper();
}
},
// 初始化剪切
initCropper () {
let _this = this;
// 初始化裁剪区域
_this.imgObj = $('');
let $avatarPreview = $('.avatar-preview');
$('#myCropper-workspace').empty().html(_this.imgObj);
_this.imgObj.cropper({
aspectRatio: _this.proportionX / _this.proportionY,
preview: $avatarPreview,
crop: function(e) {
}
});
_this.hasSelectImg = true;
},
// 确认
crop_ok () {
let _this = this, imgToken = null, imgBase64Data = null;
// 判断是否选择图片
if (_this.hasSelectImg == false) {
_this.$Modal.error({
title: '裁剪失败',
content: '请选择图片,然后进行裁剪操作!'
});
return false;
}
// 确认按钮不可用
_this.cropperLoading = true;
let $imgData = _this.imgObj.cropper('getCroppedCanvas')
imgBase64Data = $imgData.toDataURL('image/png');
// 构造上传图片的数据
let formData = new FormData();
// 截取字符串
let photoType = imgBase64Data.substring(imgBase64Data.indexOf(",") + 1);
//进制转换
const b64toBlob = (b64Data, contentType = '', sliceSize = 512) => {
const byteCharacters = atob(b64Data);
const byteArrays = [];
for(let offset = 0; offset < byteCharacters.length; offset += sliceSize) {
const slice = byteCharacters.slice(offset, offset + sliceSize);
const byteNumbers = new Array(slice.length);
for(let i = 0; i < slice.length; i++) {
byteNumbers[i] = slice.charCodeAt(i);
}
const byteArray = new Uint8Array(byteNumbers);
byteArrays.push(byteArray);
}
const blob = new Blob(byteArrays, {
type: contentType
});
return blob;
}
const contentType = 'image/jepg';
const b64Data2 = photoType;
const blob = b64toBlob(b64Data2, contentType);
formData.append("file", blob, "client-camera-photo.png")
formData.append("type", _this.imgType)
// ajax上传
$.ajax({
url: _this.$nfs.uploadUrl,
method: 'POST',
data: formData,
// 默认为true,设为false后直到ajax请求结束(调完回掉函数)后才会执行$.ajax(...)后面的代码
async: false,
// 下面三个,因为直接使用FormData作为数据,contentType会自动设置,也不需要jquery做进一步的数据处理(序列化)。
cache: false,
contentType: false,
processData: false,
type: _this.imgType,
success: function(res) {
let imgToken = res.data.token;
_this.cropperLoading = false;
// 传参
Bus.$emit('getTarget', imgToken);
},
error: function(error) {
_this.cropperLoading = false;
_this.$Modal.error({
title: '系统错误',
content: '请重新裁剪图片进行上传!'
});
}
});
},
}
}
</script>
<style lang="less" scoped>
.myCropper-container {
height: 400px;
}
.myCropper-container #myCropper-input {
width: 0px;
height: 0px;
}
.myCropper-container #myCropper-workspace {
width: 500px;
height: 400px;
border: 1px solid #dddee1;
float: left;
}
// 裁剪图片未选择图片的提示文字
.myCropper-container #myCropper-workspace .myCropper-words{
text-align: center;
font-size: 18px;
padding-top: 180px;
}
// 裁剪图片的预览区域
.myCropper-container .myCropper-preview-long {
width: 300px;
}
.myCropper-container .myCropper-preview-short {
width: 200px;
}
.myCropper-container .myCropper-preview {
float: left;
height: 400px;
margin-left: 10px;
}
.myCropper-container .myCropper-preview .myCropper-preview-1 {
border-radius: 5px;
overflow: hidden;
border: 1px solid #dddee1;
box-shadow: 3px 3px 3px #dddee1;
img {
width: 100%;
height: 100%;
}
}
.myCropper-container .myCropper-preview .myCropper-preview-2 {
margin-top: 20px;
border-radius: 5px;
overflow: hidden;
border: 1px solid #dddee1;
box-shadow: 3px 3px 3px #dddee1;
img {
width: 100%;
height: 100%;
}
}
.myCropper-container .myCropper-preview .myCropper-preview-3 {
margin-top: 20px;
border-radius: 5px;
overflow: hidden;
border: 1px solid #dddee1;
box-shadow: 3px 3px 3px #dddee1;
img {
width: 100%;
height: 100%;
}
}
// 按钮
.myCropper-btn {
float: left;
margin-top: 20px;
margin-right: 10px;
}
</style>

熱AI工具

Undresser.AI Undress
人工智慧驅動的應用程序,用於創建逼真的裸體照片

AI Clothes Remover
用於從照片中去除衣服的線上人工智慧工具。

Undress AI Tool
免費脫衣圖片

Clothoff.io
AI脫衣器

Video Face Swap
使用我們完全免費的人工智慧換臉工具,輕鬆在任何影片中換臉!

熱門文章
熱工具

記事本++7.3.1
好用且免費的程式碼編輯器

SublimeText3漢化版
中文版,非常好用

禪工作室 13.0.1
強大的PHP整合開發環境

Dreamweaver CS6
視覺化網頁開發工具

SublimeText3 Mac版
神級程式碼編輯軟體(SublimeText3)


 vue中怎麼用bootstrap
Apr 07, 2025 pm 11:33 PM
vue中怎麼用bootstrap
Apr 07, 2025 pm 11:33 PM
在 Vue.js 中使用 Bootstrap 分為五個步驟:安裝 Bootstrap。在 main.js 中導入 Bootstrap。直接在模板中使用 Bootstrap 組件。可選:自定義樣式。可選:使用插件。
 vue怎麼給按鈕添加函數
Apr 08, 2025 am 08:51 AM
vue怎麼給按鈕添加函數
Apr 08, 2025 am 08:51 AM
可以通過以下步驟為 Vue 按鈕添加函數:將 HTML 模板中的按鈕綁定到一個方法。在 Vue 實例中定義該方法並編寫函數邏輯。
 vue中的watch怎麼用
Apr 07, 2025 pm 11:36 PM
vue中的watch怎麼用
Apr 07, 2025 pm 11:36 PM
Vue.js 中的 watch 選項允許開發者監聽特定數據的變化。當數據發生變化時,watch 會觸發一個回調函數,用於執行更新視圖或其他任務。其配置選項包括 immediate,用於指定是否立即執行回調,以及 deep,用於指定是否遞歸監聽對像或數組的更改。
 vue返回上一頁的方法
Apr 07, 2025 pm 11:30 PM
vue返回上一頁的方法
Apr 07, 2025 pm 11:30 PM
Vue.js 返回上一頁有四種方法:$router.go(-1)$router.back()使用 <router-link to="/"> 組件window.history.back(),方法選擇取決於場景。
 vue多頁面開發是啥意思
Apr 07, 2025 pm 11:57 PM
vue多頁面開發是啥意思
Apr 07, 2025 pm 11:57 PM
Vue 多頁面開發是一種使用 Vue.js 框架構建應用程序的方法,其中應用程序被劃分為獨立的頁面:代碼維護性:將應用程序拆分為多個頁面可以使代碼更易於管理和維護。模塊化:每個頁面都可以作為獨立的模塊,便於重用和替換。路由簡單:頁面之間的導航可以通過簡單的路由配置來管理。 SEO 優化:每個頁面都有自己的 URL,這有助於搜索引擎優化。
 React與Vue:Netflix使用哪個框架?
Apr 14, 2025 am 12:19 AM
React與Vue:Netflix使用哪個框架?
Apr 14, 2025 am 12:19 AM
NetflixusesAcustomFrameworkcalled“ Gibbon” BuiltonReact,notReactorVuedIrectly.1)TeamSperience:selectBasedonFamiliarity.2)ProjectComplexity:vueforsimplerprojects:reactforforforproproject,reactforforforcompleplexones.3)cocatizationneedneeds:reactoffipicatizationneedneedneedneedneedneeds:reactoffersizationneedneedneedneedneeds:reactoffersizatization needefersmoreflexibleise.4)
 vue.js怎麼引用js文件
Apr 07, 2025 pm 11:27 PM
vue.js怎麼引用js文件
Apr 07, 2025 pm 11:27 PM
在 Vue.js 中引用 JS 文件的方法有三種:直接使用 <script> 標籤指定路徑;利用 mounted() 生命週期鉤子動態導入;通過 Vuex 狀態管理庫進行導入。
 vue遍歷怎麼用
Apr 07, 2025 pm 11:48 PM
vue遍歷怎麼用
Apr 07, 2025 pm 11:48 PM
Vue.js 遍歷數組和對像有三種常見方法:v-for 指令用於遍歷每個元素並渲染模板;v-bind 指令可與 v-for 一起使用,為每個元素動態設置屬性值;.map 方法可將數組元素轉換為新數組。
