

Angular如何正確的操作DOM

這篇文章主要介紹了關於Angular如何正確的操作DOM,有著一定的參考價值,現在分享給大家,有需要的朋友可以參考一下
無奈接手了一個舊項目,上一個老哥在Angular專案中大量使用了JQuery來操作DOM,真的是太不講究了。那麼如何優雅的使用Angular的方式來操作DOM呢?
獲取元素
1、ElementRef --- A wrapper around a native element inside of a View.
在組件的 constructor中註入ElementRef,可以取得到整個組件元素的包裹。
@Component({
  selector: 'app-test-page',
  templateUrl: './test-page.component.html',
  styleUrls: ['./test-page.component.scss']
})
export class TestPageComponent implements OnInit {

  constructor(    private el: ElementRef
  ) { }

  ngOnInit() {
  }

  getDomTest() {
    console.dir(this.el);
  }
}
ElementRef中的nativeElement即是元件最外層的DOM元素。再透過原生的DOM定位方式,即可取得指定的selector元素。
  getDomTest() {
    console.dir(this.el.nativeElement.querySelector('.test-get-dom')); // 获取指定的子元素
}2、@viewChild() --- You can use ViewChild to get the first element or the directive matching the selector from the view DOM.
## #@viewChild可以取得指定的元素, 指定的方式可以是本機變數或元件類型;// HTML
<p class="tip-test-wrapper">
<button class="test-get-dom" (click)="getDomTest()">测试获取DOM</button>
</p>
<app-dialog></app-dialog>
// ts
import { DialogComponent } from './../../common/components/dialog/dialog.component';
@Component({
selector: 'app-test-page',
templateUrl: './test-page.component.html',
styleUrls: ['./test-page.component.scss']
})
export class TestPageComponent implements OnInit {
// 通过本地变量获取元素 可通过read来指定获取的元素类型
@ViewChild('testdom' , { read: ViewContainerRef }) viewcontainer: ViewContainerRef;
@ViewChild('testdom') viewelement: ElementRef;
// 通过组件类型来获取
@ViewChild(DialogComponent) viewcontent: DialogComponent;
constructor(
private el: ElementRef
) { }
ngOnInit() {
}
getDomTest() {
// console.dir(this.el.nativeElement.querySelector('.test-get-dom'));
console.dir(this.viewcontainer);
console.dir(this.viewelement);
console.dir(this.viewcontent);
}
}

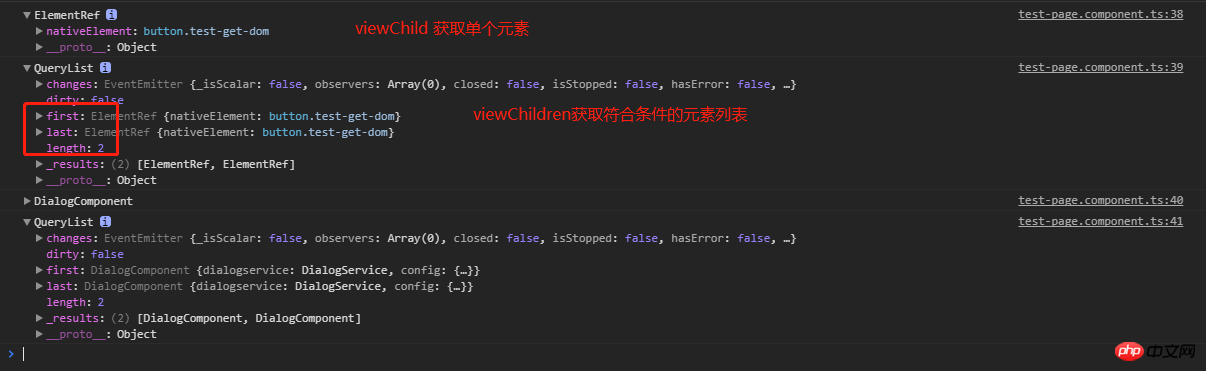
3、@viewChildren -- You can use ViewChildren to get the {@link QueryList} of elements or directives from theview DOM.
@viewChild會傳回符合條件的第一個會傳回符合條件的第一view個元素,如果需要取得多個符合條件的元素呢?
@viewChildren會傳回所有符合條件的元素的list。指定selector的方式與@viewChild一致。 // 复制一个元素
<p class="tip-test-wrapper">
<button class="test-get-dom" #testdom (click)="getDomTest()">测试获取DOM</button>
</p>
<p class="tip-test-wrapper">
<button class="test-get-dom" #testdom (click)="getDomTest()">测试获取DOM</button>
</p>
</p>
<app-dialog></app-dialog>
<app-dialog></app-dialog>// tsimport { DialogComponent } from './../../common/components/dialog/dialog.component';
@Component({
selector: 'app-test-page',
templateUrl: './test-page.component.html',
styleUrls: ['./test-page.component.scss']
})
export class TestPageComponent implements OnInit {
@ViewChild('testdom' , { read: ViewContainerRef }) viewcontainer: ViewContainerRef;
@ViewChild('testdom') viewelement: ElementRef; @ViewChildren('testdom') viewelements: QueryList<any>; @ViewChild(DialogComponent) viewcontent: DialogComponent; @ViewChildren(DialogComponent) viewcontents: QueryList<DialogComponent>;
constructor( private el: ElementRef
) { }
ngOnInit() {
}
getDomTest() { // console.dir(this.el.nativeElement.querySelector('.test-get-dom')); // console.dir(this.viewcontainer);
console.dir(this.viewelement);
console.dir(this.viewelements);
console.dir(this.viewcontent);
console.dir(this.viewcontents);
}
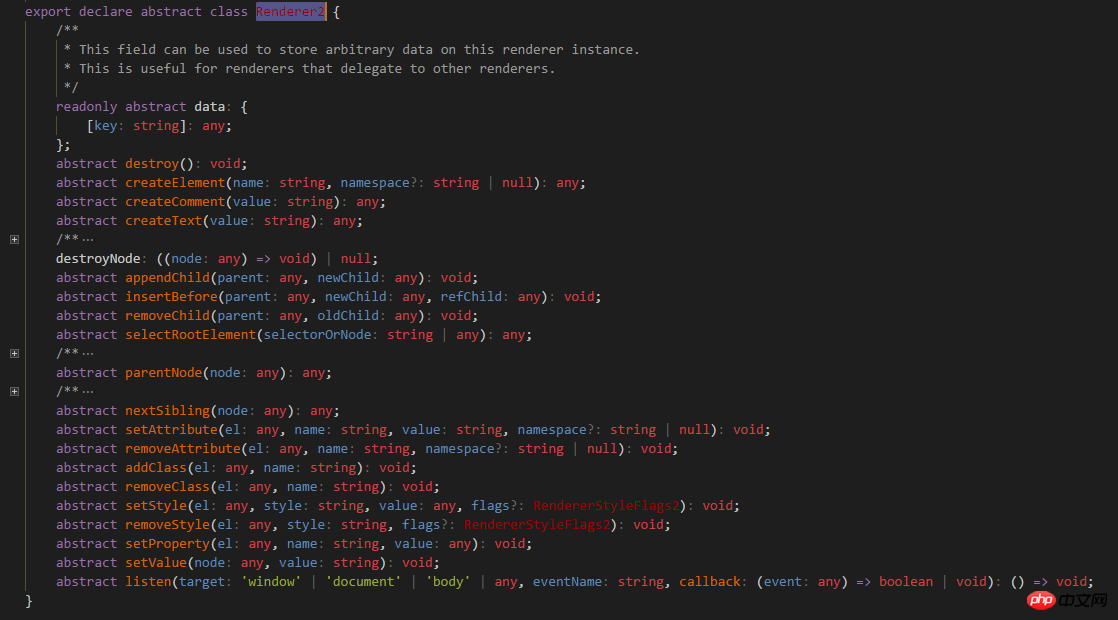
 操作DOM --- Renderer2
在取得dom之後,如何對dom進行操作?原生的domAPI是一種選擇,但是Angular提供了更好的跨平台方式 Renderer2。
引入
Renderer2 ,然後在construct中註入。 ,如下: 以上就是本文的全部內容,希望對大家的學習有所幫助,更多相關內容請關注PHP中文網! 相關推薦: 以上是Angular如何正確的操作DOM的詳細內容。更多資訊請關注PHP中文網其他相關文章!import { Component, OnInit , ViewContainerRef , ElementRef , ViewChild, , ViewChildren, QueryList} from '@angular/core';
import { DialogComponent } from './../../common/components/dialog/dialog.component';
@Component({
selector: 'app-test-page',
templateUrl: './test-page.component.html',
styleUrls: ['./test-page.component.scss']
})
export class TestPageComponent implements OnInit {
@ViewChild('testdom' , { read: ViewContainerRef }) viewcontainer: ViewContainerRef;
@ViewChild('testdom') viewelement: ElementRef;
@ViewChildren('testdom') viewelements: QueryList<any>;
@ViewChild(DialogComponent) viewcontent: DialogComponent;
@ViewChildren(DialogComponent) viewcontents: QueryList<DialogComponent>;
constructor(
private el: ElementRef
) { }
ngOnInit() {
}
getDomTest() {
}
} 總結
總結# 透過elementRef或@ viewChild @viewChildren取得元素,再透過renderer2提供的API來操作元素。不過記得在不要在 ngAfterViewInit 週期之前使用。透過Angular提供的方式,可以滿足大部分的操作DOM的需求了。如果有特殊的場景,當然還是原生DOM擼起來呀

熱AI工具

Undresser.AI Undress
人工智慧驅動的應用程序,用於創建逼真的裸體照片

AI Clothes Remover
用於從照片中去除衣服的線上人工智慧工具。

Undress AI Tool
免費脫衣圖片

Clothoff.io
AI脫衣器

Video Face Swap
使用我們完全免費的人工智慧換臉工具,輕鬆在任何影片中換臉!

熱門文章
熱工具

記事本++7.3.1
好用且免費的程式碼編輯器

SublimeText3漢化版
中文版,非常好用

禪工作室 13.0.1
強大的PHP整合開發環境

Dreamweaver CS6
視覺化網頁開發工具

SublimeText3 Mac版
神級程式碼編輯軟體(SublimeText3)


 聊聊Angular中的元資料(Metadata)和裝飾器(Decorator)
Feb 28, 2022 am 11:10 AM
聊聊Angular中的元資料(Metadata)和裝飾器(Decorator)
Feb 28, 2022 am 11:10 AM
這篇文章繼續Angular的學習,帶大家了解Angular中的元數據和裝飾器,簡單了解一下他們的用法,希望對大家有幫助!
 如何在Ubuntu 24.04上安裝Angular
Mar 23, 2024 pm 12:20 PM
如何在Ubuntu 24.04上安裝Angular
Mar 23, 2024 pm 12:20 PM
Angular.js是一種可自由存取的JavaScript平台,用於建立動態應用程式。它允許您透過擴展HTML的語法作為模板語言,以快速、清晰地表示應用程式的各個方面。 Angular.js提供了一系列工具,可協助您編寫、更新和測試程式碼。此外,它還提供了許多功能,如路由和表單管理。本指南將討論在Ubuntu24上安裝Angular的方法。首先,您需要安裝Node.js。 Node.js是一個基於ChromeV8引擎的JavaScript運行環境,可讓您在伺服器端執行JavaScript程式碼。要在Ub


 Angular + NG-ZORRO快速開發一個後台系統
Apr 21, 2022 am 10:45 AM
Angular + NG-ZORRO快速開發一個後台系統
Apr 21, 2022 am 10:45 AM
這篇文章跟大家分享一個Angular實戰,了解一下angualr 結合 ng-zorro 如何快速開發一個後台系統,希望對大家有幫助!
 如何使用PHP和Angular進行前端開發
May 11, 2023 pm 04:04 PM
如何使用PHP和Angular進行前端開發
May 11, 2023 pm 04:04 PM
隨著網路的快速發展,前端開發技術也不斷改進與迭代。 PHP和Angular是兩種廣泛應用於前端開發的技術。 PHP是一種伺服器端腳本語言,可以處理表單、產生動態頁面和管理存取權限等任務。而Angular是一種JavaScript的框架,可以用來開發單一頁面應用程式和建構元件化的網頁應用程式。本篇文章將介紹如何使用PHP和Angular進行前端開發,以及如何將它們
 淺析angular中怎麼使用monaco-editor
Oct 17, 2022 pm 08:04 PM
淺析angular中怎麼使用monaco-editor
Oct 17, 2022 pm 08:04 PM
angular中怎麼使用monaco-editor?以下這篇文章記錄下最近的一次業務中用到的 monaco-editor 在 angular 中的使用,希望對大家有幫助!
 淺析Angular中的獨立組件,看看怎麼使用
Jun 23, 2022 pm 03:49 PM
淺析Angular中的獨立組件,看看怎麼使用
Jun 23, 2022 pm 03:49 PM
這篇文章帶大家了解Angular中的獨立元件,看看怎麼在Angular中建立一個獨立元件,怎麼在獨立元件中導入已有的模組,希望對大家有幫助!
