這篇文章主要介紹了關於如何使用MixPHP來開發API接口,有著一定的參考價值,現在分享給大家,有需要的朋友可以參考一下
MixPHP 是一款基於Swoole 的常駐內存型PHP 高效能框架,框架的高效能特點非常適合開發API 接口,而且MixPHP 非常接近傳統MVC 框架,所以開發接口時非常簡單。
下面做一個開發 API 介面的簡單實例:
從 articles 表,透過 id 取得一篇文章。
存取該介面的URL:
http://www.e.com/articles/details?id=1
資料庫表結構如下:
CREATE TABLE `articles` (
  `id` int(10) unsigned NOT NULL AUTO_INCREMENT,
  `title` varchar(255) NOT NULL,
  `content` varchar(255) NOT NULL,
  `dateline` timestamp NOT NULL DEFAULT CURRENT_TIMESTAMP,
  PRIMARY KEY (`id`)
) ENGINE=InnoDB DEFAULT CHARSET=utf8;
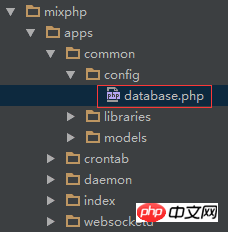
修改資料庫設定文件,MixPHP 的在應用程式設定檔中,關於資料庫的資訊都引用了common/config/database.php 檔案。

修改應用程式設定檔:
修改Response 元件預設輸出格式為JSON 格式。
修改 404/500 錯誤輸出格式為 JSON 格式。

框架預設的404/500 回應是網頁,而API 服務需要回應JSON 數據,通常其他傳統MVC 框架需要修改很多地方才可完成這個需求,MixPHP 本身就提供該種配置,只需修改一下配置即可。
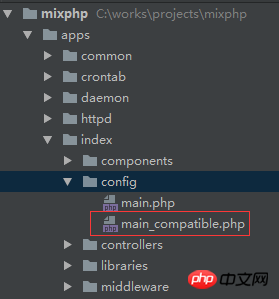
MixPHP 的預設 Web 應用程式中有兩個設定文件,分別為:
main.php : 部署在 mix-httpd 時使用。
main_compatible.php :部署在 Apache/PHP-FPM 時使用。
開發 API 時我們推薦在 Apache/PHP-FPM 下開發,上線再部署至 mix-httpd 即可,反正是無縫切換的。
現在我們修改response 鍵名下的defaultFormat 鍵為mix\http\Error::FORMAT_JSON,如下:
// 响应
'response' => [
    // 类路径
    'class'         => 'mix\http\compatible\Response',
    // 默认输出格式
    'defaultFormat' => mix\http\Response::FORMAT_JSON,
    // json
    'json'          => [
        // 类路径
        'class' => 'mix\http\Json',
    ],
    // jsonp
    'jsonp'         => [
        // 类路径
        'class' => 'mix\http\Jsonp',
        // callback键名
        'name'  => 'callback',
    ],
    // xml
    'xml'           => [
        // 类路径
        'class' => 'mix\http\Xml',
    ],
],然後修改main_compatible.php 檔案中error 鍵名下的format 鍵為mix\http\Error::FORMAT_JSON,如下:
// 错误
'error'    => [
    // 类路径
    'class'  => 'mix\http\Error',
    // 输出格式
    'format' => mix\http\Error::FORMAT_JSON,
],建立控制器:
apps/index/controllers/ArticlesController.php
<?php
namespace apps\index\controllers;
use mix\facades\Request;
use mix\http\Controller;
use apps\index\messages\ErrorCode;
use apps\index\models\ArticlesForm;
class ArticlesController extends Controller
{
public function actionDetails()
{
// 使用模型
$model = new ArticlesForm();
$model->attributes = Request::get();
$model->setScenario('actionDetails');
if (!$model->validate()) {
return ['code' => ErrorCode::INVALID_PARAM];
}
// 获取数据
$data = $model->getDetails();
if (!$data) {
return ['code' => ErrorCode::ERROR_ID_UNFOUND];
}
// 响应
return ['code' => ErrorCode::SUCCESS, 'data' => $data];
}
}建立錯誤碼類別:
apps/index/messages/ErrorCode.php
<?php

namespace apps\index\messages;

class ErrorCode
{

    const SUCCESS = 0;
    const INVALID_PARAM = 100001;
    const ERROR_ID_UNFOUND = 200001;

}建立表單驗證模型:
apps/index/models/ArticlesForm.php
<?php
namespace apps\index\models;
use mix\validators\Validator;
use apps\common\models\ArticlesModel;
class ArticlesForm extends Validator
{
public $id;
// 规则
public function rules()
{
return [
'id' => ['integer', 'unsigned' => true, 'maxLength' => 10],
];
}
// 场景
public function scenarios()
{
return [
'actionDetails' => ['required' => ['id']],
];
}
// 获取详情
public function getDetails()
{
return (new ArticlesModel())->getRowById($this->id);
}
}建立資料表模型:
apps/common/models/ArticlesModel.php
<?php
namespace apps\common\models;
use mix\facades\RDB;
class ArticlesModel
{
const TABLE = 'articles';
// 获取一行数据通过id
public function getRowById($id)
{
$sql = "SELECT * FROM `" . self::TABLE . "` WHERE id = :id";
$row = RDB::createCommand($sql)->bindParams([
'id' => $id,
])->queryOne();
return $row;
}
}以上就是全部程式碼的寫。
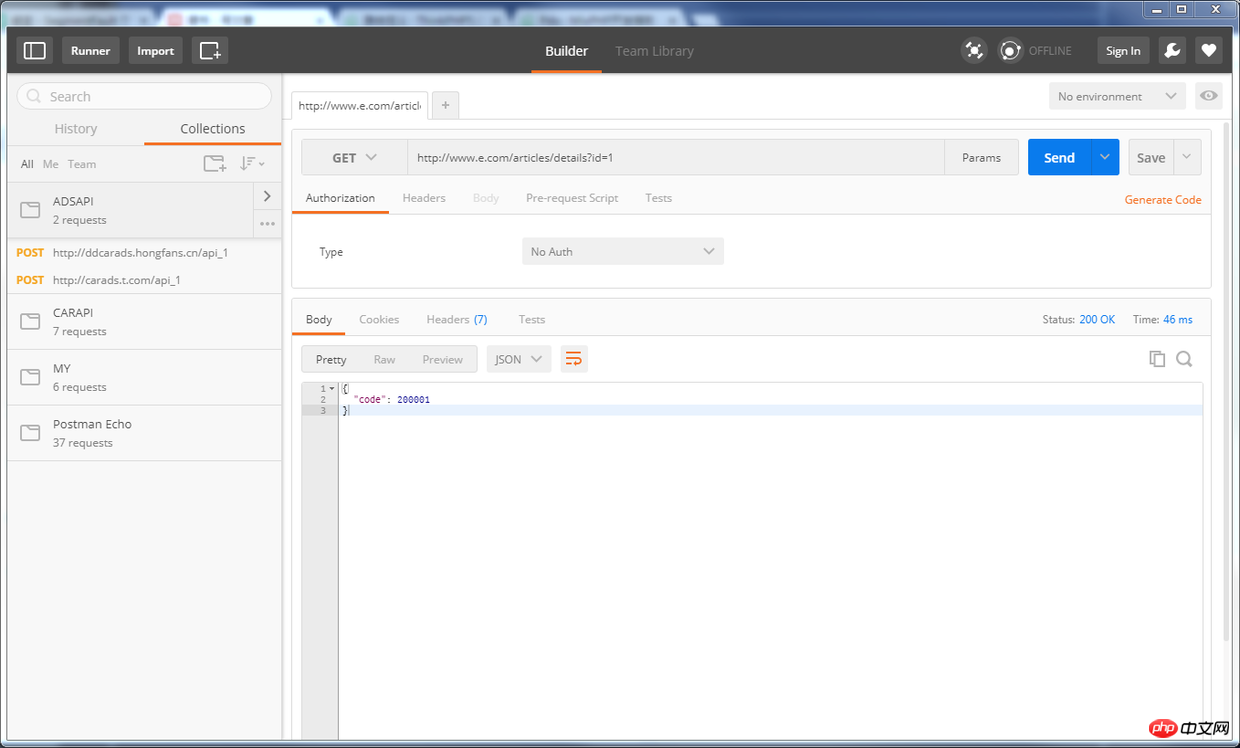
使用 Postman 測試,如下:

#介面開發與測試完成,是不是很簡單呀。
以上就是本文的全部內容,希望對大家的學習有所幫助,更多相關內容請關注PHP中文網!
相關推薦:
以上是如何使用MixPHP來開發API介面的詳細內容。更多資訊請關注PHP中文網其他相關文章!


