這篇文章主要介紹了canvas像素點操作之視頻綠幕摳圖的相關資料,小編覺得挺不錯的,現在分享給大家,也給大家做個參考。一起跟著小編過來看看吧
本文介紹了canvas像素點操作之視訊綠幕摳圖,分享給大家,具體如下:
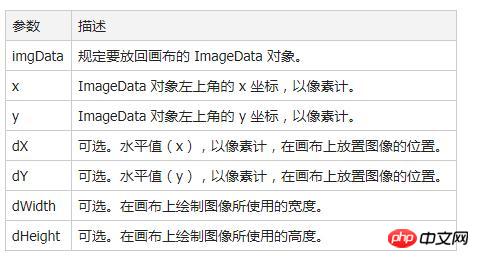
##用法:context.putImageData(imgData, x, y, dX, dY, dWidth, dHeight);


import imgUrl from './component/sample.jpg';
export default {
data () {
return {
imgUrl: imgUrl
}
},
methods: {
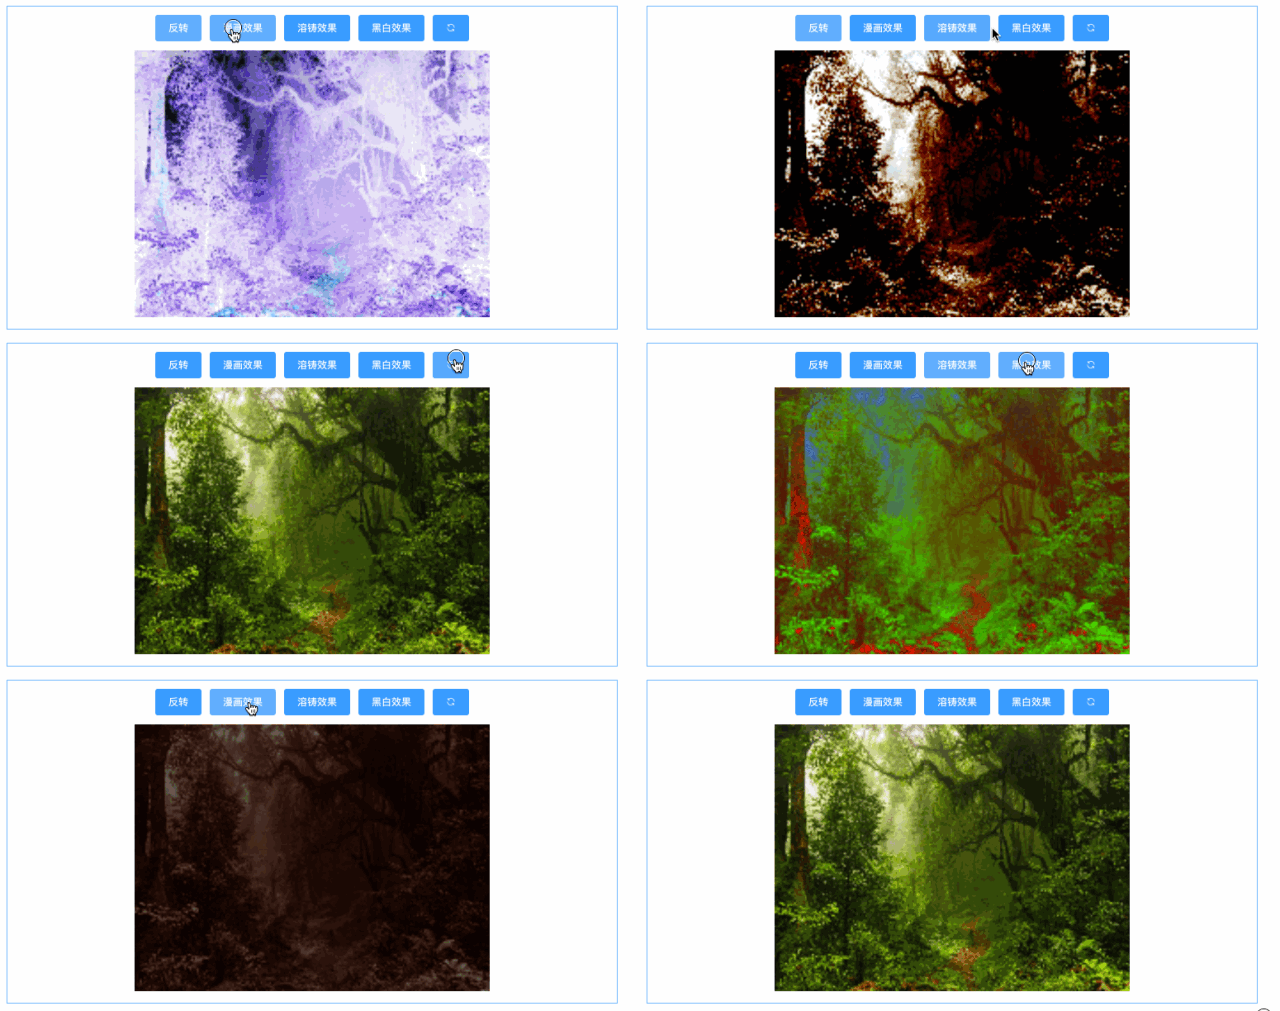
onOperate1 () {
this.ctx.putImageData(this.onCompute1(), 0, 0);
},
onOperate2 () {
this.ctx.putImageData(this.onCompute2(), 0, 0);
},
...
onCancel () {
this.reload();
},
onCompute1 () {
let data = this.frameData.data;
for (let i = 0; i < this.imgDataLength; i += 4) {
let r = data[i + 0],
g = data[i + 1],
b = data[i + 2];
data[i + 0] = 255 - r;
data[i + 1] = 255 - g;
data[i + 2] = 255 - b;
}
return this.frameData;
},
onCompute2 () {
let data = this.frameData.data;
for (let i = 0; i < this.imgDataLength; i += 4) {
data[i] = Math.abs(data[i + 1] - data[i + 2] + data[i + 1] + data[i]) * data[i] / 256;
data[i + 1] = Math.abs(data[i + 2] - data[i + 1] + data[i + 2] + data[i]) * data[i] / 256;
data[i + 2] = Math.abs(data[i + 2] - data[i + 1] + data[i + 2] + data[i]) * data[i + 1] / 256;
}
return this.frameData;
},
...
},
mounted () {
this.canvas = this.$refs['canvas'];
this.ctx = this.canvas.getContext('2d');
this.reload();
}
}

import videoUrl from './component/video.ogv';
import imgUrl from './component/sample.jpg';
const TOLERANCE = 5;
export default {
data () {
return {
videoUrl: videoUrl,
imgUrl: imgUrl
}
},
methods: {
draw () {
if (this.video.paused || this.video.ended) {
return;
}
this.ctx.drawImage(this.video, 0, 0, this.width, this.height);
this.ctx.putImageData(this.cutOut(), 0, 0);
},
cutOut () {
let frameData = this.ctx.getImageData(0, 0, this.width, this.height),
len = frameData.data.length / 4;
for (let i = 0; i < len; i++) {
let r = frameData.data[i * 4 + 0],
g = frameData.data[i * 4 + 1],
b = frameData.data[i * 4 + 2];
if (r - 100 >= TOLERANCE
&& g - 100 >= TOLERANCE
&& b - 43 <= TOLERANCE) {
frameData.data[i * 4 + 3] = 0;
}
}
return frameData;
}
},
mounted () {
this.video = this.$refs['video'];
this.canvas = this.$refs['canvas'];
this.ctx = this.canvas.getContext('2d');
this.timer = null;
this.video.addEventListener('play', () => {
this.width = this.video.videoWidth;
this.height = this.video.videoHeight;
this.timer && clearInterval(this.timer);
this.timer = setInterval(() => {
this.draw();
}, 50);
}, false);
}
}參考資料
Manipulating video using canvas
Pixel manipulation with canvasCanvas and images and pixels
總結:以上就是這篇文章的全部內容,希望能對大家的學習有幫助。更多相關教學請造訪
Html5影片教學 ##### #HTML5線上手冊######以上是canvas像素點操作影片綠幕摳圖的詳細內容。更多資訊請關注PHP中文網其他相關文章!


