Node.js中操作MySQL資料庫的基礎教學
這篇文章帶給大家的內容是關於Node.js中操作MySQL資料庫的基礎教程,有一定的參考價值,有需要的朋友可以參考一下,希望對你有幫助。
本文是一篇使用mysql這個npm模組操作MySQL資料庫的基礎教學。 不涉及MySQL的安裝和配置,如果電腦中還未安裝MySQL, 推薦安裝WAMP、XAMPP等整合環境。本文中也使用到了輕量級的Node.js框架Koa搭建web程序,為的是透過前端瀏覽器請求的方式來模擬專案場景,你無需掌握Koa框架的語法也是可以輕鬆閱讀本文的。
初始化專案
建立專案目錄,並使用npm init初始化專案後,執行下方操作:
安裝相依
npm install mysql koa koa-router
建立index.js
// index.js

const Koa = require('koa');
const Router = require('koa-router');
const mysql = require('mysql');

const app = new Koa();
const router = new Router();

const connection = mysql.createConnection({
  host: 'localhost', // 填写你的mysql host
  user: 'root', // 填写你的mysql用户名
  password: '123456' // 填写你的mysql密码
})

connection.connect(err => {
  if(err) throw err;
  console.log('mysql connncted success!');
})

router.get('/', ctx => {
  ctx.body = 'Visit index';
})
app.use(router.routes());

app.listen(3000);在shell中執行node index.js,當看到shell中列印出mysql connected success!,表示MySQL資料庫連線成功。
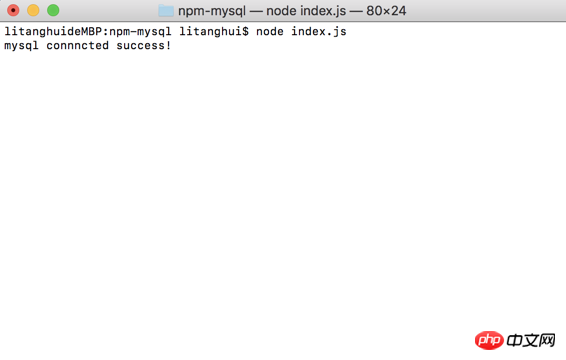
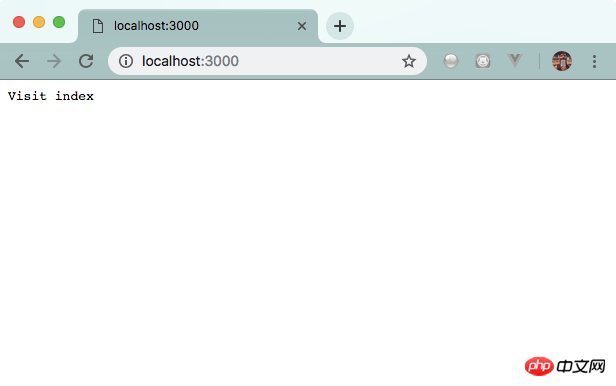
開啟瀏覽器, 存取localhost:3000,當看到螢幕顯示Visit index時,表名項目初始化成功。
資料庫操作
建立資料庫
當存取/createdb時,建立一個mysqlkoa的資料庫,程式碼如下:
router.get('/createdb', ctx => {
  return new Promise(resolve => {
    const sql = `CREATE DATABASE mysqlkoa`;

    connection.query(sql, (err) => {
      if (err) throw err;
      ctx.body = {
        code: 200,
        msg: `create database mysqlkoa success!`
      }
      resolve();
    });
  })
})重新執行node index.js,並使用瀏覽器存取localhost:3000/createdb
<img src="/static/imghw/default1.png" data-src="https://img.php.cn//upload/image/332/781/973/1540792367149822.png" class="lazy" title="1540792367149822.png" alt="Node.js中操作MySQL資料庫的基礎教學">
建立資料表
為了方便,我們直接在連線時使用剛才建立的資料庫,需要在mysql.createConnection中加入database:mysqlkoa的設定項目。
const connection = mysql.createConnection({
  host: 'localhost',
  user: 'root',
  password: '123456',
  database: 'mysqlkoa' // 添加该列
})當存取/createtable時,我們建立一個資料表fe_frame,該表用來保存前端框架的資料:
router.get('/createtable', ctx => {
  return new Promise(resolve => {
    const sql = `CREATE TABLE fe_frame(
      id INT(11) AUTO_INCREMENT PRIMARY KEY,
      name VARCHAR(255),
      author VARCHAR(255)
    )`;
    connection.query(sql, (err ,results, filelds) => {
      if (err) throw err;
      ctx.body = {
        code: 200,
        msg: `create table of fe_frame success!`
      }
      resolve();
    })
  })
})重新執行node index.js,並使用瀏覽器存取localhost :3000/createtable
<img src="/static/imghw/default1.png" data-src="https://img.php.cn//upload/image/332/781/973/1540792367149822.png" class="lazy" title="1540792367149822.png" alt="Node.js中操作MySQL資料庫的基礎教學">
#插入資料
插入單一資料
當存取/insert時,用來插入單一資料:
router.get('/insert', ctx => {
  return new Promise(resolve => {
    const sql = `INSERT INTO fe_frame(name, author)
    VALUES('vue', 'Evan')`;
    connection.query(sql, (err) => {
      if (err) throw err;
      ctx.body = {
        cde: 200,
        msg: `insert data to fe_frame success!`
      }
      resolve();
    })
  })
})重新執行node index.js,並使用瀏覽器存取localhost:3000/insert
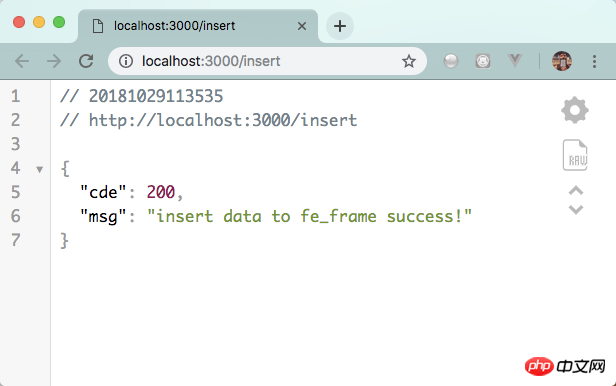
插入多個資料
當存取/insertmulti時,用來插入多個資料:
router.get('/insertmulti', ctx => {
  return new Promise(resolve => {
    const sql = `INSERT INTO fe_frame(name, author)
    VALUES ?`;
    const values = [
      ['React', 'Facebook'],
      ['Angular', 'Google'],
      ['jQuery', 'John Resig']
    ];
    connection.query(sql, [values], (err, result) => {
      if (err) throw err;
      ctx.body = {
        code: 200,
        msg: `insert ${result.affectedRows} data to fe_frame success!`
      }
      resolve();
    })
  })
})重新執行node index.js,並使用瀏覽器訪問localhost:3000/insertmulti
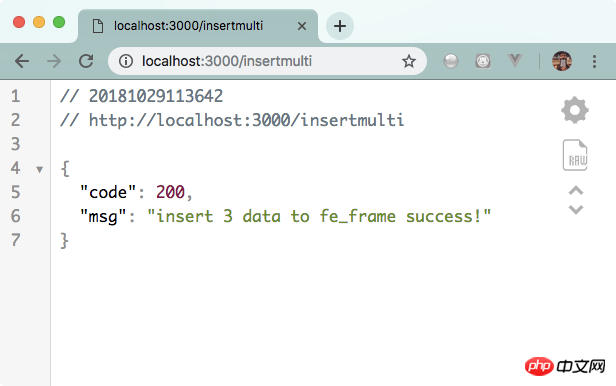
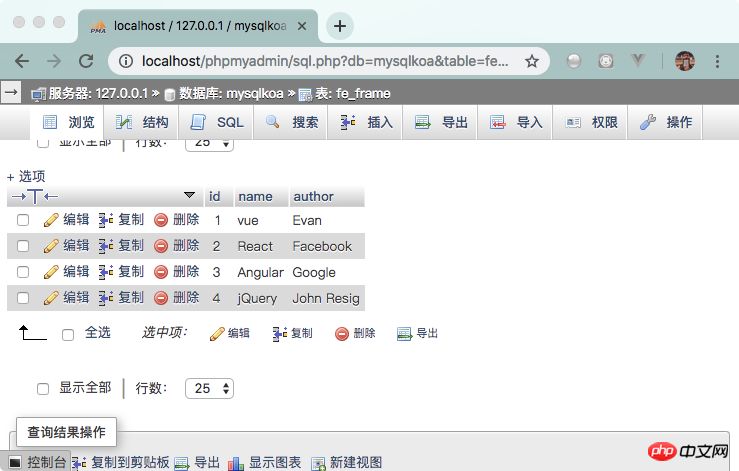
#使用phpMyAdmin訪問,可以看到此時mysqlkoa表格如下
#刪除資料
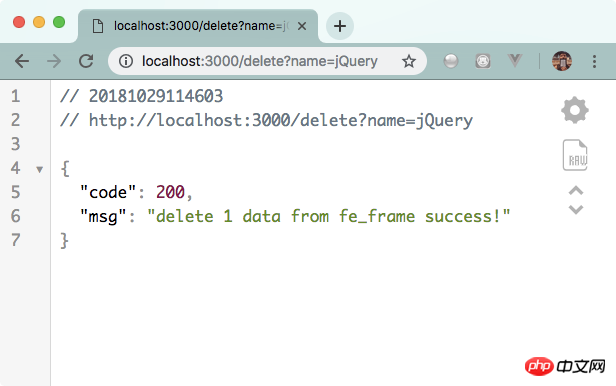
當存取/delete時,刪除對應行。我們使用請求參數name來指定刪除哪個框架,在伺服器端使用ctx.query.name獲取,程式碼如下:
router.get('/delete', ctx => {
  return new Promise(resolve => {
    const name = ctx.query.name;
    const sql = `DELETE FROM fe_frame WHERE name = '${name}'`;
    connection.query(sql, (err, result) => {
      if (err) throw err;
      ctx.body = {
        code: 200,
        msg: `delete ${result.affectedRows} data from fe_frame success!`
      };
      resolve();
    })
  })
})重新執行node index.js,並使用瀏覽器存取http://localhost: 3000/delete?name=jQuery
#修改資料
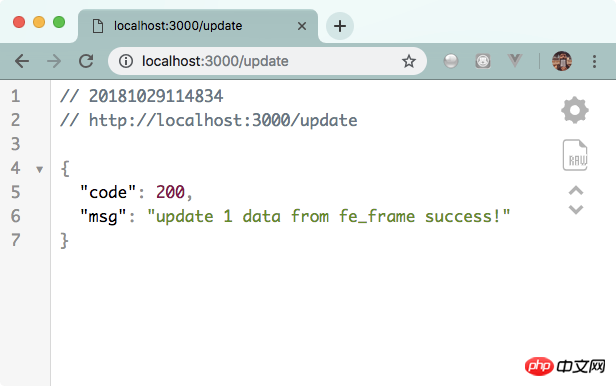
當存取/update時,更新vue框架的作者名為Evan You,程式碼如下:
router.get('/update', ctx => {
  return new Promise(resolve => {
    const sql =  `UPDATE fe_frame SET author = 'Evan You' WHERE NAME = 'vue'`;
    connection.query(sql, (err, result) => {
      if (err) throw err;
      ctx.body = {
        code: 200,
        msg: `update ${result.affectedRows} data from fe_frame success!`
      };
      resolve();
    })
  })
})重新執行node index.js,並使用瀏覽器存取http://localhost:3000/update
查找資料
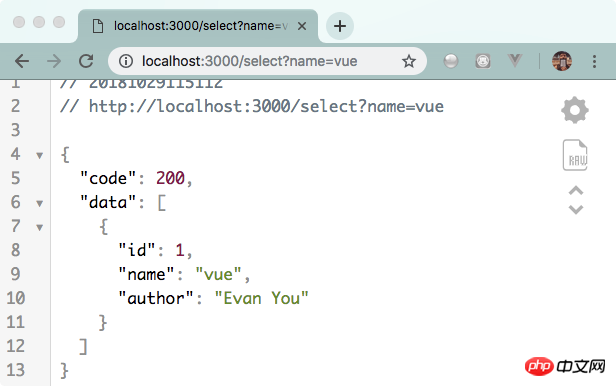
當存取/select時,取得滿足請求參數中框架名條件的項,程式碼如下:
router.get('/select', ctx => {
  return new Promise(resolve => {
    let name = ctx.query.name;
    const sql = `SELECT * FROM fe_frame WHERE name = '${name}'`;
    connection.query(sql, (err, result) => {
      if (err) throw err;
      ctx.body = {
        code: 200,
        data: result
      }
      resolve();
    })
  })
})重新執行node index.js,並使用瀏覽器存取http://localhost:3000/select?name=vue
以上是Node.js中操作MySQL資料庫的基礎教學的詳細內容。更多資訊請關注PHP中文網其他相關文章!

熱AI工具

Undresser.AI Undress
人工智慧驅動的應用程序,用於創建逼真的裸體照片

AI Clothes Remover
用於從照片中去除衣服的線上人工智慧工具。

Undress AI Tool
免費脫衣圖片

Clothoff.io
AI脫衣器

Video Face Swap
使用我們完全免費的人工智慧換臉工具,輕鬆在任何影片中換臉!

熱門文章

熱工具

記事本++7.3.1
好用且免費的程式碼編輯器

SublimeText3漢化版
中文版,非常好用

禪工作室 13.0.1
強大的PHP整合開發環境

Dreamweaver CS6
視覺化網頁開發工具

SublimeText3 Mac版
神級程式碼編輯軟體(SublimeText3)
 PHP與Vue:完美搭檔的前端開發利器
Mar 16, 2024 pm 12:09 PM
PHP與Vue:完美搭檔的前端開發利器在當今網路快速發展的時代,前端開發變得愈發重要。隨著使用者對網站和應用的體驗要求越來越高,前端開發人員需要使用更有效率和靈活的工具來創建響應式和互動式的介面。 PHP和Vue.js作為前端開發領域的兩個重要技術,搭配起來可以稱得上是完美的利器。本文將探討PHP和Vue的結合,以及詳細的程式碼範例,幫助讀者更好地理解和應用這兩
 Django是前端還是後端?一探究竟!
Jan 19, 2024 am 08:37 AM
Django是一個由Python編寫的web應用框架,它強調快速開發和乾淨方法。儘管Django是web框架,但要回答Django是前端還是後端這個問題,需要深入理解前後端的概念。前端是指使用者直接和互動的介面,後端是指伺服器端的程序,他們透過HTTP協定進行資料的互動。在前端和後端分離的情況下,前後端程式可以獨立開發,分別實現業務邏輯和互動效果,資料的交
 簡易JavaScript教學:取得HTTP狀態碼的方法
Jan 05, 2024 pm 06:08 PM
JavaScript教學:如何取得HTTP狀態碼,需要具體程式碼範例前言:在Web開發中,經常會涉及到與伺服器進行資料互動的場景。在與伺服器進行通訊時,我們經常需要取得傳回的HTTP狀態碼來判斷操作是否成功,並根據不同的狀態碼來進行對應的處理。本篇文章將教你如何使用JavaScript來取得HTTP狀態碼,並提供一些實用的程式碼範例。使用XMLHttpRequest
 Go語言前端技術探秘:前端開發新視野
Mar 28, 2024 pm 01:06 PM
Go語言作為一種快速、高效的程式語言,在後端開發領域廣受歡迎。然而,很少有人將Go語言與前端開發聯繫起來。事實上,使用Go語言進行前端開發不僅可以提高效率,還能為開發者帶來全新的視野。本文將探討使用Go語言進行前端開發的可能性,並提供具體的程式碼範例,幫助讀者更了解這一領域。在傳統的前端開發中,通常會使用JavaScript、HTML和CSS來建立使用者介面
 Django:前端和後端開發都能搞定的神奇框架!
Jan 19, 2024 am 08:52 AM
Django:前端和後端開發都能搞定的神奇框架! Django是一個高效、可擴展的網路應用程式框架。它能夠支援多種Web開發模式,包括MVC和MTV,可以輕鬆地開發出高品質的Web應用程式。 Django不僅支援後端開發,還能夠快速建構出前端的介面,透過模板語言,實現靈活的視圖展示。 Django把前端開發和後端開發融合成了一種無縫的整合,讓開發人員不必專門學習
 前端面試官常問的問題
Mar 19, 2024 pm 02:24 PM
在前端開發面試中,常見問題涵蓋廣泛,包括HTML/CSS基礎、JavaScript基礎、框架和函式庫、專案經驗、演算法和資料結構、效能最佳化、跨域請求、前端工程化、設計模式以及新技術和趨勢。面試官的問題旨在評估候選人的技術技能、專案經驗以及對行業趨勢的理解。因此,應試者應充分準備這些方面,以展現自己的能力和專業知識。
 如何在JavaScript中取得HTTP狀態碼的簡單方法
Jan 05, 2024 pm 01:37 PM
JavaScript中的HTTP狀態碼取得方法簡介:在進行前端開發中,我們常常需要處理與後端介面的交互,而HTTP狀態碼就是其中非常重要的一部分。了解並取得HTTP狀態碼有助於我們更好地處理介面傳回的資料。本文將介紹使用JavaScript取得HTTP狀態碼的方法,並提供具體程式碼範例。一、什麼是HTTP狀態碼HTTP狀態碼是指當瀏覽器向伺服器發起請求時,服務
 Golang與前端技術結合:探討Golang如何在前端領域發揮作用
Mar 19, 2024 pm 06:15 PM
Golang與前端技術結合:探討Golang如何在前端領域發揮作用,需要具體程式碼範例隨著互聯網和行動應用的快速發展,前端技術也愈發重要。而在這個領域中,Golang作為一門強大的後端程式語言,也可以發揮重要作用。本文將探討Golang如何與前端技術結合,以及透過具體的程式碼範例來展示其在前端領域的潛力。 Golang在前端領域的角色作為一門高效、簡潔且易於學習的


