我們在跟別人透過微信或qq聊天的時候都會有對話框氣泡,那麼這個對話框氣泡是怎麼實現的呢?這篇文章來跟大家介紹如何使用CSS製作我們常可以看到的對話框氣泡,以下我們來看具體的內容。
首先我們來看看我們需要製作的對話框的效果
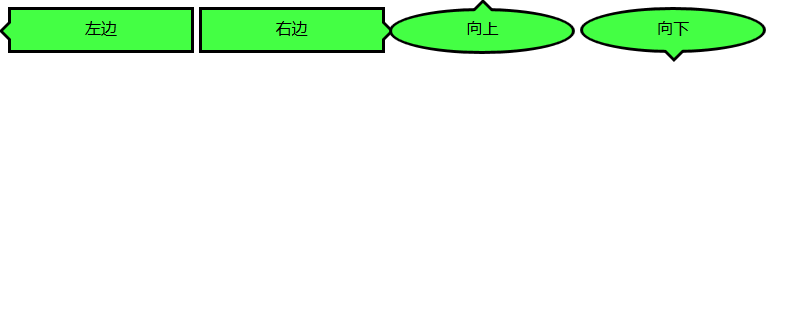
#接下來我們就來看看這幾種對話氣泡的實作方法
我們來看看如何實作箭頭向左的對話氣泡
#我們需要先來製作一個框架
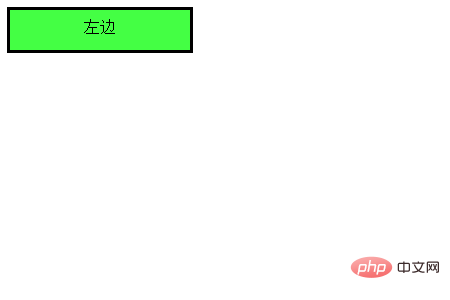
#程式碼如下
HTML程式碼
<div class="balloon-left">
左边
</div>
CSS程式碼
 .balloon-left {
  position: relative;
  display: inline-block;
  padding: 0 15px;
  width: auto;
  min-width: 150px;
  height: 40px;
  line-height: 34px;
  text-align: center;
  background: #44FF44;
  border: 3px solid #000000;
  z-index: 0;
}接著,我們使用:before來製作箭頭部分,用:after來製作箭頭的邊
CSS程式碼
.balloon-left:before {
  border-style: solid;
  border-width: 10px 10px 10px 0;
  border-color: transparent #44FF44 transparent transparent;
  content: "";
  position: absolute;
  top: 50%; left: -8px;
  margin-top: -9px;
  display: block;
  width: 0px;
  height: 0px;
  z-index: 0;
}
.balloon-left:after {
  border-style: solid;
  border-width: 11px 11px 11px 0;
  border-color: transparent #000000 transparent transparent;
  content: "";
  position: absolute;
  top: 50%; left: -12px;
  margin-top: -10px;
  display: block;
  width: 0px;
  height: 0px;
  z-index: -1;
}運行效果入下所示
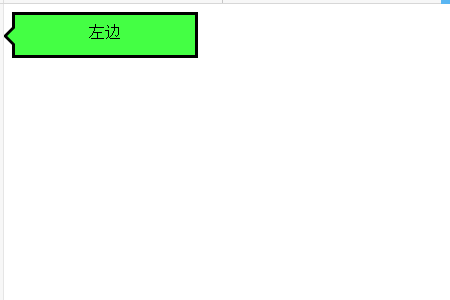
這樣就完成了第一個對話氣泡
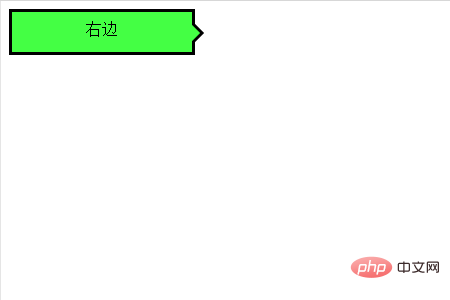
下面我們就來根據上述方法來製作箭頭向右的對話氣泡
#程式碼如下
HTML程式碼
<div class="balloon-right">
  右边
</div>
CSS程式碼
.balloon-right {
  position: relative;
  display: inline-block;
  padding: 0 15px;
  width: auto;
  min-width: 150px;
  height: 40px;
  line-height: 34px;
  text-align: center;
  background: #44FF44;
  border: 3px solid #000000;
  z-index: 0;
}
.balloon-right:before {
  border-style: solid;
  border-width: 10px 0 10px 10px;
  border-color: transparent transparent transparent #44FF44;
  content: "";
  position: absolute;
  top: 50%; right: -8px;
  margin-top: -9px;
  display: block;
  width: 0px;
  height: 0px;
  z-index: 0;
}
.balloon-right:after {
  border-style: solid;
  border-width: 11px 0 11px 11px;
  border-color: transparent transparent transparent #000000;
  content: "";
  position: absolute;
  top: 50%; right: -12px;
  margin-top: -10px;
  display: block;
  width: 0px;
  height: 0px;
  z-index: -1;
}運行上述程式碼的效果如下所示:是一個向右的氣泡
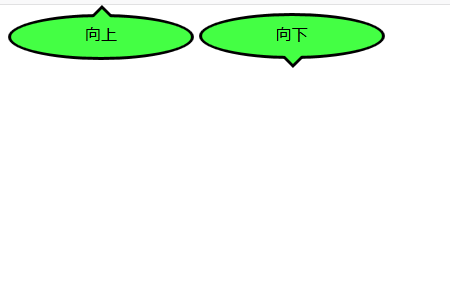
最後我們來說箭頭向左和向右的對話氣泡
我們需要用到border-radius屬性讓氣泡變得圓滑
程式碼如下
HTML程式碼
<div class="balloon-top">向上</div>
  <div class="balloon-bottom">向下</div>
CSS程式碼
.balloon-top {
  position: relative;
  display: inline-block;
  padding: 0 15px;
  width: auto;
  min-width: 150px;
  height: 40px;
  line-height: 32px;
  text-align: center;
  background: #44FF44;
  border: 3px solid #000000;
  z-index: 0;
  border-radius: 60%;
}
.balloon-top:before {
  border-style: solid;
  border-width: 0 10px 10px 10px;
  border-color: transparent transparent #44FF44 transparent;
  content: "";
  position: absolute;
  top: -8px; left: 50%;
  margin-left: -9px;
  display: block;
  width: 0px;
  height: 0px;
  z-index: 0;
}
.balloon-top:after {
  border-style: solid;
  border-width: 0 11px 11px 11px;
  border-color: transparent transparent #000000 transparent;
  content: "";
  position: absolute;
  top: -12px; left: 50%;
  margin-left: -10px;
  display: block;
  width: 0px;
  height: 0px;
  z-index: -1;
}
.balloon-bottom {
  position: relative;
  display: inline-block;
  padding: 0 15px;
  width: auto;
  min-width: 150px;
  height: 40px;
  line-height: 34px;
  text-align: center;
  background-color: #44FF44;
  border: 3px solid #000000;
  z-index: 0;
  border-radius: 60%;
}
.balloon-bottom:before {
  content: "";
  position: absolute;
  bottom: -8px; left: 50%;
  margin-left: -9px;
  width: 0px;
  height: 0px;
  border-style: solid;
  border-width: 10px 10px 0 10px;
  border-color: #44FF44 transparent transparent transparent;
  z-index: 0;
}
.balloon-bottom:after {
  border-style: solid;
  border-width: 11px 11px 0 11px;
  border-color: #000000 transparent transparent transparent;
  content: "";
  position: absolute;
  bottom: -12px; left: 50%;
  margin-left: -10px;
  width: 0px;
  height: 0px;
  z-index: -1;
}效果如下所示
#總結
CSS部分有點複雜,但你可以根據以上範例透過自訂顏色和形狀來製作各種類型的對話框氣泡。
這篇文章到這裡就全部結束了,更多精彩內容大家可以移步到php中文網的CSS影片教學專欄進一步的學習! ! !
以上是如何使用CSS製作對話框氣泡的詳細內容。更多資訊請關注PHP中文網其他相關文章!
