以下由Laravel教學專欄為大家介紹Laravel Auth原理淺析,希望對需要的朋友有幫助!

由於公司最近使用Laravel-admin做後台,接觸了下Laravel框架,不得不說,Laravel社區的力量以及生態確實挺強大。
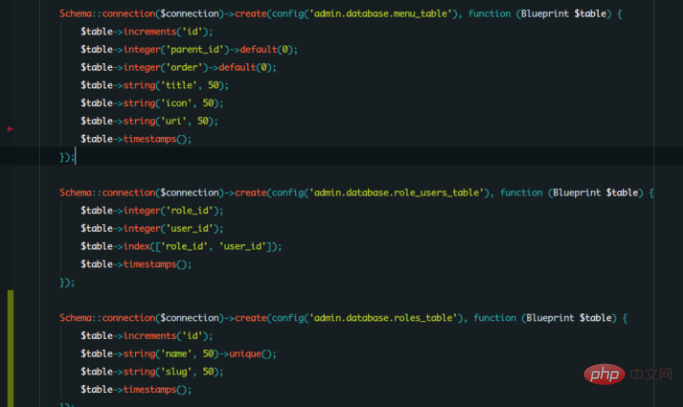
但是公司內部業務都處於Java端,後台全部都是調JavaApi,因此使用Laravel的特性就得大打折扣了,首先Eloquent模型完全不能用,我這邊把業務分開來,只存了3張表,這是Laravel-admin自備的表。

Laravel-admin帶了9張表,由於使用者登入業務全保存在Api端,自備的表功能被我割捨了。因此需要自行實作Api登入的邏輯,而又必須走Laravel Auth認證。
原文理解讀
// 使用下面这个命令Laravel会自动为我们生成Auth路由和认证模块。跟着代码往下解读。
  php artisan make:auth

// Http/Controllers/Auth/LoginController 使用了 AuthenticatesUsers
其中 下面這三個方法詮釋了登入邏輯的全部。
public function login(Request $request)
    {
        $this->validateLogin($request);
        if ($this->hasTooManyLoginAttempts($request)) {
            $this->fireLockoutEvent($request);
            return $this->sendLockoutResponse($request);
        }
        // 这里尝试登录系统,
        if ($this->attemptLogin($request)) {
            return $this->sendLoginResponse($request);
        }
        $this->incrementLoginAttempts($request);
        return $this->sendFailedLoginResponse($request);
    }
    protected function attemptLogin(Request $request)
    {
        return $this->guard()->attempt(
            $this->credentials($request), $request->has('remember')
        );
    }
    protected function guard()
    {
        return Auth::guard();
}控制器會去尋找Auth::guard(), 那這個Auth::guard()是個什麼東西呢,
首先Auth 是系統的單例,原型在
Illuminate\Auth\AuthManager;
顧名思義,是一個Auth管理模組,實作了認證工廠模式介面guards(),
public function __construct($app)
    {
        $this->app = $app;
        $this->userResolver = function ($guard = null) {
            return $this->guard($guard)->user();
        };
    }
    // Auth::guard();就是调用了这个方法。
    public function guard($name = null)
    {
        // 首先查找$name, 没有就使用默认的驱动,
        $name = $name ?: $this->getDefaultDriver();
        // 意思就是要实例化出这个驱动并且返回,
        return isset($this->guards[$name])
                    ? $this->guards[$name]
                    : $this->guards[$name] = $this->resolve($name);
    }

    // 默认的驱动是从配置文件里面读取的,/config/auth.php default配置项
    public function getDefaultDriver()
    {
        return $this->app['config']['auth.defaults.guard'];
    }

   // 这里是构造Auth-guard驱动
   protected function resolve($name)
    {
        $config = $this->getConfig($name);
        if (is_null($config)) {
            throw new InvalidArgumentException("xxx");
        }
        // 这里是如果你自己实现的驱动就返回
        if (isset($this->customCreators[$config['driver']])) {
            return $this->callCustomCreator($name, $config);
        }
        // 这里是系统默认两个类分别是
       // session 和 token 这里主要讲 sessionGuard .
        $driverMethod = 'create'.ucfirst($config['driver']).'Driver';
        if (method_exists($this, $driverMethod)) {
            return $this->{$driverMethod}($name, $config);
        }
        throw new InvalidArgumentException("xxx");
}接下來看看設定檔auth.php
 // Auth::guard() ,不传参数,就调用默认的default.guard ,
   'defaults' => [
        'guard' => 'web',
        'passwords' => 'users',
    ],
   // 系统的guard .默认支持 "database", "eloquent",意思就是说你的provider必须是这两个实例中的一个,
    'guards' => [
        'web' => [
            'driver' => 'session',
            'provider' => 'users',
        ],
        'api' => [
            'driver' => 'token',
            'provider' => 'users',
        ],
    ],
  // 这个就是上面的provider了,你使用哪一个provider作为你的Auth::guard()返回的
 // 模型
    'providers' => [
        'users' => [
            'driver' => 'eloquent',
            'model' => App\User::class,
        ],
        // 'users' => [
        //     'driver' => 'database',
        //     'table' => 'users',
        // ],
],也就是說也就是說終歸到底,Auth::guard(), 在預設設定裡面是給我反回了一個sessionGuard .
#主要看下面4個方法
namespace Illuminate\Auth;
class SessionGuard{
    public function attempt(array $credentials = [], $remember = false)
    {
        // 这里触发 试图登录事件,此时还没有登录
        $this->fireAttemptEvent($credentials, $remember);
        $this->lastAttempted =
        $user = $this->provider->retrieveByCredentials($credentials);
        // 这里会调用hasValidCredentials,其实就是验证用户名和密码的一个过程
        if ($this->hasValidCredentials($user, $credentials)) {
            // 如果验证通过了,就调用login方法 .
            $this->login($user, $remember);
            return true;
        }
        // 否则就触发登录失败事件,返回假
        $this->fireFailedEvent($user, $credentials);
        return false;
    }
    // 这里是登录用户的操作,就是说调用这个方法已经是合法用户了,必须是一个
  // AuthenticatableContract 的实例 .
    public function login(AuthenticatableContract $user,
    $remember = false)
    {
        // 直接更新session,这里就是把session存起来,session的键在该方法的
        // getName() 里边,
        $this->updateSession($user->getAuthIdentifier());
        if ($remember) {
            $this->ensureRememberTokenIsSet($user);
            $this->queueRecallerCookie($user);
        }
     // 触发登录事件,已经登录了这个时候,
        $this->fireLoginEvent($user, $remember);
        // 将user对象保存到sessionGuard , 后续的类访问Auth::user();直接拿到
        $this->setUser($user);
    }
    // 这里就是经常使用到的 Auth::user()了,具体如何返回看AuthManager里面的
    // __call
    public function user()
    {
        if ($this->loggedOut) {
            return;
        }
        if (! is_null($this->user)) {
            return $this->user;
        }
        // 这里读取session拿到user的id ,
        $id = $this->session->get($this->getName());
        $user = null;
        // 如果拿到了id ,查找到该user
        if (! is_null($id)) {
            if ($user = $this->provider->retrieveById($id)) {
                $this->fireAuthenticatedEvent($user);
            }
        }
        $recaller = $this->recaller();
        if (is_null($user) && ! is_null($recaller)) {
            $user = $this->userFromRecaller($recaller);
            if ($user) {
                $this->updateSession($user->getAuthIdentifier());
                $this->fireLoginEvent($user, true);
            }
        }
        return $this->user = $user;
    }
    // 这里就直接返回用户id了,
    public function id()
    {
        if ($this->loggedOut) {
            return;
        }
        return $this->user()
                    ? $this->user()->getAuthIdentifier()
                    : $this->session->get($this->getName());
    }
}大體上用戶登入的流程就完了,簡單流程就是
//伪代码
$credentials = $request()->only(['username' ,'password']);
if(Auth::guard("session")->attempt($credentials)){
  // 登录成功
}else{
  // 登录失败
}實現使用者登入之後才能存取的控制器/方法
Route::get("/home")->middleware("auth");
// auth Middleware 是在app/Http/Kernel中注册的,
// 类名是  \Illuminate\Auth\Middleware\Authenticate::class
// 解析过程实质上是这个方法:
    public function handle($request, Closure $next, ...$guards)
    {
        $this->authenticate($guards);
        return $next($request);
    }

    protected function authenticate(array $guards)
    {
        // 默认情况下会去 Auth中寻找authenticate这个方法
        if (empty($guards)) {
            return $this->auth->authenticate();
        }
        // 如果middleware中传了参数,会遍历一遍,不通过就抛出异常
        foreach ($guards as $guard) {
            if ($this->auth->guard($guard)->check()) {
                return $this->auth->shouldUse($guard);
            }
        }
        throw new AuthenticationException('Unauthenticated.', $guards);
    }
    //sessionGuard 中的authenticate其实也就是调用了一遍user方法。
    public function authenticate()
    {
        if (! is_null($user = $this->user())) {
            return $user;
        }
        throw new AuthenticationException;
}第一次寫文,有錯誤請指出謝謝!
以上是關於Laravel Auth原理淺析的詳細內容。更多資訊請關注PHP中文網其他相關文章!


