

詳解Nginx1.19 php8.0 原始碼編譯安裝

推薦學習:《PHP8教學》
#準備好centos7以上的版本
第一步
下載nginx套件放置在指定目錄下一般放置mnt目錄:
下載位址: nginx.org/ en/download.html
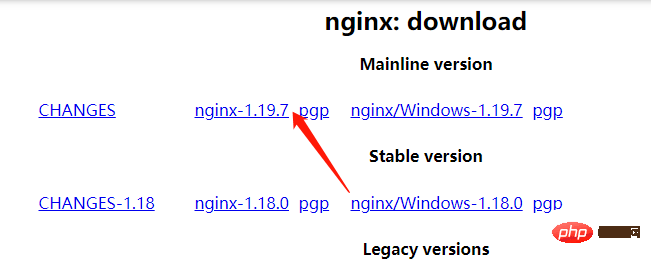
解壓縮nginx壓縮套件
tar zxvf nginx-1.19.7.tar.gz
登入後複製
準備依賴套件:
yum -y install zlib-devel pcre-devel openssl-devel
登入後複製
準備nginx用戶:
useradd -M -s /sbin/nologin nginx
登入後複製
原始碼編譯與安裝:
./configure --prefix=/usr/local/nginx --with-http_stub_status_module --with-http_ssl_module --with-http_random_index_module --with-http_sub_module

make
make install
登入後複製
設定設定檔:
user nginx;
登入後複製
服務管理:
1.偵測設定語法
/usr/local/nginx/sbin/nginx -t
登入後複製
2.啟動服務
/usr/local/nginx/sbin/nginx
登入後複製
3.重載服務
/usr/local/nginx/sbin/nginx -s reload
pkill -HUP nginx
登入後複製
4.關閉服務
/usr/local/nginx/sbin/nginx -s stop
pkill nginx
登入後複製
5.開機啟動
vi /etc/rc.local/usr/local/nginx/sbin/nginx
登入後複製
進程管理:
pstree |grep nginx
ps -ef |grep nginx
ps aux |grep nginx
登入後複製
端口管理:
netstat -tunpl |grep nginx
登入後複製
客戶端測試:(輸入你的公網IP)
http://192.168.2.1
登入後複製
nginx 重載
[root@wml sbin]# pkill -HUP nginx
登入後複製
php8.0原始碼編譯安裝
一安裝php8的依賴
yum -y install autoconf freetype gd libpng libpng-devel libjpeg libxml2 libxml2-devel zlib curl curl-devel net-snmp-devel libjpeg-devel php-ldap openldap-devel openldap-clients freetype-devel gmp-devel libzip libzip-devel sqlite-devel
登入後複製
二安裝php8的依賴套件
1.解壓縮
tar -zxvf oniguruma-6.9.4.tar.gz
登入後複製
2.切換目錄
cd oniguruma-6.9.4/
登入後複製
3產生configure
./autogen.sh
登入後複製
4.產生編譯設定檔
./configure --prefix=/usr
登入後複製
5.編譯並安裝
make && make install
登入後複製
登入後複製
2.編譯PHP8主機套件
1.解壓縮
tar xzf php-8.0.0.tar.gz
登入後複製
2.切換目錄
cd php-8.0.0/
登入後複製
3.產生編譯設定檔
./configure --prefix=/usr/local/php --with-config-file-path=/usr/local/php/etc --enable-fpm --with-fpm-user=nginx --with-fpm-group=nginx --enable-mysqlnd --with-mysqli --with-pdo-mysql --enable-opcache --with-pcre-jit --enable-gd --with-jpeg --with-freetype --with-gettext --with-curl --with-openssl --enable-sockets --enable-mbstring --enable-xml --with-zip --with-zlib --with-snmp --with-mhash --enable-ftp --enable-bcmath --enable-soap --enable-shmop --enable-sysvsem --enable-pcntl --with-gmp
登入後複製
4.編譯並安裝
make && make install
登入後複製
登入後複製
#error 編譯安裝遇到的錯誤

解决办法 yum install automake
登入後複製

解决办法 执行 yum install libtool
登入後複製
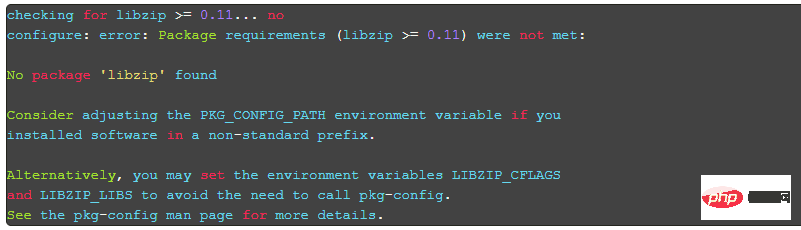
解决办法 参考 下图
登入後複製
以上是詳解Nginx1.19 php8.0 原始碼編譯安裝的詳細內容。更多資訊請關注PHP中文網其他相關文章!
本網站聲明
本文內容由網友自願投稿,版權歸原作者所有。本站不承擔相應的法律責任。如發現涉嫌抄襲或侵權的內容,請聯絡admin@php.cn

熱AI工具

Undresser.AI Undress
人工智慧驅動的應用程序,用於創建逼真的裸體照片

AI Clothes Remover
用於從照片中去除衣服的線上人工智慧工具。

Undress AI Tool
免費脫衣圖片

Clothoff.io
AI脫衣器

Video Face Swap
使用我們完全免費的人工智慧換臉工具,輕鬆在任何影片中換臉!

熱門文章
Windows 11 KB5054979中的新功能以及如何解決更新問題
3 週前
By DDD
如何修復KB5055523無法在Windows 11中安裝?
2 週前
By DDD
Inzoi:如何申請學校和大學
4 週前
By DDD
如何修復KB5055518無法在Windows 10中安裝?
2 週前
By DDD
Roblox:Dead Rails - 如何召喚和擊敗Nikola Tesla
4 週前
By 尊渡假赌尊渡假赌尊渡假赌
熱工具

記事本++7.3.1
好用且免費的程式碼編輯器

SublimeText3漢化版
中文版,非常好用

禪工作室 13.0.1
強大的PHP整合開發環境

Dreamweaver CS6
視覺化網頁開發工具

SublimeText3 Mac版
神級程式碼編輯軟體(SublimeText3)

