今天,日月在這裡教大家如何使用springBoot整合redis,說實話比較簡單,網路上也有大把的教學。先套用一下網路上的簡介。
定義
REmote DIctionary Server(Redis) 是由Salvatore Sanfilippo所寫的key-value儲存系統。
Redis是一個開源的使用ANSI C語言編寫、遵守BSD協定、支援網路、可基於記憶體亦可持久化的日誌型、Key-Value資料庫,並提供多種語言的API。
它通常被稱為資料結構伺服器,因為值(value)可以是字串(String), 雜湊(Map), 列表(list), 集合(sets) 和有序集合(sorted sets)等類型。
reids的優點
以下是Redis的一些優點。
異常快速 - Redis非常快,每秒可執行大約110000次的設定(SET)操作,每秒大約可執行81000次的讀取/獲取(GET)操作。
支援豐富的資料類型 - Redis支援開發人員常用的大多數資料類型,例如列表,集合,排序集和散列等等。這使得Redis很容易被用來解決各種問題,因為我們知道哪些問題可以更好使用地哪些資料類型來處理解決。
操作具有原子性 - 所有Redis操作都是原子操作,這確保如果兩個客戶端並發訪問,Redis伺服器能接收更新的值。
多實用工具- Redis是一個多實用工具,可用於多種用例,如:緩存,訊息隊列(Redis本地支援發布/訂閱),應用程式中的任何短期數據,例如,web應用程式中的會話,網頁命中計數等。
推薦(免費):redis
#Redis 安裝
##Window 下安裝 下載網址:https://github.com/MSOpenTech/redis/releases。
Redis 支援 32 位元和 64 位元。這個需要根據你係統平台的實際情況選擇,這裡我們下載 Redis-x64-xxx.zip壓縮包到 C 盤,解壓縮後,將資料夾重新命名為 redis。
執行
redis-server.exe redis.windows.conf 如果想方便的話,可以把redis 的路徑加到系統的環境變數裡,這樣就省得再輸路徑了,後面的那個redis.windows.conf 可以省略,如果省略,會啟用預設的。輸入之後,會顯示如下介面: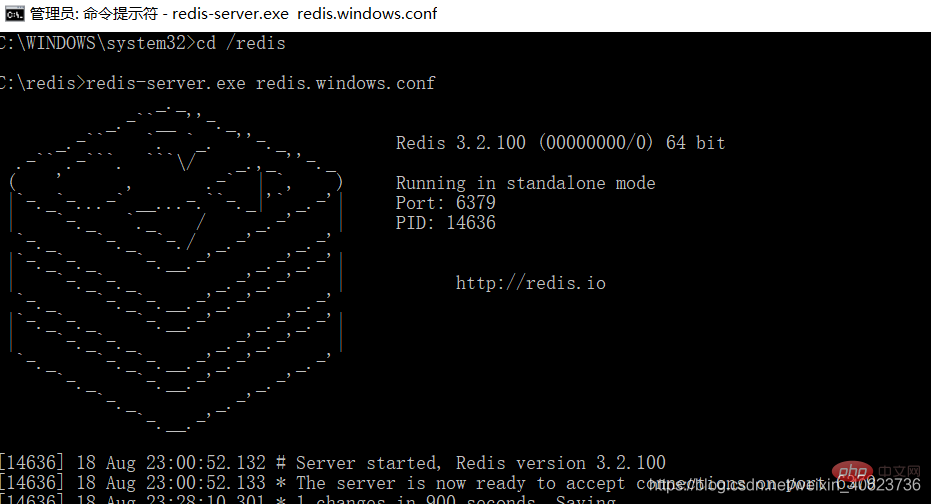
1、新增依賴
<!--集成redis-->
<dependency>
    <groupid>org.springframework.boot</groupid>
    <artifactid>spring-boot-starter-redis</artifactid>
    <version>1.4.1.RELEASE</version>
</dependency>
<dependency>
    <groupid>com.alibaba</groupid>
    <artifactid>fastjson</artifactid>
    <version>1.2.3</version>
</dependency>
<dependency>
    <groupid>com.fasterxml.jackson.core</groupid>
    <artifactid>jackson-databind</artifactid>
</dependency>
2、在設定中心加入redis設定
spring.redis.host=127.0.0.1
#Redis服务器连接端口
spring.redis.port=6379
#Redis服务器连接密码(默认为空)
spring.redis.password=
#连接池最大连接数(使用负值表示没有限制)
spring.redis.pool.max-active=8
#连接池最大阻塞等待时间(使用负值表示没有限制)
spring.redis.pool.max-wait=-1
#连接池中的最大空闲连接
spring.redis.pool.max-idle=8
#连接池中的最小空闲连接
spring.redis.pool.min-idle=0
#连接超时时间(毫秒)
spring.redis.timeout=30000
3、設定類別RedisConfig
import java.lang.reflect.Method;
import org.springframework.beans.factory.annotation.Value;
import org.springframework.cache.CacheManager;
import org.springframework.cache.annotation.CachingConfigurerSupport;
import org.springframework.cache.annotation.EnableCaching;
import org.springframework.cache.interceptor.KeyGenerator;
import org.springframework.cloud.context.config.annotation.RefreshScope;
import org.springframework.context.annotation.Bean;
import org.springframework.context.annotation.Configuration;
import org.springframework.data.redis.cache.RedisCacheManager;
import org.springframework.data.redis.connection.RedisConnectionFactory;
import org.springframework.data.redis.connection.jedis.JedisConnectionFactory;
import org.springframework.data.redis.core.RedisTemplate;
import org.springframework.data.redis.core.StringRedisTemplate;
import org.springframework.data.redis.serializer.Jackson2JsonRedisSerializer;
import com.fasterxml.jackson.annotation.PropertyAccessor;
import com.fasterxml.jackson.annotation.JsonAutoDetect;
import com.fasterxml.jackson.databind.ObjectMapper;
@Configuration
@EnableCaching
@RefreshScope
public class RedisConfig extends CachingConfigurerSupport{
    @Value("${spring.redis.host}")
    private String host;
    @Value("${spring.redis.port}")
    private int port;
    @Value("${spring.redis.timeout}")
    private int timeout;
    @Value("${spring.redis.password}")
    private String password;
    @Value("${spring.redis.pool.max-active}")
    private int maxActive;
    @Value("${spring.redis.pool.max-wait}")
    private int maxWait;
    @Value("${spring.redis.pool.max-idle}")
    private int maxIdle;
    @Value("${spring.redis.pool.min-idle}")
    private int minIdle;

    @RefreshScope
    @Bean
    public KeyGenerator wiselyKeyGenerator(){
        return new KeyGenerator() {
            @Override
            public Object generate(Object target, Method method, Object... params) {
                StringBuilder sb = new StringBuilder();
                sb.append(target.getClass().getName());
                sb.append(method.getName());
                for (Object obj : params) {
                    sb.append(obj.toString());
                }
                return sb.toString();
            }
        };
    }

    @RefreshScope
    @Bean
    public JedisConnectionFactory redisConnectionFactory() {
        JedisConnectionFactory factory = new JedisConnectionFactory();
        factory.setHostName(host);
        factory.setPort(port);
        factory.setTimeout(timeout); //设置连接超时时间
        factory.setPassword(password);
        factory.getPoolConfig().setMaxIdle(maxIdle);
        factory.getPoolConfig().setMinIdle(minIdle);
        factory.getPoolConfig().setMaxTotal(maxActive);
        factory.getPoolConfig().setMaxWaitMillis(maxWait);
        return factory;
    }

    @RefreshScope
    @Bean
    public CacheManager cacheManager(RedisTemplate redisTemplate) {
        RedisCacheManager cacheManager = new RedisCacheManager(redisTemplate);
        // Number of seconds before expiration. Defaults to unlimited (0)
        cacheManager.setDefaultExpiration(10); //设置key-value超时时间
        return cacheManager;
    }

    @RefreshScope
    @Bean
    public RedisTemplate<string> redisTemplate(RedisConnectionFactory factory) {
        StringRedisTemplate template = new StringRedisTemplate(factory);
        setSerializer(template); //设置序列化工具,这样ReportBean不需要实现Serializable接口
        template.afterPropertiesSet();
        return template;
    }

    @RefreshScope
    private void setSerializer(StringRedisTemplate template) {
        Jackson2JsonRedisSerializer jackson2JsonRedisSerializer = new Jackson2JsonRedisSerializer(Object.class);
        ObjectMapper om = new ObjectMapper();
        om.setVisibility(PropertyAccessor.ALL, JsonAutoDetect.Visibility.ANY);
        om.enableDefaultTyping(ObjectMapper.DefaultTyping.NON_FINAL);
        jackson2JsonRedisSerializer.setObjectMapper(om);
        template.setValueSerializer(jackson2JsonRedisSerializer);
    }
}</string>4、RedisUtils類別
import java.io.Serializable;
import java.util.List;
import java.util.Set;
import java.util.concurrent.TimeUnit;
import org.springframework.beans.factory.annotation.Autowired;
import org.springframework.data.redis.core.HashOperations;
import org.springframework.data.redis.core.ListOperations;
import org.springframework.data.redis.core.RedisTemplate;
import org.springframework.data.redis.core.SetOperations;
import org.springframework.data.redis.core.ValueOperations;
import org.springframework.data.redis.core.ZSetOperations;
import org.springframework.stereotype.Service;
@Service
public class RedisUtils {
    @Autowired
    private RedisTemplate redisTemplate;
    /**
     * 写入缓存
     * @param key
     * @param value
     * @return
     */
    public boolean set(final String key, Object value) {
        boolean result = false;
        try {
            ValueOperations<serializable> operations = redisTemplate.opsForValue();
            operations.set(key, value);
            result = true;
        } catch (Exception e) {
            e.printStackTrace();
        }
        return result;
    }
    /**
     * 写入缓存设置时效时间
     * @param key
     * @param value
     * @return
     */
    public boolean set(final String key, Object value, Long expireTime ,TimeUnit timeUnit) {
        boolean result = false;
        try {
            ValueOperations<serializable> operations = redisTemplate.opsForValue();
            operations.set(key, value);
            redisTemplate.expire(key, expireTime, timeUnit);
            result = true;
        } catch (Exception e) {
            e.printStackTrace();
        }
        return result;
    }
    /**
     * 批量删除对应的value
     * @param keys
     */
    public void remove(final String... keys) {
        for (String key : keys) {
            remove(key);
        }
    }
    /**
     * 批量删除key
     * @param pattern
     */
    public void removePattern(final String pattern) {
        Set<serializable> keys = redisTemplate.keys(pattern);
        if (keys.size() > 0){
            redisTemplate.delete(keys);
        }
    }
    /**
     * 删除对应的value
     * @param key
     */
    public void remove(final String key) {
        if (exists(key)) {
            redisTemplate.delete(key);
        }
    }
    /**
     * 判断缓存中是否有对应的value
     * @param key
     * @return
     */
    public boolean exists(final String key) {
        return redisTemplate.hasKey(key);
    }
    /**
     * 读取缓存
     * @param key
     * @return
     */
    public Object get(final String key) {
        Object result = null;
        ValueOperations<serializable> operations = redisTemplate.opsForValue();
        result = operations.get(key);
        return result;
    }
    /**
     * 哈希 添加
     * @param key
     * @param hashKey
     * @param value
     */
    public void hmSet(String key, Object hashKey, Object value){
        HashOperations<string> hash = redisTemplate.opsForHash();
        hash.put(key,hashKey,value);
    }
    /**
     * 哈希获取数据
     * @param key
     * @param hashKey
     * @return
     */
    public Object hmGet(String key, Object hashKey){
        HashOperations<string>  hash = redisTemplate.opsForHash();
        return hash.get(key,hashKey);
    }
    /**
     * 列表添加
     * @param k
     * @param v
     */
    public void lPush(String k,Object v){
        ListOperations<string> list = redisTemplate.opsForList();
        list.rightPush(k,v);
    }
    /**
     * 列表获取
     * @param k
     * @param l
     * @param l1
     * @return
     */
    public List<object> lRange(String k, long l, long l1){
        ListOperations<string> list = redisTemplate.opsForList();
        return list.range(k,l,l1);
    }
    /**
     * 集合添加
     * @param key
     * @param value
     */
    public void add(String key,Object value){
        SetOperations<string> set = redisTemplate.opsForSet();
        set.add(key,value);
    }
    /**
     * 集合获取
     * @param key
     * @return
     */
    public Set<object> setMembers(String key){
        SetOperations<string> set = redisTemplate.opsForSet();
        return set.members(key);
    }
    /**
     * 有序集合添加
     * @param key
     * @param value
     * @param scoure
     */
    public void zAdd(String key,Object value,double scoure){
        ZSetOperations<string> zset = redisTemplate.opsForZSet();
        zset.add(key,value,scoure);
    }
    /**
     * 有序集合获取
     * @param key
     * @param scoure
     * @param scoure1
     * @return
     */
    public Set<object> rangeByScore(String key,double scoure,double scoure1){
        ZSetOperations<string> zset = redisTemplate.opsForZSet();
        return zset.rangeByScore(key, scoure, scoure1);
}</string></object></string></string></object></string></string></object></string></string></string></serializable></serializable></serializable></serializable>5、測試,修改controller
import java.util.concurrent.TimeUnit;
import org.slf4j.Logger;
import org.slf4j.LoggerFactory;
import org.springframework.beans.factory.annotation.Autowired;
import org.springframework.web.bind.annotation.PathVariable;
import org.springframework.web.bind.annotation.RequestMapping;
import org.springframework.web.bind.annotation.RestController;
import com.chenqi.springboot.redis.RedisUtils;
import com.chenqi.springboot.service.TestService;
@RestController
public class SpringBootController {

    public static final Logger log = LoggerFactory.getLogger(SpringBootController.class);

    @Autowired
    TestService testService;

    @Autowired
    private RedisUtils redisUtils;
    @RequestMapping(value = "/hello/{id}")
    public String hello(@PathVariable(value = "id") String id){
        //查询缓存中是否存在
        boolean hasKey = redisUtils.exists(id);
        String str = "";
        if(hasKey){
            //获取缓存
            Object object =  redisUtils.get(id);
            log.info("从缓存获取的数据"+ object);
            str = object.toString();
        }else{
            //从数据库中获取信息
            log.info("从数据库中获取数据");
            str = testService.test();
            //数据插入缓存(set中的参数含义:key值,user对象,缓存存在时间10(long类型),时间单位)
            redisUtils.set(id,str,10L,TimeUnit.MINUTES);
            log.info("数据插入缓存" + str);
        }
        return str;
    }
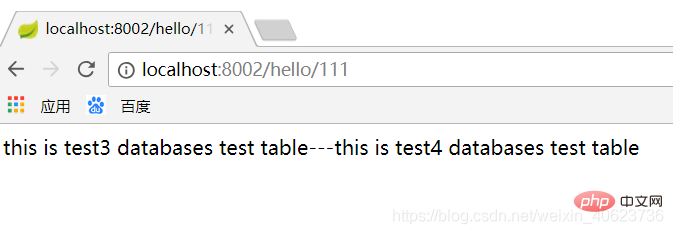
}
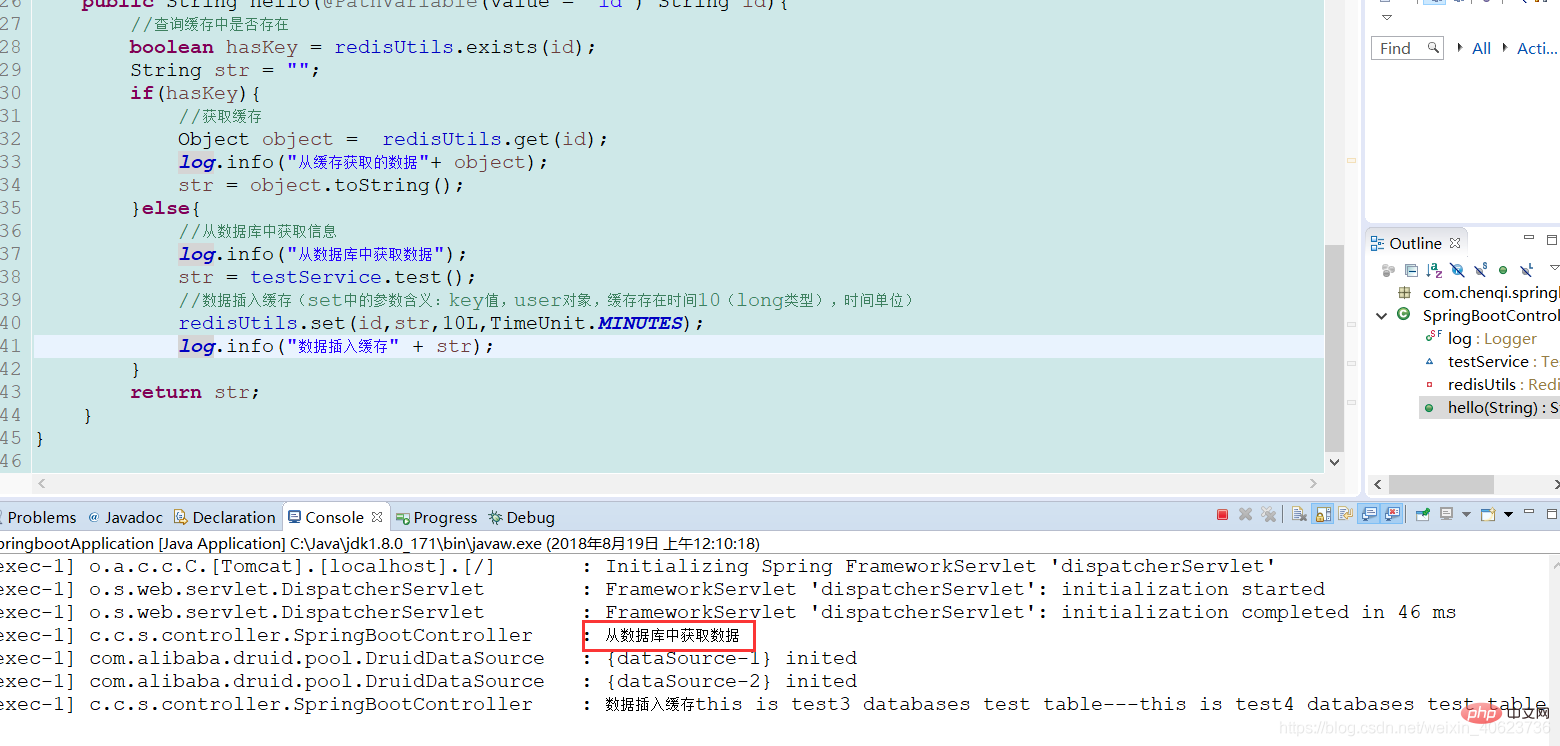 透過控制台輸出,我們可以看到是從資料庫中取得的數據,並且存入了redis快取中。
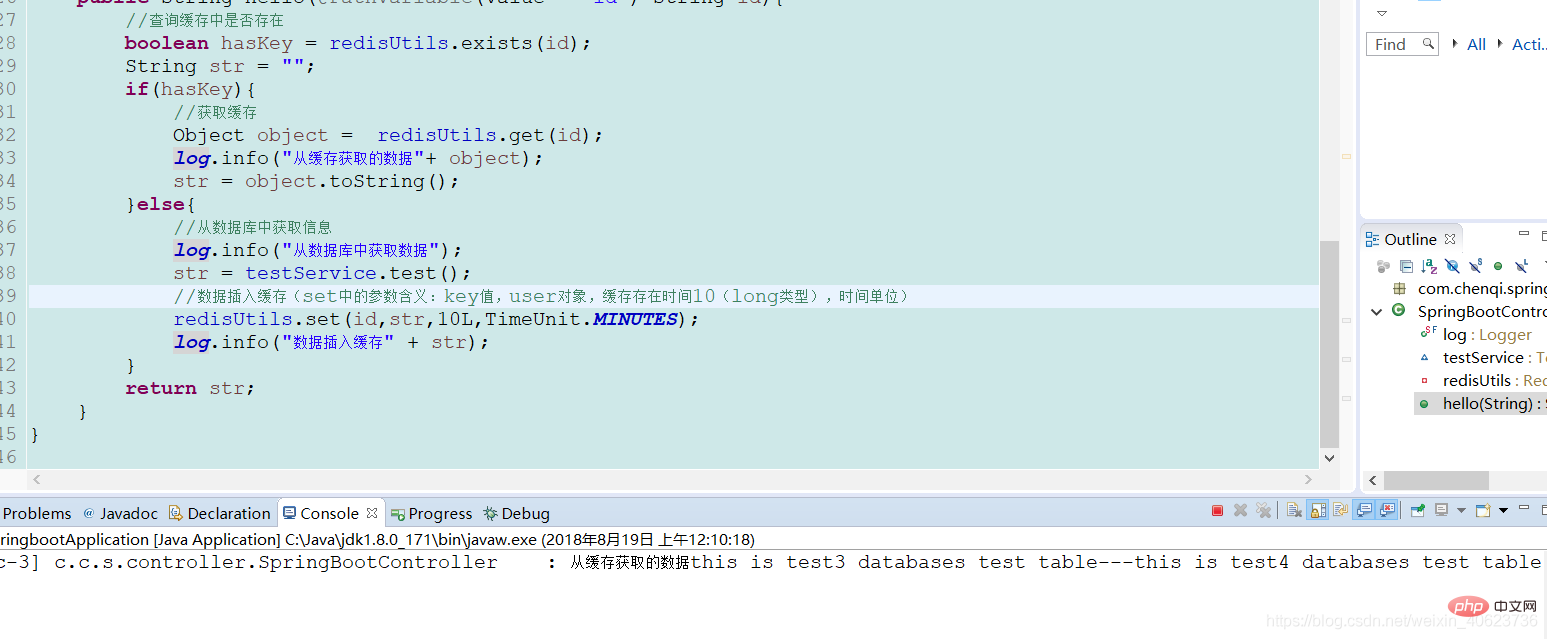 可以看到,第二次是從快取中讀取的,我們試試不斷刷新瀏覽器
 可以看到,之後都是從快取中取得的。
急需demo的兄弟就自行下載吧,不急可以留言郵箱,一般48小時內會發。
以上是詳解SpringBoot集成redis的詳細內容。更多資訊請關注PHP中文網其他相關文章!
