本篇文章為大家介紹一下實作新增使用者功能的方法。有一定的參考價值,有需要的朋友可以參考一下,希望對大家有幫助。

新增使用者功能的實作
需求
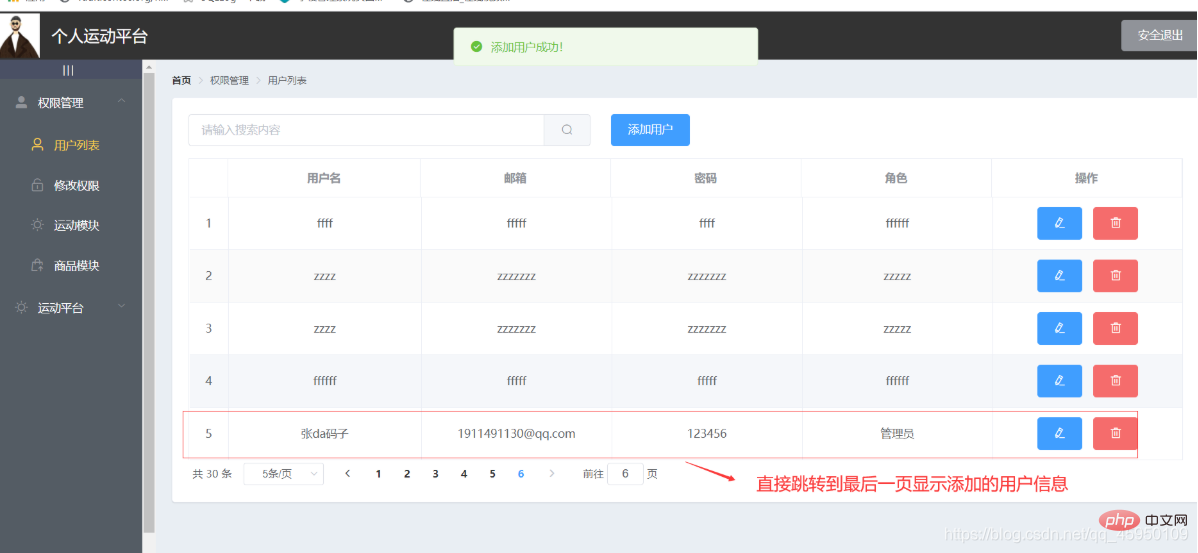
#點擊新增按鈕之後,會跳出一個新增使用者的對話框,然後在這個對話框裡輸入添加用戶的信息,點擊添加,用戶信息會在最後一頁展示出來。
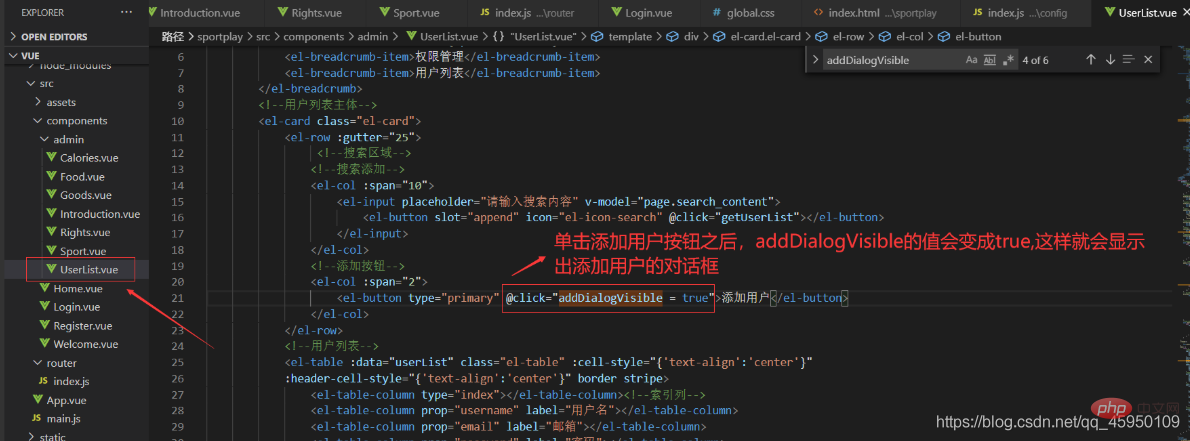
給新增使用者按鈕綁定點擊事件
給新增使用者按鈕綁定一個點擊事件,點擊新增使用者按鈕之後,會彈出一個新增使用者的對話框,綁定的點選事件如下圖:
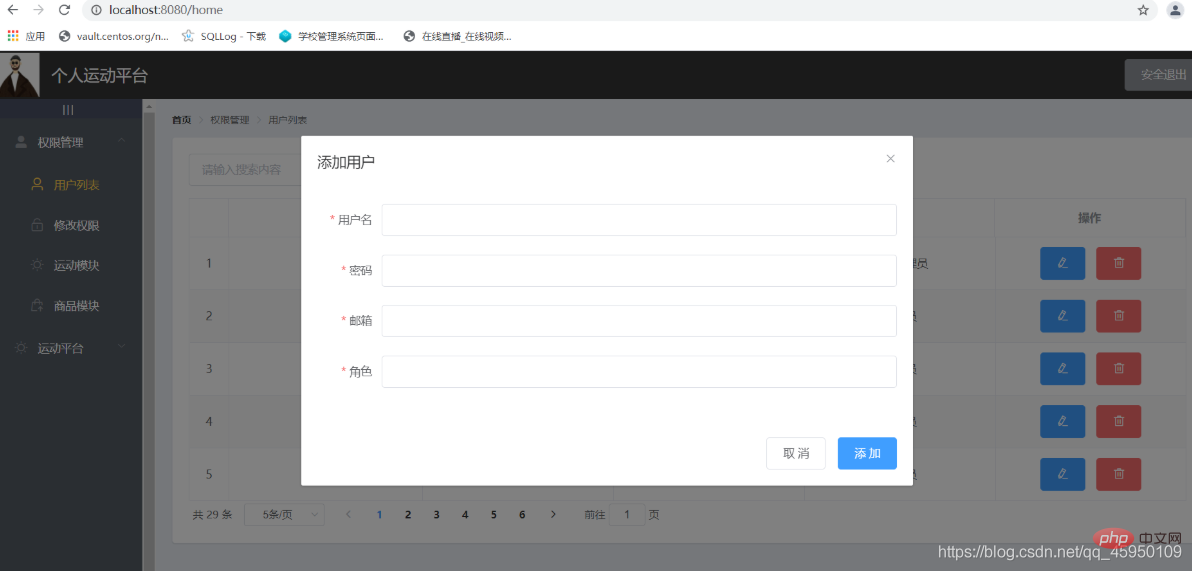
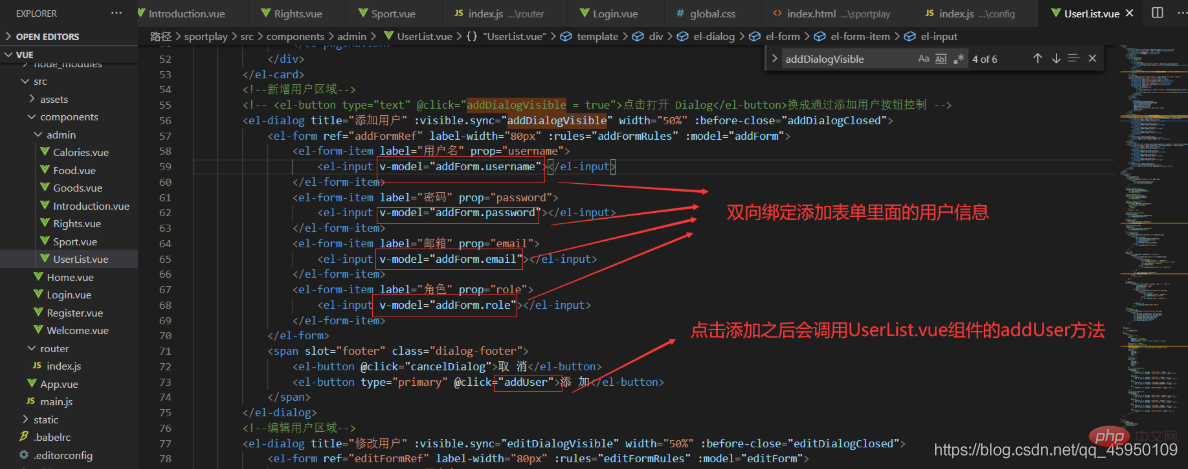
新增使用者的對話方塊的效果和程式碼
效果如下圖:
程式碼如下圖:
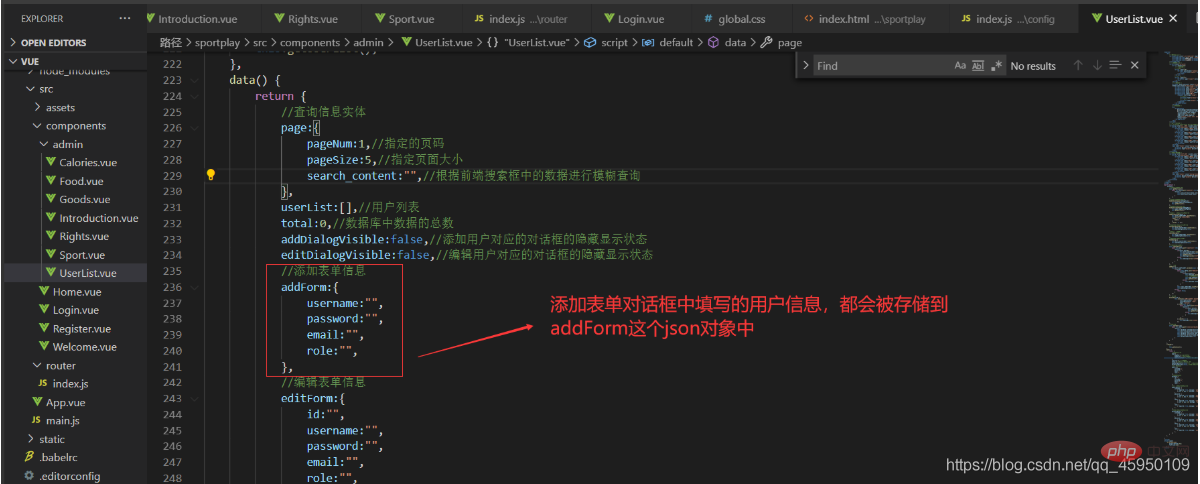
新增使用者對話方塊需要用到的UserList.vue元件中的資料
在新增表單中輸入在新增使用者的資訊之後,因為是雙向綁定,所以使用者資訊會被儲存到名字為addForm的json物件的屬性中,addForm資料物件如下圖:
## UserList.vue元件中的addUser方法
addUser方法中的內容如下圖:
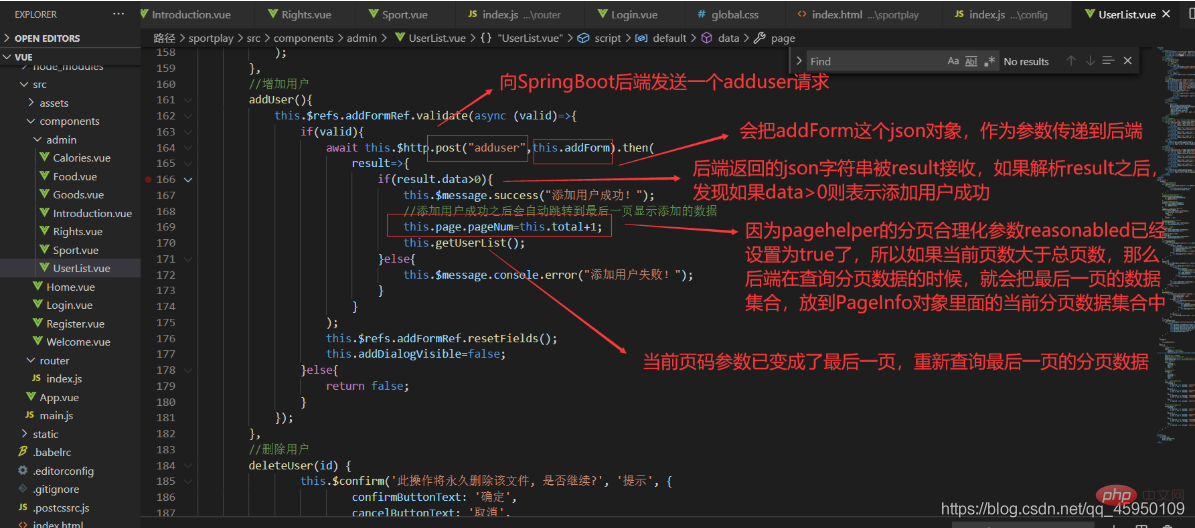
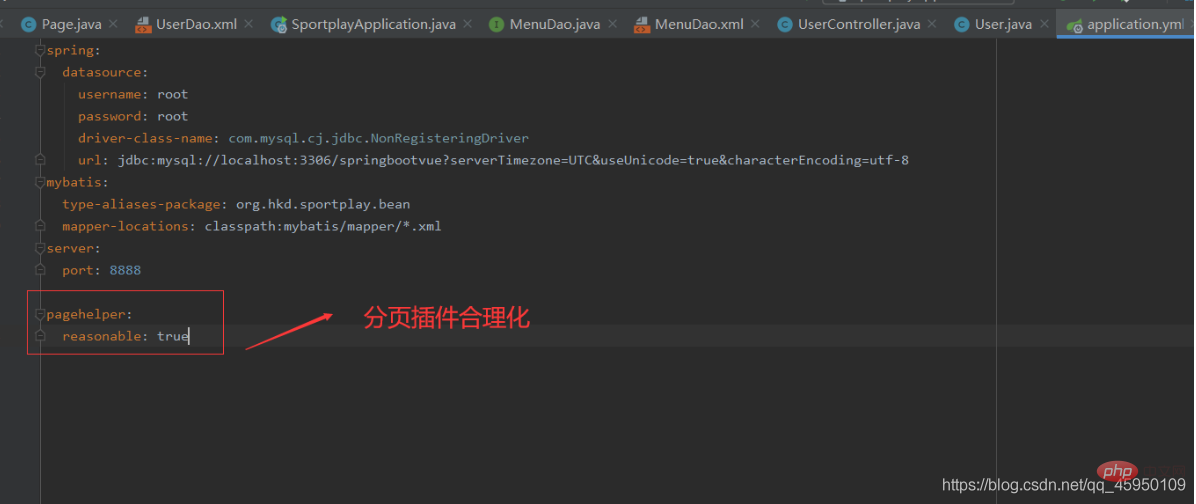
addUser方法執行成功之後,資料庫中的easyUser表中已經新增了一個使用者數據,需要在UserList.vue元件的顯示使用者的表格中,顯示這條新增的數據,怎麼顯示呢?就是把目前頁碼改為一個很大的值,大過總頁碼,因為在SpringBoot的設定檔中已經設定了分頁參數合理化參數reasonabled的值為ture,所以這個很大的頁碼其實相當於最後一頁的頁碼。設定完目前頁碼後,在addUser方法中呼叫getUserList方法重新載入最後一頁的使用者集合資料即可。
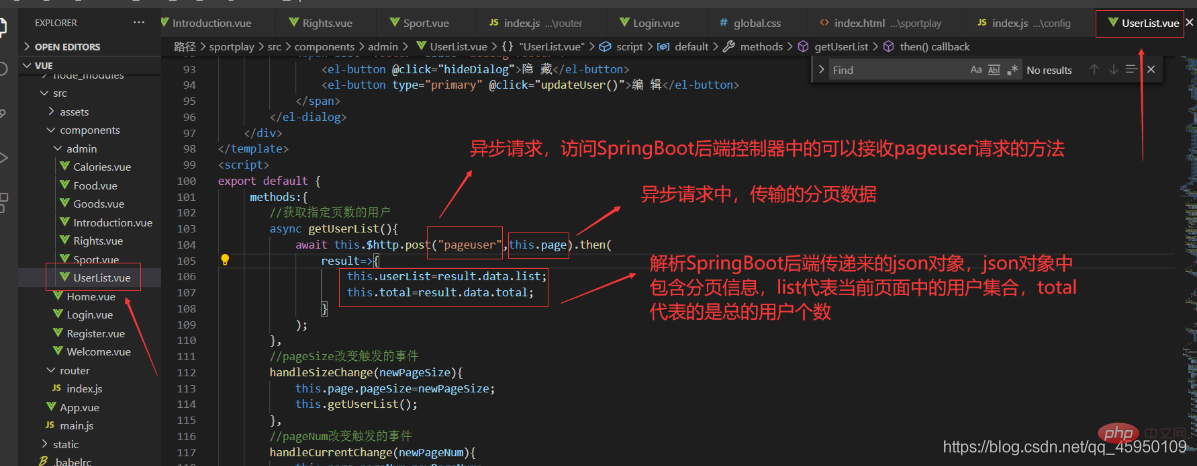
getUserList方法
getUserList方法,用來為userList和total資料賦值,如下圖:
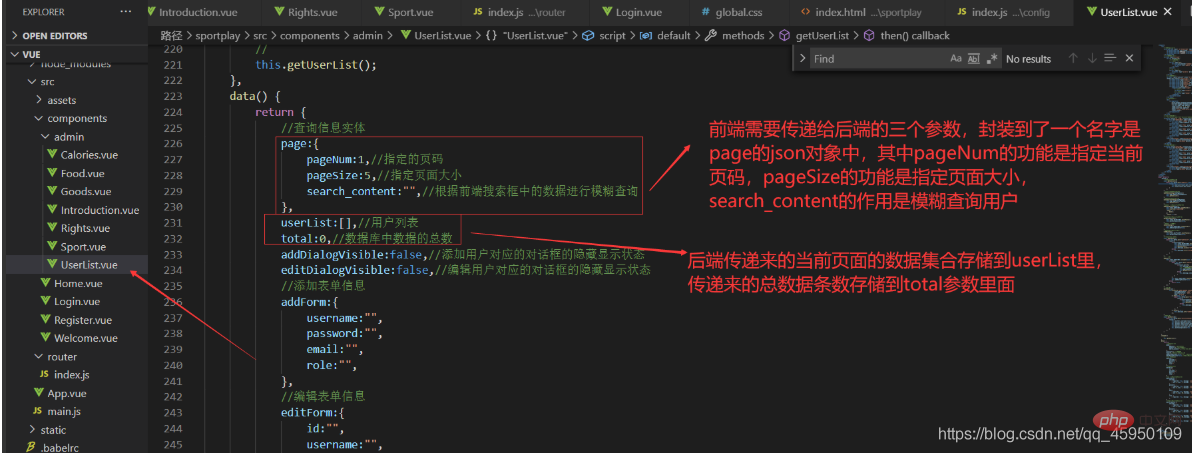
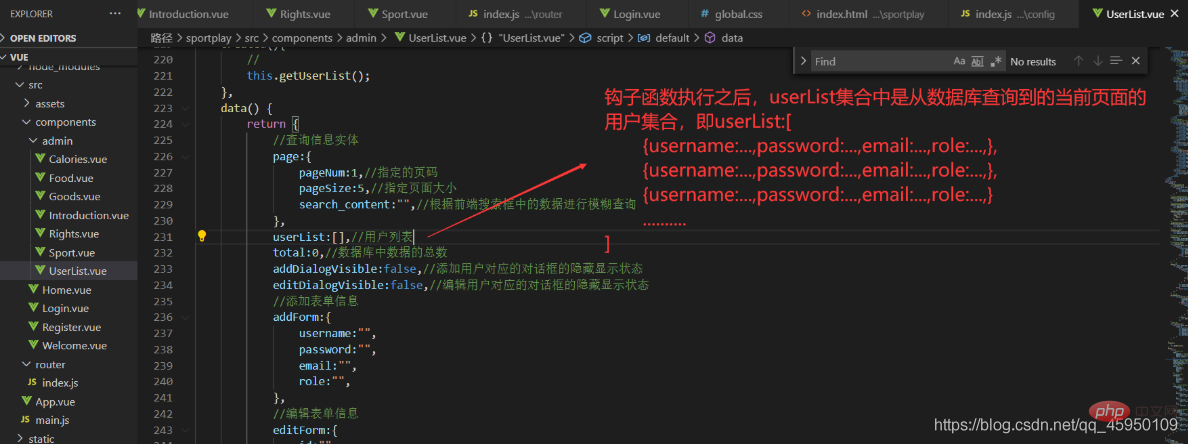
UserList.vue元件中的分頁資料
如下圖:
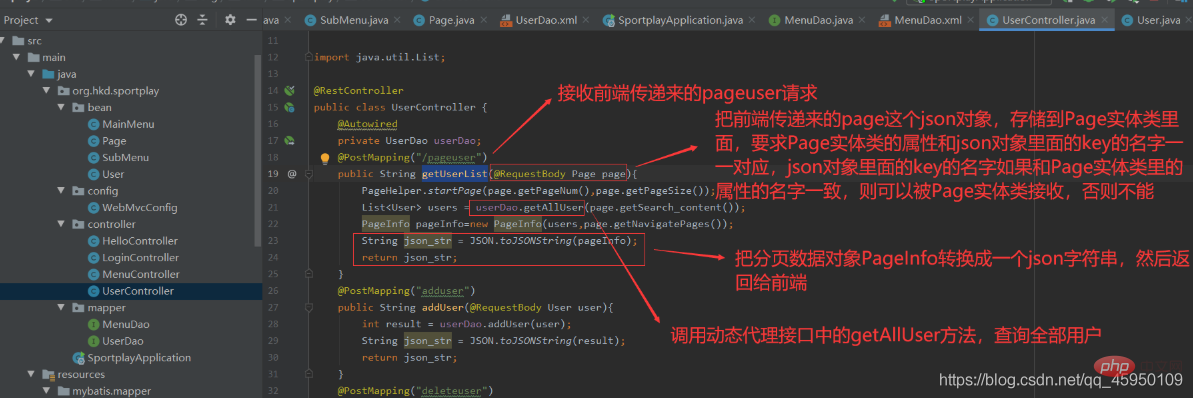
SpringBoot後端控制器中接收pageuser請求的方法getUserList
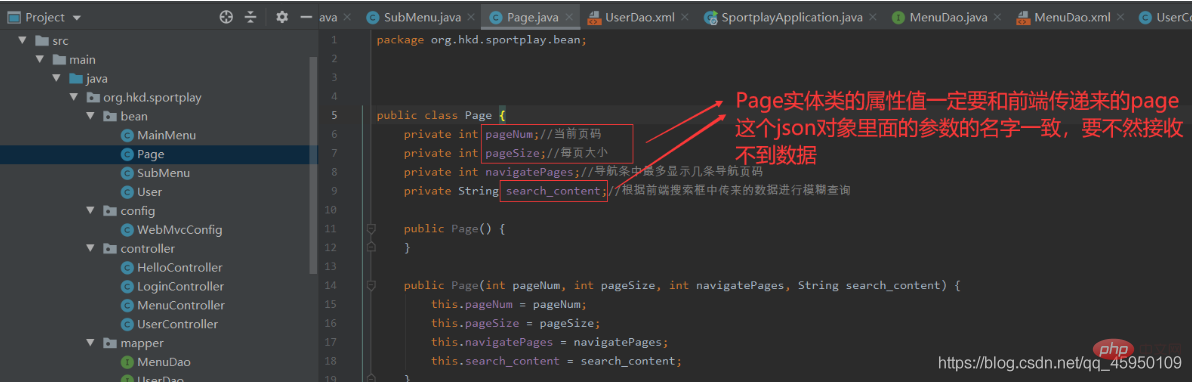
因為後端需要接收前端傳遞來的Page這個json對象,所以要在後端寫一個與之對應的Page實體類,這樣方便接收前端傳遞來的參數,Page實體類如下圖:
SpringBoot後端中的getUserList方法,如下圖:
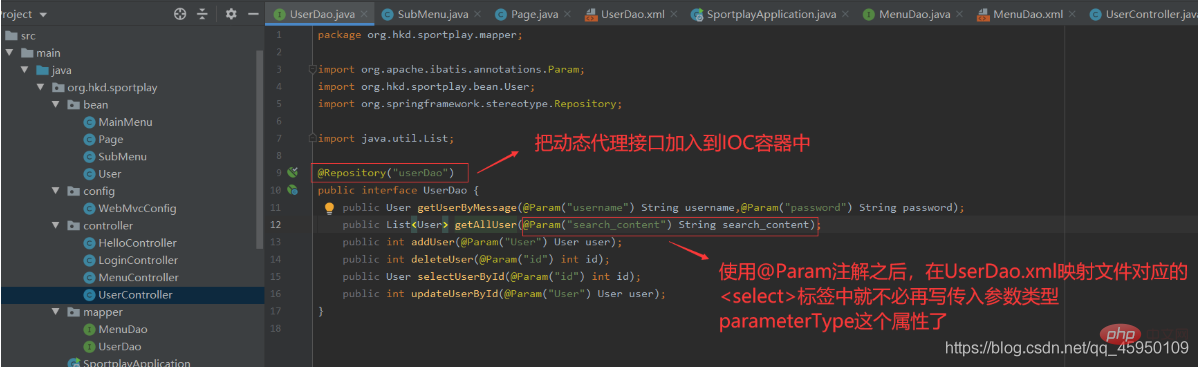
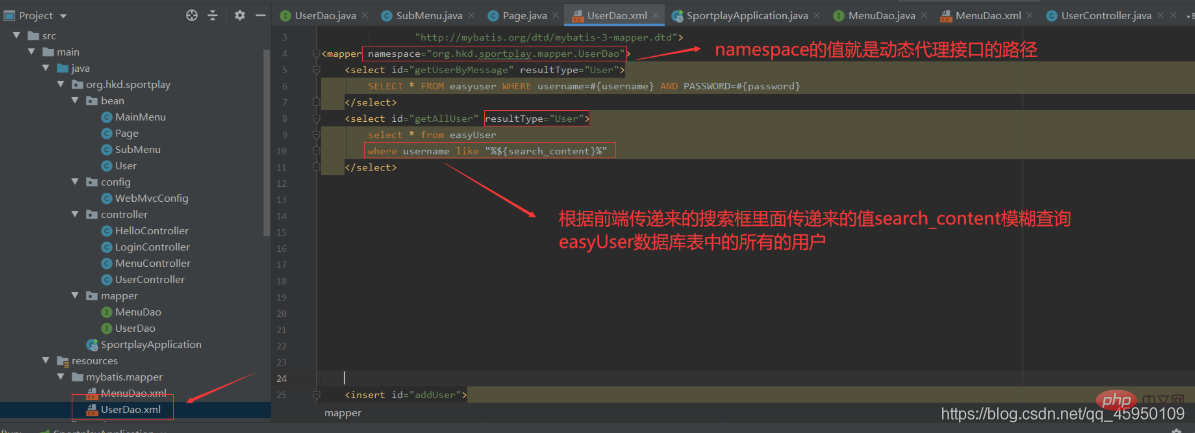
#動態代理程式介面UserDao中的getAllUser方法
如下圖:
UserDao.xml對應檔案中的sql語句
如下圖:
addUser方法中執行完getUserList方法之後,會把查詢到的分頁資料重新渲染到UserList.vue元件顯示使用者資訊的表格中
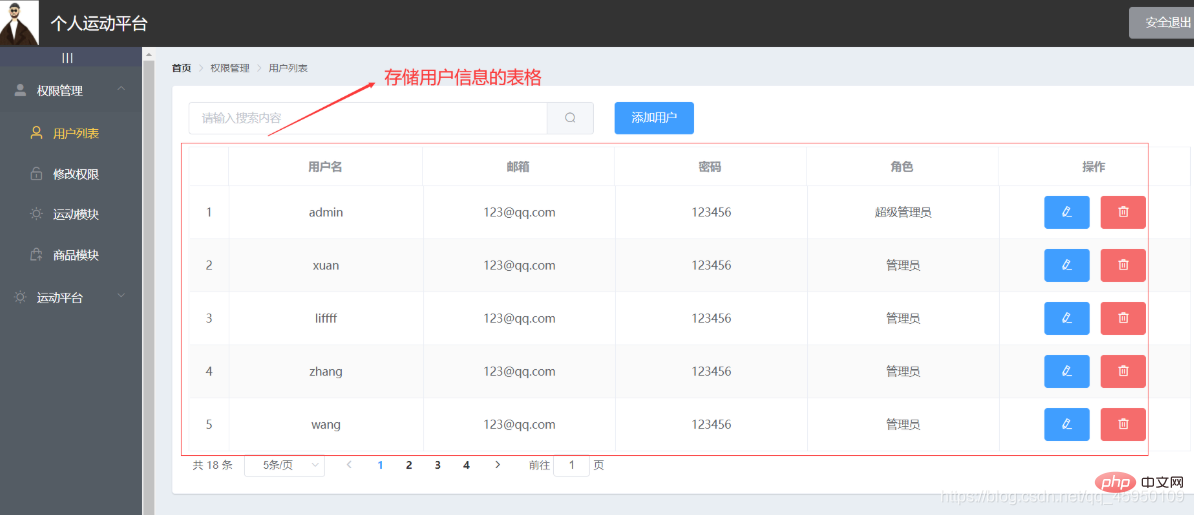
儲存使用者資訊的表格,如下圖:
getUserList方法執行之後,目前頁面的數據,都會儲存到userList集合中,如下圖:
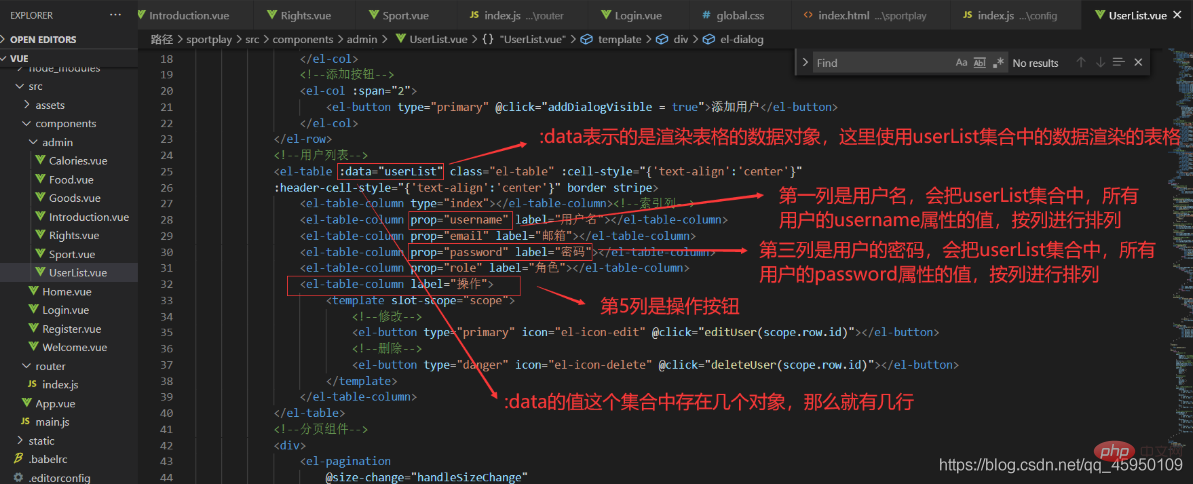
使用elment ui中的表格顯示userList集合中的使用者數據,如下圖:
測試
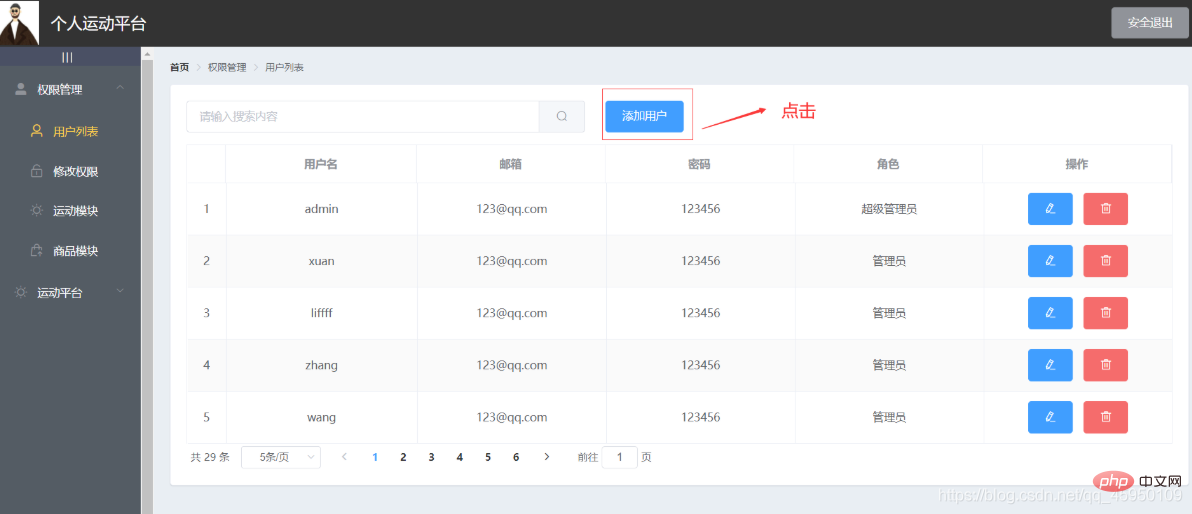
首選進入首頁點擊新增使用者按鈕如下圖:
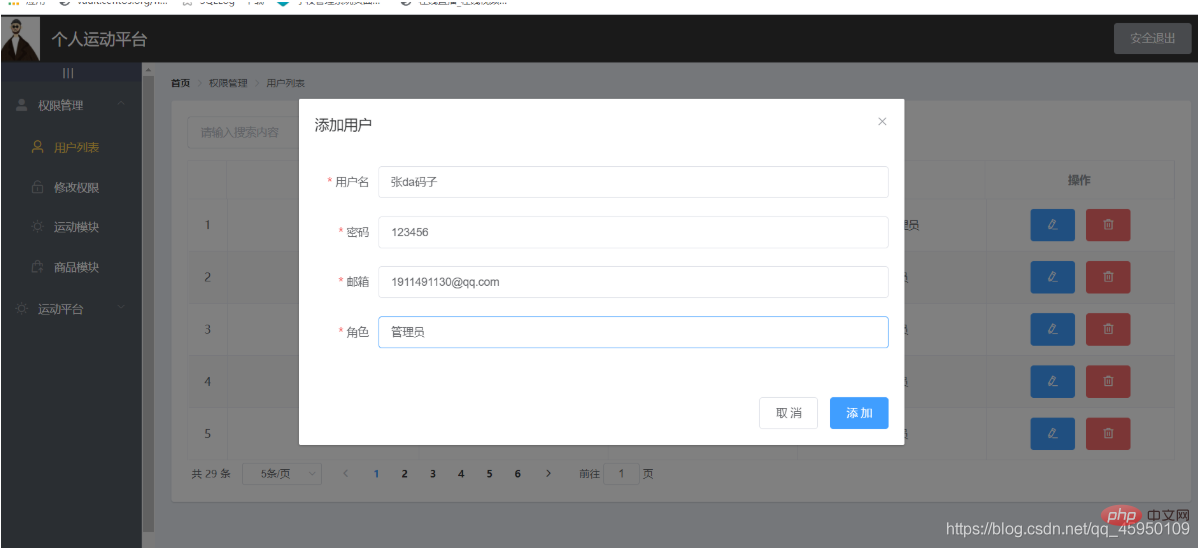
然後在彈出的對話框中填寫要新增的使用者信息,如下圖:
點擊新增按鈕如下圖:
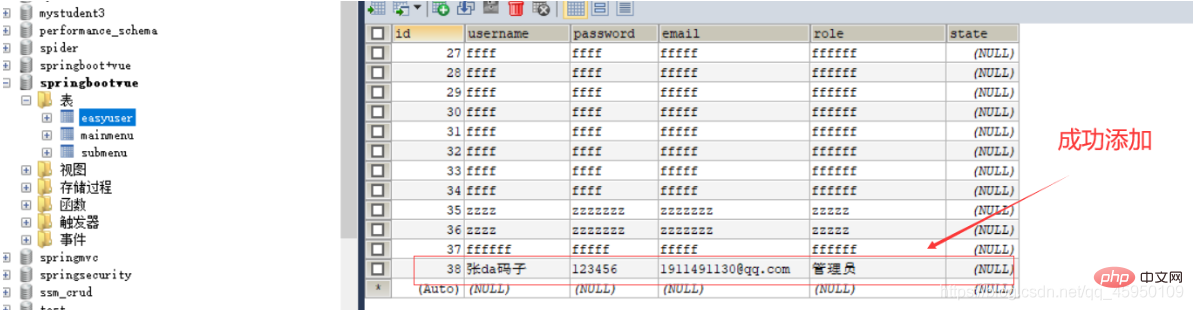
##查看資料庫中的easyUser表,如下圖:
【推薦學習:
SQL影片教學】
以上是如何實現新增用戶功能的詳細內容。更多資訊請關注PHP中文網其他相關文章!