首頁 > web前端 > js教程 > 淺談Angular中父子組件間互傳的方法

淺談Angular中父子組件間互傳的方法

青灯夜游
發布: 2021-06-04 11:28:53
轉載
3028 人瀏覽過

本篇文章跟大家介紹一下Angular中父元件和子元件互相傳參的方法。有一定的參考價值,有需要的朋友可以參考一下,希望對大家有幫助。

淺談Angular中父子組件間互傳的方法

【相關教學推薦:《angular教學》】

一:父元件取得子元件的資料和方法

也就是說子元件傳送資料和方法


淺談Angular中父子組件間互傳的方法

淺談Angular中父子組件間互傳的方法


淺談Angular中父子組件間互傳的方法

淺談Angular中父子組件間互傳的方法


#。 #父元件:news
子元件:header

假如子元件header有run方法

run(){
 console.log(‘我是header里面的run方法’);
 }
登入後複製
在父元件呼叫子元件header的run方法

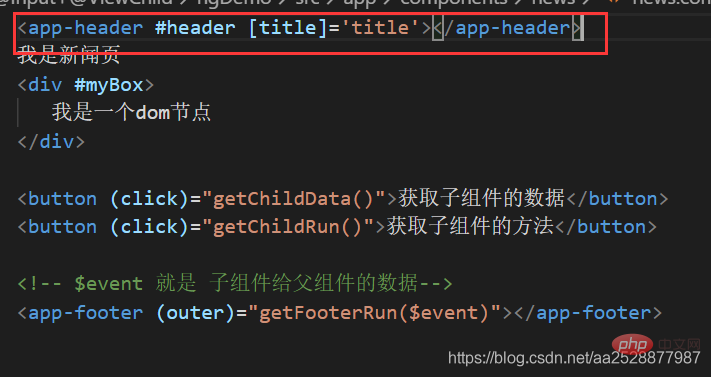
#1、在父元件中呼叫子元件,並為子元件定義一個名稱

<app-header #header></app-header>
登入後複製


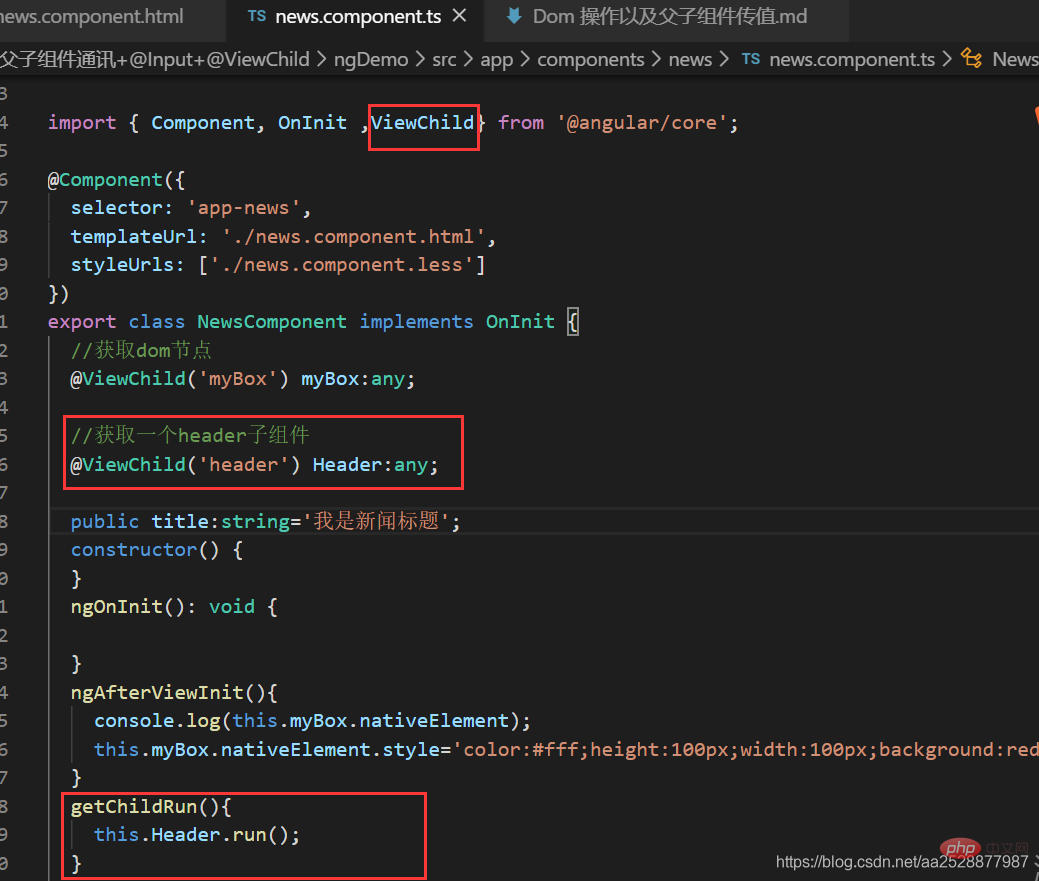
#2、在父元件引入ViewChild

import { Component,OnInit ,ViewChild} from ‘@angular/core’;
登入後複製

3、利用屬性裝飾器ViewChild 和剛才的子元件關聯起來淺談Angular中父子組件間互傳的方法

@ViewChild(‘header’)
 Header:any;
登入後複製

4、呼叫子元件的方法

#
getChildRun(){
 this.Header.run();
 }
登入後複製

淺談Angular中父子組件間互傳的方法

二:父元件給子元件傳值-@input

示範範例:

父元件: home

子元件:header

父元件不僅可以給子元件傳遞簡單的數據,還可以把自己的方法以及整個父元件傳給子元件

所以在子元件中可以呼叫父元件的方法


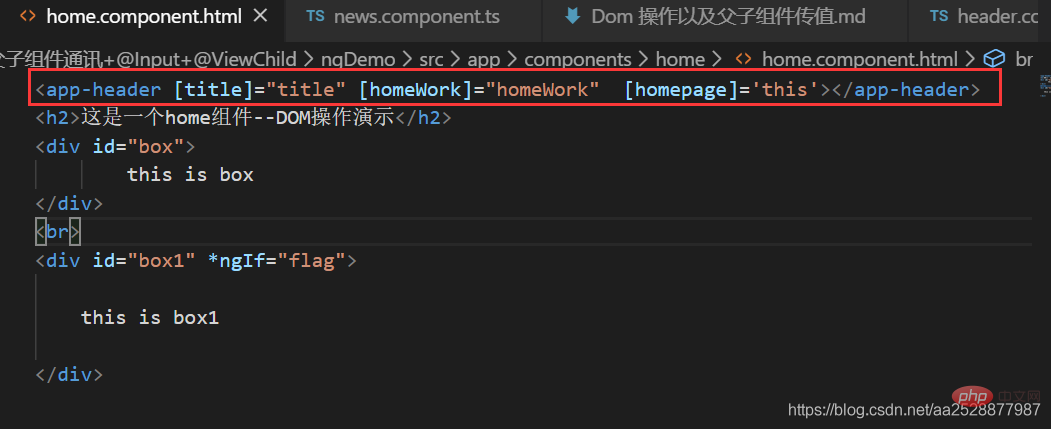
1、父元件呼叫子元件的時候傳入資料

 <app-header [title]="title" [homeWork]="homeWork"  [homepage]=&#39;this&#39;></app-header>
登入後複製

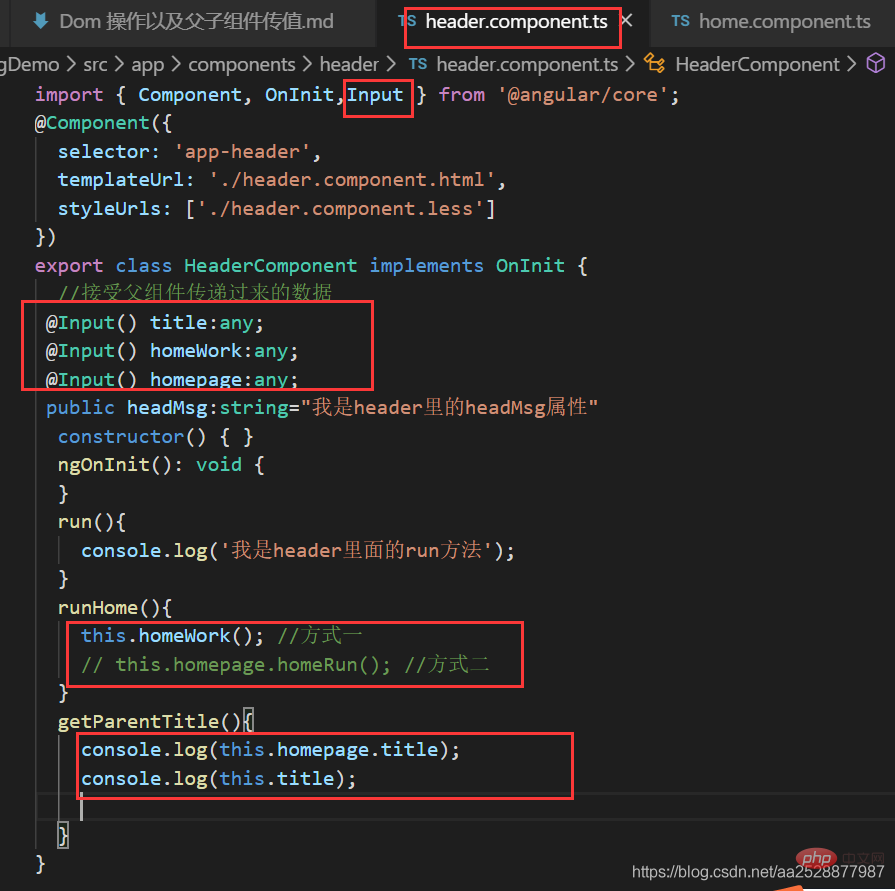
## 2、子元件引入Input 模組
import { Component, OnInit ,Input } from ‘@angular/core’;
登入後複製

3、子元件中@Input 接收父元件傳過來的資料

export class HeaderComponent implements OnInit {
    @Input()  title:string

    constructor() { }
    ngOnInit() {}
}
登入後複製

4、子元件中使用父元件的資料

這是頭部元件-- {

{title}}


5 、子元件中使用父元件的方法

總結:

父傳子:@input

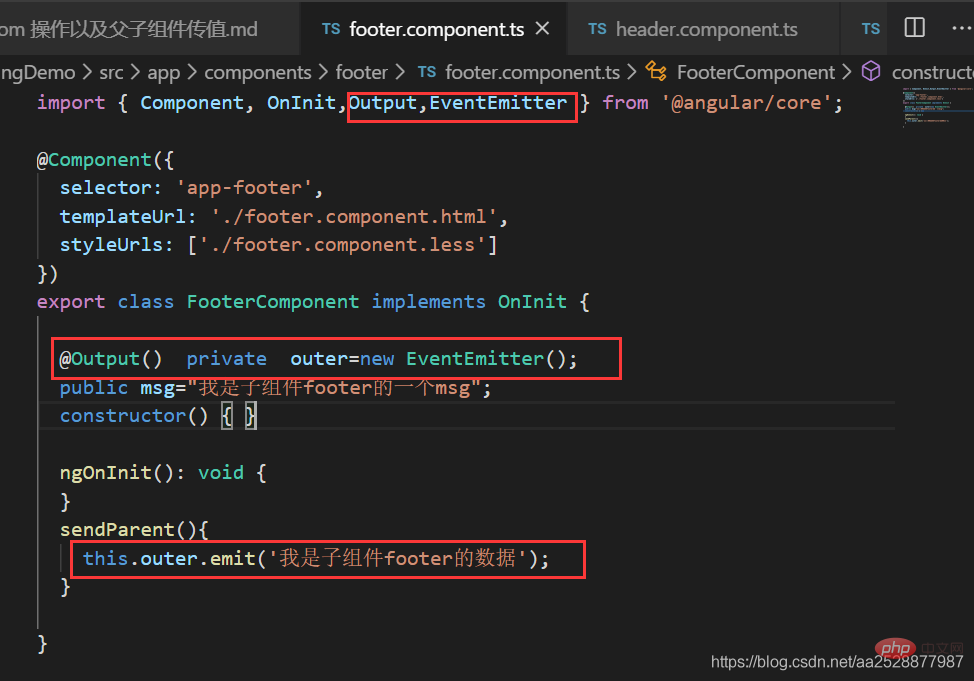
子傳父:ViewChild####### ##三、子元件透過@Output觸發父元件的方法##########示範範例:### 父元件:news### 子元件:footer#########1 、子元件引入Output 和EventEmitter######
import { Component, OnInit ,Input,Output,EventEmitter} from ‘@angular/core’;
登入後複製
######2、子元件中實例化EventEmitter#########@Output()###private outer=new EventEmitter( );###/用EventEmitter 和output 裝飾器搭配使用指定類型變數/##########3、子元件透過EventEmitter 物件outer 實例廣播資料######
sendParent(){
 this.outer.emit(‘msg from child’)
 }
登入後複製
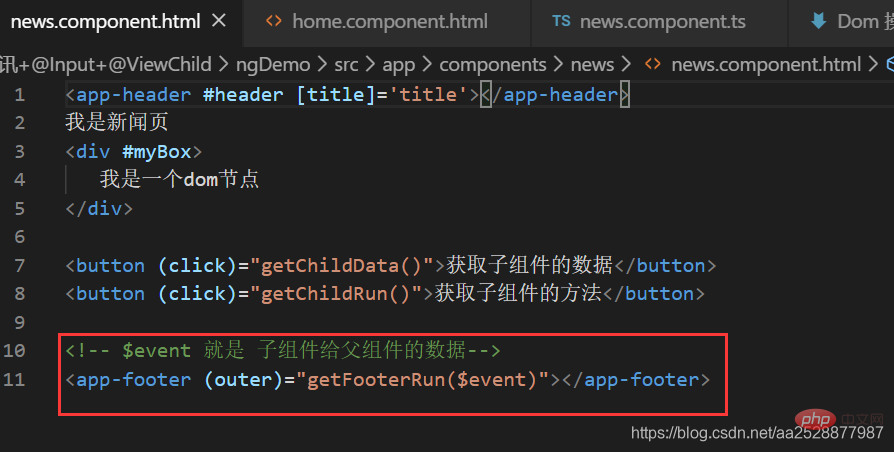
##### ##########4、父元件呼叫子元件的時候,定義接收事件,outer 就是子元件的EventEmitter 物件outer#########檔:components\news\news\news.component .html###
<app-footer (outer)=“getFooterRun(data)”>
登入後複製
###############5、父元件接收到資料會呼叫自己的getFooterRun 方法,這個時候就能拿到子元件的數字###### ####檔案:components\news\news.component.ts###
//接收子组件传递过来的数据
 getFooterRun(data){
 console.log(data);
 }
登入後複製
#######五、非父子元件通訊#########1、公共的服務### 2、 Localstorage(推薦)### 3、Cookie#########總結:############vue中關於$emit的用法#########1 、父元件可以使用###屬性###把資料傳給子元件,子元件透過props接受。 ### 2、子元件可以使用 $emit 觸發父元件的自訂事件。 ###
vm.$emit( event, arg ) //触发当前实例上的事件
vm.$on( event, fn );//监听event事件后运行 fn;
登入後複製
######angular中關於emit的用法#########1、父元件可以使用###屬性###把資料傳給子元件,子元件透過@input接受。 ### 2、子元件可以使用 Output 和 EventEmitter 觸發父元件的自訂事件。 ######父元件###
<app-footer (event)=“getFooterRun(data)”>
登入後複製
###子元件###
@Output() 
private event=new EventEmitter<string>();
/*用 EventEmitter 和 output 装饰器配合使用 <string>指定类型变量*/

sendParent(){ 
    // outer 相当于是事件名称
    this.event.emit(data)  
 }
登入後複製
<button (event)=“sendParent()”>通过@Output给父组件广播数据
登入後複製
###更多程式相關知識,請造訪:###程式設計影片###! ! ###

以上是淺談Angular中父子組件間互傳的方法的詳細內容。更多資訊請關注PHP中文網其他相關文章!
相關標籤:
來源:csdn.net
本網站聲明
本文內容由網友自願投稿,版權歸原作者所有。本站不承擔相應的法律責任。如發現涉嫌抄襲或侵權的內容,請聯絡admin@php.cn
熱門教學
更多>
最新下載
更多>
網站特效
網站源碼
網站素材
前端模板