

Angular組件間怎麼進行互動?常用互動方法介紹

元件之間的互動主要是在主從元件之間進行互動。那麼Angular元件之間怎麼進行互動?以下這篇文章跟大家介紹一下Angular組件間進行常用互動的方法。

【相關教學推薦:《angular教學》】
1、透過輸入型綁定把資料從父元件傳到子元件
child.component.ts
export class ChildComponent implements OnInit {
  @Input() hero: any;
  @Input('master') masterName: string;      // 第二个 @Input 为子组件的属性名 masterName 指定一个别名 master

  constructor() { }

  ngOnInit(): void {
  }

}child.component.html
<div style="background-color: #749f84">
  <p>child works!</p>
  <h3 id="hero-name-nbsp-says">{{hero?.name}} says:</h3>
  <p>I, {{hero?.name}}, am at your service, {{masterName}}.</p>
</div>parent.component.ts
export class ParentComponent implements OnInit {
  hero = {name: 'qxj'}
  master = 'Master'

  constructor() {
  }

  ngOnInit(): void {
  }

}parent.component.html
<app-child [hero]="hero" [master]="master"></app-child>
#2、父元件監聽子元件的事件
##child.component. tsexport class ChildComponent implements OnInit {
@Input() name: string;
@Output() voted = new EventEmitter<boolean>();
didVote = false;
vote(agreed: boolean) {
this.voted.emit(agreed);
this.didVote = true;
}
constructor() { }
ngOnInit(): void {
}
}<h4 id="name">{{name}}</h4>
<button (click)="vote(true)" [disabled]="didVote">Agree</button>
<button (click)="vote(false)" [disabled]="didVote">Disagree</button>export class ParentComponent implements OnInit {
agreed = 0
disagreed = 0
voters = ['Narco', 'Celeritas', 'Bombasto']
onVoted(agreed: boolean) {
agreed ? this.agreed++ : this.disagreed++
}
constructor() {
}
ngOnInit(): void {
}
}<h2 id="Should-nbsp-mankind-nbsp-colonize-nbsp-the-nbsp-Universe">Should mankind colonize the Universe?</h2>
<h3 id="Agree-nbsp-agreed-nbsp-Disagree-nbsp-disagreed">Agree: {{agreed}}, Disagree: {{disagreed}}</h3>
<app-child *ngFor="let voter of voters" [name]="voter" (voted)="onVoted($event)"></app-child>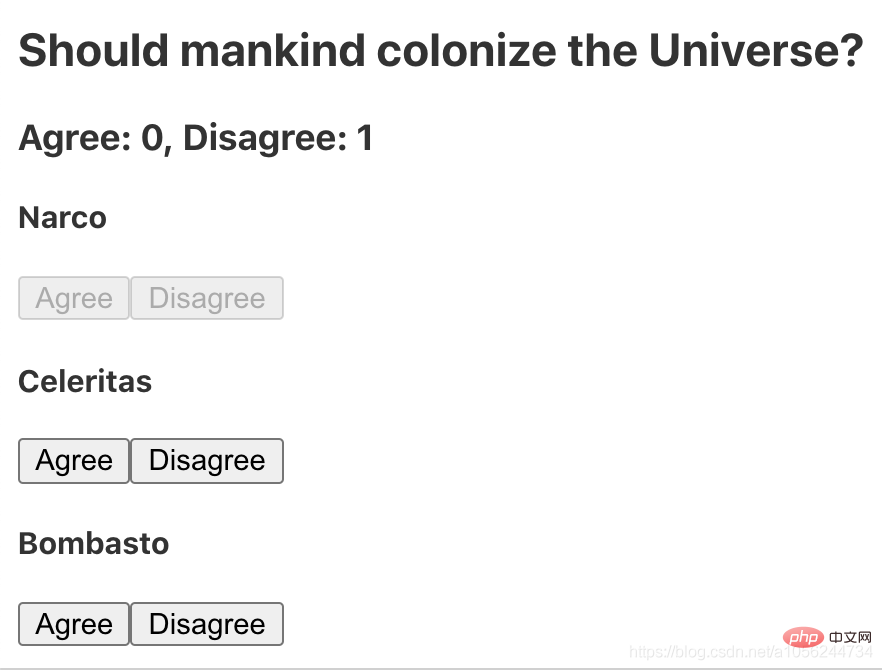
#3、父元件與子元件透過本地變數互動
#父元件不能使用資料綁定來讀取子元件的屬性或呼叫子組件的方法。但可以在父元件模板裡,新建一個本地變數來代表子元件,然後利用這個變數來讀取子元件的屬性和呼叫子元件的方法,如下例所示。 子元件CountdownTimerComponent 進行倒數計時,歸零時發射一個飛彈。 start 和 stop 方法負責控制時脈並在範本裡顯示倒數計時的狀態資訊。
export class ChildComponent implements OnInit, OnDestroy {
  intervalId = 0
  message = ''
  seconds = 11

  clearTimer() {
    clearInterval(this.intervalId)
  }

  ngOnInit() {
    this.start()
  }

  ngOnDestroy() {
    this.clearTimer()
  }

  start() {
    this.countDown()
  }

  stop() {
    this.clearTimer()
    this.message = `Holding at T-${this.seconds} seconds`
  }

  private countDown() {
    this.clearTimer()
    this.intervalId = window.setInterval(() => {
      this.seconds -= 1
      if (this.seconds === 0) {
        this.message = 'Blast off!'
      } else {
        if (this.seconds < 0) {
          this.seconds = 10
        } // reset
        this.message = `T-${this.seconds} seconds and counting`
      }
    }, 1000)
  }

}<p>{{message}}</p>export class ParentComponent implements OnInit {
constructor() {
}
ngOnInit(): void {
}
}
<h3 id="Countdown-nbsp-to-nbsp-Liftoff-nbsp-via-nbsp-local-nbsp-variable">Countdown to Liftoff (via local variable)</h3>
<button (click)="child.start()">Start</button>
<button (click)="child.stop()">Stop</button>
<div class="seconds">{{child.seconds}}</div>
<app-child #child></app-child>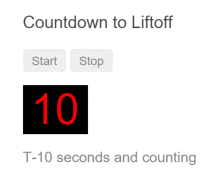
4、父元件呼叫#@ViewChild()<span style="font-size: 16px;"></span> ##這個
方法是個簡單便利的方法。但是它也有局限性,因為父組件-子組件的連接必須全部在父組件的模板中進行。父元件本身的程式碼對子元件沒有存取權。 如果父元件的
類別需要讀取子元件的屬性值或呼叫子元件的方法,就不能使用本機變數方法。 當父元件
類別需要這種存取時,可以把子元件當作 ViewChild,***注入***到父元件裡面。 countdown-parent.component.ts
import {AfterViewInit, Component, ViewChild} from '@angular/core'
import {ChildComponent} from '../child/child.component'

@Component({
  selector: 'app-parent-vc',
  template: `
    <h3 id="Countdown-nbsp-to-nbsp-Liftoff-nbsp-via-nbsp-ViewChild">Countdown to Liftoff (via ViewChild)</h3>
    <button (click)="start()">Start</button>
    <button (click)="stop()">Stop</button>
    <div class="seconds">{{ seconds() }}</div>
    <app-child></app-child>
  `,
})
export class CountdownParentComponent implements AfterViewInit {

  @ViewChild(ChildComponent)
  private timerComponent: ChildComponent

  seconds() {
    return 0
  }

  ngAfterViewInit() {
    // Redefine `seconds()` to get from the `ChildComponent.seconds` ...
    // but wait a tick first to avoid one-time devMode
    // unidirectional-data-flow-violation error
    setTimeout(() => {
      this.seconds = () => this.timerComponent.seconds
    }, 0)
  }

  start() {
    this.timerComponent.start()
  }

  stop() {
    this.timerComponent.stop()
  }
}更多程式相關知識,請造訪:
程式設計入門以上是Angular組件間怎麼進行互動?常用互動方法介紹的詳細內容。更多資訊請關注PHP中文網其他相關文章!

熱AI工具

Undresser.AI Undress
人工智慧驅動的應用程序,用於創建逼真的裸體照片

AI Clothes Remover
用於從照片中去除衣服的線上人工智慧工具。

Undress AI Tool
免費脫衣圖片

Clothoff.io
AI脫衣器

AI Hentai Generator
免費產生 AI 無盡。

熱門文章
熱工具

記事本++7.3.1
好用且免費的程式碼編輯器

SublimeText3漢化版
中文版,非常好用

禪工作室 13.0.1
強大的PHP整合開發環境

Dreamweaver CS6
視覺化網頁開發工具

SublimeText3 Mac版
神級程式碼編輯軟體(SublimeText3)
熱門話題


 聊聊Angular中的元資料(Metadata)和裝飾器(Decorator)
Feb 28, 2022 am 11:10 AM
聊聊Angular中的元資料(Metadata)和裝飾器(Decorator)
Feb 28, 2022 am 11:10 AM
這篇文章繼續Angular的學習,帶大家了解Angular中的元數據和裝飾器,簡單了解一下他們的用法,希望對大家有幫助!
 如何在Ubuntu 24.04上安裝Angular
Mar 23, 2024 pm 12:20 PM
如何在Ubuntu 24.04上安裝Angular
Mar 23, 2024 pm 12:20 PM
Angular.js是一種可自由存取的JavaScript平台,用於建立動態應用程式。它允許您透過擴展HTML的語法作為模板語言,以快速、清晰地表示應用程式的各個方面。 Angular.js提供了一系列工具,可協助您編寫、更新和測試程式碼。此外,它還提供了許多功能,如路由和表單管理。本指南將討論在Ubuntu24上安裝Angular的方法。首先,您需要安裝Node.js。 Node.js是一個基於ChromeV8引擎的JavaScript運行環境,可讓您在伺服器端執行JavaScript程式碼。要在Ub

 淺析angular中怎麼使用monaco-editor
Oct 17, 2022 pm 08:04 PM
淺析angular中怎麼使用monaco-editor
Oct 17, 2022 pm 08:04 PM
angular中怎麼使用monaco-editor?以下這篇文章記錄下最近的一次業務中用到的 monaco-editor 在 angular 中的使用,希望對大家有幫助!

 Angular + NG-ZORRO快速開發一個後台系統
Apr 21, 2022 am 10:45 AM
Angular + NG-ZORRO快速開發一個後台系統
Apr 21, 2022 am 10:45 AM
這篇文章跟大家分享一個Angular實戰,了解一下angualr 結合 ng-zorro 如何快速開發一個後台系統,希望對大家有幫助!
 如何使用PHP和Angular進行前端開發
May 11, 2023 pm 04:04 PM
如何使用PHP和Angular進行前端開發
May 11, 2023 pm 04:04 PM
隨著網路的快速發展,前端開發技術也不斷改進與迭代。 PHP和Angular是兩種廣泛應用於前端開發的技術。 PHP是一種伺服器端腳本語言,可以處理表單、產生動態頁面和管理存取權限等任務。而Angular是一種JavaScript的框架,可以用來開發單一頁面應用程式和建構元件化的網頁應用程式。本篇文章將介紹如何使用PHP和Angular進行前端開發,以及如何將它們
 Angular元件及其顯示屬性:了解非block預設值
Mar 15, 2024 pm 04:51 PM
Angular元件及其顯示屬性:了解非block預設值
Mar 15, 2024 pm 04:51 PM
Angular框架中元件的預設顯示行為不是區塊級元素。這種設計選擇促進了元件樣式的封裝,並鼓勵開發人員有意識地定義每個元件的顯示方式。透過明確設定CSS屬性 display,Angular組件的顯示可以完全控制,從而實現所需的佈局和響應能力。
