教你怎麼使用css3為圖片加上漸層效果(程式碼詳解)
之前的文章《手把手教你怎麼使用CSS3實現動畫效果(代碼分享)》中,跟大家介紹一下怎麼使用css3動畫效果設定經驗。以下這篇文章跟大家介紹怎麼使用css3為圖片加入漸變效果,夥伴們來看看一下。

初次接觸css3漸變是在很早以前了,覺得這個東西很有意思哈,跟玩 PS 似的,可以做出很多華麗的東西。
瀏覽器支援情況
| IE | #FF | Chrome | #Safari | Opera | iOS | Android | Android Chrome |
|---|---|---|---|---|---|---|---|
| #6-9(no) | 2-3.5(no) | 4-9(部分-webkit-) | 3.1-3.2(no) | - | #3.2-4.3(部分) | 2.1-3.0(-webkit-) | 10-25(-webkit-) |
| 10 | 3.6-15(-webkit-) | 10-25(-webkit-) | 4-5(部分)5-6.1(-webkit-) | - | 5 | 4-4.3(-webkit-) | 26 |
| - | 15 | 25 | 5-6 | 15 | - | 4.4 | - |
線性漸變linear-gradient
#使用語法
linear-gradient([ [ [| to [top | bottom] || [left | right] ],]?[,]+);
以下程式碼都可以運行,執行的結果一樣
linear-gradient(#fff, #333);
linear-gradient(to bottom, #fff, #333);
linear-gradient(to top, #333, #fff);
linear-gradient(180deg, #fff, #333);
linear-gradient(to bottom, #fff 0%, #333 100%);
可以定義角度,起始方向,顏色,以及顏色佔比
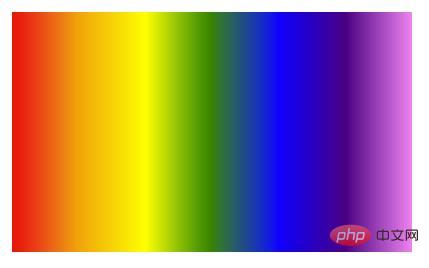
demo
<div style="width: 200px; height: 200px;"></div>
<style>
  div {
    background: linear-gradient(
      to right,
      red,
      orange,
      yellow,
      green,
      blue,
      indigo,
      violet
    );
  }
</style>
填滿試線性漸變repeating-linear-gradient
用法和linear-gradient 差不多,其實就是漸層的一個填滿。可以精確到像素,例如實作一個斑馬紋
<div class="g"></div>
<style>
  .g {
    background: repeating-linear-gradient(
      -45deg,
      transprent,
      transprent 25px,
      #fff 25px,
      #fff50px
    );
  }
</style>
徑向漸層radial-gradient
使用語法
#radial-gradient( [ circle ||][ at]? , | [ ellipse || [|]{2}][ at]? , | [ [ circle | ellipse ] ||][ at]? , | at,[ ,]+ )以下程式碼執行結果一樣
radial-gradient(circle, #f00, #ff0, #080);
radial-gradient(circle at center, #f00, #ff0, #080);
radial-gradient(circle at 50%, #f00, #ff0, #080);
radial-gradient(circle farthest-corner, #f00, #ff0, #080);
可以透過 length 來快速定位形狀的位置closest-side 漸變的邊緣形狀與容器距離漸變中心點最近的一邊相切(圓形)或至少與距離漸變中心點最近的垂直和水平邊相切(橢圓)。
closest-corner 漸層的邊緣形狀與容器距離漸層中心點最近的一個角相交。
farthest-side 與 closest-side 相反,邊緣形狀與容器距離漸變中心點最遠的一邊相切(或最遠的垂直和水平邊)。
farthest-corner 漸層的邊緣形狀與容器距離漸層中心點最遠的一個角相交。
可以透過at 來快速制定圓心的位置circle at left top圓心在左上角
circle at right top圓心在右上角
#circle at left bottom 圓心在左下角
#circle at right bottom 圓心在右下角
circle at center | at 50% 圓心在正中間
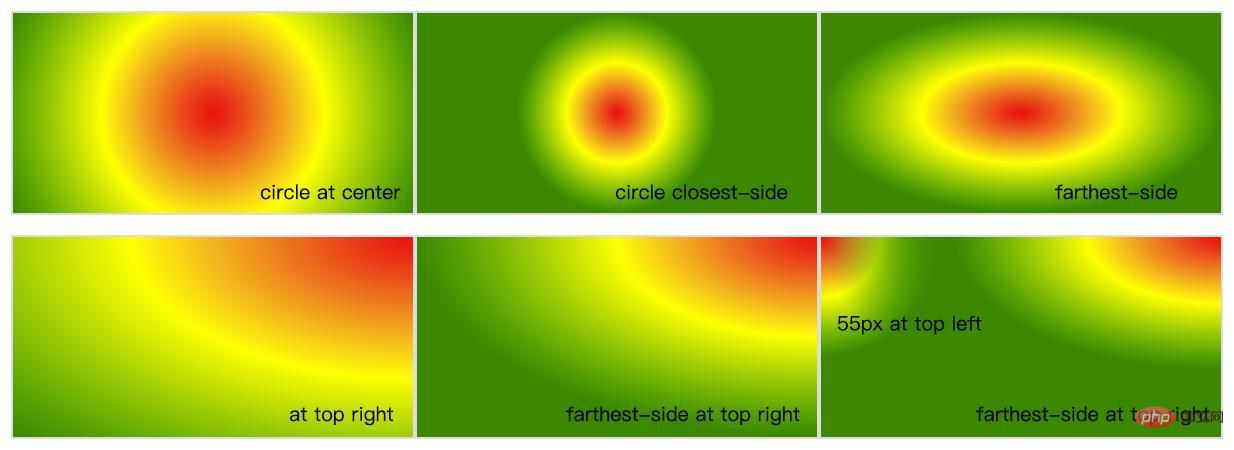
程式碼範例
<style>
  div {
    width: 200px;
    height: 100px;
    margin-top: 10px;
    border: 1px solid #ddd;
  }
  .g1 {
    background: radial-gradient(circle at center, #f00, #ff0, #080);
  }
  .g2 {
    background: radial-gradient(circle closest-side, #f00, #ff0, #080);
  }
  .g3 {
    background: radial-gradient(farthest-side, #f00 20%, #ff0 50%, #080 80%);
  }
  .g4 {
    background: radial-gradient(at top right, #f00, #ff0, #080);
  }
  .g5 {
    background: radial-gradient(farthest-side at top right, #f00, #ff0, #080);
  }
  .g6 {
    background: radial-gradient(
        farthest-side at top right,
        #f00,
        #ff0,
        #080,
        transparent
      ), radial-gradient(60px at top left, #f00, #ff0, #080);
  }
</style>
<div class="g1"></div>
<div class="g2"></div>
<div class="g3"></div>
<div class="g4"></div>
<div class="g5"></div>
<div class="g6"></div>得到如下

填充式徑向漸層repeating-radial-gradient
這個和repeating-linear-gradient 使用差不多,就是漸變的填滿。
程式碼範例
<style>
  div {
    width: 200px;
    height: 100px;
    border: 1px solid #ddd;
    float: left;
    margin: 10px;
  }
  .g1 {
    background: repeating-radial-gradient(circle, #f00 0, #ff0 10%, #f00 15%);
  }
  .g2 {
    background: repeating-radial-gradient(
      at top left,
      #f00,
      #ff0 10%,
      #080 15%,
      #ff0 20%,
      #f00 25%
    );
  }
  .g3 {
    background: repeating-radial-gradient(
      circle closest-corner at 20px 50px,
      #f00,
      #ff0 10%,
      #080 20%,
      #ff0 30%,
      #f00 40%
    );
  }
</style>

<div class="g1"></div>
<div class="g2"></div>
<div class="g3"></div>得到如下

#利用漸層可以做出很多效果
程式碼範例
<style>
  @keyframes up {
    0% {
      top: 100%;
    }
    100% {
      top: -100px;
    }
  }
  .blister {
    position: absolute;
    width: 80px;
    height: 80px;
    display: block;
    border-radius: 50%;
    // left: 300px;
    overflow: hidden;
    animation: up 20s linear infinite;
    bottom: -100%;
    background: rgba(255, 255, 255, 0.1);
    cursor: pointer;
    &:hover {
      animation-play-state: paused;
    }
    &::before {
      content: "";
      left: 0;
      top: 0;
      height: 100%;
      width: 100%;
      box-shadow: 0 0 20px #fff inset;
      position: absolute;
      border-radius: 50%;
    }
    .light {
      border-radius: 50%;
      width: 75px;
      height: 54px;
      transform: rotate(140deg);
      top: -24px;
      position: absolute;
      left: -18px;
      display: block;
      background: radial-gradient(farthest-side, #fff, rgba(255, 255, 255, 0));
    }
    .light2 {
      width: 24px;
      height: 15px;
      position: absolute;
      bottom: 9px;
      right: 15px;
      transform: rotate(-25deg);
      border-radius: 50%;
      display: block;
      background: radial-gradient(farthest-side, #fff, rgba(255, 255, 255, 0));
    }
  }
</style><span class="blister"> <span class="light"></span> <span class="light2"></span> </span>
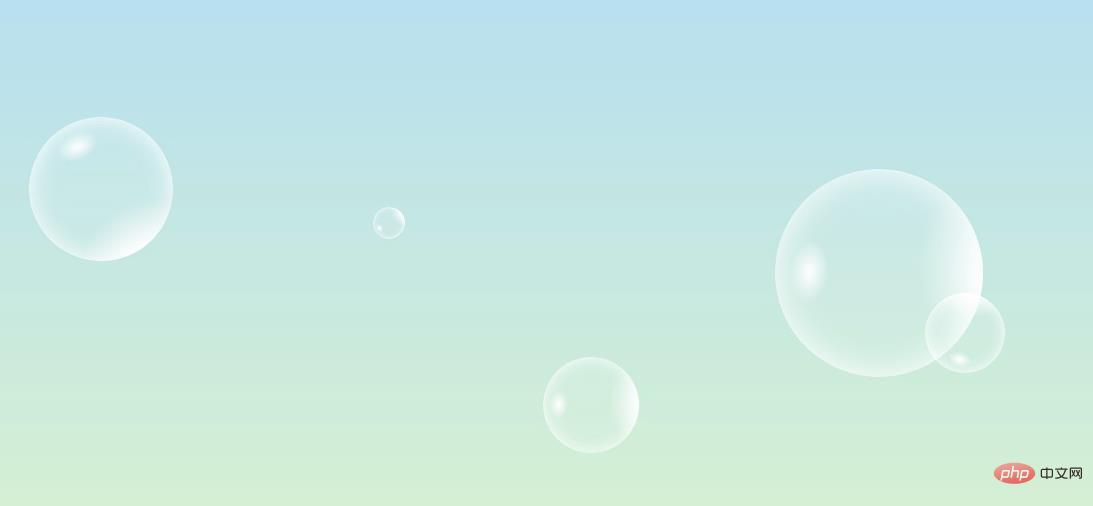
如下圖,可以做一個漂亮的氣泡

#然後再用上一篇文章的animation讓他動起來。
看效果點這裡 https://k-ui.cn 動畫延遲,要等會才能呈現。
推薦學習:CSS3影片教學
以上是教你怎麼使用css3為圖片加上漸層效果(程式碼詳解)的詳細內容。更多資訊請關注PHP中文網其他相關文章!

熱AI工具

Undresser.AI Undress
人工智慧驅動的應用程序,用於創建逼真的裸體照片

AI Clothes Remover
用於從照片中去除衣服的線上人工智慧工具。

Undress AI Tool
免費脫衣圖片

Clothoff.io
AI脫衣器

AI Hentai Generator
免費產生 AI 無盡。

熱門文章

熱工具

記事本++7.3.1
好用且免費的程式碼編輯器

SublimeText3漢化版
中文版,非常好用

禪工作室 13.0.1
強大的PHP整合開發環境

Dreamweaver CS6
視覺化網頁開發工具

SublimeText3 Mac版
神級程式碼編輯軟體(SublimeText3)


