
這篇文章帶大家了解下angular中的內容投影,介紹一下單插槽內容投影、多插槽內容投影、有條件的內容投影,希望對大家有幫助!

【相關教學推薦:《angular教學》】
ng-content
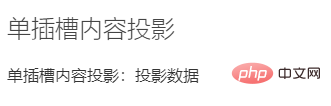
zippy-basic.component.ts有了import { Component } from '@angular/core'; @Component({ selector: 'app-zippy-basic', template: ` <h2>单插槽内容投影</h2> <ng-content></ng-content> ` }) export class ZippyBasicComponent {}登入後複製
<!-- 将 app-zippy-basic 元素包裹的全部内容投影到 zippy-basic 组件中去 -->
<app-zippy-basic>
  <p>单插槽内容投影:投影数据</p>
</app-zippy-basic>
效果如下:select標籤上的
- ng-content 元素是佔位符,它不會創建真正的DOM 元素。
- ng-content
的那些自訂屬性將被忽略。多重插槽內容投影- ng-content
#元件範本含有多個- 標籤。
ng-content為了區分投影的內容可以投影到對應ng-content標籤,需要使用
屬性作為識別。
select屬性支援標籤名稱、屬性、CSS 類別和 :not 偽類別的任意組合。 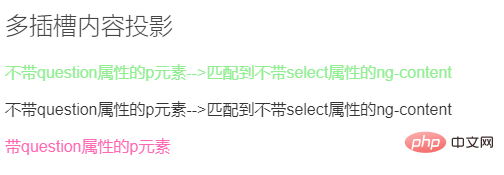 不加入
不加入
屬性的ng-content標籤將作為預設插槽。所有為匹配的投影內容都會投影在該ng-content的位置。
import { Component } from '@angular/core';

@Component({
  selector: 'app-zippy-multislot',
  template: `
  <h2>多插槽内容投影</h2>
  <ng-content></ng-content>
  <ng-content select="[question]"></ng-content>
`
})
export class ZippyMultislotComponent {}<!-- 使用 question 属性的内容将投影到带有 `select=[question]` 属性的 ng-content 元素。 -->
<app-zippy-multislot>
<p question style="color: hotpink;">
带question属性的p元素
</p>
<p style="color: lightgreen">不带question属性的p元素-->匹配到不带select属性的ng-content</p>
<p>不带question属性的p元素-->匹配到不带select属性的ng-content</p>
</app-zippy-multislot>效果如下:#在前面的範例中,只有第二個ng-content 元素定義了select 屬性。結果,
| 有條件的內容投影 | ||
|---|---|---|
<ng-container *ngTemplateOutlet="templateRefExp; context: contextExp"></ng-container>
<!-- 等同 -->
<ng-container [ngTemplateOutlet]="templateRefExp" [ngTemplateOutletContext]="contextExp"></ng-container>
登入後複製 | 參數 | |
| 說明 |
一個字串,用於定義模板參考以及模板的上下文物件##contextExp #Object | null是一個對象,該物件的鍵名將可以在局部模板中使用let 宣告中進行綁定。在上下文物件中使用 $implicit 為鍵名時,將把它作為預設值。
ng-template
標籤的#ID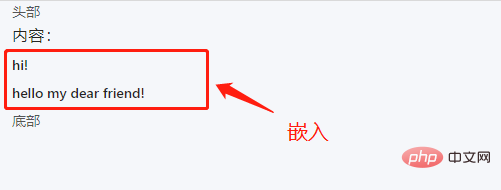 會符合
會符合
範例一:<header>头部</header> <main> <h3>内容:</h3> <ng-container [ngTemplateOutlet]="greet"></ng-container> </main> <footer>底部</footer> <ng-template #greet> <div> <h4>hi!</h4> <h4>hello my dear friend!</h4> </div> </ng-template>
;
ViewChild:與視圖子節點有關,操作自身的視圖內容;
ContentChild首先創建兩個元件
#在上一個部分,我們透過內容投影,讓自訂的元件標籤能夠嵌入html標籤或自訂元件標籤,那麼它如何操作投影進來的內容呢?
/**** part-b.component.ts ****/
import { Component, OnInit,Output} from '@angular/core';

@Component({
	selector: 'app-content-part-b',
	templateUrl: './part-b.component.html',
	styleUrls: ['./part-b.component.scss']
})

export class PartBComponent implements OnInit {
	constructor() { }
	ngOnInit() { }

	public func():void{
		console.log("PartB");
	}
}/**** part-a.component.ts ****/
import { Component, OnInit, ContentChild } from '@angular/core';
// 1、引入 part-b 组件
import { PartBComponent } from '../part-b/part-b.component';
@Component({
selector: 'app-content-part-a',
templateUrl: './part-a.component.html',
styleUrls: ['./part-a.component.scss']
})
export class PartAComponent implements OnInit {
// 2、获取投影
@ContentChild(PartBComponent) PartB:PartBComponent
constructor() { }
ngOnInit() {}
ngAfterContentInit(): void {
// 3、调用 part-b 组件的 func() 方法
this.PartB.func();
}
public func() {
console.log('PartA')
}
}part-a元件中
 <!-- content.component.html -->
<div>
	<div>Content</div>
	<div>
		<app-content-part-a>
		<!-- 投影在part-a组件中的内容 -->
			<h1>PartA--start</h1>
			<app-content-part-b></app-content-part-b>
			<span>PartA--end</span>
		</app-content-part-a>
	</div>
</div>
是與投影內容初始化有關,所以我們有關投影的內容操作盡量放在它初始化完成之後進行ViewChildViewChild
操作的時投影進來的內容,而#上一部分的ContentChild
操作的是自身的視圖內容 給上一個部分的content.component.html修改如下:
 <!-- content.component.html -->
<div>
	<div>Content</div>
	<div>
	<!-- 在此处引用模板变量 #partA -->
		<app-content-part-a #partA>
			<h1>PartA--start</h1>
				<app-content-part-b></app-content-part-b>
			<span>PartA--end</span>
		</app-content-part-a>
	</div>
</div>
/**** content.component.ts ****/
import { Component, OnInit, ViewChild } from '@angular/core';

@Component({
	selector: 'app-content',
	templateUrl: './content.component.html',
	styleUrls: ['./content.component.scss']
})

export class ContentComponent implements OnInit {
	// 2、获取视图 partA
	@ViewChild('partA') partA: any;
	constructor() { }
	ngOnInit() {}
	ngAfterViewInit(): void {
		// 3、调用 part-a 组件的 func() 方法
		this.partA.func();
	}
}ngAfterContentInit( )對應的是ngAfterViewInit()(視圖節點初始化是在投影內容初始化之後)
和###ViewChild## #還存在複數的形式,即###ContentChildren###和###ViewChildren###,它們取到的是節點的一個集合,其他的沒有什麼區別######寫法如下:## #import { Component, OnInit, ContentChild,ContentChildren ,QueryList } from '@angular/core';
import { PartBComponent } from '../part-b/part-b.component';
@Component({
selector: 'app-content-part-a',
templateUrl: './part-a.component.html',
styleUrls: ['./part-a.component.scss']
})
export class PartAComponent implements OnInit {
@ContentChildren(PartBComponent) PartBs: QueryList<PartBComponent>;
constructor() { }
ngOnInit() {}
}以上是一文了解angular中的3種內容投影(單插槽、多插槽、有條件)的詳細內容。更多資訊請關注PHP中文網其他相關文章!


