詳細分析PHP中怎樣定義顏色、繪製點、線和矩形?
在之前的文章中為大家帶來了《PHP中怎麼輸出圖片? (圖例詳解)》,其中詳細介紹了應該怎樣在PHP中輸出圖片,本篇文章繼續給大家帶來我們應該怎樣在PHP中繪製圖像,希望能夠幫助到大家!

在PHP中繪製圖像一切還是基於上一篇文章中的畫布,建立畫布,然後在畫布上進行繪製圖像。想到圖像我們就想到了色彩,所以首先,我們來看一下,我們應該如何在PHP中為圖像定義顏色。
圖像定義顏色
當我們使用PHP進行圖像操作時,必然離不開的就是顏色的設置,不同的顏色勾勒出了這漂亮的圖像。那麼在PHP中我們應該如何給圖像提供顏色呢?這時候我們就要用到imagecolorallocate() 和 imagecolorallocatealpha()這兩個函數。接下來,我們就來看看應該怎麼使用這兩個函數。
imagecolorallocate()函數
imagecolorallocate() 函數能夠為映像分配顏色,想要設定多種顏色的話,需要多次呼叫該函數,函數的語法格式:
imagecolorallocate(resource $image, int $red, int $green, int $blue)
其中,$image表示了需要設定顏色的圖像,該函數會傳回一個標識符,表示了給定的RGB成分組成的顏色,$red,$green 和$blue 分別是所需要的顏色的紅,綠,藍成分,取值範圍是0 到255 的整數或者十六進制的0x00 到0xFF。
範例如下:
<?php
$image = imagecreate(100, 100);
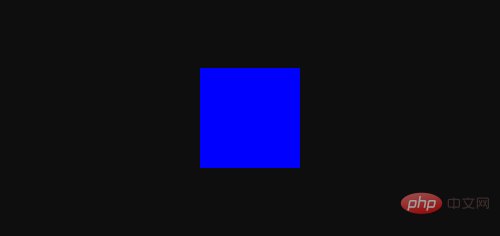
$blue = imagecolorallocate($image, 0, 0, 255);
header('Content-type:image/jpeg');
imagejpeg($image);
imagedestroy($image);
?>輸出結果:

函數# imagecolorallocatealpha()
imagecolorallocatealpha()函數與imagecolorallocate()函數相比,它們的作用是相同的,但是多了一個用來設定透明參數的alpha,它的語法格式如下:
imagecolorallocatealpha(resource $image, int $red, int $green, int $blue, int $alpha)
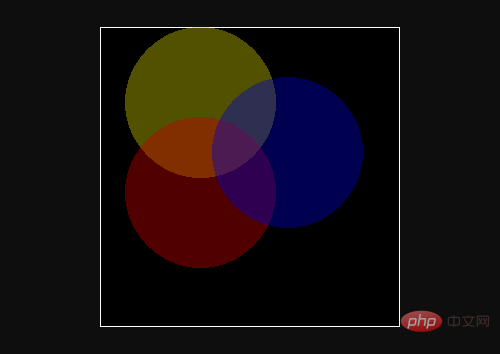
其中,前面的參數與imagecolorallocate()函數的參數表示為一致的,$alphab表示的是透明度的參數,取值範圍在0 到127 之間,0 表示完全不透明,127 則表示完全透明。
<?php
$size=300;
$image=imagecreatetruecolor($size,$size);
$back=imagecolorallocate($image,0,0,0);
$border=imagecolorallocate($image,255,255,255);
imagefilledrectangle($image,0,0,$size-1,$size-1,$back);
imagerectangle($image,0,0,$size-1,$size-1,$border);
$yellow_x=100;
$yellow_y=75;
$red_x=100;
$red_y=165;
$blue_x=187;
$blue_y=125;
$radius=150;
//用alpha值分配一些颜色
$yellow=imagecolorallocatealpha($image,200,200,0,75);
$red=imagecolorallocatealpha($image,200,0,0,75);
$blue=imagecolorallocatealpha($image,0,0,200,75);
//画3个交迭的圆
imagefilledellipse($image,$yellow_x,$yellow_y,$radius,$radius,$yellow);
imagefilledellipse($image,$red_x,$red_y,$radius,$radius,$red);
imagefilledellipse($image,$blue_x,$blue_y,$radius,$radius,$blue);
//不要忘记输出正确的header!
header('Content-type:image/png');
//最后输出结果
imagepng($image);
imagedestroy($image);
?>
#由此透過imagecolorallocate() 和imagecolorallocatealpha()這兩個函數已經能夠實現在圖像上定義顏色了。同時影像不僅是由顏色構成的,還需要有點、線條還有不同的形狀。那接下來我們來看看,應該怎麼去解決這些問題。 繪製點和線
繪製點和線可以說是PHP中繪製影像最基本的操作了,雖然很基本,但是靈活應用起來,可以透過它們繪製出更多複雜的圖像,我們可以透過
函數在畫布中繪製一個點,也可以設定點的顏色,它的函數的語法格式如下:
imagesetpixel(resource $image, int $x, int $y, int $color)
繪製一條線段則可以使用
函數,其語法格式如下:
imageline(resource $image, int $x1, int $y1, int $x2, int $y2, int $color)
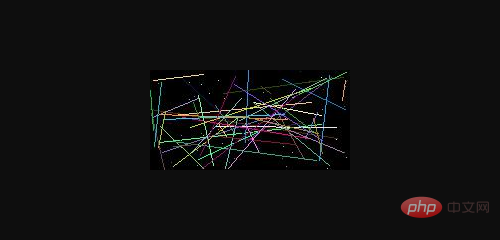
接下來我們可以透過循環和隨機數的結合來進行範例:
<?php
$img = imagecreate(200, 100);
imagecolorallocate($img, 0, 0, 0);
$blue = imagecolorallocate($img, 0, 0, 255);
$red = imagecolorallocate($img, 255, 0, 0);
for ($i=0; $i <= 50; $i++) {
$color = imagecolorallocate($img, rand(0, 255), rand(0, 255), rand(0, 255));
imagesetpixel($img, rand(0, 200), rand(0, 100), $color);
imageline($img, rand(0, 200), rand(0, 100), rand(0, 200), rand(0, 100), $color);
}
header('Content-type:image/jpeg');
imagejpeg($img);
imagedestroy($img);
?>
繪製矩形
在PHP中,我們想要繪製矩形的話,需要透過 imagerectangle() 或
imagefilledrectangle()
imagerectangle(resource $image, int $x1, int $y1, int $x2, int $y2, int $color)
imagefilledrectangle(resource $image, int $x1, int $y1, int $x2, int $y2, int $color)
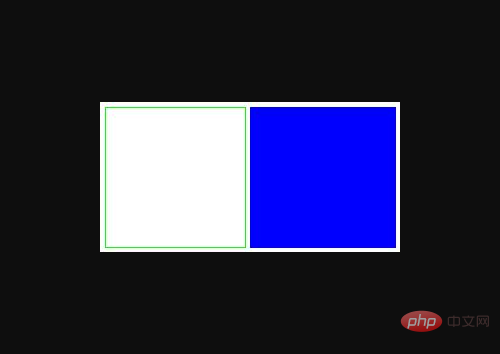
接下來透過範例透過 imagerectangle() 或imagefilledrectangle() 函數分別繪製一個矩形,範例如下:
<?php
$img = imagecreate(300, 150);
imagecolorallocate($img, 255, 255, 255);
$green = imagecolorallocate($img, 0, 255, 0);
$blue = imagecolorallocate($img, 0, 0, 255);
imagerectangle($img, 5, 5, 145, 145, $green);
imagefilledrectangle($img, 150, 5, 295, 145, $blue);
header('Content-type:image/jpeg');
imagejpeg($img);
imagedestroy($img);
?>
推薦學習:《PHP影片教學》
以上是詳細分析PHP中怎樣定義顏色、繪製點、線和矩形?的詳細內容。更多資訊請關注PHP中文網其他相關文章!

熱AI工具

Undresser.AI Undress
人工智慧驅動的應用程序,用於創建逼真的裸體照片

AI Clothes Remover
用於從照片中去除衣服的線上人工智慧工具。

Undress AI Tool
免費脫衣圖片

Clothoff.io
AI脫衣器

Video Face Swap
使用我們完全免費的人工智慧換臉工具,輕鬆在任何影片中換臉!

熱門文章

熱工具

記事本++7.3.1
好用且免費的程式碼編輯器

SublimeText3漢化版
中文版,非常好用

禪工作室 13.0.1
強大的PHP整合開發環境

Dreamweaver CS6
視覺化網頁開發工具

SublimeText3 Mac版
神級程式碼編輯軟體(SublimeText3)
 適用於 Ubuntu 和 Debian 的 PHP 8.4 安裝和升級指南
Dec 24, 2024 pm 04:42 PM
PHP 8.4 帶來了多項新功能、安全性改進和效能改進,同時棄用和刪除了大量功能。 本指南介紹如何在 Ubuntu、Debian 或其衍生版本上安裝 PHP 8.4 或升級到 PHP 8.4
 如何設定 Visual Studio Code (VS Code) 進行 PHP 開發
Dec 20, 2024 am 11:31 AM
Visual Studio Code,也稱為 VS Code,是一個免費的原始碼編輯器 - 或整合開發環境 (IDE) - 可用於所有主要作業系統。 VS Code 擁有大量針對多種程式語言的擴展,可以輕鬆編寫
 在PHP API中說明JSON Web令牌(JWT)及其用例。
Apr 05, 2025 am 12:04 AM
JWT是一種基於JSON的開放標準,用於在各方之間安全地傳輸信息,主要用於身份驗證和信息交換。 1.JWT由Header、Payload和Signature三部分組成。 2.JWT的工作原理包括生成JWT、驗證JWT和解析Payload三個步驟。 3.在PHP中使用JWT進行身份驗證時,可以生成和驗證JWT,並在高級用法中包含用戶角色和權限信息。 4.常見錯誤包括簽名驗證失敗、令牌過期和Payload過大,調試技巧包括使用調試工具和日誌記錄。 5.性能優化和最佳實踐包括使用合適的簽名算法、合理設置有效期、
 php程序在字符串中計數元音
Feb 07, 2025 pm 12:12 PM
字符串是由字符組成的序列,包括字母、數字和符號。本教程將學習如何使用不同的方法在PHP中計算給定字符串中元音的數量。英語中的元音是a、e、i、o、u,它們可以是大寫或小寫。 什麼是元音? 元音是代表特定語音的字母字符。英語中共有五個元音,包括大寫和小寫: a, e, i, o, u 示例 1 輸入:字符串 = "Tutorialspoint" 輸出:6 解釋 字符串 "Tutorialspoint" 中的元音是 u、o、i、a、o、i。總共有 6 個元
 您如何在PHP中解析和處理HTML/XML?
Feb 07, 2025 am 11:57 AM
本教程演示瞭如何使用PHP有效地處理XML文檔。 XML(可擴展的標記語言)是一種用於人類可讀性和機器解析的多功能文本標記語言。它通常用於數據存儲
 解釋PHP中的晚期靜態綁定(靜態::)。
Apr 03, 2025 am 12:04 AM
靜態綁定(static::)在PHP中實現晚期靜態綁定(LSB),允許在靜態上下文中引用調用類而非定義類。 1)解析過程在運行時進行,2)在繼承關係中向上查找調用類,3)可能帶來性能開銷。
 什麼是PHP魔術方法(__ -construct,__destruct,__call,__get,__ set等)並提供用例?
Apr 03, 2025 am 12:03 AM
PHP的魔法方法有哪些? PHP的魔法方法包括:1.\_\_construct,用於初始化對象;2.\_\_destruct,用於清理資源;3.\_\_call,處理不存在的方法調用;4.\_\_get,實現動態屬性訪問;5.\_\_set,實現動態屬性設置。這些方法在特定情況下自動調用,提升代碼的靈活性和效率。


