手把手教你在vue2中利用svg開發一個環形進度條組件
這篇文章給大家詳細介紹如何用svg去開發一個環形進度條vue2元件,希望對大家有幫助!

普通的矩形進度條我們透過div css很容易就可以實現,而環形的就有點麻煩,當然他也可以用div css透過背景屬性或clip屬性配合css3變數做障眼法去實現,但是過於複雜而且相容和控制起來都比較麻煩,所以,達到最佳效果我們還是去使用svg實現吧。 【相關推薦:《vue.js教學》】
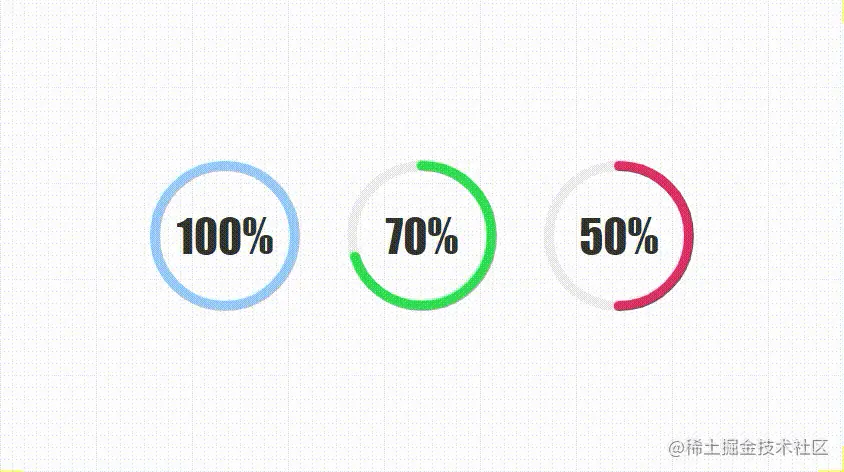
#我們先康康最後完成的效果吧:

開發自己組件好處就是,裡面的大小,顏色,粗細,動畫等等都可以任意擴展,準備好了麼,馬上要開始啦~
正文
##1.傳參與計算<script>
export default {
name: "CircleProgress",
data() {
return {
now: 0
};
},
props: {
// 进度值
value: {
type: [String, Number],
default: 0
},
// 尺寸
size: {
type: [String, Number],
default: 120
},
// 边框粗细
strokeWidth:{
type: [String, Number],
default: 10
},
// 进度条颜色
color: {
type: String,
default: "rgba(153,202,251,1)"
},
// 动画执行时间
duration:{
type: [String, Number],
default: 1000
}
},
computed: {
percentage() {
return this.value;
},
countDown() {
return this.now;
},
// 圆心x轴坐标
cx() {
return this.size / 2;
},
// 圆心y轴坐标
cy() {
return this.size / 2;
},
// 半径
radius() {
return (this.size - this.strokeWidth) / 2;
},
// 圆周长
circumference() {
return 2 * Math.PI * this.radius;
},
// 进度长度
progress() {
return (1 - this.now / 100) * this.circumference;
}
},
};
</script>登入後複製
相信大家透過上面的註解怎麼開發就會猜的八九不十,我們的這個元件可以設定大小,邊框粗細,進度條顏色,和後面要多久從0呈現出進度值的動畫時長。至於計算屬性,會在後面繪製svg的時候,根據註解一一對應不難看出來目的。 <script>
export default {
name: "CircleProgress",
data() {
return {
now: 0
};
},
props: {
// 进度值
value: {
type: [String, Number],
default: 0
},
// 尺寸
size: {
type: [String, Number],
default: 120
},
// 边框粗细
strokeWidth:{
type: [String, Number],
default: 10
},
// 进度条颜色
color: {
type: String,
default: "rgba(153,202,251,1)"
},
// 动画执行时间
duration:{
type: [String, Number],
default: 1000
}
},
computed: {
percentage() {
return this.value;
},
countDown() {
return this.now;
},
// 圆心x轴坐标
cx() {
return this.size / 2;
},
// 圆心y轴坐标
cy() {
return this.size / 2;
},
// 半径
radius() {
return (this.size - this.strokeWidth) / 2;
},
// 圆周长
circumference() {
return 2 * Math.PI * this.radius;
},
// 进度长度
progress() {
return (1 - this.now / 100) * this.circumference;
}
},
};
</script>2.結構與樣式<template>
<div class="circle-main">
<div class="circle-main-box" :style="[{ 'width': size+'px','height': size+'px'}]">
<svg :width="size" :height="size" class="circle">
<circle
:r="radius"
:cx="cx"
:cy="cy"
fill="transparent"
stroke="#EEEEEE"
:stroke-width="strokeWidth"
/>
<circle
:r="radius"
:cx="cx"
:cy="cy"
fill="transparent"
:stroke="color"
:stroke-width="strokeWidth"
stroke-linecap="round"
:stroke-dasharray="circumference"
:stroke-dashoffset="progress"
/>
</svg>
<span class="count-num" :style="[{ 'font-size': size*.3+'px'}]">{{countDown}}%</span>
</div>
</div>
</template>登入後複製
其實這個很簡單就是用svg寫兩個圓環,第一個當灰色底圓,第二個就是我們的進度條了,設定好大小圓心半徑邊框色,而且我們要把填充色變為同名,都寫完了剩下兩項stroke-dasharray和stroke-dashoffset,相信大家都會猜的到了,svg進度條變化核心就是這兩個屬性,剛剛計算屬性也算出來了,分別就是圓環的周長和當前進度的長度。我們利用當前進度值來計算百分比佔目前的長度,實現環形進度條的變化,就是這麼簡單。 然後我們還要寫一丟丟css,而且是必須寫,因為svg圓環不是從我們認為的0度開始,而是偏移了90度。 <template>
<div class="circle-main">
<div class="circle-main-box" :style="[{ 'width': size+'px','height': size+'px'}]">
<svg :width="size" :height="size" class="circle">
<circle
:r="radius"
:cx="cx"
:cy="cy"
fill="transparent"
stroke="#EEEEEE"
:stroke-width="strokeWidth"
/>
<circle
:r="radius"
:cx="cx"
:cy="cy"
fill="transparent"
:stroke="color"
:stroke-width="strokeWidth"
stroke-linecap="round"
:stroke-dasharray="circumference"
:stroke-dashoffset="progress"
/>
</svg>
<span class="count-num" :style="[{ 'font-size': size*.3+'px'}]">{{countDown}}%</span>
</div>
</div>
</template>
.circle {
  transform: rotate(-90deg);
}.circle-main-box {
position: relative;
display: block;
margin: 0 auto;
}
.count-num {
width: 100px;
height: 100px;
position: absolute;
left: 50%;
top: 50%;
margin-left: -50px;
margin-top: -50px;
align-items: center;
justify-content: center;
display: flex;
font-family: fantasy;
font-size: 30px;
color: #333;
user-select: none;
}
3.動畫與使用<script>
export default {
name: "CircleProgress",
// ...
mounted() {
this.run();
},
methods: {
run() {
if (this.value == 0) return;
let t = this.duration / this.value
this.timer = setInterval(() => {
if (this.now >= this.value) {
return clearInterval(this.timer);
}
this.now++;
}, t);
}
}
};登入後複製
我們會透過目前動畫執行時間與目前的值計算出每次數量1執行的時間,然後透過setInterval去執行,直至達到進度值。最後,我們就要開始使用這個元件啦~~<script>
export default {
name: "CircleProgress",
// ...
mounted() {
this.run();
},
methods: {
run() {
if (this.value == 0) return;
let t = this.duration / this.value
this.timer = setInterval(() => {
if (this.now >= this.value) {
return clearInterval(this.timer);
}
this.now++;
}, t);
}
}
};<div id="app">
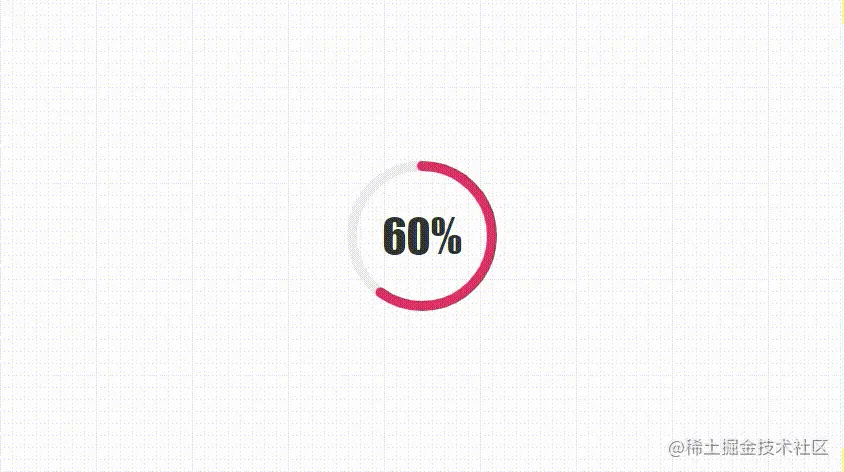
<CircleProgress :value="60" :size="150" :color="'#d36'" :duration="3000" />
</div>
結語
你學廢了麼,以後做類似的像完成度這樣的加載器是不是又有新的想法了,有了圓形做基礎,還怕其他圖形麼,看的再多,說的再多,都不如動手去試試,快行動起來吧,大家加油鴨~~更多程式相關知識,請造訪:程式設計影片! !
以上是手把手教你在vue2中利用svg開發一個環形進度條組件的詳細內容。更多資訊請關注PHP中文網其他相關文章!

熱AI工具

Undresser.AI Undress
人工智慧驅動的應用程序,用於創建逼真的裸體照片

AI Clothes Remover
用於從照片中去除衣服的線上人工智慧工具。

Undress AI Tool
免費脫衣圖片

Clothoff.io
AI脫衣器

Video Face Swap
使用我們完全免費的人工智慧換臉工具,輕鬆在任何影片中換臉!

熱門文章

熱工具

記事本++7.3.1
好用且免費的程式碼編輯器

SublimeText3漢化版
中文版,非常好用

禪工作室 13.0.1
強大的PHP整合開發環境

Dreamweaver CS6
視覺化網頁開發工具

SublimeText3 Mac版
神級程式碼編輯軟體(SublimeText3)
 vue中怎麼用bootstrap
Apr 07, 2025 pm 11:33 PM
在 Vue.js 中使用 Bootstrap 分為五個步驟:安裝 Bootstrap。在 main.js 中導入 Bootstrap。直接在模板中使用 Bootstrap 組件。可選:自定義樣式。可選:使用插件。
 vue怎麼給按鈕添加函數
Apr 08, 2025 am 08:51 AM
可以通過以下步驟為 Vue 按鈕添加函數:將 HTML 模板中的按鈕綁定到一個方法。在 Vue 實例中定義該方法並編寫函數邏輯。
 vue中的watch怎麼用
Apr 07, 2025 pm 11:36 PM
Vue.js 中的 watch 選項允許開發者監聽特定數據的變化。當數據發生變化時,watch 會觸發一個回調函數,用於執行更新視圖或其他任務。其配置選項包括 immediate,用於指定是否立即執行回調,以及 deep,用於指定是否遞歸監聽對像或數組的更改。
 vue多頁面開發是啥意思
Apr 07, 2025 pm 11:57 PM
Vue 多頁面開發是一種使用 Vue.js 框架構建應用程序的方法,其中應用程序被劃分為獨立的頁面:代碼維護性:將應用程序拆分為多個頁面可以使代碼更易於管理和維護。模塊化:每個頁面都可以作為獨立的模塊,便於重用和替換。路由簡單:頁面之間的導航可以通過簡單的路由配置來管理。 SEO 優化:每個頁面都有自己的 URL,這有助於搜索引擎優化。
 vue.js怎麼引用js文件
Apr 07, 2025 pm 11:27 PM
在 Vue.js 中引用 JS 文件的方法有三種:直接使用 <script> 標籤指定路徑;利用 mounted() 生命週期鉤子動態導入;通過 Vuex 狀態管理庫進行導入。
 vue返回上一頁的方法
Apr 07, 2025 pm 11:30 PM
Vue.js 返回上一頁有四種方法:$router.go(-1)$router.back()使用 <router-link to="/"> 組件window.history.back(),方法選擇取決於場景。
 vue遍歷怎麼用
Apr 07, 2025 pm 11:48 PM
Vue.js 遍歷數組和對像有三種常見方法:v-for 指令用於遍歷每個元素並渲染模板;v-bind 指令可與 v-for 一起使用,為每個元素動態設置屬性值;.map 方法可將數組元素轉換為新數組。
 vue的div怎麼跳轉
Apr 08, 2025 am 09:18 AM
Vue 中 div 元素跳轉的方法有兩種:使用 Vue Router,添加 router-link 組件。添加 @click 事件監聽器,調用 this.$router.push() 方法跳轉。


