

簡單常用技巧之React組件間通訊(整理分享)

本篇文章為大家帶來了React組件間通信簡單易用的常用方式,React知識中一個主要內容便是組件之間的通信,以下列舉幾種常用的組件通信方式,結合實例,通俗易懂,建議收藏,希望對大家有幫助。

一、父子元件通訊
原則:父元件透過props(與vue中的props區分開)向子元件通信,子元件透過回呼事件與父元件通訊。
首先,先建立一個父元件Parent.js跟子元件Children.js,二者的關係為直接父子關係。
Parent.js父元件如下,給父元件一個預設狀態state,引入子元件,透過在子元件加上toChildren={this.state.msg},該處為傳送props 。
import React from 'react';
import { Button } from 'element-react';
import Children from './Children';
class Parent extends React.Component {
constructor(props) {
super(props);
this.state = {
msg:'父组件传递给子组件'
};
this.changeMsg = this.changeMsg.bind(this)
}
changeMsg(){
this.setState({
msg:'父组件传递给子组件(改变之后的内容)'
})
}
render(){
return (
<p style={{backgroundColor:'#f7ba2a',padding:'20px',width:'500px',margin:'auto',textAlign:'center'}}>
<p>父子组件通信实例</p>
<Button onClick={this.changeMsg}>父传子</Button>
<Children toChildren={this.state.msg}></Children>
</p>
)
}
}
export default ParentChildren.js子元件如下,初始狀態透過props拿到父元件傳過來的值。
import React from 'react';
class Children extends React.Component {
constructor(props) {
super(props);
this.state = {
msg:this.props.toChildren //通过props拿到父组件传过来的值
};
}
render(){
return (
<p style={{backgroundColor:'#13ce66',padding:'10px',width:'200px',margin:'auto',marginTop:'20px'}}>
<p>从父组件传过来:</p>
<span style={{color:'blue'}}>{this.state.msg}</span>
</p>
)
}
}
export default Children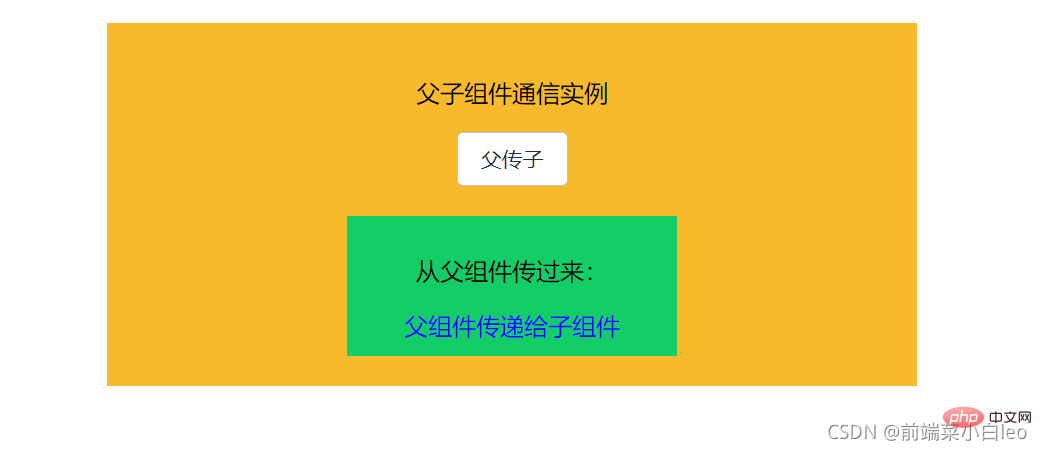
注意:子元件取值時應與父元件放在子元件的欄位props一致,即本例中的 toChildren,如下


# 那麼子元件想傳送值給父元件(向上傳值),可以透過呼叫父元件傳過來的回呼函數
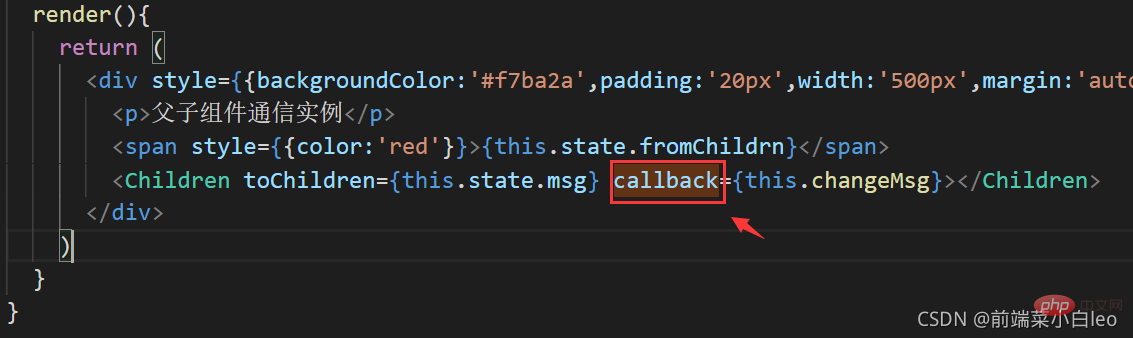
在Parent.js中向Children.js加入回呼函數callback,綁定changeMsg方法
import React from 'react';
import Children from './Children';
class Parent extends React.Component {
constructor(props) {
super(props);
this.state = {
msg:'父组件传递给子组件',
fromChildrn:''
};
this.changeMsg = this.changeMsg.bind(this)
}
changeMsg(val){
this.setState({
fromChildrn: val
})
}
render(){
return (
<p style={{backgroundColor:'#f7ba2a',padding:'20px',width:'500px',margin:'auto',textAlign:'center'}}>
<p>父子组件通信实例</p>
<span style={{color:'red'}}>{this.state.fromChildrn}</span>
<Children toChildren={this.state.msg} callback={this.changeMsg}></Children>
</p>
)
}
}
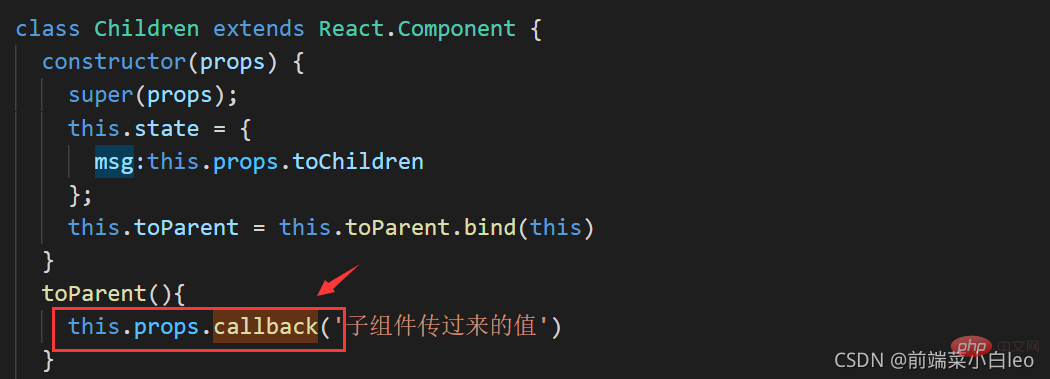
export default Parent在子元件中,用this.props.callback()執行父元件的回呼函數,從而執行綁定方法changeMsg,顯示子元件傳過來的值
import React from 'react';
import { Button } from 'element-react';
class Children extends React.Component {
constructor(props) {
super(props);
this.state = {
msg:this.props.toChildren
};
this.toParent = this.toParent.bind(this)
}
toParent(){
this.props.callback('子组件传过来的值') //子组件通过此触发父组件的回调方法
}
render(){
return (
<p style={{backgroundColor:'#13ce66',padding:'10px',width:'200px',margin:'auto',marginTop:'20px'}}>
<p>从父组件传过来:</p>
<span style={{color:'blue'}}>{this.state.msg}</span>
<Button onClick={this.toParent}>子传父</Button>
</p>
)
}
}
export default Children注意:props中的回呼函數名稱需一致,即本例中的callback,如下
#小結: 以上為直接父子元件通訊的其中一種方式,父傳子,透過props;子傳父,執行回呼。
二、跨級元件通訊
假設一個父元件中存在一個子元件,這個子元件中又存在一個子元件,暫且稱為“孫元件”,當父元件需要與「孫組件」通訊時,常用的方式有兩種,逐層傳值與跨層傳值。
1、逐層傳值
這種方式就是上面的直接父子通訊的基礎上在加上一個中間層。如父、“孫”組件通信,可以先父子通信,然後再子“孫”通信,傳遞的層級變成父-->子-->“孫”,同理,通過props往下傳,透過回調往上傳。不展開,有興趣的自己動手實現一下。
2、跨級傳值
顧名思義,父跟「孫」通信,不需要經過子(中間層)元件。這裡引出了Context。
React官方文件對Context做出了解釋:
在典型的React 應用中,資料是透過props 屬性自上而下(由父及子)傳遞的,但這種做法對於某些類型的屬性而言是極其繁瑣的(例如:地區偏好,UI 主題),這些屬性是應用程式中許多元件都需要的。 Context 提供了一種在元件之間共用此類值的方式,而不必明確地透過元件樹的逐層傳遞 props。
一句話概括就是:跨級傳值,狀態共享。
看下簡單的實例,直接講用法。
首先,我先建立一個context.js檔案(與父子孫同個目錄),預設值為一個物件。
import React from "react";
const MyContext = React.createContext({text:'luck'});
export default MyContext然後,對父元件進行改寫,引入context,使用一個 Provider 來將目前的 value 傳遞給以下的元件樹,value為傳遞的值。
import React from 'react';
import Children from './Children';
import MyContext from './context';
class Parent extends React.Component {
constructor(props) {
super(props);
}
// 使用一个 Provider 来将当前的 value 传递给以下的组件树。
// 无论多深,任何组件都能读取这个值。
render(){
return (
<p style={{backgroundColor:'#f7ba2a',padding:'20px',width:'500px',margin:'auto',textAlign:'center'}}>
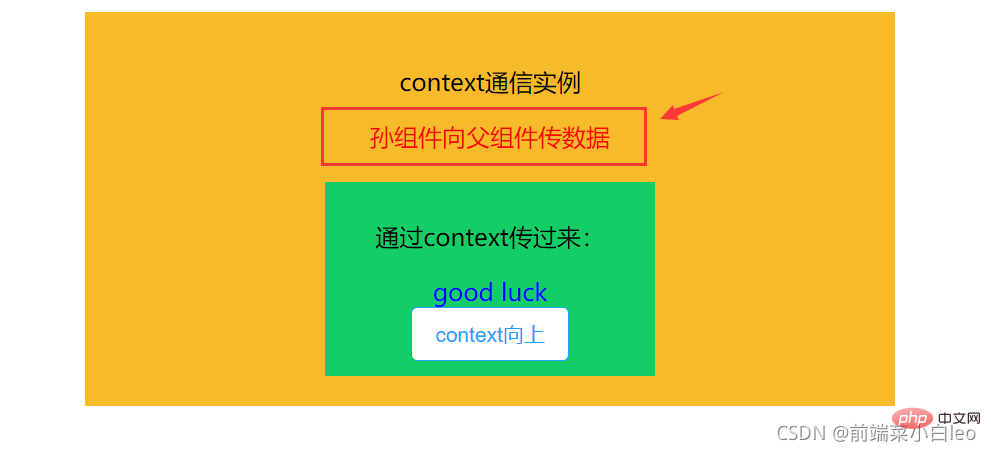
<p>context通信实例</p>
<MyContext.Provider value={{text:'good luck'}}>
<Children></Children>
</MyContext.Provider>
</p>
)
}
}
export default Parent子元件為中間層,不做處理,用於包裹「孫」元件。
import React from 'react';
import Grandson from './Grandson';

class Children extends React.Component {
  render(){
    return (
      <p>
        <Grandson></Grandson>
      </p>
    )
  }
}

export default Children新增一個「孫」元件,同樣需引入context,在元件內部加入static contextType = MyContext,此時將能透過this.context直接取得到上層距離最近的Provider傳遞的值,此時this.context = {text:good luck},即父元件傳遞value。
import React from 'react';
import MyContext from './context';
class Grandson extends React.Component {
static contextType = MyContext
render(){
return (
<p style={{backgroundColor:'#13ce66',padding:'10px',width:'200px',margin:'auto',marginTop:'20px'}}>
<p>通过context传过来:</p>
<span style={{color:'blue'}}>{this.context.text}</span>
</p>
)
}
}
export default Grandson透過this.context.text取得到傳遞的值。

以上的是一個父-->孫的過程,也就是向下的流程,如果想孫-->父向上傳值,可以透過回呼的方式
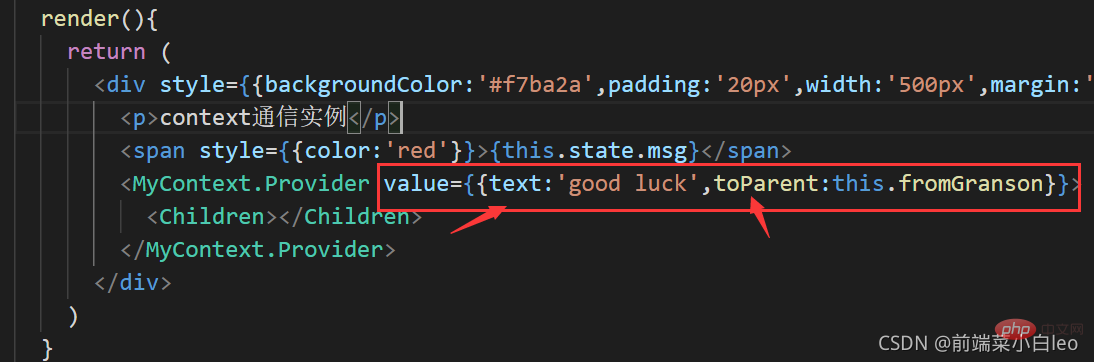
对父组件进行传值修改,在传过来的对象中添加一个属性,里面绑定父组件的方法value={{text:'good luck',toParent:this.fromGranson}}
import React from 'react';
import Children from './Children';
import MyContext from './context';
class Parent extends React.Component {
constructor(props) {
super(props);
this.state = {
msg:''
};
this.fromGranson = this.fromGranson.bind(this)
}
fromGranson(val){
this.setState({
msg:val
})
}
// 使用一个 Provider 来将当前的 theme 传递给以下的组件树。
// 无论多深,任何组件都能读取这个值。
render(){
return (
<p style={{backgroundColor:'#f7ba2a',padding:'20px',width:'500px',margin:'auto',textAlign:'center'}}>
<p>context通信实例</p>
<span style={{color:'red'}}>{this.state.msg}</span>
<MyContext.Provider value={{text:'good luck',toParent:this.fromGranson}}>
<Children></Children>
</MyContext.Provider>
</p>
)
}
}
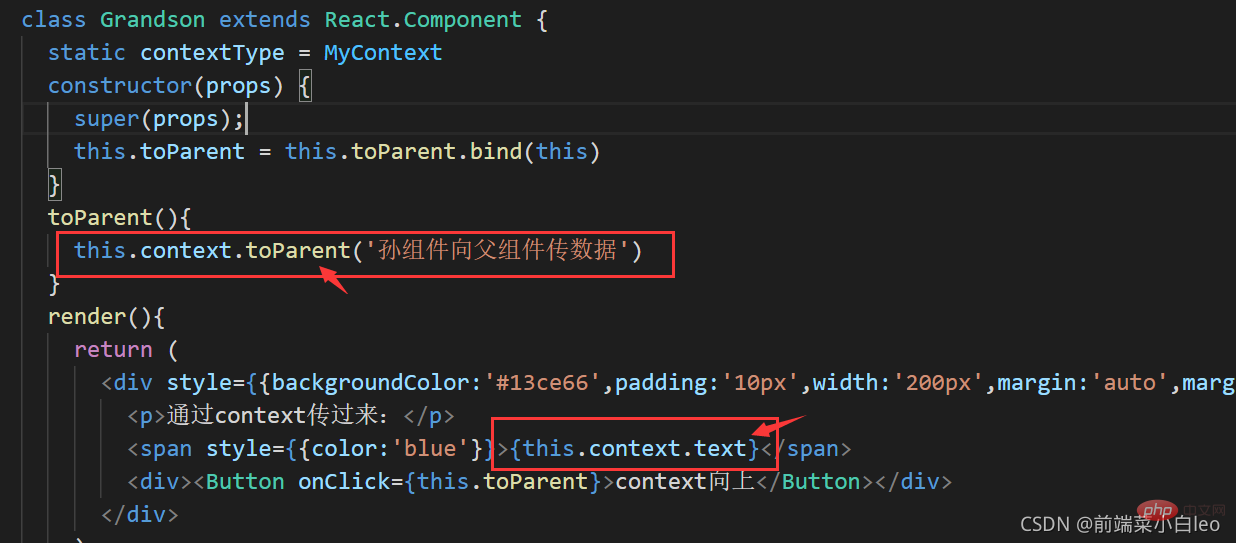
export default Parent然后在孙组件中添加一个按钮,绑定方法,执行函数回调
toParent(){
this.context.toParent('孙组件向父组件传数据')
}
import React from 'react';
import MyContext from './context';
import { Button } from 'element-react'
class Grandson extends React.Component {
static contextType = MyContext
constructor(props) {
super(props);
this.toParent = this.toParent.bind(this)
}
toParent(){
this.context.toParent('孙组件向父组件传数据')
}
render(){
return (
<p style={{backgroundColor:'#13ce66',padding:'10px',width:'200px',margin:'auto',marginTop:'20px'}}>
<p>通过context传过来:</p>
<span style={{color:'blue'}}>{this.context.text}</span>
<p><Button onClick={this.toParent}>context向上</Button></p>
</p>
)
}
}
export default Grandson默认的页面为:
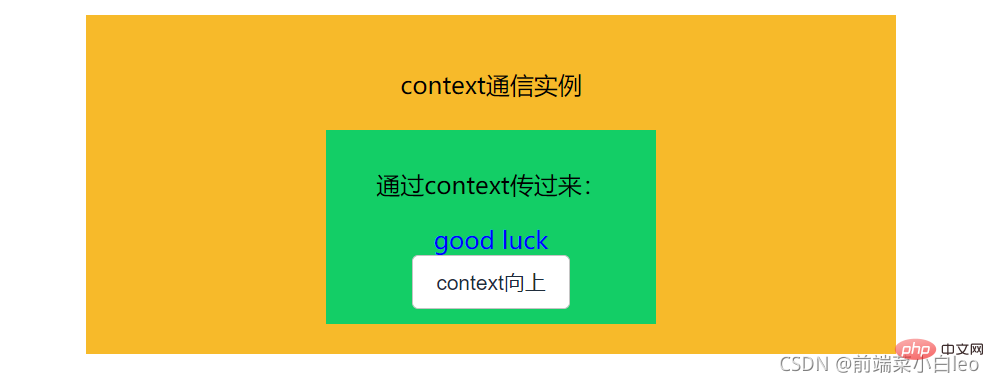
点击按钮之后,执行context中的回调,向上传值。
不管层级有多深,都可以使用context进行向下或向上传值。
注意:在下层组件中取的context中的字段需与value中传递字段保持一致。text与toParent
以上就是Context的大致使用,更多细节请往React官方文档:
Context – React=https://react.docschina.org/docs/context.html
三、兄弟(无嵌套)组件通信
当两个组件互不嵌套,处在同个层级或者不同层级上,他们之间要进行通信,有以下几种常用方法
1、某个组件先将值传到同一个父组件,然后在通过父组件传给另外一个组件,用到父子组件传值
2、使用缓存sessionStorage、localStorage等
3、如果两个组件之间存在跳转,可以使用路由跳转传值,附上详细用法
React学习笔记 -- 组件通信之路由传参(react-router-dom)_前端菜小白leo的博客-CSDN博客
4、event(发布--订阅)
首先,安装event
npm install event -save
新建一个event.js
import { EventEmitter } from 'events';
export default new EventEmitter();然后另两个组件处于同层级(不同个父组件或者不同层级都可以)
import React from 'react';
import Grandson from './Grandson';
import GrandsonOther from './GrandsonOther';

class Children extends React.Component {
  render(){
    return (
      <p>
        <Grandson></Grandson>
        <GrandsonOther></GrandsonOther>
      </p>
    )
  }
}

export default Children组件一,导入event,在componentDidMount阶段添加监听addListener(订阅),在componentWillUnmount移除监听removeListener,事件名称与组件二中emit一致。
import React from 'react';
import event from '../event';
class Grandson extends React.Component {
constructor(props) {
super(props);
this.state = {
msg:''
}
}
componentDidMount(){
event.addListener('eventMsg',val => {
this.setState({
msg:val
})
})
}
componentWillUnmount(){
event.removeListener('eventMsg')
}
render(){
return (
<p style={{backgroundColor:'#13ce66',padding:'10px',width:'200px',margin:'auto',marginTop:'20px'}}>
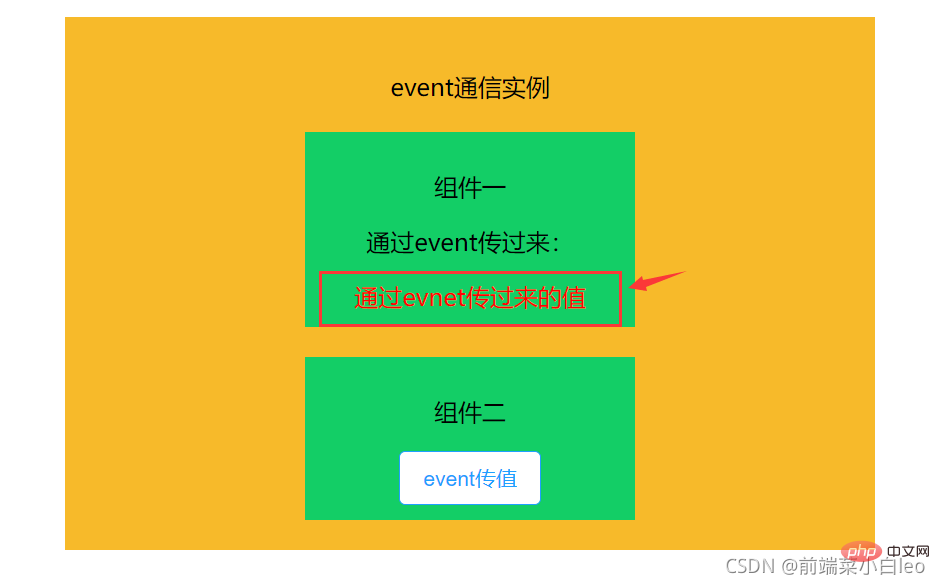
<p>组件一</p>
<p>通过event传过来:</p>
<span style={{color:'red'}}>{this.state.msg}</span>
</p>
)
}
}
export default Grandson组件二,导入event,按钮绑定方法,使用event.emit触发(发布)事件。
import React from 'react';
import event from '../event';
import { Button } from 'element-react'
class Grandson extends React.Component {
constructor(props) {
super(props);
this.state = {
msg:''
}
this.toOther = this.toOther.bind(this)
}
toOther(){
event.emit('eventMsg','通过evnet传过来的值')
}
render(){
return (
<p style={{backgroundColor:'#13ce66',padding:'10px',width:'200px',margin:'auto',marginTop:'20px'}}>
<p>组件二</p>
<span style={{color:'blue'}}>{this.state.msg}</span>
<p><Button onClick={this.toOther}>event传值</Button></p>
</p>
)
}
}
export default Grandson点击按钮,组件二发布事件,组件一监听(订阅)事件,更新内容。(如果交换发布者订阅者身份,写法一致)

注意:如果两个组件使用event进行通信,确保发布订阅的事件名称一致,如上例中 eventMsg
小结: event的方式比较灵活,不管是父子、跨级、还是同级,甚至毫无关联的组件,都可以使用此方式进行通信。
四、路由传值
React学习笔记 -- 组件通信之路由传参(react-router-dom)_前端菜小白leo的博客-CSDN博客
五、Redux
Redux基本用法(在react中使用,链路打通)_前端菜小白leo的博客-CSDN博客
总结:主要讲了react中常用的组件通信方式,在平时工作中,根据不同的应用场景,选择不同的通信方式,会让通信流程更加简单、清晰。
对比Vue中的组件通信方式,你会发现很多相似之处:
Vue组件间的通信方式(多种场景,通俗易懂,建议收藏)_前端菜小白leo的博客-CSDN博客
推荐学习:《react视频教程》
以上是簡單常用技巧之React組件間通訊(整理分享)的詳細內容。更多資訊請關注PHP中文網其他相關文章!

熱AI工具

Undresser.AI Undress
人工智慧驅動的應用程序,用於創建逼真的裸體照片

AI Clothes Remover
用於從照片中去除衣服的線上人工智慧工具。

Undress AI Tool
免費脫衣圖片

Clothoff.io
AI脫衣器

Video Face Swap
使用我們完全免費的人工智慧換臉工具,輕鬆在任何影片中換臉!

熱門文章
熱工具

記事本++7.3.1
好用且免費的程式碼編輯器

SublimeText3漢化版
中文版,非常好用

禪工作室 13.0.1
強大的PHP整合開發環境

Dreamweaver CS6
視覺化網頁開發工具

SublimeText3 Mac版
神級程式碼編輯軟體(SublimeText3)


 React前後端分離指南:如何實作前後端的解耦與獨立部署
Sep 28, 2023 am 10:48 AM
React前後端分離指南:如何實作前後端的解耦與獨立部署
Sep 28, 2023 am 10:48 AM
React前後端分離指南:如何實現前後端的解耦和獨立部署,需要具體程式碼範例在當今的Web開發環境中,前後端分離已經成為一種趨勢。透過將前端和後端程式碼分開,可以讓開發工作更加靈活、高效,並且方便進行團隊協作。本文將介紹如何使用React實現前後端分離,從而實現解耦和獨立部署的目標。首先,我們要先理解什麼是前後端分離。傳統的Web開發模式中,前端和後端是耦合在
 如何利用React和RabbitMQ建立可靠的訊息應用
Sep 28, 2023 pm 08:24 PM
如何利用React和RabbitMQ建立可靠的訊息應用
Sep 28, 2023 pm 08:24 PM
如何利用React和RabbitMQ建立可靠的訊息傳遞應用程式引言:現代化的應用程式需要支援可靠的訊息傳遞,以實現即時更新和資料同步等功能。 React是一種流行的JavaScript庫,用於建立使用者介面,而RabbitMQ是一種可靠的訊息傳遞中間件。本文將介紹如何結合React和RabbitMQ建立可靠的訊息傳遞應用,並提供具體的程式碼範例。 RabbitMQ概述:
 React Router使用指南:如何實現前端路由控制
Sep 29, 2023 pm 05:45 PM
React Router使用指南:如何實現前端路由控制
Sep 29, 2023 pm 05:45 PM
ReactRouter使用指南:如何實現前端路由控制隨著單頁應用的流行,前端路由成為了一個不可忽視的重要部分。 ReactRouter作為React生態系統中最受歡迎的路由庫,提供了豐富的功能和易用的API,使得前端路由的實作變得非常簡單和靈活。本文將介紹ReactRouter的使用方法,並提供一些具體的程式碼範例。安裝ReactRouter首先,我們需要
 PHP、Vue和React:如何選擇最適合的前端框架?
Mar 15, 2024 pm 05:48 PM
PHP、Vue和React:如何選擇最適合的前端框架?
Mar 15, 2024 pm 05:48 PM
PHP、Vue和React:如何選擇最適合的前端框架?隨著互聯網技術的不斷發展,前端框架在Web開發中起著至關重要的作用。 PHP、Vue和React作為三種代表性的前端框架,每一種都具有其獨特的特徵和優勢。在選擇使用哪種前端框架時,開發人員需要根據專案需求、團隊技能和個人偏好做出明智的決策。本文將透過比較PHP、Vue和React這三種前端框架的特徵和使
 Java框架與前端React框架的整合
Jun 01, 2024 pm 03:16 PM
Java框架與前端React框架的整合
Jun 01, 2024 pm 03:16 PM
Java框架與React框架的整合:步驟:設定後端Java框架。建立專案結構。配置建置工具。建立React應用程式。編寫RESTAPI端點。配置通訊機制。實戰案例(SpringBoot+React):Java程式碼:定義RESTfulAPI控制器。 React程式碼:取得並顯示API回傳的資料。
 如何利用React開發一個響應式的後台管理系統
Sep 28, 2023 pm 04:55 PM
如何利用React開發一個響應式的後台管理系統
Sep 28, 2023 pm 04:55 PM
如何利用React開發一個響應式的後台管理系統隨著互聯網的快速發展,越來越多的企業和組織需要一個高效、靈活、易於管理的後台管理系統來處理日常的操作事務。 React作為目前最受歡迎的JavaScript庫之一,提供了一種簡潔、高效和可維護的方式來建立使用者介面。本文將介紹如何利用React開發一個響應式的後台管理系統,並給出具體的程式碼範例。建立React專案首先
 vue.js vs.反應:特定於項目的考慮因素
Apr 09, 2025 am 12:01 AM
vue.js vs.反應:特定於項目的考慮因素
Apr 09, 2025 am 12:01 AM
Vue.js適合中小型項目和快速迭代,React適用於大型複雜應用。 1)Vue.js易於上手,適用於團隊經驗不足或項目規模較小的情況。 2)React的生態系統更豐富,適合有高性能需求和復雜功能需求的項目。
 react有哪些閉包
Oct 27, 2023 pm 03:11 PM
react有哪些閉包
Oct 27, 2023 pm 03:11 PM
react有事件處理函數、useEffect和useCallback、高階元件等等閉包。詳細介紹:1、事件處理函數閉包:在React中,當我們在元件中定義事件處理函數時,函數會形成一個閉包,可以存取元件作用域內的狀態和屬性。這樣可以在事件處理函數中使用元件的狀態和屬性,實現互動邏輯;2、useEffect和useCallback中的閉包等等。
