這篇文章為大家帶來了關於uniapp的相關知識,主要包括了怎樣實現上傳圖片的相關問題,下面就一起來看一下應該怎樣實現,希望對大家有幫助。

推薦:《uniapp教學》
一、前言
應用uni-app開發跨平台App專案時,上傳圖片、文件等資源功能需求十分常見:點選相框按鈕可選擇圖片上傳,點選每個圖片可以預覽,點選每個圖片刪除圖示可刪除對應圖片。基本實作功能點如下:
- 本地相簿選擇圖片或使用相機拍照上傳圖片;
- 可以預覽選擇上傳的圖片;
- 刪除選錯誤或不選的圖片;
二、專案實戰
經過研讀uni-app門戶,官網推薦應用uni.chooseImage(OBJECT)介面從本地相簿選擇圖片或使用相機拍照。
對於門戶提到的
選擇照片大多為了上傳,uni ui封裝了更完善的uni-file-picker元件,檔案選擇、上傳到uniCloud的免費儲存和cdn中,一站式整合。強烈推薦使用。
本人並不認可,經過實踐可知,該介面只能實現客戶端將圖片資源上傳到uniCloud後台伺服器中,並不支援本地伺服器,故並不滿足功能需求,需謹慎使用。
專案實作頁面大致邏輯如下,完整頁面實作邏輯可移步《Uni-app 實作圖片上傳、刪除、預覽、壓縮》下載。
檢視渲染
1 2 3 4 5 6 7 8 9 10 11 12 13 14 15 16 | <template>
<view>
<!-- 上传图片 -->
<view>
<view>
<image></image>
<view>
<uni-icons></uni-icons>
</view>
</view>
<view>
<image></image>
</view>
<!-- 图片数量提示 -->
<view>{{curTotal}}/3</view>
</view></view></template>
|
登入後複製
JS邏輯圖層-圖片上傳
1 2 3 4 5 6 7 8 9 10 11 12 13 14 15 16 17 18 19 20 21 22 23 24 25 26 27 28 29 30 31 32 33 34 35 36 37 38 | var _self = this;
uni.chooseImage({
count: 1,
sizeType: ['original', 'compressed'],
sourceType: ['album', 'camera'],
success: function (res) {
console.log('res:', res)
_self.curTotal++;
_self.imgList.push(res.tempFilePaths[0]);
const tempFilePaths = res.tempFilePaths[0];
const uploadTask = uni.uploadFile({
url : 'http://22.189.25.91:9988/admin/sys-file/upload', // post请求地址
filePath: tempFilePaths,
name: 'file',
header: {
'Content-Type': 'multipart/form-data',
'Authorization': getApp().globalData.token || 'Basic YXBwOmFwcA=='
},
success: function (uploadFileRes) {
console.log('Success:', uploadFileRes);
_self.imgsID.push(JSON.parse(uploadFileRes.data).data.fileId);
console.log('_self.imgsID:', _self.imgsID)
},
fail: function (uploadFileFail) {
console.log('Error:', uploadFileFail.data);
},
complete: ()=> {
console.log('Complete:');
}
});
},
error : function(e){
console.log(e);
}
});}
|
登入後複製
JS邏輯圖層-圖片預覽
1 2 3 4 5 6 7 8 9 10 11 |
viewImage(i, imgList) {
let imgurl = []
imgList.forEach(item => imgurl.push(item))
uni.previewImage({
urls: imgurl,
current: imgList[i]
});}
|
登入後複製
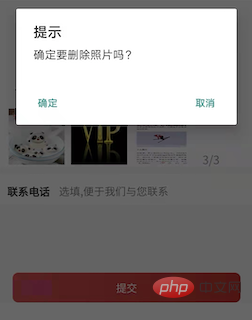
JS邏輯圖層-圖片刪除
1 2 3 4 5 6 7 8 9 10 11 12 13 14 15 16 17 |
delImg(i, imgList, imgsID) {
uni.showModal({
title: '提示',
content: '确定要删除照片吗?',
cancelText: '取消',
confirmText: '确定',
success: res => {
if(res.confirm) {
imgList.splice(i, 1);
imgsID.splice(i, 1);
this.curTotal--;
}
}
})}}
|
登入後複製
JS邏輯圖層-圖片壓縮
1 2 3 4 5 6 7 8 9 10 11 12 13 14 15 16 17 18 19 20 | var dstname = "_doc/IMG-" + (new Date()).valueOf() + ".jpg";
var width, height, quality;
width = "80%";
height = "80%";
quality = 80;
plus.zip.compressImage({
src: src,
dst: dstname,
overwrite: true,
quality: quality,
width: width,
height: height },
function(event) {
callback(event.target, dstname, _this);
},
function(error) {
return src;
});}
|
登入後複製
#注意:在圖片上傳前進行圖片壓縮,由於圖片壓縮時間過長,應採用await上傳圖片之前先壓縮,否則上傳會比壓縮先執行。
應用程式實現效果如下:
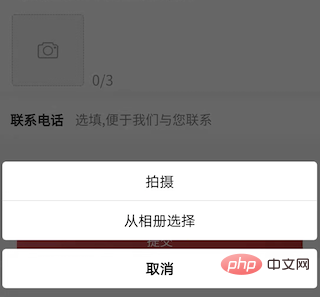
拍照或從相簿選擇圖片/上傳一張圖片

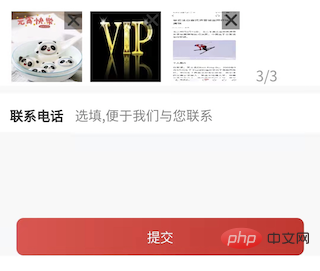
上傳3張圖片/刪除圖片
三、知識點總結
3.1 實作原理
客戶端透過 uni.chooseImage()方法選擇本地相簿圖片或拍照,取得到一個本地資源的臨時檔案路徑後,然後以POST 請求方式透過uni.uploadFile()方法將本機資源上傳到開發者伺服器,POST 請求中content-type 為multipart/form-data。
3.2 注意事項
圖片選擇應用程式uni.chooseImage()實現,請謹慎使用uni ui封裝的所謂更完善的uni-file-picker元件,其將資源檔案選擇、上傳到uniCloud的免費儲存和cdn中,一站式集成,個人無法修改。強烈推薦不使用!
-
圖片上傳應用程式uni.uploadFile()實現,上傳成功後回呼函數傳回的uploadFileRes.data是個String類型,轉物件的時候需要套用JSON.parse()解析。
1 | JSON.parse(uploadFileRes.data).data.fileId)
|
登入後複製
1 2 3 4 | {
"data": "{\"code\":0,\"msg\":null,\"data\":{\"bucketName\":\"cicc\",\"fileName\":\"5aaa39d669224ffb869b60d245b0751a.jpg\",\"original\":\"1644999553865_mmexport1644913914292.jpg\",\"url\":\"/admin/sys-file/cicc/5aaa39d669224ffb869b60d245b0751a.jpg\",\"fileId\":\"172\"}}",
"statusCode": 200,
"errMsg": "uploadFile:ok"}
|
登入後複製
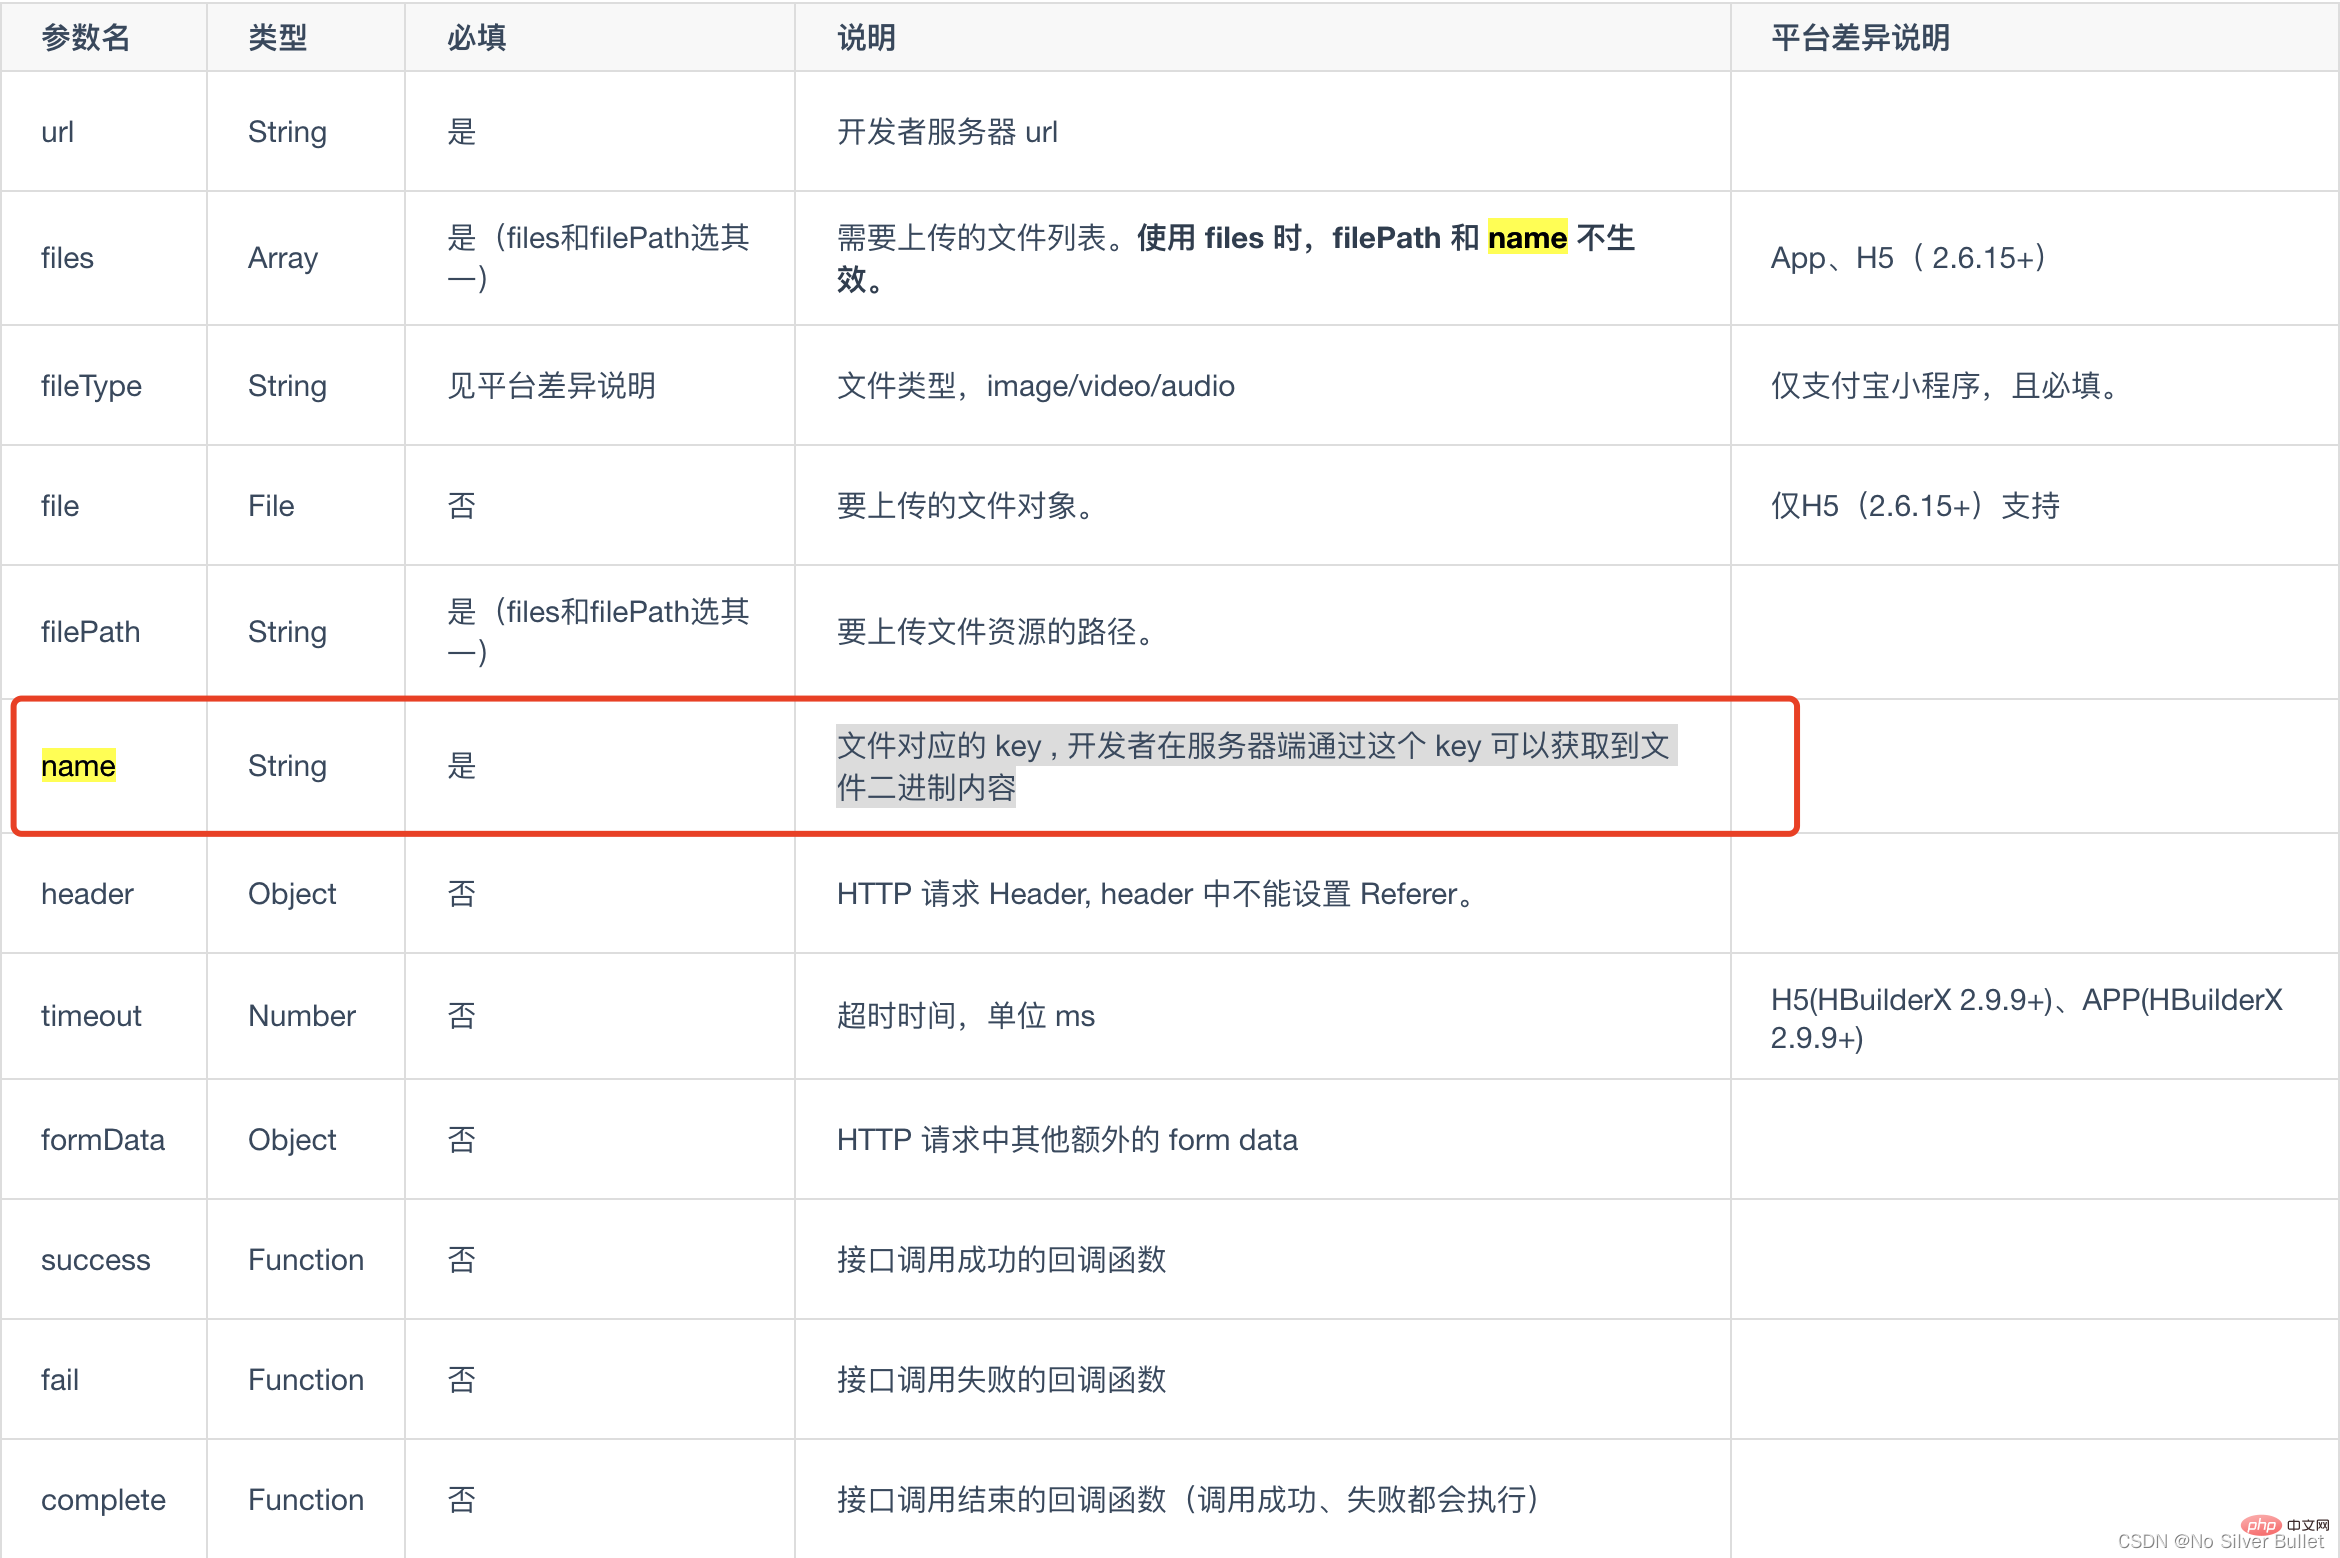
uni.uploadFile() OBJECT 參數說明部分中name屬性為待上傳檔案對應的key , 開發者在伺服器端透過這個key 可以取得到檔案二進位內容,前後端對於該key應保持一致,否則會導致服務無法請求。
圖片預覽應用程式uni.previewImage()實現,沒遇到坑,大家可依需求依照入口網站參數使用。
推薦:《uniapp學習教學》
以上是一起分析uni-app怎麼實現上傳圖片的詳細內容。更多資訊請關注PHP中文網其他相關文章!