這篇文章為大家帶來了關於css的相關知識,其中主要介紹了關於transform變換和transitions過渡的相關問題,一起看看CSS實現盒子的轉換與過渡效果,希望對大家有幫助。

語法:
transform: rotate | scale | skew | translate |matrix;
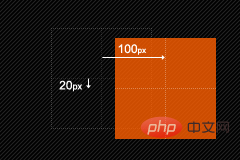
1、translate(x,y) 設定盒子位移
(1)1、translate(
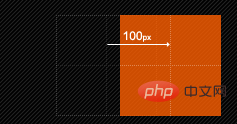
(2)translateX(
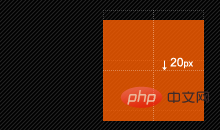
(3)translateY(
#2、scale(x,y) 設定盒子縮放
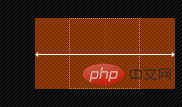
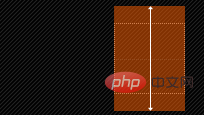
##縮放scale和移動translate是極為相似,他也有三種情況:scale(x,y)使元素水平方向和垂直方向同時縮放(也就是X軸和Y軸同時縮放);scaleX(x)元素僅水平方向縮放( X軸縮放);scaleY(y)元素僅垂直方向縮放(Y軸縮放),但它們具有相同的縮放中心點和基數,其中心點就是元素的中心位置,縮放基數為1,如果其值大於1元素就放大,反之其值小於1,元素縮小。以下我們具體來看看這三種情況具體使用方法:(1)scale(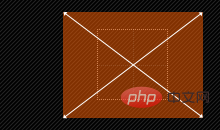
3、rotate(deg) 設定盒子旋轉
rotate(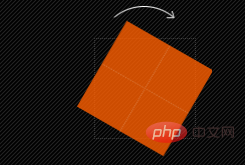
#4、skew(x-angle,y-angle) 設定盒子斜切#
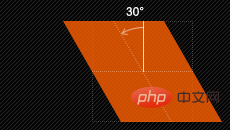
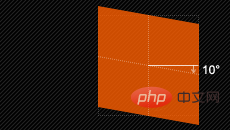
扭曲skew和translate、scale一样同样具有三种情况:skew(x,y)使元素在水平和垂直方向同时扭曲(X轴和Y轴同时按一定的角度值进行扭曲变形);skewX(x)仅使元素在水平方向扭曲变形(X轴扭曲变形);skewY(y)仅使元素在垂直方向扭曲变形(Y轴扭曲变形),具体使用如下:
(1)skew(
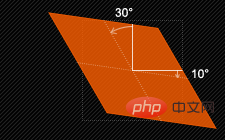
(2)skewX(
(3)skewY(
5、perspective 设置透视距离
6、transform-style flat | preserve-3d 设置盒子是否按3d空间显示
7、translateX、translateY、translateZ 设置三维移动
8、rotateX、rotateY、rotateZ 设置三维旋转
9、scaleX、scaleY、scaleZ 设置三维缩放
10、tranform-origin 设置变形的中心点
主要作用就是让我们在进行transform动作之前可以改变元素的基点位置,因为我们元素默认基点就是其中心位置,换句话说我们没有使用transform-origin改变元素基点位置的情况下,transform进行的rotate,translate,scale,skew,matrix等操作都是以元素自己中心位置进行变化的。但有时候我们需要在不同的位置对元素进行这些操作,那么我们就可以使用transform-origin来对元素进行基点位置改变,使元素基点不在是中心位置,以达到你需要的基点位置。下面我们主要来看看其使用规则:
transform-origin(X,Y):用来设置元素的运动的基点(参照点)。默认点是元素的中心点。其中X和Y的值可以是百分值,em,px,其中X也可以是字符参数值left,center,right;Y和X一样除了百分值外还可以设置字符值top,center,bottom,这个看上去有点像我们background-position设置一样;下面我列出他们相对应的写法:
*top left | left top 等价于 0 0 | 0% 0%
*top | top center | center top 等价于 50% 0
*III、right top | top right 等价于 100% 0
*left | left center | center left 等价于 0 50% | 0% 50%
*center | center center 等价于 50% 50%(默认值)
*right | right center | center right 等价于 100% 50%
*bottom left | left bottom 等价于 0 100% | 0% 100%
*bottom | bottom center | center bottom 等价于 50% 100%
*bottom right | right bottom 等价于 100% 100%
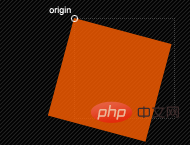
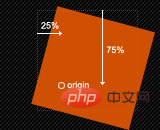
其中 left,center right是水平方向取值,对应的百分值为left=0%;center=50%;right=100%而top center bottom是垂直方向的取值,其中top=0%;center=50%;bottom=100%;如果只取一个值,表示垂直方向值不变,我们分别来看看以下几个实例
(1)transform-origin:(left,top):
(2)transform-origin:right

(3)transform-origin(25%,75%)
11、backface-visibility 设置盒子背面是否可见
transform在不同浏览器内核下的书写规则
//Mozilla内核浏览器:firefox3.5+
-moz-transform: rotate | scale | skew | translate ;
//Webkit内核浏览器:Safari and Chrome
-webkit-transform: rotate | scale | skew | translate ;
//Opera
-o-transform: rotate | scale | skew | translate ;
//IE9
-ms-transform: rotate | scale | skew | translate ;
//W3C标准
transform: rotate | scale | skew | translate ;
transition主要包含四个属性值:执行变换的属性:transition-property,变换延续的时间:transition-duration,在延续时间段,变换的速率变化transition-timing-function,变换延迟时间transition-delay。下面分别来看这四个属性值
transition-property:
语法:
transition-property : none | all | [ <IDENT> ] [ ',' <IDENT> ]*
transition-property是用来指定当元素其中一个属性改变时执行transition效果,其主要有以下几个值:none(没有属性改变);all(所有属性改变)这个也是其默认值;indent(元素属性名)。当其值为none时,transition马上停止执行,当指定为all时,则元素产生任何属性值变化时都将执行transition效果,ident是可以指定元素的某一个属性值。其对应的类型如下:
1、color: 通过红、绿、蓝和透明度组件变换(每个数值处理)如:background-color,border-color,color,outline-color等css属性;
2、length: 真实的数字 如:word-spacing,width,vertical-align,top,right,bottom,left,padding,outline-width,margin,min-width,min-height,max-width,max-height,line-height,height,border-width,border-spacing,background-position等属性;
3、percentage:真实的数字 如:word-spacing,width,vertical-align,top,right,bottom,left,min-width,min-height,max-width,max-height,line-height,height,background-position等属性;
4、integer离散步骤(整个数字),在真实的数字空间,以及使用floor()转换为整数时发生 如:outline-offset,z-index等属性;
5、number真实的(浮点型)数值,如:zoom,opacity,font-weight,等属性;
6、transform list:详情请参阅:《CSS3 Transform》
7、rectangle:通过x, y, width 和 height(转为数值)变换,如:crop
8、visibility: 离散步骤,在0到1数字范围之内,0表示“隐藏”,1表示完全“显示”,如:visibility
9、shadow: 作用于color, x, y 和 blur(模糊)属性,如:text-shadow
10、gradient: 通过每次停止时的位置和颜色进行变化。它们必须有相同的类型(放射状的或是线性的)和相同的停止数值以便执行动画,如:background-image
11、paint server (SVG): 只支持下面的情况:从gradient到gradient以及color到color,然后工作与上面类似
12、space-separated list of above:如果列表有相同的项目数值,则列表每一项按照上面的规则进行变化,否则无变化
13、a shorthand property: 如果缩写的所有部分都可以实现动画,则会像所有单个属性变化一样变化
具体什么css属性可以实现transition效果,在W3C官网中列出了所有可以实现transition效果的CSS属性值以及值的类型,大家可以点这里了解详情。这里需要提醒一点是,并不是什么属性改变都为触发transition动作效果,比如页面的自适应宽度,当浏览器改变宽度时,并不会触发transition的效果。但上述表格所示的属性类型改变都会触发一个transition动作效果。
transition-duration:
语法:
transition-duration : <time> [, <time>]
transition-duration是用来指定元素 转换过程的持续时间,取值:
transition-timing-function:
语法:
transition-timing-function : ease | linear | ease-in | ease-out | ease-in-out | cubic-bezier(<number>, <number>, <number>, <number>) [, ease | linear | ease-in | ease-out | ease-in-out | cubic-bezier(<number>, <number>, <number>, <number>)]
取值:
transition-timing-function的值允许你根据时间的推进去改变属性值的变换速率,transition-timing-function有6个可能值:
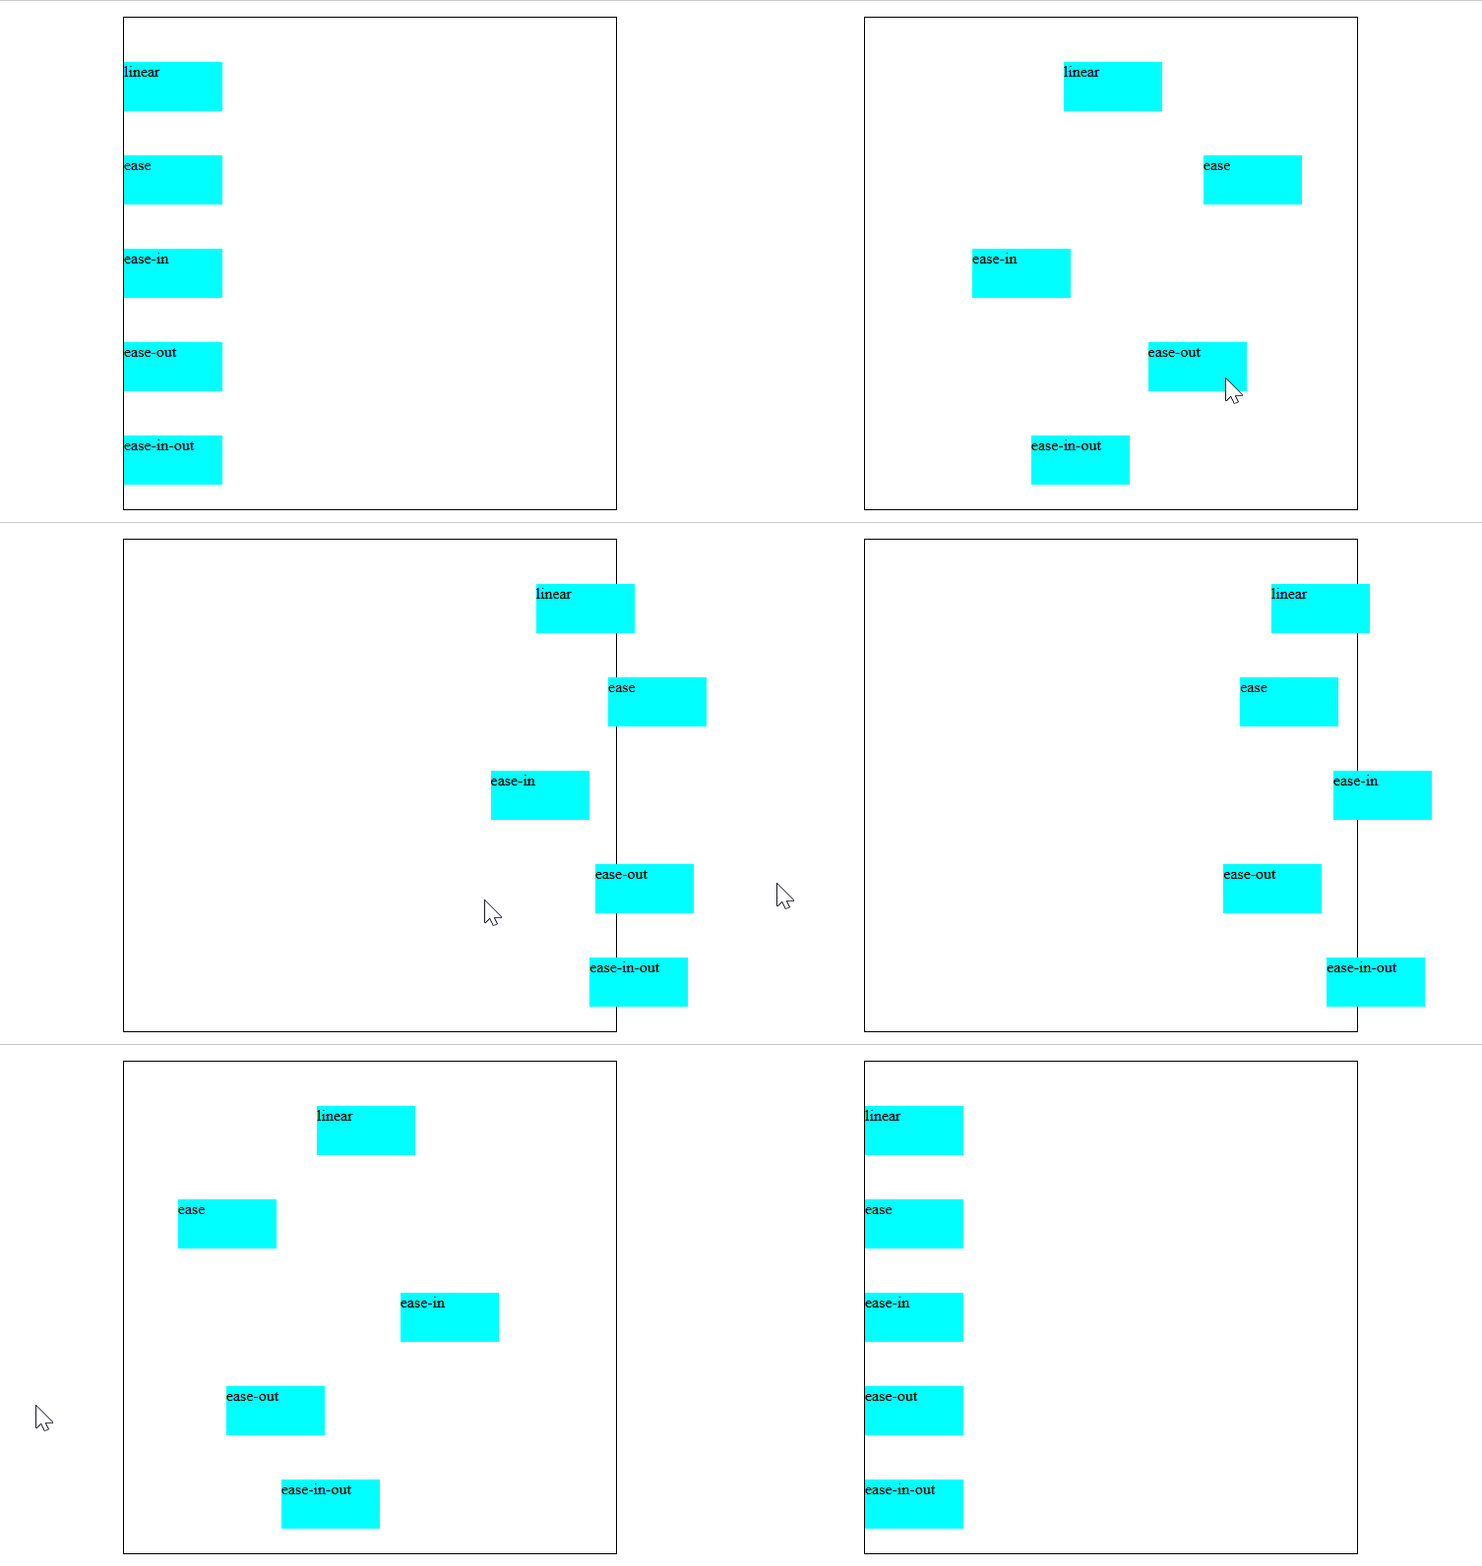
1、ease:(逐渐变慢)默认值,ease函数等同于贝塞尔曲线(0.25, 0.1, 0.25, 1.0).
2、linear:(匀速),linear 函数等同于贝塞尔曲线(0.0, 0.0, 1.0, 1.0).
3、ease-in:(加速),ease-in 函数等同于贝塞尔曲线(0.42, 0, 1.0, 1.0).
4、ease-out:(减速),ease-out 函数等同于贝塞尔曲线(0, 0, 0.58, 1.0).
5、ease-in-out:(加速然后减速),ease-in-out 函数等同于贝塞尔曲线(0.42, 0, 0.58, 1.0)
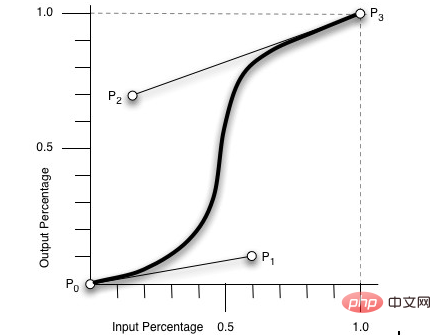
6、cubic-bezier:(该值允许你去自定义一个时间曲线), 特定的cubic-bezier曲线。 (x1, y1, x2, y2)四个值特定于曲线上点P1和点P2。所有值需在[0, 1]区域内,否则无效。
其是cubic-bezier为通过贝赛尔曲线来计算“转换”过程中的属性值,如下曲线所示,通过改变P1(x1, y1)和P2(x2, y2)的坐标可以改变整个过程的Output Percentage。初始默认值为default.
其他几个属性的示意图:

transition-delay:
语法:
transition-delay : <time> [, <time>]*
transition-delay是用来指定一个动画开始执行的时间,也就是说当改变元素属性值后多长时间开始执行transition效果,其取值:
有时我们不只改变一个css效果的属性,而是想改变两个或者多个css属性的transition效果,那么我们只要把几个transition的声明串在一起,用逗号(“,”)隔开,然后各自可以有各自不同的延续时间和其时间的速率变换方式。但需要值得注意的一点:transition-delay与transition-duration的值都是时间,所以要区分它们在连写中的位置,一般浏览器会根据先后顺序决定,第一个可以解析为时间的怭值为transition-duration第二个为transition-delay。如:
a {
-moz-transition: background 0.5s ease-in,color 0.3s ease-out;
-webkit-transition: background 0.5s ease-in,color 0.3s ease-out;
-o-transition: background 0.5s ease-in,color 0.3s ease-out;
transition: background 0.5s ease-in,color 0.3s ease-out;
}如果你想给元素执行所有transition效果的属性,那么我们还可以利用all属性值来操作,此时他们共享同样的延续时间以及速率变换方式,如:
a {
-moz-transition: all 0.5s ease-in;
-webkit-transition: all 0.5s ease-in;
-o-transition: all 0.5s ease-in;
transition: all 0.5s ease-in;
}综合上述我们可以给transition一个速记法:transition:

相对应的一个示例代码:
p {
-webkit-transition: all .5s ease-in-out 1s;
-o-transition: all .5s ease-in-out 1s;
-moz-transition: all .5s ease-in-out 1s;
transition: all .5s ease-in-out 1s;
}浏览器的兼容性:

因为transition最早是有由webkit内核浏览器提出来的,mozilla和opera都是最近版本才支持这个属性,而我们的大众型浏览器IE全家都是不支持,另外由于各大现代浏览器Firefox,Safari,Chrome,Opera都还不支持W3C的标准写法,所以在应用transition时我们有必要加上各自的前缀,最好在放上我们W3C的标准写法,这样标准的会覆盖前面的写法,只要浏览器支持我们的transition属性,那么这种效果就会自动加上去:
//Mozilla内核 -moz-transition : [<'transition-property'> || <'transition-duration'> || <'transition-timing-function'> || <'transition-delay'> [, [<'transition-property'> || <'transition-duration'> || <'transition-timing-function'> || <'transition-delay'>]]* //Webkit内核 -webkit-transition : [<'transition-property'> || <'transition-duration'> || <'transition-timing-function'> || <'transition-delay'> [, [<'transition-property'> || <'transition-duration'> || <'transition-timing-function'> || <'transition-delay'>]]* //Opera -o-transition : [<'transition-property'> || <'transition-duration'> || <'transition-timing-function'> || <'transition-delay'> [, [<'transition-property'> || <'transition-duration'> || <'transition-timing-function'> || <'transition-delay'>]]* //W3C 标准 transition : [<'transition-property'> || <'transition-duration'> || <'transition-timing-function'> || <'transition-delay'> [, [<'transition-property'> || <'transition-duration'> || <'transition-timing-function'> || <'transition-delay'>]]*
CSS transitions 可以决定哪些属性发生动画效果 (明确地列出这些属性),何时开始 (设置 delay),持续多久 (设置 duration) 以及如何动画 (定义timing function,比如匀速地或先快后慢)。
过渡三要素:
必须属性变化
有过渡对象
持续多长
:hover 鼠标悬停触发
:active 用户单击元素并按住鼠标时触发
:focus 获得焦点时触发
@media触发 符合媒体查询条件时触发
点击事件 用户点击元素时触发
transition-property:
规定应用过渡的 CSS 属性的名称
none 没有属性会获得过渡效果
all 所有属性
property 定义应用过渡效果的 CSS 属性名称列表,列表以逗号分隔
transition-duration:
定义过渡效果花费的时间。默认是 0。默认就是没有效果
transition-timing-function
规定过渡效果的时间曲线。默认是 "ease"。
linear 匀速(等于 cubic-bezier(0,0,1,1))。
ease 慢速-变快-慢速结束的过渡效果(cubic-bezier(0.25,0.1,0.25,1))。
ease-in 慢速开始的过渡效果(等于 cubic-bezier(0.42,0,1,1))
ease-out 慢速结束的过渡效果(等于 cubic-bezier(0,0,0.58,1))。
ease-in-out 慢速开始和结束的过渡效果(等于 cubic-bezier(0.42,0,0.58,1))。
cubic-bezier(n,n,n,n) 在 cubic-bezier 函数中定义自己的值。可能的值是 0 至 1 之间的数值。
transition-delay
规定过渡效果何时开始。默认是 0---延迟时间,建议用秒
速写:
transition: 过渡属性 过渡时长 运动速度 延迟时间;
eg:transition: width 5s linear 0s,background-color 5s linear 0s;
连写可以省略后两个参数,因为前两个写了就满足过渡三要素了
注意:
a.触发动作里面要指定属性变化的结果
b.当从本地拿一个图片时只需要设置宽即可,高可以自己适应比例,如果设置了高,后期设计到变形就不会等比例缩小或者扩大
先上个效果图:
代码:
<body>
    <!-- 速写 ul>li*5 -->
    <ul>
        <li>linear</li>
        <li>ease</li>
        <li>ease-in</li>
        <li>ease-out</li>
        <li>ease-in-out</li>
    </ul>

</body>


<style>
    *{
        margin: 0;
        padding: 0;
        /* 列表样式:无(即去掉li前面的小圆点) */
        list-style: none;
    }
    ul{
        width: 500px;
        height: 500px;
        border: 1px solid;
        /* 让整个在视口区居中 */
        margin: 40px auto;
    }
    ul li{
        width: 100px;
        height: 50px;
        margin-top: 45px;
        background-color: aqua;
    }

    /* 给内存li全部设置了 移入ul  li向右游动 */
    ul:hover li{
        margin-left: 500px;
    }
    /* 匀速变化 */
    ul li:first-child{
        transition: margin-left 4s linear;
    }
    /* 慢快慢 */
    ul li:nth-child(2){
        transition: margin-left 4s ease;
    }
    /* 慢--加快---结束 */
    ul li:nth-child(3){
        transition: margin-left 4s ease-in;
    }
    /* 慢结束 */
    ul li:nth-child(4){
        /* background-color: red; */
        transition: margin-left 4s ease-out;
    }
    /* 慢速开始,慢速结束,中间较快 */
    ul li:last-child{
        transition: margin-left 4s ease-in-out;
    }
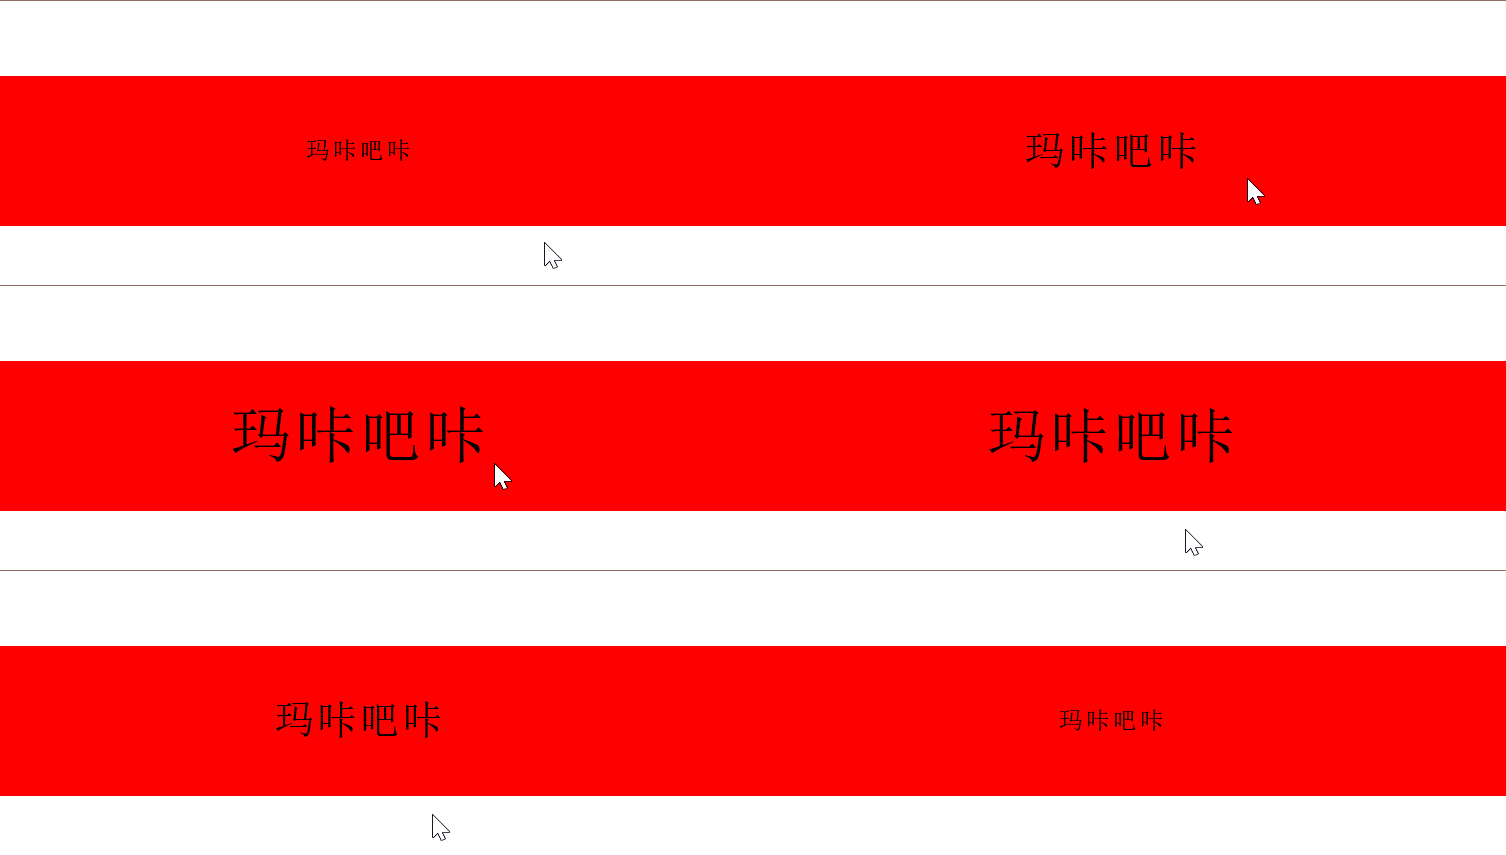
</style>先上个效果图:
<body>
    <p>
        <span>玛</span>
        <span>咔</span>
        <span>吧</span>
        <span>咔</span>
    </p>
</body>


<style>
    p{
        height: 200px;
        background-color: red;
        margin-top: 100px;
        text-align: center;

    }
    p span{
        /* 垂直居中  内层元素行高=外层元素height */
        line-height: 200px;
        font-size: 32px;
        transition: font-size 2s linear;
    }
    p:hover span{
        font-size: 90px;
    }
</style>效果图:

<body>
    <ul>
        <li><img src="/static/imghw/default1.png"  data-src="./images/ad7.jpeg"  class="lazy"   alt=""></li>
        <li><img src="/static/imghw/default1.png"  data-src="./images/ad8.jpg"  class="lazy"   alt=""></li>
        <li><img src="/static/imghw/default1.png"  data-src="./images/ad9.jpeg"  class="lazy"   alt=""></li>
        <li><img src="/static/imghw/default1.png"  data-src="./images/ad10.jpg"  class="lazy"   alt=""></li>
        <li><img src="/static/imghw/default1.png"  data-src="./images/ad11.jpg"  class="lazy"   alt=""></li>
        <li><img src="/static/imghw/default1.png"  data-src="./images/ad12.jpg"  class="lazy"   alt=""></li>
    </ul>
</body>


<style>
    *{
        margin: 0;
        padding: 0;
        list-style: none;
    }
    ul{
        width: 920px;
        height: 300px;
        border: 1px solid;
        margin: 500px auto;
        overflow: hidden;
        /* display: flex; */

    }
    ul li{
        width: 150px;
        height: 300px;
        /* 清洁浮动 */
        float: left;
        transition: width 0.5s ;
    }
    /* html文档执行顺序是自上而下的 */
    ul:hover li{
        width: 100px;
    }
    /*鼠标移动  图片变为400px */
   ul li:hover{
        width: 400px;
    }
</style>效果图:

<body>
    <p class="box1"></p>
</body>


<style>
    .box1{
        /* 先给一只兔子的宽高 */
        width: 100px;
        height: 200px;
        background-image: url(./images/兔子.png);
        /* 居中 */
        margin:0 auto;
        /* 设置背景图像的起始位置。 */
        background-position: 0 0;
        transition: 1s steps(3);
    }
    .box1:hover{
        background-position: -300px 0;
    }
</style>以上是一起看看CSS實現盒子的轉換與過渡效果的詳細內容。更多資訊請關注PHP中文網其他相關文章!

