8個你可能不了解但很實用的Web API

在 Web API 中,有非常有用的物件、屬性和函數可用於執行小到存取 DOM 這樣的小任務,大到處理音訊、視訊這樣的複雜任務。常見的 API 有 Canvas、Web Worker、History、Fetch 等。下面就來看一些不常見但很實用的 Web API!
全文概覽:
Web Audio API
-
Fullscreen API
Web Speech API
Web Bluetooth API
Vibration API
-
Broadcast Channel API
Clipboard API
#Web Share API
    <header>
        <h2>Web APIs<h2>
    </h2>
</h2></header>
    <div>

        <div>
            <div>
                Demo - Audio
            </div>
            <div>
                <div></div>
                <div>
                    <audio></audio>
                </div>

                <div>
                    <button>Init</button>
                    <button>Play</button>
                    <button>Pause</button>
                    <button>Stop</button>
                </div>
                <div>

                    <span>Vol: <input></span>
                    <span>Pan: <input></span>
                </div>

            </div>
        </div>

    </div>


<script>
    const l = console.log
    let audioFromAudioFile = (function() {
        var audioContext
        var volNode
        var pannerNode
        var mediaSource

        function init() {
            l("Init")
        try {
                audioContext = new AudioContext()
                mediaSource = audioContext.createMediaElementSource(audio)
                volNode = audioContext.createGain()
                volNode.gain.value = 1
                pannerNode = new StereoPannerNode(audioContext, { pan:0 })

                mediaSource.connect(volNode).connect(pannerNode).connect(audioContext.destination)
            }
            catch(e) {
                error.innerHTML = "此设备不支持 Web Audio API"
                error.classList.remove("close")
            }
        }

        function play() {
            audio.play()
        }

        function pause() {
            audio.pause()
        }

        function stop() {
            audio.stop()
        }

        function changeVolume() {
            volNode.gain.value = this.value
            l("Vol Range:",this.value)
        }

        function changePan() {
            pannerNode.gain.value = this.value
            l("Pan Range:",this.value)
        }

        return {
            init,
            play,
            pause,
            stop,
            changePan,
            changeVolume
        }
    })()
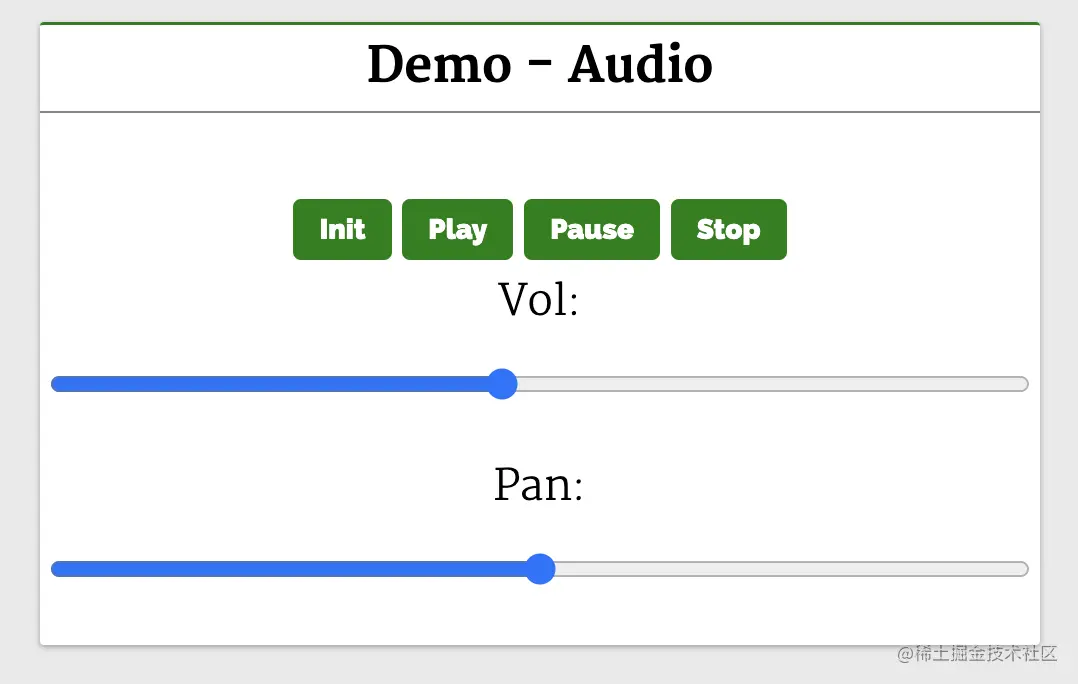
</script>init 函數。這將建立一個 AudioContext 實例並將其設定為 audioContext。接下來,它會建立一個媒體來源 createMediaElementSource(audio),將音訊元素作為音訊來源傳遞。音量節點 volNode 由 createGain 創建,可以用來調整音量。接下來使用 StereoPannerNode 設定平移效果,最後將節點連接至媒體來源。

相關資源:
- Demo:web-api-examples.github.io/audio.html
- MDN 文件:developer.mozilla.org/zh-CN/docs/… ##2. Fullscreen API
Fullscreen API 用於在Web 應用程式中開啟全螢幕模式,使用它就可以在全螢幕模式下檢視頁面/元素。在安卓手機中,它會溢出瀏覽器視窗和安卓頂部的狀態列(顯示網路狀態、電池狀態等的地方)。
Fullscreen API 方法:
- requestFullscreen
- :系統上以全螢幕模式顯示所選元素,會關閉其他應用程式以及瀏覽器和系統 UI 元素。
- :退出全螢幕模式並切換到正常模式。
    <header>
        <h2>Web APIs<h2>
    </h2>
</h2></header>
    <div>
        <div>
        <div>
            Demo - Fullscreen
        </div>
        <div>
        <div></div>
        <div>
            This API makes fullscreen-mode of our webpage possible. It lets you select the Element you want to view in fullscreen-mode, then it shuts off the browsers window features like URL bar, the window pane, and presents the Element to take the entire width and height of the system.

In Android phones, it will remove the browsers window and the Android UI where the network status, battery status are displayed, and display the Element in full width of the Android system.
        </div>
        <div>
            <video></video>
            <button>Toogle Fullscreen</button>
        </div>
        <div>
            This API makes fullscreen-mode of our webpage possible. It lets you select the Element you want to view in fullscreen-mode, then it shuts off the browsers window features like URL bar, the window pane, and presents the Element to take the entire width and height of the system.

In Android phones, it will remove the browsers window and the Android UI where the network status, battery status are displayed, and display the Element in full width of the Android system.
        </div>
        </div>
        </div>
    </div>


<script>
    const l =console.log

    function toggle() {
        const videoStageEl = document.querySelector(".video-stage")
        if(videoStageEl.requestFullscreen) {
            if(!document.fullscreenElement){
                videoStageEl.requestFullscreen()
            }
            else {
                document.exitFullscreen()
            }
        } else {
            error.innerHTML = "此设备不支持 Fullscreen API"
            error.classList.remove("close")
        }
    }
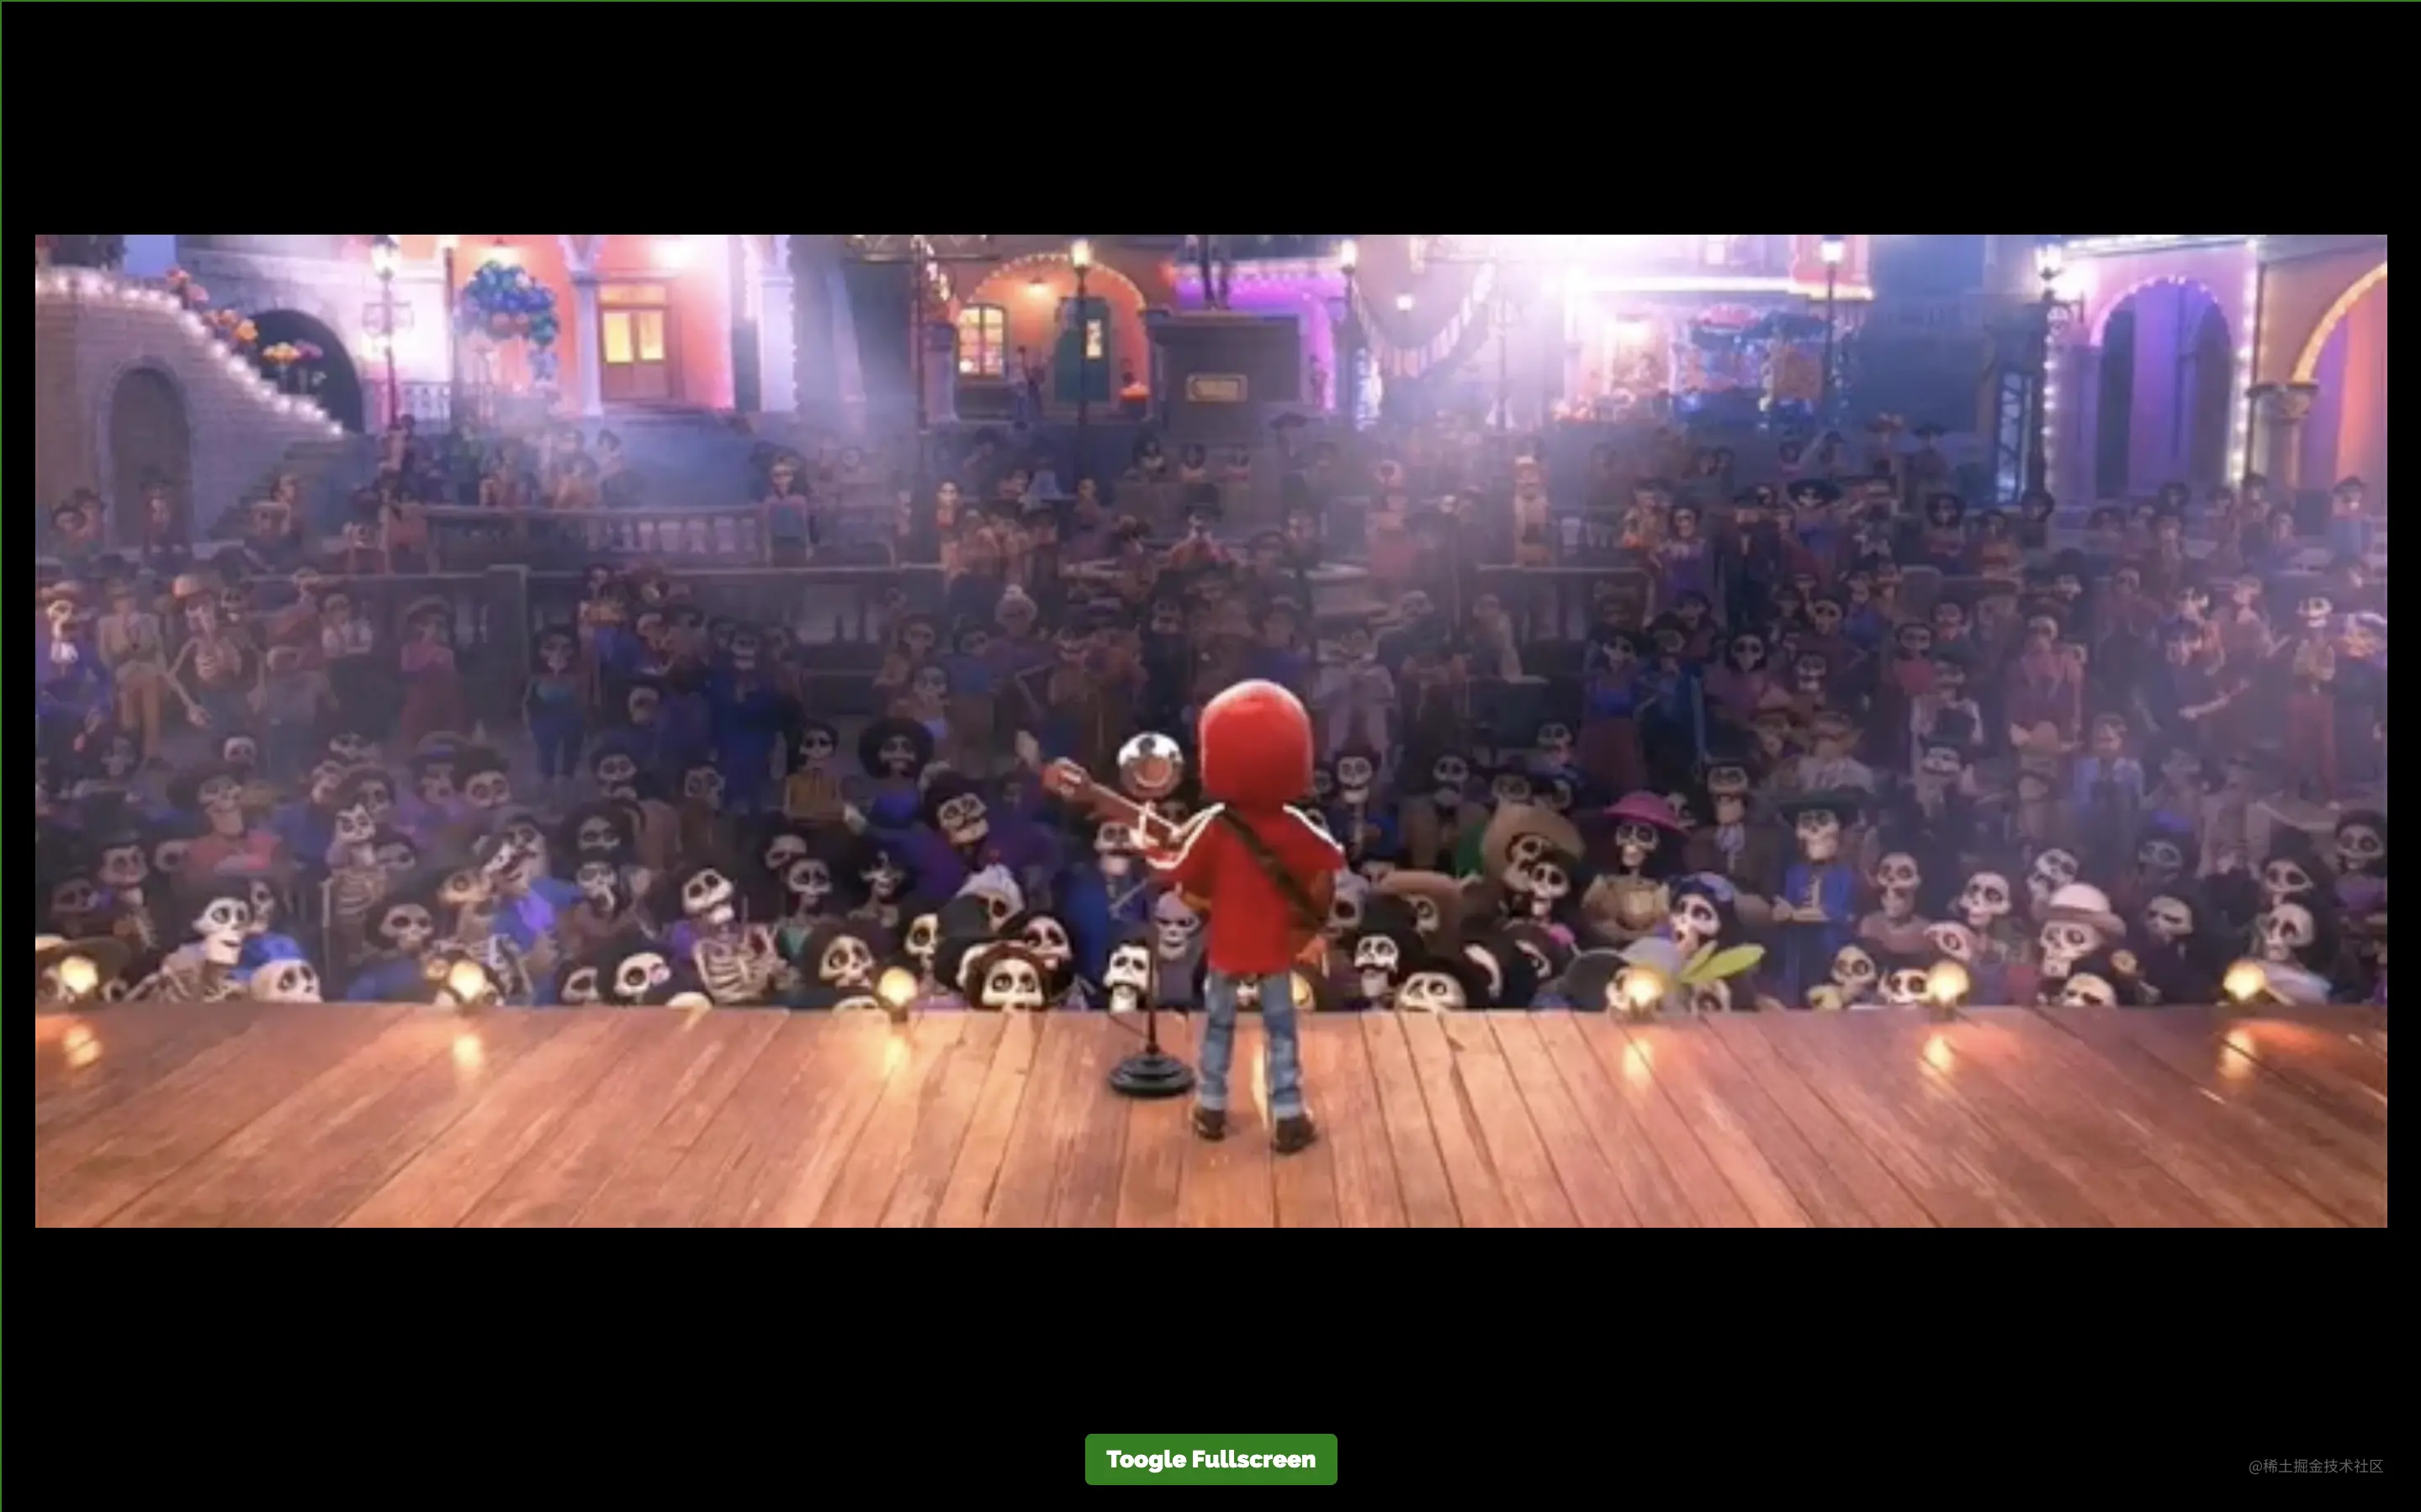
</script>可以看到,video 元素在div#video-stage 元素中,帶有一個按鈕Toggle Fullscreen。
 當點擊按鈕切換全螢幕時,我們想要讓元素
全螢幕顯示。 toggle 函數的實作如下:<div class="code" style="position:relative; padding:0px; margin:0px;"><pre class="brush:php;toolbar:false">function toggle() {
const videoStageEl = document.querySelector(".video-stage")
if(!document.fullscreenElement)
videoStageEl.requestFullscreen()
else
document.exitFullscreen()
}</pre><div class="contentsignin">登入後複製</div></div>這裡透過
尋找div#video-stage 元素並將其HTMLDivElement 實例儲存在videoStageEl 上。 然後,使用
屬性來決定document 是否是全螢幕的,所以可以在videoStageEl# 上呼叫requestFullscreen( )。這將使 div#video-stage 佔據整個裝置的視圖。 如果在全螢幕模式下點擊 Toggle Fullscreen 按鈕,就會在
上呼叫 exitFullcreen,這樣 UI 視圖就會回到普通視圖(退出全螢幕)。

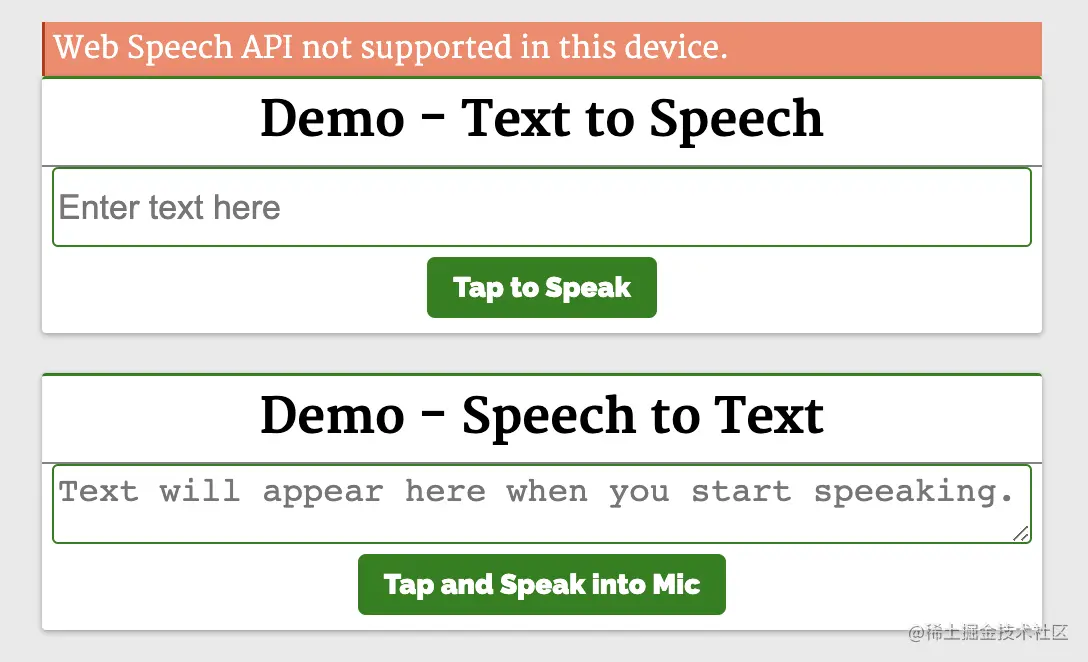
Web Speech API 提供了将语音合成和语音识别添加到 Web 应用程序的功能。使用此 API,我们将能够向 Web 应用程序发出语音命令,就像在 Android 上通过其 Google Speech 或在 Windows 中使用 Cortana 一样。 下面来看一个简单的例子,使用 Web Speech API 实现文字转语音和语音转文字: 第一个演示 Demo - Text to Speech 演示了使用这个 API 和一个简单的输入字段,接收输入文本和一个按钮来执行语音操作。 它实例化了 第二个演示 Demo - Speech to Text 将语音识别为文字。 点击 Tap and Speak into Mic 按钮并对着麦克风说话,我们说的话会被翻译成文本输入框中的内容。 点击 Tap and Speak into Mic 按钮会调用 tapToSpeak 函数: 这里实例化了 在 相关资源: Bluetooth API 让我们可以访问手机上的低功耗蓝牙设备,并使用它将网页上的数据共享到另一台设备。 基本 API 是 下面来看一个简单的例子,使用 这里会显示设备信息。 单击 Get BLE Device 按钮会调用 相关资源: Vibration API 可以使我们的设备振动,作为对我们应该响应的新数据或信息的通知或物理反馈的一种方式。 执行振动的方法是 这将使设备振动在 200 毫秒之后停止: 这将使设备先振动 200 毫秒,再暂停 300 毫秒,最后振动 400 毫秒并停止: 可以通过传递 0、[]、[0,0,0] 来消除振动。 下面来看一个简单的例子: 这里有一个输入框和一个按钮。 在输入框中输入振动的持续时间并按下按钮。我们的设备将在输入的时间内振动。 相关资源: Broadcast Channel API 允许从同源的不同浏览上下文进行消息或数据的通信。其中,浏览上下文指的是窗口、选项卡、iframe、worker 等。 如果它是第一个具有 下面来看一个简单的聊天应用: 这里有一个简单的文本和按钮。 输入消息,然后按按钮发送消息。下面初始化了 点击按钮就会调用 复制、剪切和粘贴等剪贴板操作是应用程序中最常见的一些功能。 Clipboard API 使 Web 用户能够访问系统剪贴板并执行基本的剪贴板操作。 以前,可以使用 从剪贴板读取内容: 将内容写入剪贴板: 相关资源: Share API 可帮助我们在 web 应用上实现共享功能。它给人以移动原生共享的感觉。它使共享文本、文件和指向设备上其他应用程序的链接成为可能。 可通过 上面的代码使用原生 JavaScript 实现了文本共享。需要注意,我们只能使用 相关资源: 更多编程相关知识,请访问:编程视频!!3. Web Speech API
    <header>
        <h2>Web APIs<h2>
    </h2>
</h2></header>
    <div>
        <div></div>

        <div>
            <div>
                Demo - Text to Speech
            </div>
            <div>
                <div>
                    <input>
                </div>

                <div>
                    <button>Tap to Speak</button>
                </div>
            </div>
        </div>

        <div>
            <div>
                Demo - Speech to Text
            </div>
            <div>
                <div>
                    <textarea></textarea>
                </div>

                <div>
                    <button>Tap and Speak into Mic</button>
                </div>
            </div>
        </div>

    </div>


<script>

    try {
        var speech = new SpeechSynthesisUtterance()
        var SpeechRecognition = SpeechRecognition;
        var recognition = new SpeechRecognition()

    } catch(e) {
        error.innerHTML = "此设备不支持 Web Speech API"
        error.classList.remove("close")
    }

    function speak() {
        speech.text = textToSpeech.value
        speech.volume = 1
        speech.rate=1
        speech.pitch=1
        window.speechSynthesis.speak(speech)
    }

    function tapToSpeak() {
        recognition.onstart = function() { }

        recognition.onresult = function(event) {
            const curr = event.resultIndex
            const transcript = event.results[curr][0].transcript
            speechToText.value = transcript
        }

        recognition.onerror = function(ev) {
            console.error(ev)
        }

        recognition.start()
    }
</script>
function speak() {
  const speech = new SpeechSynthesisUtterance()
  speech.text = textToSpeech.value
  speech.volume = 1
  speech.rate = 1
  speech.pitch = 1
  window.speechSynthesis.speak(speech)
}SpeechSynthesisUtterance() 对象,将文本设置为从输入框中输入的文本中朗读。 然后,使用 speech 对象调用 SpeechSynthesis#speak 函数,在扬声器中说出输入框中的文本。function tapToSpeak() {
var SpeechRecognition = SpeechRecognition;
const recognition = new SpeechRecognition()
recognition.onstart = function() { }
recognition.onresult = function(event) {
const curr = event.resultIndex
const transcript = event.results[curr][0].transcript
speechToText.value = transcript
}
recognition.onerror = function(ev) {
console.error(ev)
}
recognition.start()
}SpeechRecognition,然后注册事件处理程序和回调。语音识别开始时调用 onstart,发生错误时调用 onerror。 每当语音识别捕获一条线时,就会调用 onresult。onresult 回调中,提取内容并将它们设置到 textarea 中。 因此,当我们对着麦克风说话时,文字会出现在 textarea 内容中。4. Web Bluetooth API
navigator.bluetooth.requestDevice。 调用它将使浏览器提示用户使用设备选择器,用户可以在其中选择一个设备或取消请求。navigator.bluetooth.requestDevice 需要一个强制对象。 此对象定义过滤器,用于返回与过滤器匹配的蓝牙设备。navigator.bluetooth.requestDevice API 从 BLE 设备检索基本设备信息:
  <header>
    <h2>Web APIs<h2>
      </h2>
</h2></header>
      <div>

        <div>
          <div>
            Demo - Bluetooth
          </div>
          <div>
            <div></div>
            <div>
              <div>Device Name: <span></span>
</div>
              <div>Device ID: <span></span>
</div>
              <div>Device Connected: <span></span>
</div>
            </div>

            <div>
              <button>Get BLE Device</button>
            </div>

          </div>
        </div>

      </div>


    <script>
      function bluetoothAction(){
        if(navigator.bluetooth) {
          navigator.bluetooth.requestDevice({
            acceptAllDevices: true
          }).then(device => {
            dname.innerHTML = device.name
            did.innerHTML = device.id
            dconnected.innerHTML = device.connected
          }).catch(err => {
            error.innerHTML = "Oh my!! Something went wrong."
            error.classList.remove("close")
          })
        } else {
          error.innerHTML = "Bluetooth is not supported."
          error.classList.remove("close")
        }
      }
</script>bluetoothAction 函数:function bluetoothAction(){
navigator.bluetooth.requestDevice({
acceptAllDevices: true
}).then(device => {
dname.innerHTML = device.name
did.innerHTML = device.id
dconnected.innerHTML = device.connected
}).catch(err => {
console.error("Oh my!! Something went wrong.")
})
}bluetoothAction 函数调用带有 acceptAllDevices:true 选项的 navigator.bluetooth.requestDevice API,这将使其扫描并列出所有附近的蓝牙活动设备。 它返回了一个 promise,所以将它解析为从回调函数中获取一个参数 device,这个 device 参数将保存列出的蓝牙设备的信息。这是我们使用其属性在设备上显示信息的地方。5. Vibration API
navigator.vibrate(pattern)。pattern 是描述振动模式的单个数字或数字数组。navigator.vibrate(200)
navigator.vibrate([200])
navigator.vibrate([200, 300, 400])
  <header>
    <h2>Web APIs<h2>
  </h2>
</h2></header>
  <div>
    <div>
      <div>
        Demo - Vibration
      </div>
      <div>
        <div></div>
        <div>
          <input>
        </div>
        <div>
          <button>Vibrate</button>
        </div>
      </div>
    </div>
  </div>


<script>
      if(navigator.vibrate) {
        function vibrate() {
          const time = vibTime.value
          if(time != "")
            navigator.vibrate(time)
        }
      } else {
        error.innerHTML = "Vibrate API not supported in this device."
        error.classList.remove("close")
      }
</script>6. Broadcast Channel API
BroadcastChannel 类用于创建或加入频道:const politicsChannel = new BroadcastChannel("politics")politics 是频道的名称,任何使用 politics 始化 BroadcastChannel 构造函数的上下文都将加入 politics 频道,它将接收在频道上发送的任何消息,并可以将消息发送到频道中。politics 的 BroadcastChannel 构造函数,则将创建该频道。可以使用 BroadcastChannel.postMessage API 来将消息发布到频道。使用 BroadcastChannel.onmessage API 要订阅频道消息。
<header>
<h2>Web APIs<h2>
</h2>
</h2></header>
<div>
<div>
<div>
Demo - BroadcastChannel
</div>
<div>
<div>Open this page in another <i>tab</i>, <i>window</i> or <i>iframe</i> to chat with them.</div>
<div></div>
<div>
</div>
<div>
<input>
<button>Send Msg to Channel</button>
</div>
</div>
</div>
</div>
<script>
const l = console.log;
try {
var politicsChannel = new BroadcastChannel("politics")
politicsChannel.onmessage = onMessage
var userId = Date.now()
} catch(e) {
error.innerHTML = "BroadcastChannel API not supported in this device."
error.classList.remove("close")
}
input.addEventListener("keydown", (e) => {
if(e.keyCode === 13 && e.target.value.trim().length > 0) {
sendMsg()
}
})
function onMessage(e) {
const {msg,id}=e.data
const newHTML = "<div class='chat-msg'><span><i>"+id+": "+msg+""
displayMsg.innerHTML = displayMsg.innerHTML + newHTML
displayMsg.scrollTop = displayMsg.scrollHeight
}
function sendMsg() {
politicsChannel.postMessage({msg:input.value,id:userId})
const newHTML = "<div class='chat-msg'><span><i>Me: "+input.value+""
displayMsg.innerHTML = displayMsg.innerHTML + newHTML
input.value = ""
displayMsg.scrollTop = displayMsg.scrollHeight
}
</script>politicalChannel,并在 politicalChannel 上设置了一个 onmessage 事件监听器,这样它就可以接收和显示消息。sendMsg 函数。 它通过 BroadcastChannel#postMessage API 将消息发送到 politics 频道。任何初始化此脚本的选项卡、iframe 或工作程序都将接收从此处发送的消息,因此此页面将接收从其他上下文发送的消息。相关资源:7. Clipboard API
document.execCommand 与系统剪贴板进行交互。 现代异步剪贴板 API 提供了直接读取和写入剪贴板内容的访问权限。navigator.clipboard.readText().then(clipText =>
document.getElementById("outbox").innerText = clipText
);function updateClipboard(newClip) {
navigator.clipboard.writeText(newClip).then(function() {
/* clipboard successfully set */
}, function() {
/* clipboard write failed */
});
}8. Web Share API
navigator.share 方法访问 Web Share API:if (navigator.share) {
navigator.share({
title: '百度',
text: '百度一下',
url: '<https:></https:>',
})
.then(() => console.log('分享成功'))
.catch((error) => console.log('分享失败', error));
}onclick 事件调用此操作:function Share({ label, text, title }) {
const shareDetails = { title, text };
const handleSharing = async () => {
if (navigator.share) {
try {
await navigator.share(shareDetails).then(() => console.log("Sent"));
} catch (error) {
console.log(`Oops! I couldn't share to the world because: ${error}`);
}
} else {
// fallback code
console.log(
"Web share is currently not supported on this browser. Please provide a callback"
);
}
};
return (
<button>
<span>{label}</span>
</button>
);
}
以上是8個你可能不了解但很實用的Web API的詳細內容。更多資訊請關注PHP中文網其他相關文章!

熱AI工具

Undresser.AI Undress
人工智慧驅動的應用程序,用於創建逼真的裸體照片

AI Clothes Remover
用於從照片中去除衣服的線上人工智慧工具。

Undress AI Tool
免費脫衣圖片

Clothoff.io
AI脫衣器

Video Face Swap
使用我們完全免費的人工智慧換臉工具,輕鬆在任何影片中換臉!

熱門文章

熱工具

記事本++7.3.1
好用且免費的程式碼編輯器

SublimeText3漢化版
中文版,非常好用

禪工作室 13.0.1
強大的PHP整合開發環境

Dreamweaver CS6
視覺化網頁開發工具

SublimeText3 Mac版
神級程式碼編輯軟體(SublimeText3)
 WebSocket與JavaScript:實現即時監控系統的關鍵技術
Dec 17, 2023 pm 05:30 PM
WebSocket與JavaScript:實現即時監控系統的關鍵技術引言:隨著互聯網技術的快速發展,即時監控系統在各個領域中得到了廣泛的應用。而實現即時監控的關鍵技術之一就是WebSocket與JavaScript的結合使用。本文將介紹WebSocket與JavaScript在即時監控系統中的應用,並給出程式碼範例,詳細解釋其實作原理。一、WebSocket技
 PHP與Vue:完美搭檔的前端開發利器
Mar 16, 2024 pm 12:09 PM
PHP與Vue:完美搭檔的前端開發利器在當今網路快速發展的時代,前端開發變得愈發重要。隨著使用者對網站和應用的體驗要求越來越高,前端開發人員需要使用更有效率和靈活的工具來創建響應式和互動式的介面。 PHP和Vue.js作為前端開發領域的兩個重要技術,搭配起來可以稱得上是完美的利器。本文將探討PHP和Vue的結合,以及詳細的程式碼範例,幫助讀者更好地理解和應用這兩
 Django是前端還是後端?一探究竟!
Jan 19, 2024 am 08:37 AM
Django是一個由Python編寫的web應用框架,它強調快速開發和乾淨方法。儘管Django是web框架,但要回答Django是前端還是後端這個問題,需要深入理解前後端的概念。前端是指使用者直接和互動的介面,後端是指伺服器端的程序,他們透過HTTP協定進行資料的互動。在前端和後端分離的情況下,前後端程式可以獨立開發,分別實現業務邏輯和互動效果,資料的交
 簡易JavaScript教學:取得HTTP狀態碼的方法
Jan 05, 2024 pm 06:08 PM
JavaScript教學:如何取得HTTP狀態碼,需要具體程式碼範例前言:在Web開發中,經常會涉及到與伺服器進行資料互動的場景。在與伺服器進行通訊時,我們經常需要取得傳回的HTTP狀態碼來判斷操作是否成功,並根據不同的狀態碼來進行對應的處理。本篇文章將教你如何使用JavaScript來取得HTTP狀態碼,並提供一些實用的程式碼範例。使用XMLHttpRequest
 Go語言前端技術探秘:前端開發新視野
Mar 28, 2024 pm 01:06 PM
Go語言作為一種快速、高效的程式語言,在後端開發領域廣受歡迎。然而,很少有人將Go語言與前端開發聯繫起來。事實上,使用Go語言進行前端開發不僅可以提高效率,還能為開發者帶來全新的視野。本文將探討使用Go語言進行前端開發的可能性,並提供具體的程式碼範例,幫助讀者更了解這一領域。在傳統的前端開發中,通常會使用JavaScript、HTML和CSS來建立使用者介面
 Django:前端和後端開發都能搞定的神奇框架!
Jan 19, 2024 am 08:52 AM
Django:前端和後端開發都能搞定的神奇框架! Django是一個高效、可擴展的網路應用程式框架。它能夠支援多種Web開發模式,包括MVC和MTV,可以輕鬆地開發出高品質的Web應用程式。 Django不僅支援後端開發,還能夠快速建構出前端的介面,透過模板語言,實現靈活的視圖展示。 Django把前端開發和後端開發融合成了一種無縫的整合,讓開發人員不必專門學習
 前端面試官常問的問題
Mar 19, 2024 pm 02:24 PM
在前端開發面試中,常見問題涵蓋廣泛,包括HTML/CSS基礎、JavaScript基礎、框架和函式庫、專案經驗、演算法和資料結構、效能最佳化、跨域請求、前端工程化、設計模式以及新技術和趨勢。面試官的問題旨在評估候選人的技術技能、專案經驗以及對行業趨勢的理解。因此,應試者應充分準備這些方面,以展現自己的能力和專業知識。
 如何在JavaScript中取得HTTP狀態碼的簡單方法
Jan 05, 2024 pm 01:37 PM
JavaScript中的HTTP狀態碼取得方法簡介:在進行前端開發中,我們常常需要處理與後端介面的交互,而HTTP狀態碼就是其中非常重要的一部分。了解並取得HTTP狀態碼有助於我們更好地處理介面傳回的資料。本文將介紹使用JavaScript取得HTTP狀態碼的方法,並提供具體程式碼範例。一、什麼是HTTP狀態碼HTTP狀態碼是指當瀏覽器向伺服器發起請求時,服務


