

Vue如何實現拖曳穿梭框功能?四種方式分享(附程式碼)

Vue專案中如何實現拖曳穿梭框功能?以下這篇文章跟大家分享Vue實現拖曳穿梭框功能四種方式,希望對大家有幫助!

一、使用原生js實作拖曳
<meta>
<title>Lazyload</title>
<style>
.drag {
background-color: skyblue;
position: absolute;
line-height: 100px;
text-align: center;
width: 100px;
height: 100px;
}
</style>
<!-- left和top要写在行内样式里面 -->
<div>按住拖动</div>
<script></script>
<script>
// 获取DOM元素
let dragDiv = document.getElementsByClassName('drag')[0]
// 鼠标按下事件 处理程序
let putDown = function (event) {
dragDiv.style.cursor = 'pointer'
let offsetX = parseInt(dragDiv.style.left) // 获取当前的x轴距离
let offsetY = parseInt(dragDiv.style.top) // 获取当前的y轴距离
let innerX = event.clientX - offsetX // 获取鼠标在方块内的x轴距
let innerY = event.clientY - offsetY // 获取鼠标在方块内的y轴距
// 按住鼠标时为div添加一个border
dragDiv.style.borderStyle = 'solid'
dragDiv.style.borderColor = 'red'
dragDiv.style.borderWidth = '3px'
// 鼠标移动的时候不停的修改div的left和top值
document.onmousemove = function (event) {
dragDiv.style.left = event.clientX - innerX + 'px'
dragDiv.style.top = event.clientY - innerY + 'px'
// 边界判断
if (parseInt(dragDiv.style.left) <= 0) {
dragDiv.style.left = '0px'
}
if (parseInt(dragDiv.style.top) <= 0) {
dragDiv.style.top = '0px'
}
if (
parseInt(dragDiv.style.left) >=
window.innerWidth - parseInt(dragDiv.style.width)
) {
dragDiv.style.left =
window.innerWidth - parseInt(dragDiv.style.width) + 'px'
}
if (
parseInt(dragDiv.style.top) >=
window.innerHeight - parseInt(dragDiv.style.height)
) {
dragDiv.style.top =
window.innerHeight - parseInt(dragDiv.style.height) + 'px'
}
}
// 鼠标抬起时,清除绑定在文档上的mousemove和mouseup事件
// 否则鼠标抬起后还可以继续拖拽方块
document.onmouseup = function () {
document.onmousemove = null
document.onmouseup = null
// 清除border
dragDiv.style.borderStyle = ''
dragDiv.style.borderColor = ''
dragDiv.style.borderWidth = ''
}
}
// 绑定鼠标按下事件
dragDiv.addEventListener('mousedown', putDown, false)
</script>
二、VUe使用js實作拖曳穿梭框
<template>
  <div>
    <h3 id="拖拽穿梭框">拖拽穿梭框</h3>
    <div>
      <div>
        <span>
          <span>{{ item.label }}</span>
          <span>X</span>          >
        </span>
      </div>
      <div>
        <span>
          <span>{{ item.label }}</span>
          <span>X</span>          >
        </span>
      </div>
    </div>
  </div>
</template>

<script>
export default {
  name: "home",
  data() {
    return {
      leftData: [
        { label: "首页", id: 1 },
        { label: "咨询", id: 2 },
        { label: "生活", id: 3 },
        { label: "财富", id: 4 },
        { label: "我的", id: 5 },
      ],
      rightData: [{ label: "世界", id: 6 }],
      isMoveTrue: false,
      isMove: false,
      moveId: "",
    };
  },
  mounted() {},
  components: {},
  methods: {
    mousedown(index, val) {
      this.isMoveTrue = true;
      if (val == 1) {
        this.moveId = "mouse" + index;
      } else {
        this.moveId = "deleteMouse" + index;
      }
    },
    mousemove(event) {
      if (this.isMoveTrue) {
        this.isMove = true;
        document.getElementById(this.moveId).style.position = "absolute";
        document.getElementById(this.moveId).style.top = event.clientY + "px";
        document.getElementById(this.moveId).style.left = event.clientX + "px";
        document.getElementById(this.moveId).style.transform =
          "translate(-50%,-50%)";
      }
    },
    mouseup(item, val, index) {
      if (!this.isMove) {
        this.isMoveTrue = false;
        this.moveId = "";
      }
      if (this.isMoveTrue && val == 2) {
        this.$nextTick(() => {
          this.rightData.splice(index, 1);
          this.leftData.push(item);
        });
      } else if (this.isMoveTrue && val) {
        this.leftData.splice(index, 1);
        this.rightData.push(item);
      }
      document.getElementById(this.moveId).style.display = "none";
      this.isMoveTrue = false;
      this.isMove = false;
      this.moveId = "";
    },
    handerClickX(item, index, val) {
      if (val == 1) {
        this.leftData.splice(index, 1);
        this.rightData.push(item);
      } else {
        this.rightData.splice(index, 1);
        this.leftData.push(item);
      }
    },
  },
};
</script>

<style>
#home {
  display: flex;
  justify-content: space-around;
}
.tree-select-content {
  width: 40%;
  height: 300px;
  background: #f9faff;
  border: 1px solid #dee0ec;
  border-radius: 4px;
  display: flex;
  flex-wrap: wrap;
  align-content: baseline;
}
.select-content {
  width: max-content;
  height: 20px;
  padding: 1.6%;
  border: 1px solid #d6dbed;
  margin: 2% 1% 0;
  background: #ffffff;
  box-shadow: 0 0 8px 0 rgba(72, 119, 236, 0.1);
  border-radius: 4px;
}
.select-content:hover span {
  color: #4877ec;
}
.select-content:hover {
  cursor: pointer;
  background: #f8faff;
  border: 1px solid #3e75f4;
}
.select-text {
  font-size: 15px;
  color: #2e2f36;
  text-align: center;
  font-weight: 400;
}
.select-text-X {
  font-size: 15px;
  color: #4877ec;
  letter-spacing: 0;
  font-weight: 400;
  margin-left: 12px;
  cursor: pointer;
}
</style>效果圖: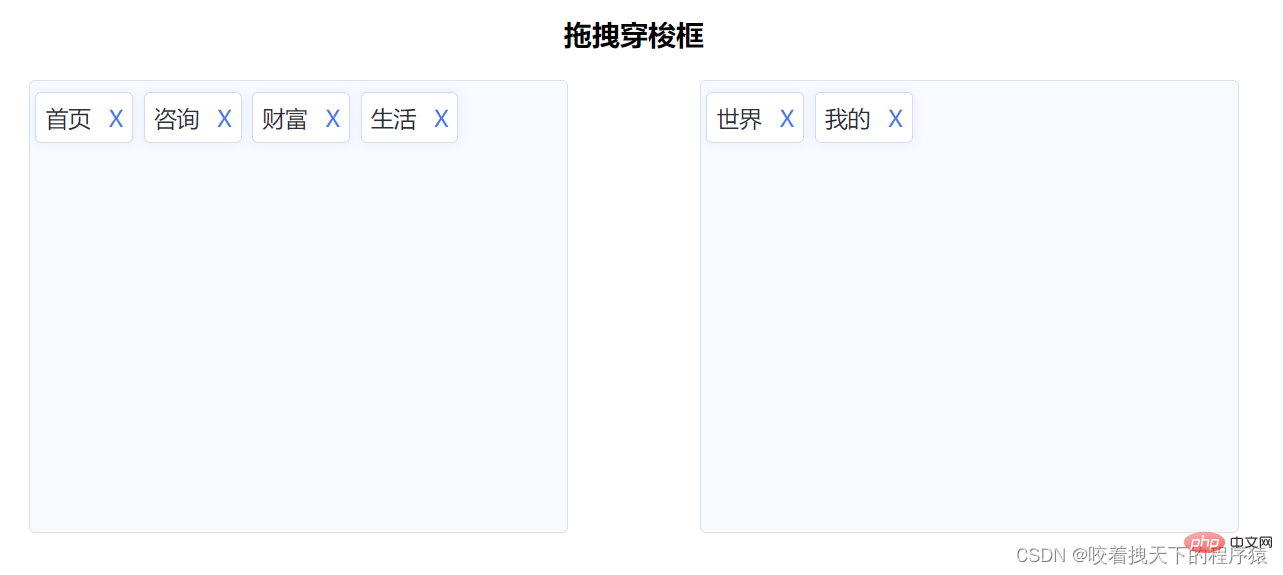
三、Vue 拖曳元件vuedraggable
vuedraggable 是標準的元件式封裝,並且將可拖曳元素放進了transition-group 上面,轉場動畫都比較好。 【相關推薦:vuejs影片教學】
使用方式:
yarn add vuedraggable

import vuedraggable from 'vuedraggable';
在使用的時候,可以透過v-model 來雙向綁定本地data,如果需要更新或觸發父元件監聽的事件,可以在updated() 中去emit。
案例:
<template>
  <div>
    <div>{{ drag ? "拖拽中" : "拖拽停止" }}</div>
    <!--使用draggable组件-->
    <draggable>
      <transition-group>
        <div>
          {{ element.name }}
        </div>
      </transition-group>
    </draggable>
    <div>
      <div>
        {{ color.text }}
      </div>
    </div>
  </div>
</template>
  <style>
/*被拖拽对象的样式*/
.item {
  padding: 6px;
  background-color: #fdfdfd;
  border: solid 1px #eee;
  margin-bottom: 10px;
  cursor: move;
}
/*选中样式*/
.chosen {
  border: solid 1px #3089dc !important;
}
</style>
  <script>
//导入draggable组件
import draggable from "vuedraggable";
export default {
  //注册draggable组件
  components: {
    draggable,
  },
  data() {
    return {
      drag: false,
      //定义要被拖拽对象的数组
      myArray: [
        { people: "cn", id: 10, name: "www.itxst.com" },
        { people: "cn", id: 20, name: "www.baidu.com" },
        { people: "cn", id: 30, name: "www.taobao.com" },
        { people: "us", id: 40, name: "www.yahoo.com" },
      ],
      colors: [
        {
          text: "Aquamarine",
        },
        {
          text: "Hotpink",
        },
        {
          text: "Gold",
        },
        {
          text: "Crimson",
        },
        {
          text: "Blueviolet",
        },
        {
          text: "Lightblue",
        },
        {
          text: "Cornflowerblue",
        },
        {
          text: "Skyblue",
        },
        {
          text: "Burlywood",
        },
      ],
    };
  },
  methods: {
    //开始拖拽事件
    onStart() {
      this.drag = true;
    },
    //拖拽结束事件
    onEnd() {
      this.drag = false;
    },
  },
};
</script>四、Awe-dnd指令封裝
vue-dragging 的npm 套件的名字是awe -dnd ,並不是vue-dragging,這個函式庫的特點是封裝了v-dragging 全域指令,然後透過全域指令去資料綁定等。
相比及vuedraggable 來說, awe-dnd 是沒有雙向綁定(這裡沒有雙向綁定並不是很嚴謹,準確的來說沒有暴露雙向綁定的方式),因此提供了事件,在拖曳結束的時候用來更新列表(不需要手動更新列表,其實內部是實現了雙向綁定的)或者是去觸發父組件監聽的事件。
安裝依賴:
npm install awe-dnd --save
yarn add awe-and
main.js
import VueDND from 'awe-dnd'

Vue.use(VueDND)
案例:##
<template>
  <div>
    <div>
      <div>
        {{ color.text }}
      </div>
    </div>
  </div>
</template>
<style>
/*被拖拽对象的样式*/
.item {
  padding: 6px;
  background-color: #fdfdfd;
  border: solid 1px #eee;
  margin-bottom: 10px;
  cursor: move;
}
/*选中样式*/
.chosen {
  border: solid 1px #3089dc !important;
}
</style>
<script>
export default {
  data() {
    return {
      drag: false,
      colors: [
        {
          text: "Aquamarine",
        },
        {
          text: "Hotpink",
        },
        {
          text: "Gold",
        },
        {
          text: "Crimson",
        },
        {
          text: "Blueviolet",
        },
        {
          text: "Lightblue",
        },
        {
          text: "Cornflowerblue",
        },
        {
          text: "Skyblue",
        },
        {
          text: "Burlywood",
        },
      ],
    };
  },
  methods: {},
};
</script>以上是Vue如何實現拖曳穿梭框功能?四種方式分享(附程式碼)的詳細內容。更多資訊請關注PHP中文網其他相關文章!

熱AI工具

Undresser.AI Undress
人工智慧驅動的應用程序,用於創建逼真的裸體照片

AI Clothes Remover
用於從照片中去除衣服的線上人工智慧工具。

Undress AI Tool
免費脫衣圖片

Clothoff.io
AI脫衣器

Video Face Swap
使用我們完全免費的人工智慧換臉工具,輕鬆在任何影片中換臉!

熱門文章
熱工具

記事本++7.3.1
好用且免費的程式碼編輯器

SublimeText3漢化版
中文版,非常好用

禪工作室 13.0.1
強大的PHP整合開發環境

Dreamweaver CS6
視覺化網頁開發工具

SublimeText3 Mac版
神級程式碼編輯軟體(SublimeText3)


 vue.js vs.反應:特定於項目的考慮因素
Apr 09, 2025 am 12:01 AM
vue.js vs.反應:特定於項目的考慮因素
Apr 09, 2025 am 12:01 AM
Vue.js適合中小型項目和快速迭代,React適用於大型複雜應用。 1)Vue.js易於上手,適用於團隊經驗不足或項目規模較小的情況。 2)React的生態系統更豐富,適合有高性能需求和復雜功能需求的項目。
 vue怎麼給按鈕添加函數
Apr 08, 2025 am 08:51 AM
vue怎麼給按鈕添加函數
Apr 08, 2025 am 08:51 AM
可以通過以下步驟為 Vue 按鈕添加函數:將 HTML 模板中的按鈕綁定到一個方法。在 Vue 實例中定義該方法並編寫函數邏輯。
 vue多頁面開發是啥意思
Apr 07, 2025 pm 11:57 PM
vue多頁面開發是啥意思
Apr 07, 2025 pm 11:57 PM
Vue 多頁面開發是一種使用 Vue.js 框架構建應用程序的方法,其中應用程序被劃分為獨立的頁面:代碼維護性:將應用程序拆分為多個頁面可以使代碼更易於管理和維護。模塊化:每個頁面都可以作為獨立的模塊,便於重用和替換。路由簡單:頁面之間的導航可以通過簡單的路由配置來管理。 SEO 優化:每個頁面都有自己的 URL,這有助於搜索引擎優化。
 vue遍歷怎麼用
Apr 07, 2025 pm 11:48 PM
vue遍歷怎麼用
Apr 07, 2025 pm 11:48 PM
Vue.js 遍歷數組和對像有三種常見方法:v-for 指令用於遍歷每個元素並渲染模板;v-bind 指令可與 v-for 一起使用,為每個元素動態設置屬性值;.map 方法可將數組元素轉換為新數組。
 vue的div怎麼跳轉
Apr 08, 2025 am 09:18 AM
vue的div怎麼跳轉
Apr 08, 2025 am 09:18 AM
Vue 中 div 元素跳轉的方法有兩種:使用 Vue Router,添加 router-link 組件。添加 @click 事件監聽器,調用 this.$router.push() 方法跳轉。
 vue怎麼a標籤跳轉
Apr 08, 2025 am 09:24 AM
vue怎麼a標籤跳轉
Apr 08, 2025 am 09:24 AM
實現 Vue 中 a 標籤跳轉的方法包括:HTML 模板中使用 a 標籤指定 href 屬性。使用 Vue 路由的 router-link 組件。使用 JavaScript 的 this.$router.push() 方法。可通過 query 參數傳遞參數,並在 router 選項中配置路由以進行動態跳轉。
 vue組件傳值是什麼意思
Apr 07, 2025 pm 11:51 PM
vue組件傳值是什麼意思
Apr 07, 2025 pm 11:51 PM
Vue 組件傳值是一種在組件之間傳遞數據和信息的機制。它可以通過屬性 (props) 或事件 (events) 實現:屬性 (props):聲明要在組件中接收的數據,在父組件中傳遞數據。事件 (events):使用 $emit 方法觸發事件,並使用 v-on 指令在父組件中監聽。
 React與Vue:Netflix使用哪個框架?
Apr 14, 2025 am 12:19 AM
React與Vue:Netflix使用哪個框架?
Apr 14, 2025 am 12:19 AM
NetflixusesAcustomFrameworkcalled“ Gibbon” BuiltonReact,notReactorVuedIrectly.1)TeamSperience:selectBasedonFamiliarity.2)ProjectComplexity:vueforsimplerprojects:reactforforforproproject,reactforforforcompleplexones.3)cocatizationneedneeds:reactoffipicatizationneedneedneedneedneedneeds:reactoffersizationneedneedneedneedneeds:reactoffersizatization needefersmoreflexibleise.4)
