

如何在springboot中使用IDEA遠端連線Debug

1、先建立一個準備遠端偵錯的Demo,注意建置專案的設定
<?xml  version="1.0" encoding="UTF-8"?>
<project xsi:schemalocation="http://maven.apache.org/POM/4.0.0 https://maven.apache.org/xsd/maven-4.0.0.xsd">
	<modelversion>4.0.0</modelversion>
	<parent>
		<groupid>org.springframework.boot</groupid>
		<artifactid>spring-boot-starter-parent</artifactid>
		<version>2.1.4.RELEASE</version>
		<relativepath></relativepath> <!-- lookup parent from repository -->
	</parent>
	<groupid>com.remote.test</groupid>
	<artifactid>remote_test</artifactid>
	<version>0.0.1-SNAPSHOT</version>
	<name>remote_test</name>
	<description>Demo project for Spring Boot</description>

	<properties>
		<java.version>1.8</java.version>
	</properties>

	<dependencies>
		<dependency>
			<groupid>org.springframework.boot</groupid>
			<artifactid>spring-boot-starter</artifactid>
		</dependency>

		<dependency>
			<groupid>org.springframework.boot</groupid>
			<artifactid>spring-boot-starter-test</artifactid>
			<scope>test</scope>
		</dependency>
		<dependency>
			<groupid>org.springframework.boot</groupid>
			<artifactid>spring-boot-starter-web</artifactid>
		</dependency>
		<dependency>
			<groupid>org.junit.jupiter</groupid>
			<artifactid>junit-jupiter-api</artifactid>
			<version>RELEASE</version>
			<scope>test</scope>
		</dependency>
	</dependencies>

	<build>
		<plugins>
			<plugin>
				<groupid>org.apache.maven.plugins</groupid>
				<artifactid>maven-shade-plugin</artifactid>
				<version>2.2</version>
				<dependencies>
					<dependency>
						<groupid>org.springframework.boot</groupid>
						<artifactid>spring-boot-maven-plugin</artifactid>
						<version>2.1.4.RELEASE</version>
					</dependency>
				</dependencies>
				<configuration>
					<keepdependencieswithprovidedscope>true</keepdependencieswithprovidedscope>
					<createdependencyreducedpom>false</createdependencyreducedpom>
					<filters>
						<filter>
							<artifact>*:*</artifact>
							<excludes>
								<exclude>META-INF/*.SF</exclude>
								<exclude>META-INF/*.DSA</exclude>
								<exclude>META-INF/*.RSA</exclude>
							</excludes>
						</filter>
					</filters>
				</configuration>
				<executions>
					<execution>
						<phase>package</phase>
						<goals>
							<goal>shade</goal>
						</goals>
						<configuration>
							<finalname>${project.artifactId}-${project.version}-all</finalname>
							<transformers>
								<transformer>
									<resource>META-INF/spring.handlers</resource>
								</transformer>
								<transformer>
									<resource>META-INF/spring.factories</resource>
								</transformer>
								<transformer>
									<resource>META-INF/spring.schemas</resource>
								</transformer>
								<transformer></transformer>
								<transformer>
									<!--根据项目的全名指定启动类-->
                                    <mainclass>com.remote.test.remote_test.RemoteTestApplication</mainclass>
								</transformer>
							</transformers>
						</configuration>
					</execution>
				</executions>
			</plugin>
		</plugins>
	</build>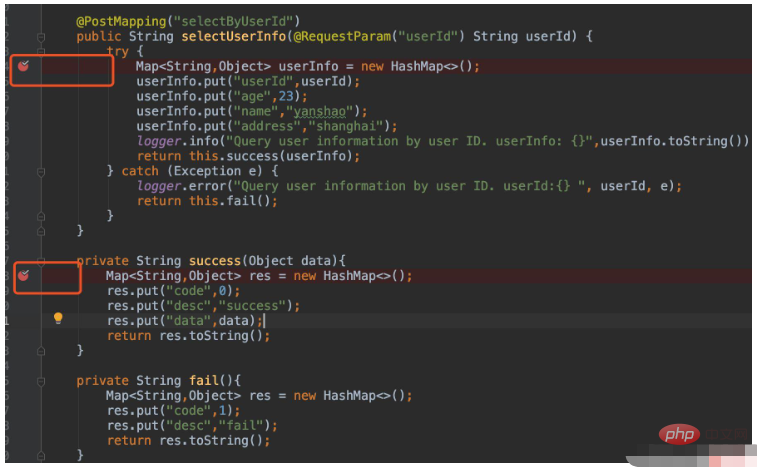
</project>package com.remote.test.remote_test;
import org.slf4j.Logger;
import org.slf4j.LoggerFactory;
import org.springframework.web.bind.annotation.PostMapping;
import org.springframework.web.bind.annotation.RequestMapping;
import org.springframework.web.bind.annotation.RequestParam;
import org.springframework.web.bind.annotation.RestController;
import java.util.HashMap;
import java.util.Map;
@RestController
@RequestMapping("remote/test")
public class UserController {
private static final Logger logger = LoggerFactory.getLogger(UserController.class);
@PostMapping("selectByUserId")
public String selectUserInfo(@RequestParam("userId") String userId) {
try {
Map<string> userInfo = new HashMap();
userInfo.put("userId",userId);
userInfo.put("age",23);
userInfo.put("name","yanshao");
userInfo.put("address","shanghai");
logger.info("Query user information by user ID. userInfo: {}",userInfo.toString());
return this.success(userInfo);
} catch (Exception e) {
logger.error("Query user information by user ID. userId:{} ", userId, e);
return this.fail();
}
}
private String success(Object data){
Map<string> res = new HashMap();
res.put("code",0);
res.put("desc","success");
res.put("data",data);
return res.toString();
}
private String fail(){
Map<string> res = new HashMap();
res.put("code",1);
res.put("desc","fail");
return res.toString();
}
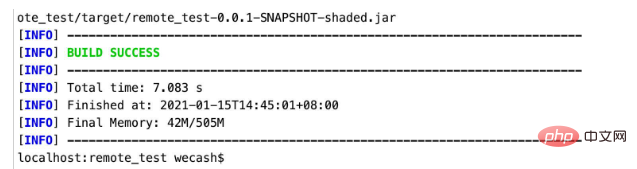
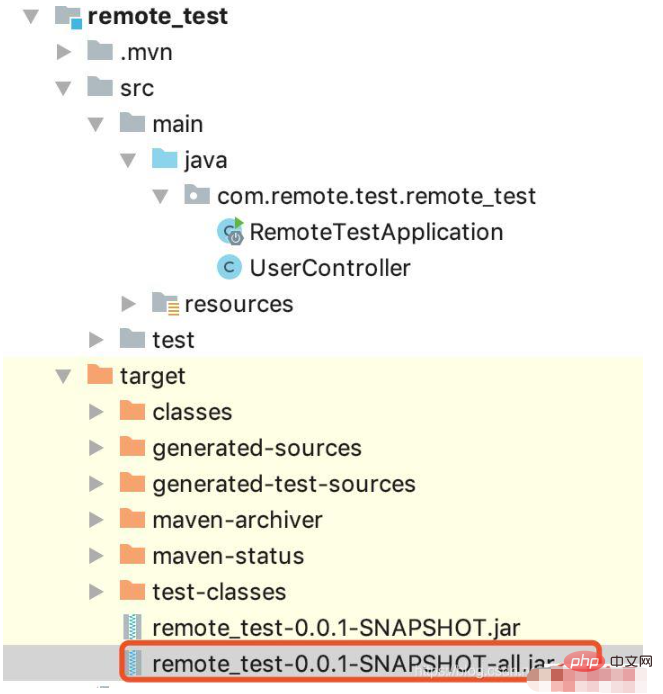
}</string></string></string>2、打包
輸入:mvn clean package#,(大概需要等幾分鐘),最好在建置之前指定本地repository,就不需要重新下載jar套件了。
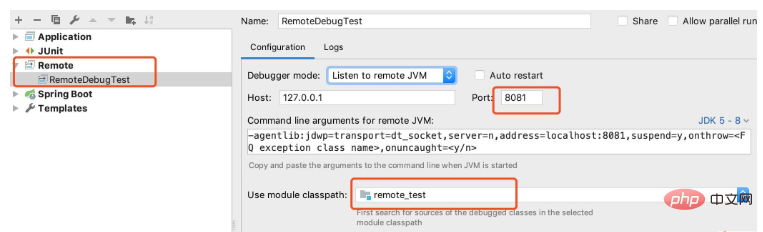
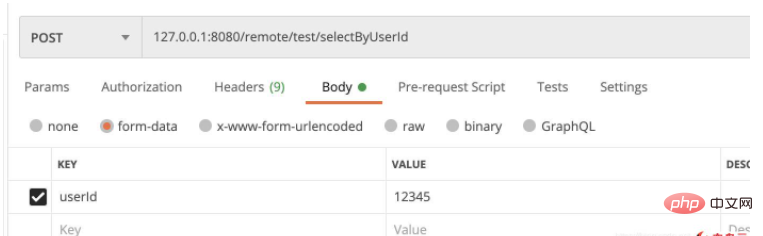
3、在IDEA設定遠端Debug
指定socket port = 8081,指定準備debug的模組
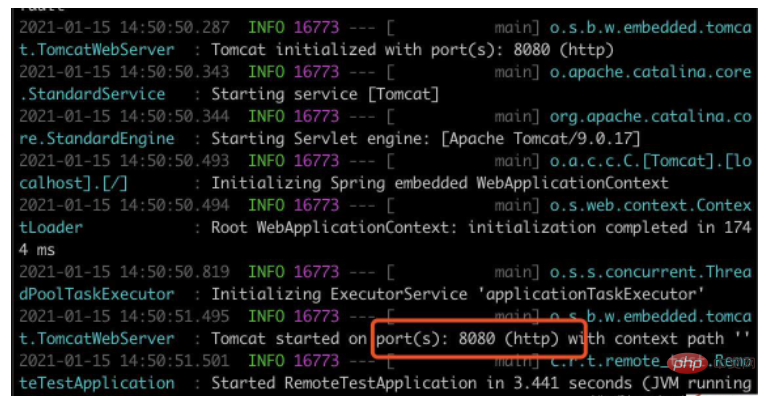
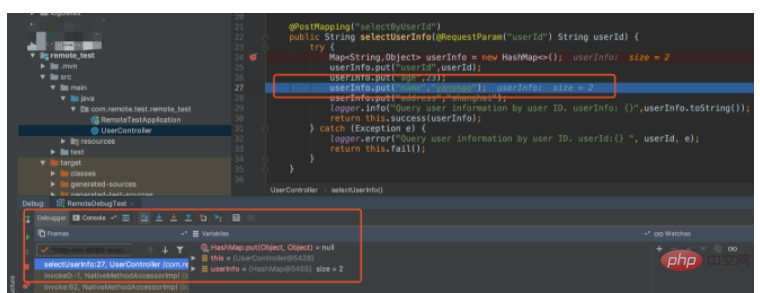
4、在終端機啟動剛才打好的jar包
##a. 先在IDEA啟動debug

b. 然後在終端機輸入指令:java -agentlib:jdwp=transport=dt_socket,server=n,address=localhost:8081 -jar remote_test-0.0. 1-SNAPSHOT-all.jar
➜ Desktop java -agentlib:jdwp=transport=dt_socket,server=n,address=localhost:8081 -jar remote_test-0.0.1-SNAPSHOT-all.jar
ERROR: transport error 202: connect failed: Connectionrefused
ERROR: JDWP Transport dt_socket failed to initialize, TRANSPORT_INIT(510)
JDWP exit error AGENT_ERROR_TRANSPORT_INIT(197): No transports initialized [debugInit.c:#750]##d
以上是如何在springboot中使用IDEA遠端連線Debug的詳細內容。更多資訊請關注PHP中文網其他相關文章!

熱AI工具

Undresser.AI Undress
人工智慧驅動的應用程序,用於創建逼真的裸體照片

AI Clothes Remover
用於從照片中去除衣服的線上人工智慧工具。

Undress AI Tool
免費脫衣圖片

Clothoff.io
AI脫衣器

Video Face Swap
使用我們完全免費的人工智慧換臉工具,輕鬆在任何影片中換臉!

熱門文章
熱工具

記事本++7.3.1
好用且免費的程式碼編輯器

SublimeText3漢化版
中文版,非常好用

禪工作室 13.0.1
強大的PHP整合開發環境

Dreamweaver CS6
視覺化網頁開發工具

SublimeText3 Mac版
神級程式碼編輯軟體(SublimeText3)


 idea社群版和專業版的區別
Nov 07, 2023 pm 05:23 PM
idea社群版和專業版的區別
Nov 07, 2023 pm 05:23 PM
idea社群版與專業版的差異在授權方式、功能、支援與更新、外掛程式支援、雲端服務與團隊協作、行動開發支援、教育與學習、整合與擴充性、錯誤處理與調試、安全性與隱私保護等方面。詳細介紹:1、授權方式,社群版是免費的,適用於所有開發人員,無論使用什麼作業系統,社群版支援開源專案和商業項目,專業版是付費的,適用於商業開發,專業版有30天的試用期,之後需要購買許可證才能繼續使用等等。
 五個IntelliJ IDEA插件,有效率地編寫程式碼
Jul 16, 2023 am 08:03 AM
五個IntelliJ IDEA插件,有效率地編寫程式碼
Jul 16, 2023 am 08:03 AM
人工智慧AI是當前廣受認可的未來趨勢和發展方向。雖然有些人擔心AI可能會取代所有的工作,但實際上只會取代那些重複性高、產出低的工作。因此,我們應該學會更聰明地工作,而不是使勁努力工作。本文介紹5個由AI驅動的Intellij插件,這些插件可以幫助你提高生產力,減少繁瑣的重複性工作,讓你的工作更有效率、方便。 1GithubCopilotGithubCopilot是由OpenAI和GitHub共同開發的一款人工智慧程式碼輔助工具。它使用了OpenAI的GPT模型來分析程式碼上下文,預測並產生新的程式碼
 怎麼在SpringBoot中使用Redis實現分散式鎖
Jun 03, 2023 am 08:16 AM
怎麼在SpringBoot中使用Redis實現分散式鎖
Jun 03, 2023 am 08:16 AM
一、Redis實現分散式鎖原理為什麼需要分散式鎖在聊分散式鎖之前,有必要先解釋一下,為什麼需要分散式鎖。與分散式鎖相對就的是單機鎖,我們在寫多執行緒程式時,避免同時操作一個共享變數產生資料問題,通常會使用一把鎖來互斥以保證共享變數的正確性,其使用範圍是在同一個進程中。如果換做是多個進程,需要同時操作一個共享資源,如何互斥?現在的業務應用通常是微服務架構,這也意味著一個應用會部署多個進程,多個進程如果需要修改MySQL中的同一行記錄,為了避免操作亂序導致髒數據,此時就需要引入分佈式鎖了。想要實現分
 springboot讀取檔案打成jar包後存取不到怎麼解決
Jun 03, 2023 pm 04:38 PM
springboot讀取檔案打成jar包後存取不到怎麼解決
Jun 03, 2023 pm 04:38 PM
springboot讀取文件,打成jar包後訪問不到最新開發出現一種情況,springboot打成jar包後讀取不到文件,原因是打包之後,文件的虛擬路徑是無效的,只能通過流去讀取。文件在resources下publicvoidtest(){Listnames=newArrayList();InputStreamReaderread=null;try{ClassPathResourceresource=newClassPathResource("name.txt");Input
 SpringBoot與SpringMVC的比較及差別分析
Dec 29, 2023 am 11:02 AM
SpringBoot與SpringMVC的比較及差別分析
Dec 29, 2023 am 11:02 AM
SpringBoot和SpringMVC都是Java開發中常用的框架,但它們之間有一些明顯的差異。本文將探究這兩個框架的特點和用途,並對它們的差異進行比較。首先,我們來了解一下SpringBoot。 SpringBoot是由Pivotal團隊開發的,它旨在簡化基於Spring框架的應用程式的建立和部署。它提供了一種快速、輕量級的方式來建立獨立的、可執行
 SpringBoot怎麼自訂Redis實作快取序列化
Jun 03, 2023 am 11:32 AM
SpringBoot怎麼自訂Redis實作快取序列化
Jun 03, 2023 am 11:32 AM
1.自訂RedisTemplate1.1、RedisAPI預設序列化機制基於API的Redis快取實作是使用RedisTemplate範本進行資料快取操作的,這裡開啟RedisTemplate類,查看該類別的源碼資訊publicclassRedisTemplateextendsRedisAccessorimplementsRedisOperations,BeanClassLoaderAware{//聲明了value的各種序列化方式,初始值為空@NullableprivateRedisSe
 springboot怎麼取得application.yml裡值
Jun 03, 2023 pm 06:43 PM
springboot怎麼取得application.yml裡值
Jun 03, 2023 pm 06:43 PM
在專案中,很多時候需要用到一些配置信息,這些信息在測試環境和生產環境下可能會有不同的配置,後面根據實際業務情況有可能還需要再做修改。我們不能將這些設定在程式碼中寫死,最好是寫到設定檔中,例如可以把這些資訊寫到application.yml檔案中。那麼,怎麼在程式碼裡取得或使用這個位址呢?有2個方法。方法一:我們可以透過@Value註解的${key}即可取得設定檔(application.yml)中和key對應的value值,這個方法適用於微服務比較少的情形方法二:在實際專案中,遇到業務繁瑣,邏
 SpringBoot+Dubbo+Nacos 開發實戰教程
Aug 15, 2023 pm 04:49 PM
SpringBoot+Dubbo+Nacos 開發實戰教程
Aug 15, 2023 pm 04:49 PM
本文來寫個詳細的例子來說下dubbo+nacos+Spring Boot開發實戰。本文不會講述太多的理論的知識,會寫一個最簡單的例子來說明dubbo如何與nacos整合,快速建構開發環境。
