windows安裝ssh
linux 本身使用ssh 無需安裝
訪問Openssh官網並根據作業系統的位元數選擇適當的安裝套件
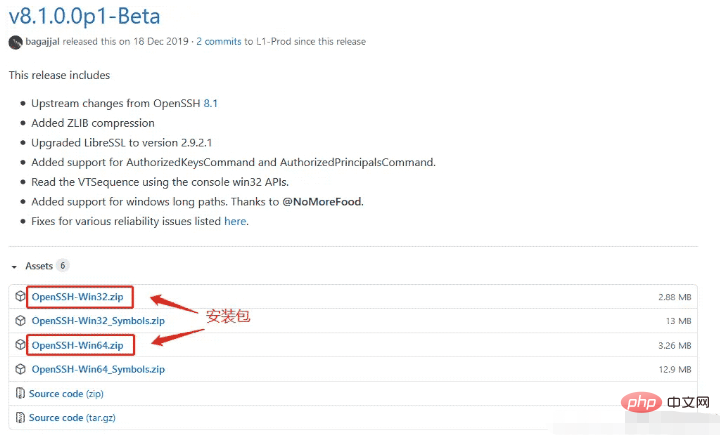
#進入官網後,依照作業系統位元數選擇合適的安裝套件。不過64位元系統也可以支援32位元的安裝包。我這裡系統64位的安裝的是32位元的安裝包。
開啟powershell終端,進入包含ssh可執行exe檔的資料夾cd C:\OpenSSH-Win32 \OpenSSH-Win32。
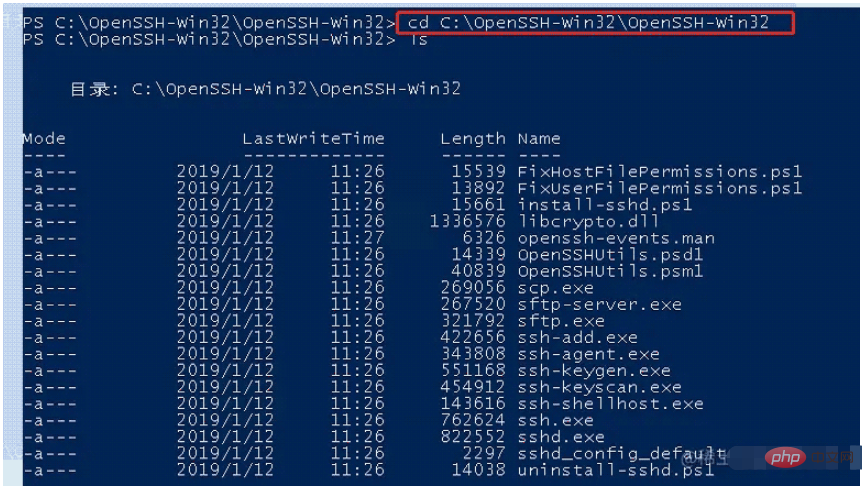
在powershell終端機輸入下方指令:
powershell.exe -ExecutionPolicy Bypass -File install-sshd.ps1
安裝成功後如下所示:

在防火牆開啟連接埠22埠號:在powershell中輸入以下指令:
netsh advfirewall firewall add rule name=sshd dir=in action=allow protocol=TCP localport=22

啟動ssh服務
net start sshd
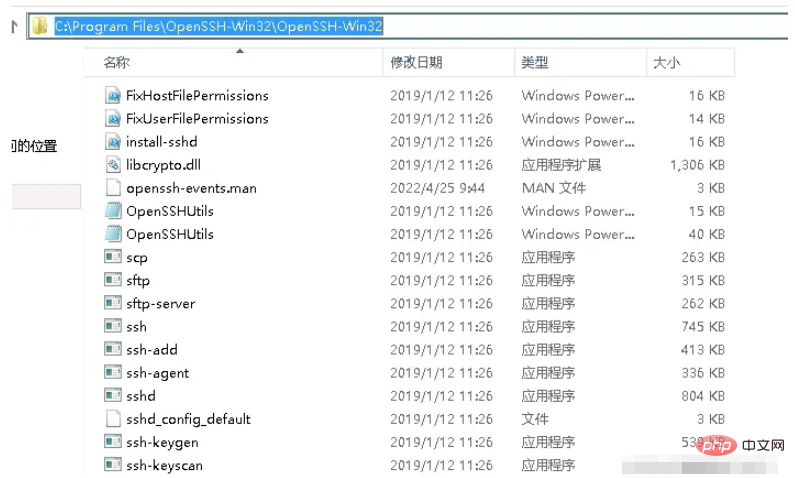
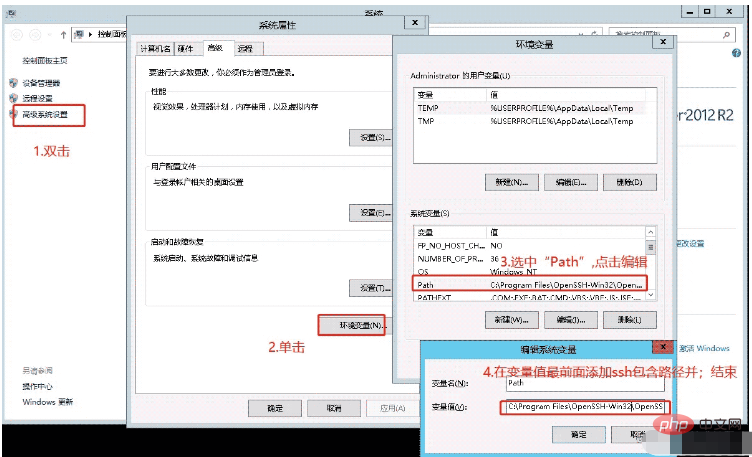
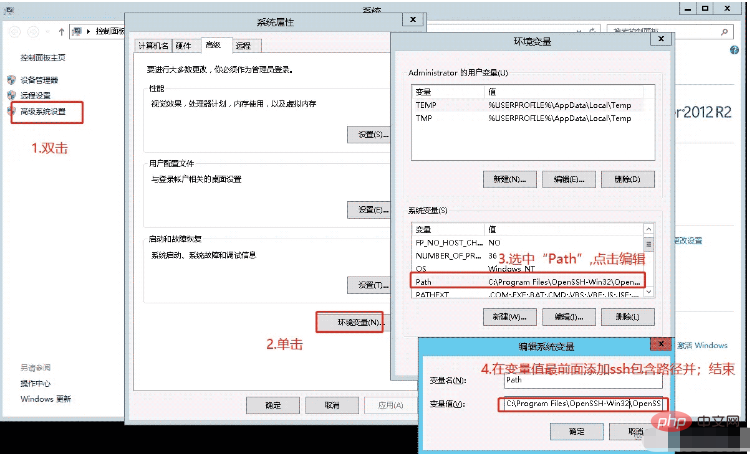
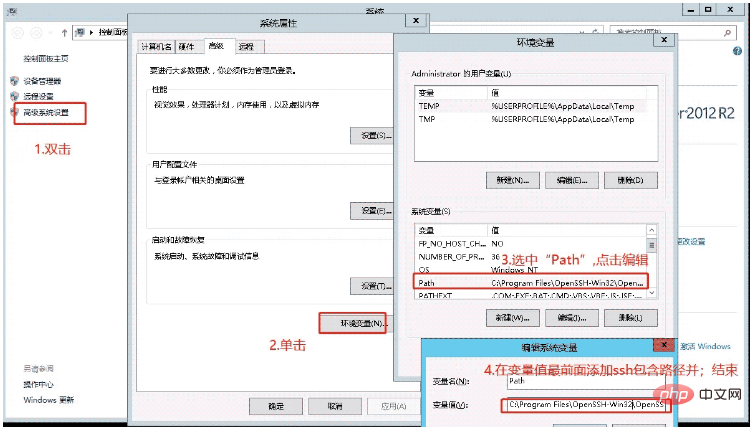
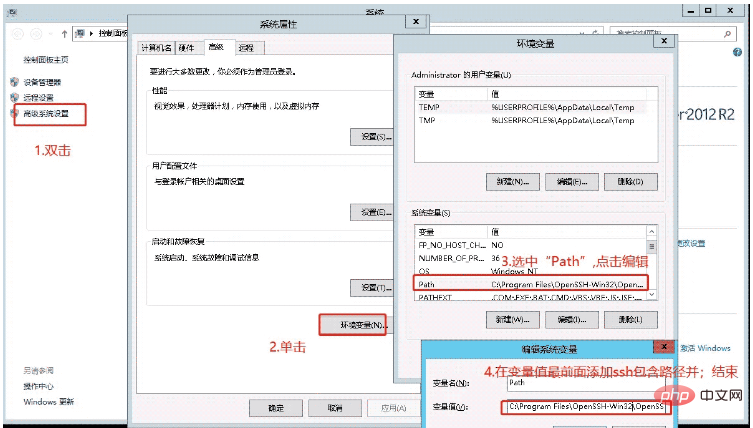
將包含ssh可執行exe檔所在路徑(我這裡是:C:\Program Files\OpenSSH-Win32\OpenSSH-Win32)加入到環境系統變數中。
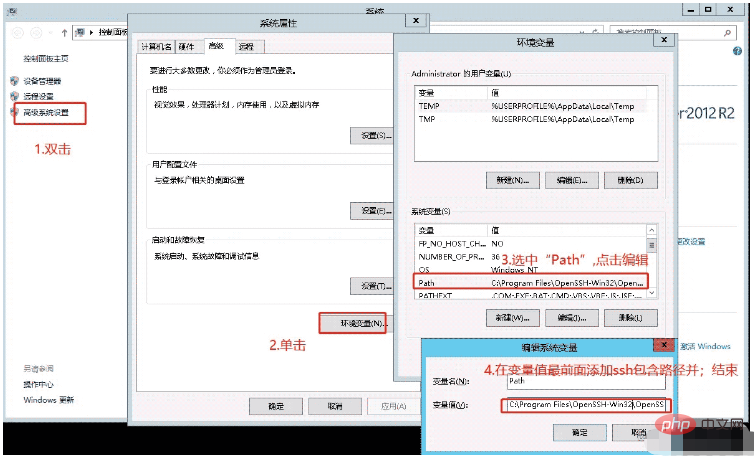
最後開啟cmd或powershell,輸入ssh出現如下圖所示,就代表已經安裝成功。
#依序開啟「伺服器管理員」——》「工具」——》 「服務」
進入服務清單介面,找到OpenSSH SSH Server服務
將下圖中openssh authentication agent按照上圖也進行同樣操作。
Start-Service sshd
Set-Service -Name sshd -StartupType 'Automatic'
Get-NetFirewallRule -Name *ssh*
<dependency>
    <groupId>cn.hutool</groupId>
    <artifactId>hutool-all</artifactId>
    <version>5.3.4</version>
</dependency><dependency>
<groupId>com.jcraft</groupId>
<artifactId>jsch</artifactId>
<version>0.1.55</version>
</dependency>@Test
void test18() {
//测试目录
String linuxPath = "/var/file/test/";
//创建session连接
Session sessionLinux = JschUtil.getSession("106.12.127.40", 22,"root", "Ocean@123");
// 1.文件操作
// 建立sftp
Sftp sftp = JschUtil.createSftp(sessionLinux);
//进入输入目录
sftp.cd(linuxPath);
//文件名称
String fileName = "Sftp创建文件夹于"+DateUtil.format(new Date(), "yyyy年MM月dd日HH时mm分ss秒");
//1.创建文件夹
sftp.mkdir(fileName);
System.out.println("=========================1.远程文件操作=========================");
System.out.println(fileName+",文件是否存在?"+sftp.exist(linuxPath+fileName));
//删除文件
sftp.delDir(linuxPath+fileName);
System.out.println(fileName+",文件是否存在?"+sftp.exist(linuxPath+fileName));
System.out.println();
//2.上传文件
// 本地新建文件
System.out.println("=========================2.上传文件操作=========================");
String localFile = DateUtil.format(new Date(), "yyyy年MM月dd日HH时mm分ss秒")+".txt";
System.out.println(localFile);
FileWriter fileWriter = new FileWriter(localFile);
// 写入内容
File file = fileWriter.write("123");
fileWriter.append("追加信息");
System.out.println(file.getPath());
sftp.upload(linuxPath, file);
//upload方法
System.out.println("1.upload方法");
System.out.println(localFile+",文件是否存在?"+sftp.exist(linuxPath+localFile));
sftp.delFile(linuxPath+localFile);
System.out.println(localFile+",文件是否存在?"+sftp.exist(linuxPath+fileName));
sftp.put(file.getPath(),linuxPath);
//put方法
System.out.println("2.put方法");
System.out.println(localFile+",文件是否存在?"+sftp.exist(linuxPath+localFile));
sftp.delFile(linuxPath+localFile);
System.out.println(localFile+",文件是否存在?"+sftp.exist(linuxPath+fileName));
//删除本地文件
FileUtil.del(file);
}以上是springboot怎麼使用Hutool的JschUtil的詳細內容。更多資訊請關注PHP中文網其他相關文章!


