

python爬蟲之selenium模組怎麼使用

一、什麼是Selenium
selenium 是一套完整的web應用程式測試系統,包含了測試的錄製( selenium IDE),編寫及運行(Selenium Remote Control)和測試的並行處理(Selenium Grid)。 Selenium的核心Selenium Core是基於JsUnit,完全由JavaScript編寫,因此可以用於任何支援JavaScript的瀏覽器上。
selenium可以模擬真實瀏覽器,自動化測試工具,支援多種瀏覽器,而爬蟲則主要用來解決JavaScript渲染問題。
二、selenium安裝
用python寫爬蟲的時候,主要用的是selenium的Webdriver,我們可以透過下面的方式先看看Selenium.Webdriver支援哪些瀏覽器
from selenium import webdrive
help(webdriver)
執行結果如下,從結果中我們也可以看出基本山支援了常見的所有瀏覽器:
NAME: selenium.webdriver
#PACKAGE CONTENTS:
android (package)
blackberry (package)
#chrome (package)
common (package)
edge (package)
- ## firefox (package)
- ie (package)
- opera (package)
- phantomjs ( package)
remote (package)
safari (package)##support (package)
webkitgtk (package)
- #VERSION
: 3.14.1
1、PhantomJS: 無可視化介面的瀏覽器(無頭瀏覽器) PhantomJS是一個而基於WebKit的服務端JavaScript API,支援Web而不需要瀏覽器支持,其快速、原生支援各種Web標準:Dom處理,CSS選擇器,JSON等等。
PhantomJS可以用於頁面自動化、網路監測、網頁截圖,以及無介面測試。 2、下載瀏覽器驅動程式
當selenium升級到3.0之後,對不同的瀏覽器驅動程式進行了規範。如果想要使用selenium驅動不同的瀏覽器,必須單獨下載並設定不同的瀏覽器驅動程式。 各瀏覽器下載位址:
Firefox瀏覽器驅動程式:geckodriver
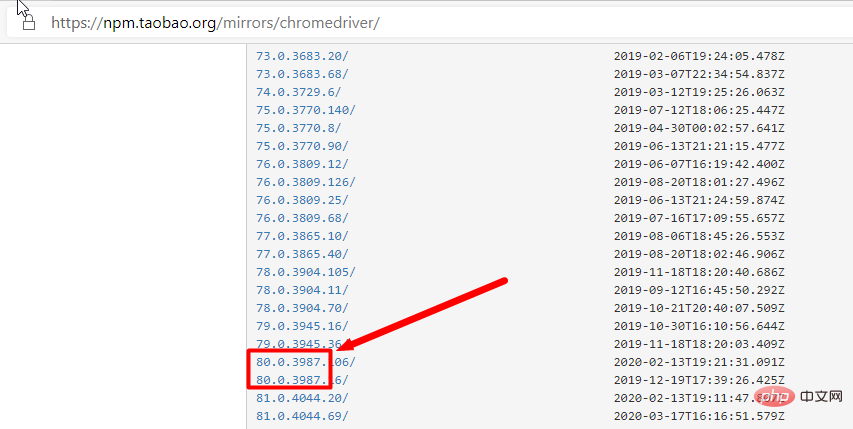
Chrome瀏覽器驅動程式:chromedriver , taobao備用位址
IE瀏覽器驅動程式:IEDriverServer
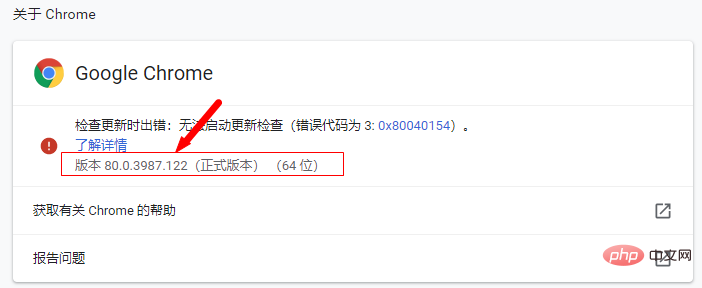
:webdriver需要和對應的瀏覽器版本以及selenium版本對應。
查看驅動程式和瀏覽器版本的對應關係:
依照chrome版本對應的driver,直接依照瀏覽器版本去找對應的driver(只對應大版本就行)下載之後,解壓縮到任何目錄(路徑不要有中文)。
瀏覽器驅動文件,(win環境下載解壓縮後得到的.exe檔案)需要放到與python.exe同級目錄中方能使用。或設定電腦環境變數可以手動建立一個存放瀏覽器驅動程式的目錄,如: C:\driver , 將下載的瀏覽器驅動程式檔案(例如:chromedriver、geckodriver)丟到該目錄下。
我的電腦-->屬性-->系統設定-->高級-->環境變數-->系統變數-->Path,將“C:\driver”目錄加入到Path的值中。
三、selenium基本上使用
1、宣告瀏覽器物件
上面我們知道了selenium支援很多的瀏覽器,但是如果想要宣告並呼叫瀏覽器則需要:
這裡只寫了兩個例子,當然了其他的支援的瀏覽器都可以透過這種方式呼叫
from selenium import webdriver

browser = webdriver.Chrome()
# browser = webdriver.Firefox()
from selenium import webdriver
from selenium.webdriver.common.by import By
from selenium.webdriver.support.ui import WebDriverWait
from selenium.webdriver.support import expected_conditions as EC
from selenium.webdriver.common.action_chains import ActionChains
from selenium.webdriver.common.keys import Keys

chrome_options = webdriver.ChromeOptions()
# 使用headless无界面浏览器模式
chrome_options.add_argument('--headless') //增加无界面选项
chrome_options.add_argument('--disable-gpu') //如果不加这个选项,有时定位会出现问题
# 启动浏览器,获取网页源代码
browser = webdriver.Chrome(chrome_options=chrome_options)
mainUrl = "https://www.taobao.com/"
browser.get(mainUrl)
print(f"browser text = {browser.page_source}")
browser.quit()from selenium import webdriver
browser = webdriver.Chrome()
browser.get("http://www.baidu.com")
print(browser.page_source)
browser.close()browser.get(<a href="http://www.taobao.com/" rel="external nofollow" rel="external nofollow" target="_blank">http://www.taobao.com</a>)
input_first = browser.find_element_by_id("q")
input_second = browser.find_element_by_css_selector("#q")
input_third = browser.find_element_by_xpath('//*[@id="q"]')
print(input_first)
print(input_second)
print(input_third)
browser.close()
常用的查找元素方法:
find_element_by_name:通过元素name定位
find_element_by_id:通过元素id定位
find_element_by_xpath:通过xpath表达式定位
find_element_by_link_text:通过完整超链接文本定位
find_element_by_partial_link_text:通过部分链接文本定位
find_element_by_tag_name:通过标签定位
find_element_by_class_name:通过类名进行定位
find_element_by_css_selector:通过css选择器进行定位
举例:
通过xpath定位,xpath定位有N种写法,这里列几个常用写法:
dr.find_element_by_xpath("//*[@id='kw']")
dr.find_element_by_xpath("//*[@name='wd']")
dr.find_element_by_xpath("//input[@class='s_ipt']")
dr.find_element_by_xpath("/html/body/form/span/input")
dr.find_element_by_xpath("//span[@class='soutu-btn']/input")
dr.find_element_by_xpath("//form[@id='form']/span/input")
dr.find_element_by_xpath("//input[@id='kw' and @name='wd']")通过css定位,css定位有N种写法,这里列几个常用写法:
dr.find_element_by_css_selector("#kw")
dr.find_element_by_css_selector("[name=wd]")
dr.find_element_by_css_selector(".s_ipt")
dr.find_element_by_css_selector("html > body > form > span > input")
dr.find_element_by_css_selector("span.soutu-btn> input#kw")
dr.find_element_by_css_selector("form#form > span > input")xpath的使用方法
1. 第一种方法:通过绝对路径做定位(相信大家不会使用这种方式)
By.xpath(“html/body/div/form/input”)
2. 第二种方法:通过相对路径做定位,两个斜杠代表相对路径
By.xpath(“//input//div”)
3. 第三种方法:通过元素索引定位
By.xpath(“//input[4]”)
4. 第四种方法:使用xpath+节点属性定位(结合第2、第3中方法可以使用)
By.xpath(“//input[@id='kw1']”)
By.xpath(“//input[@type='name' and @name='kw1']”)
5. 第五种方法:使用部分属性值匹配(最强大的方法)
By.xpath(“//input[start-with(@id,'nice')]”)
By.xpath(“//input[ends-with(@id,'很漂亮')]”)
By.xpath(“//input[contains(@id,'那么美')]”)
6. 第六种方法:使用前集中方法的组合
By.xpath(“//input[@id='kw1']//input[start-with(@id,'nice']/div[1]/form[3])
下面这种方式是比较通用的一种方式:这里需要记住By模块所以需要导入。
from selenium import webdriver

from selenium.webdriver.common.by import By

browser = webdriver.Chrome()

browser.get("http://www.taobao.com")
input_first = browser.find_element(By.ID,"q")
print(input_first)
browser.close()当然这种方法和上述的方式是通用的,browser.find_element(By.ID,"q")这里By.ID中的ID可以替换为其他几个
2、多个元素查找
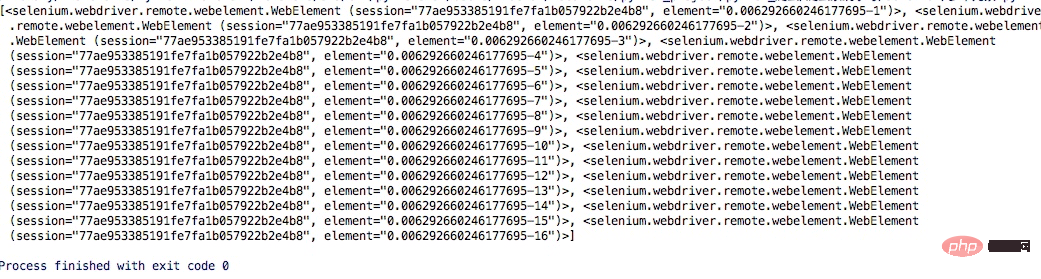
多个元素find_elements,单个元素是find_element,其他使用上没什么区别,通过其中的一个例子演示:
browser.get(<a href="http://www.taobao.com/" rel="external nofollow" rel="external nofollow" target="_blank">http://www.taobao.com</a>) lis = browser.find_elements_by_css_selector('.service-bd li') print(lis) browser.close()
这样获得就是一个列表
当然上面的方式也是可以通过导入from selenium.webdriver.common.by import By 这种方式实现
lis = browser.find_elements(By.CSS_SELECTOR,'.service-bd li')
同样的在单个元素中查找的方法在多个元素查找中同样存在:
find_elements_by_name
find_elements_by_id
find_elements_by_xpath
find_elements_by_link_text
find_elements_by_partial_link_text
find_elements_by_tag_name
find_elements_by_class_name
find_elements_by_css_selector
4、元素交互操作
一般来说,webdriver 中比较常用的操作对象的方法有下面几个:
click——点击对象
send_keys——在对象上模拟按键输入
clear——清除对象的内容,如果可以的话
submit——提交对象的内容,如果可以的话
text——用于获取元素的文本信息
1、键盘事件
要想调用键盘按键操作需要引入 keys 包:
from selenium.webdriver.common.keys import Keys
通过 send_keys()调用按键:
send_keys(Keys.TAB) # TAB
send_keys(Keys.ENTER) # 回车
send_keys(Keys.CONTROL,'a') # ctrl+a 全选输入框内容
send_keys(Keys.CONTROL,'x') # ctrl+x 剪切输入框内容
import time

browser.get(http://www.taobao.com)
input_str = browser.find_element_by_id('q')
input_str.send_keys("ipad")
time.sleep(1)
input_str.clear()
input_str.send_keys("MakBook pro")
button = browser.find_element_by_class_name('btn-search')
button.click()运行的结果可以看出程序会自动打开Chrome浏览器并打开淘宝输入ipad,然后删除,重新输入MakBook pro,并点击搜索。
2、鼠标事件
鼠标事件一般包括鼠标右键、双击、拖动、移动鼠标到某个元素上等等。需要引入ActionChains类。引入方法:
from selenium.webdriver.common.action_chains import ActionChains
ActionChains 常用方法:
context_click() :右击;
double_click() :双击;
drag_and_drop(): 拖动;
move_to_element() :鼠标悬停。
perform(): 执行所有ActionChains 中存储的行为;
鼠标双击示例:
qqq =driver.find_element_by_xpath("xxx")  #定位到要双击的元素
ActionChains(driver).double_click(qqq).perform() #对定位到的元素执行鼠标双击操作鼠标拖放示例:
from selenium.webdriver import ActionChains

url = "http://www.runoob.com/try/try.php?filename=jqueryui-api-droppable"
browser.get(url)
browser.switch_to.frame('iframeResult')
source = browser.find_element_by_css_selector('#draggable')
target = browser.find_element_by_css_selector('#droppable')
actions = ActionChains(browser)
actions.drag_and_drop(source, target)
actions.perform()
更多操作参考:
http://selenium-python.readthedocs.io/api.html#module-selenium.webdriver.common.action_chains
5、执行JavaScript
这是一个非常有用的方法,这里就可以直接调用js方法来实现一些操作,下面的例子是通过登录知乎然后通过js翻到页面底部,并弹框提示
browser.get(<a href="http://www.zhihu.com/explore" rel="external nofollow" target="_blank">http://www.zhihu.com/explore</a>)
browser.execute_script('window.scrollTo(0, document.body.scrollHeight)')
browser.execute_script('alert("To Bottom")')6、获取DOM
1、获取元素属性:get_attribute('class')
url = 'https://www.zhihu.com/explore'
browser.get(url)
logo = browser.find_element_by_id('zh-top-link-logo')
print(logo)
print(logo.get_attribute('class'))
2、获取文本值:text
url = 'https://www.zhihu.com/explore'
browser.get(url)
input = browser.find_element_by_class_name('zu-top-add-question')
print(input.text)
3、获取ID,位置,标签名
id
location
tag_name
size
url = 'https://www.zhihu.com/explore'
browser.get(url)
input = browser.find_element_by_class_name('zu-top-add-question')
print(input.id)
print(input.location)
print(input.tag_name)
print(input.size)
7、Frame
在很多网页中都是有Frame标签,所以我们爬取数据的时候就涉及到切入到frame中以及切出来的问题,通过下面的例子演示
这里常用的是switch_to.from()和switch_to.parent_frame()
import time
from selenium import webdriver
from selenium.common.exceptions import NoSuchElementException

browser = webdriver.Chrome()
url = 'http://www.runoob.com/try/try.php?filename=jqueryui-api-droppable'
browser.get(url)
browser.switch_to.frame('iframeResult')
source = browser.find_element_by_css_selector('#draggable')
print(source)

try:
    logo = browser.find_element_by_class_name('logo')
except NoSuchElementException:
    print('NO LOGO')
browser.switch_to.parent_frame()
logo = browser.find_element_by_class_name('logo')
print(logo)
print(logo.text)8、等待
1、隐式等待
当使用了隐式等待执行测试的时候,如果 WebDriver没有在 DOM中找到元素,将继续等待,超出设定时间后则抛出找不到元素的异常。
换句话说,当查找元素或元素并没有立即出现的时候,隐式等待将等待一段时间再查找 DOM,默认的时间是0
到了一定的时间发现元素还没有加载,则继续等待我们指定的时间,如果超过了我们指定的时间还没有加载就会抛出异常,如果没有需要等待的时候就已经加载完毕就会立即执行
browser.implicitly_wait(10)
browser.get('https://www.zhihu.com/explore')
input = browser.find_element_by_class_name('zu-top-add-question')
print(input)
2、显示等待
指定一个等待条件,并且指定一个最长等待时间,会在这个时间内进行判断是否满足等待条件。
如果成立就会立即返回,如果不成立,就会一直等待,直到等待你指定的最长等待时间,如果还是不满足,就会抛出异常,如果满足了就会正常返回。
from selenium import webdriver
from selenium.webdriver.common.by import By
from selenium.webdriver.support.ui import WebDriverWait
from selenium.webdriver.support import expected_conditions as EC

browser = webdriver.Chrome()
browser.get('https://www.taobao.com/')
wait = WebDriverWait(browser, 10)
input = wait.until(EC.presence_of_element_located((By.ID, 'q')))
button = wait.until(EC.element_to_be_clickable((By.CSS_SELECTOR, '.btn-search')))
print(input, button)
上述的例子中的条件:EC.presence_of_element_located()是确认元素是否已经出现了。EC.element_to_be_clickable()是确认元素是否是可点击的
3、常用的判断条件:
title_is :标题是某内容
title_contains :标题包含某内容
presence_of_element_located :元素加载出,传入定位元组,如(By.ID, 'p')
visibility_of_element_located :元素可见,传入定位元组
visibility_of :可见,传入元素对象
presence_of_all_elements_located :所有元素加载出
text_to_be_present_in_element :某个元素文本包含某文字
text_to_be_present_in_element_value :某个元素值包含某文字
frame_to_be_available_and_switch_to_it :frame加载并切换
invisibility_of_element_located :元素不可见
element_to_be_clickable :元素可点击
staleness_of :判断一个元素是否仍在DOM,可判断页面是否已经刷新
element_to_be_selected :元素可选择,传元素对象
element_located_to_be_selected :元素可选择,传入定位元组
element_selection_state_to_be :传入元素对象以及状态,相等返回True,否则返回False
element_located_selection_state_to_be :传入定位元组以及状态,相等返回True,否则返回False
alert_is_present :是否出现Alert
实例:博客园标题判断
# coding: utf-8
from selenium import webdriver
from selenium.webdriver.support import expected_conditions as EC
driver = webdriver.Firefox()
driver.get("http://www.cnblogs.com/101718qiong/")

title = EC.title_is(u"Silence&QH - 博客园") # 判断title完全等于
print title(driver)

title1 = EC.title_contains("Silence&QH") # 判断title包含
print title1(driver)

r1 = EC.title_is(u"Silence&QH - 博客园")(driver) # 另外写法
r2 = EC.title_contains("Silence&QH")(driver)
print r1
print r2更多操作参考:
http://selenium-python.readthedocs.io/api.html#module-selenium.webdriver.support.expected_conditions
9、浏览器浏览器操作
浏览器最大化、最小化
browser.maximize_window() # 将浏览器最大化显示
browser.minimize_window() # 将浏览器最小化显示
浏览器设置窗口大小
browser.set_window_size(480, 800) # 设置浏览器宽480、高800显示
浏览器前进后退
back() :后退
forward():前进
import time
from selenium import webdriver

browser = webdriver.Chrome()
browser.get('https://www.baidu.com/')
browser.get('https://www.taobao.com/')
browser.get('https://www.python.org/')
browser.back()
time.sleep(1)
browser.forward()
browser.close()
10、cookie操作
get_cookies()
delete_all_cookes()
add_cookie()
browser.get('https://www.zhihu.com/explore')
print(browser.get_cookies())
browser.add_cookie({'name': 'name', 'domain': 'www.zhihu.com', 'value': 'zhaofan'})
print(browser.get_cookies())
browser.delete_all_cookies()
print(browser.get_cookies())11、多窗口管理
通过执行js命令实现新开选项卡window.open(),不同的选项卡是存在列表里browser.window_handles。
通过browser.window_handles[0]就可以操作第一个选项卡,current_window_handle:获得当前窗口句柄
import time

browser.get('https://www.baidu.com')
browser.execute_script('window.open()')
print(browser.window_handles)
browser.switch_to.window(browser.window_handles[1])
browser.get('https://www.taobao.com')
time.sleep(1)
browser.switch_to.window(browser.window_handles[0])
browser.get('https://python.org')
12、异常处理
这里的异常比较复杂,官网的参考地址:
http://selenium-python.readthedocs.io/api.html#module-selenium.common.exceptions
这里只进行简单的演示,查找一个不存在的元素
from selenium import webdriver
from selenium.common.exceptions import TimeoutException, NoSuchElementException

browser = webdriver.Chrome()
try:
    browser.get('https://www.baidu.com')
except TimeoutException:
    print('Time Out')
try:
    browser.find_element_by_id('hello')
except NoSuchElementException:
    print('No Element')
finally:
browser.close()13.警告框处理
在WebDriver中处理JavaScript所生成的alert、confirm以及prompt十分简单,具体做法是使用 switch_to.alert 方法定位到 alert/confirm/prompt,然后使用text/accept/dismiss/ send_keys等方法进行操作。
方法
text : 返回 alert/confirm/prompt 中的文字信息
accept() : 接受现有警告框
dismiss() : 解散现有警告框
send_keys(keysToSend) : 发送文本至警告框。keysToSend:将文本发送至警告框。
实例演示
from selenium import webdriver
from selenium.webdriver.common.action_chains import ActionChains
import time

driver = webdriver.Chrome("F:\Chrome\ChromeDriver\chromedriver")
driver.implicitly_wait(10)
driver.get('http://www.baidu.com')

# 鼠标悬停至“设置”链接
link = driver.find_element_by_link_text('设置')
ActionChains(driver).move_to_element(link).perform()

# 打开搜索设置
driver.find_element_by_link_text("搜索设置").click()

#在此处设置等待2s否则可能报错
time.sleep(2)
 # 保存设置
driver.find_element_by_class_name("prefpanelgo").click()
 time.sleep(2)

# 接受警告框
driver.switch_to.alert.accept()

driver.quit()14、下拉框选择操作
导入选择下拉框Select类,使用该类处理下拉框操作。
from selenium.webdriver.support.select import Select
Select类的方法:
select_by_value(“选择值”) select标签的value属性的值
select_by_index(“索引值”) 下拉框的索引
select_by_visible_testx(“文本值”) 下拉框的文本值
有时我们会碰到下拉框,WebDriver提供了Select类来处理下拉框。 如百度搜索设置的下拉框。
from selenium import webdriver
 from selenium.webdriver.support.select import Select
 from time import sleep

driver = webdriver.Chrome("F:\Chrome\ChromeDriver\chromedriver")
 driver.implicitly_wait(10)
 driver.get('http://www.baidu.com')

#1.鼠标悬停至“设置”链接
driver.find_element_by_link_text('设置').click()
 sleep(1)
 #2.打开搜索设置
driver.find_element_by_link_text("搜索设置").click()
 sleep(2)

#3.搜索结果显示条数
sel = driver.find_element_by_xpath("//select[@id='nr']")
 Select(sel).select_by_value('50')  # 显示50条

sleep(3)
driver.quit()15、文件上传
对于通过input标签实现的上传功能,可以将其看作是一个输入框,即通过send_keys()指定本地文件路径的方式实现文件上传。
通过send_keys()方法来实现文件上传:
from selenium import webdriver
import os

driver = webdriver.Firefox()
file_path = 'file:///' + os.path.abspath('upfile.html')
driver.get(file_path)

# 定位上传按钮,添加本地文件
driver.find_element_by_name("file").send_keys('D:\\upload_file.txt')

driver.quit()16、窗口截图
自动化用例是由程序去执行的,因此有时候打印的错误信息并不十分明确。如果在脚本执行出错的时候能对当前窗口截图保存,那么通过图片就可以非常直观地看出出错的原因。WebDriver提供了截图函数get_screenshot_as_file()来截取当前窗口。
截屏方法:
get_screenshot_as_file(self, filename) 用于截取当前窗口,并把图片保存到本地
from selenium import webdriver
from time import sleep

driver =webdriver.Firefox(executable_path ="F:\GeckoDriver\geckodriver")
driver.get('http://www.baidu.com')

driver.find_element_by_id('kw').send_keys('selenium')
 driver.find_element_by_id('su').click()
 sleep(2)

#1.截取当前窗口,并指定截图图片的保存位置
driver.get_screenshot_as_file("D:\\baidu_img.jpg")

driver.quit()17、关闭浏览器
在前面的例子中我们一直使用quit()方法,其含义为退出相关的驱动程序和关闭所有窗口。除此之外,WebDriver还提供了close()方法,用来关闭当前窗口。例多窗口的处理,在用例执行的过程中打开了多个窗口,我们想要关闭其中的某个窗口,这时就要用到close()方法进行关闭了。
close() 关闭单个窗口
quit() 关闭所有窗口
18、selenium规避被检测识别
现在不少大网站有对selenium采取了监测机制。比如正常情况下我们用浏览器访问淘宝等网站的 window.navigator.webdriver的值为
undefined。而使用selenium访问则该值为true。那么如何解决这个问题呢?
只需要设置Chromedriver的启动参数即可解决问题。在启动Chromedriver之前,为Chrome开启实验性功能参数excludeSwitches,它的值为['enable-automation'],完整代码如下:
from selenium.webdriver import Chrome
from selenium.webdriver import ChromeOptions

option = ChromeOptions()
option.add_experimental_option('excludeSwitches', ['enable-automation'])
driver = Chrome(options=option)
19、实例:
自动登陆CSDN
import time
import numpy as np
from numpy import random
from selenium import webdriver
from selenium.webdriver import ActionChains
from selenium.webdriver.common.by import By
from selenium.webdriver.support.ui import WebDriverWait
from selenium.webdriver.support import expected_conditions as EC


def ease_out_expo(x):
    if x == 1:
        return 1
    else:
        return 1 - pow(2, -10 * x)


def get_tracks(distance, seconds, ease_func):
    tracks = [0]
    offsets = [0]
    for t in np.arange(0.0, seconds+0.1, 0.1):
        ease = globals()[ease_func]
        offset = round(ease(t / seconds) * distance)
        tracks.append(offset - offsets[-1])
        offsets.append(offset)
    return offsets, tracks


def drag_and_drop(browser, offset):
    # 定位滑块元素
    WebDriverWait(browser, 20).until(
        EC.visibility_of_element_located((By.XPATH, "//*[@class='nc_iconfont btn_slide']"))
    )
    knob = browser.find_element_by_xpath("//*[@class='nc_iconfont btn_slide']")
    offsets, tracks = get_tracks(offset, 0.2, 'ease_out_expo')
    ActionChains(browser).click_and_hold(knob).perform()
    for x in tracks:
        ActionChains(browser).move_by_offset(x, 0).perform()
    # 放开
    ActionChains(browser).pause(random.randint(6, 14) / 10).release().perform()


chrome_options = webdriver.ChromeOptions()
chrome_options.add_argument("--start-maximized")
browser = webdriver.Chrome(chrome_options=chrome_options)

browser.get('http://www.baidu.com')
browser.find_element_by_id('kw').send_keys('CSDN')
browser.find_element_by_id('su').click()
WebDriverWait(browser, 20).until(
    EC.visibility_of_element_located((By.PARTIAL_LINK_TEXT, "-专业IT技术社区"))
)

browser.find_element_by_partial_link_text('-专业IT技术社区').click()

browser.switch_to.window(browser.window_handles[1])  # 移动句柄
time.sleep(1)
browser.find_element_by_partial_link_text('登录').click()
browser.find_element_by_link_text('账号密码登录').click()
browser.find_element_by_id('all').send_keys('yangbobin')
browser.find_element_by_name('pwd').send_keys('pass-word')
browser.find_element_by_css_selector("button[data-type='account']").click()
time.sleep(5)  # 等待滑动模块和其他JS文件加载完毕!
while True:
    # 定义鼠标拖放动作
    drag_and_drop(browser, 261)
    # 等待JS认证运行,如果不等待容易报错
    time.sleep(2)
    # 查看是否认证成功,获取text值
    WebDriverWait(browser, 20).until(
        EC.visibility_of_element_located((By.LINK_TEXT, "刷新"))
    )
browser.find_element_by_link_text('刷新').click()自动登陆163邮箱
首先,是163.的登陆为iframe
browser.switch_to_frame('x-URS-iframe')
以上是python爬蟲之selenium模組怎麼使用的詳細內容。更多資訊請關注PHP中文網其他相關文章!

熱AI工具

Undresser.AI Undress
人工智慧驅動的應用程序,用於創建逼真的裸體照片

AI Clothes Remover
用於從照片中去除衣服的線上人工智慧工具。

Undress AI Tool
免費脫衣圖片

Clothoff.io
AI脫衣器

Video Face Swap
使用我們完全免費的人工智慧換臉工具,輕鬆在任何影片中換臉!

熱門文章
熱工具

記事本++7.3.1
好用且免費的程式碼編輯器

SublimeText3漢化版
中文版,非常好用

禪工作室 13.0.1
強大的PHP整合開發環境

Dreamweaver CS6
視覺化網頁開發工具

SublimeText3 Mac版
神級程式碼編輯軟體(SublimeText3)


 PHP和Python:解釋了不同的範例
Apr 18, 2025 am 12:26 AM
PHP和Python:解釋了不同的範例
Apr 18, 2025 am 12:26 AM
PHP主要是過程式編程,但也支持面向對象編程(OOP);Python支持多種範式,包括OOP、函數式和過程式編程。 PHP適合web開發,Python適用於多種應用,如數據分析和機器學習。
 在PHP和Python之間進行選擇:指南
Apr 18, 2025 am 12:24 AM
在PHP和Python之間進行選擇:指南
Apr 18, 2025 am 12:24 AM
PHP適合網頁開發和快速原型開發,Python適用於數據科學和機器學習。 1.PHP用於動態網頁開發,語法簡單,適合快速開發。 2.Python語法簡潔,適用於多領域,庫生態系統強大。
 Python vs. JavaScript:學習曲線和易用性
Apr 16, 2025 am 12:12 AM
Python vs. JavaScript:學習曲線和易用性
Apr 16, 2025 am 12:12 AM
Python更適合初學者,學習曲線平緩,語法簡潔;JavaScript適合前端開發,學習曲線較陡,語法靈活。 1.Python語法直觀,適用於數據科學和後端開發。 2.JavaScript靈活,廣泛用於前端和服務器端編程。
 PHP和Python:深入了解他們的歷史
Apr 18, 2025 am 12:25 AM
PHP和Python:深入了解他們的歷史
Apr 18, 2025 am 12:25 AM
PHP起源於1994年,由RasmusLerdorf開發,最初用於跟踪網站訪問者,逐漸演變為服務器端腳本語言,廣泛應用於網頁開發。 Python由GuidovanRossum於1980年代末開發,1991年首次發布,強調代碼可讀性和簡潔性,適用於科學計算、數據分析等領域。
 vs code 可以在 Windows 8 中運行嗎
Apr 15, 2025 pm 07:24 PM
vs code 可以在 Windows 8 中運行嗎
Apr 15, 2025 pm 07:24 PM
VS Code可以在Windows 8上運行,但體驗可能不佳。首先確保系統已更新到最新補丁,然後下載與系統架構匹配的VS Code安裝包,按照提示安裝。安裝後,注意某些擴展程序可能與Windows 8不兼容,需要尋找替代擴展或在虛擬機中使用更新的Windows系統。安裝必要的擴展,檢查是否正常工作。儘管VS Code在Windows 8上可行,但建議升級到更新的Windows系統以獲得更好的開發體驗和安全保障。
 visual studio code 可以用於 python 嗎
Apr 15, 2025 pm 08:18 PM
visual studio code 可以用於 python 嗎
Apr 15, 2025 pm 08:18 PM
VS Code 可用於編寫 Python,並提供許多功能,使其成為開發 Python 應用程序的理想工具。它允許用戶:安裝 Python 擴展,以獲得代碼補全、語法高亮和調試等功能。使用調試器逐步跟踪代碼,查找和修復錯誤。集成 Git,進行版本控制。使用代碼格式化工具,保持代碼一致性。使用 Linting 工具,提前發現潛在問題。
 notepad 怎麼運行python
Apr 16, 2025 pm 07:33 PM
notepad 怎麼運行python
Apr 16, 2025 pm 07:33 PM
在 Notepad 中運行 Python 代碼需要安裝 Python 可執行文件和 NppExec 插件。安裝 Python 並為其添加 PATH 後,在 NppExec 插件中配置命令為“python”、參數為“{CURRENT_DIRECTORY}{FILE_NAME}”,即可在 Notepad 中通過快捷鍵“F6”運行 Python 代碼。
 vscode 擴展是否是惡意的
Apr 15, 2025 pm 07:57 PM
vscode 擴展是否是惡意的
Apr 15, 2025 pm 07:57 PM
VS Code 擴展存在惡意風險,例如隱藏惡意代碼、利用漏洞、偽裝成合法擴展。識別惡意擴展的方法包括:檢查發布者、閱讀評論、檢查代碼、謹慎安裝。安全措施還包括:安全意識、良好習慣、定期更新和殺毒軟件。
