
下面舉個小實例說明下:
centos7系統函式庫中預設是沒有nginx的rpm包的,所以我們自己需要先更新下rpm依賴函式庫
1)使用yum安裝nginx需要包含nginx的函式庫,安裝nginx的函式庫
[root@localhost ~]# rpm -uvh http://nginx.org/packages/centos/7/noarch/rpms/nginx-release-centos-7-0.el7.ngx.noarch.rpm
2)使用下列指令安裝nginx
[root@localhost ~]# yum install nginx
3) nginx設定
[root@localhost ~]# cd /etc/nginx/conf.d/
[root@localhost conf.d]# cat test.conf
server {
listen 80;
server_name localhost;
location / {
root /var/www/html;
index index.html;
}
}

[root@localhost conf.d]# cat /var/www/html/index.html
this is page of test!!!!4)啟動nginx
[root@localhost ~]# service nginx start //或者使用 systemctl start nginx.service
5)測試存取(103.110.186.23是192.168.1.23機器的外網)
[root@localhost conf.d]# curl http://192.168.1.23
this is page of test!!!!
看看以下幾種情況:分別用http://192.168.1.23/proxy/index.html來存取測試
為了方便測試,先在另一台機器192.168.1.5上部署一個8090埠的nginx,設定如下:
[root@bastion-idc ~]# cat /usr/local/nginx/conf/vhosts/haha.conf
server {
listen 8090;
server_name localhost;
location / {
root /var/www/html;
index index.html;
}
}
[root@bastion-idc ~]# cat /var/www/html/index.html
this is 192.168.1.5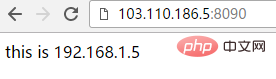
[root@bastion-idc ~]# /usr/local/nginx/sbin/nginx -s reload測試存取(103.110.186.5是192.168.1.5的外網路ip):
[root@bastion-idc ~]# curl http://192.168.1.5:8090
this is 192.168.1.5
#192.168.1.23作為nginx反向代理機器,nginx配置如下:
[root@localhost conf.d]# cat test.conf
server {
listen 80;
server_name localhost;
location / {
root /var/www/html;
index index.html;
}
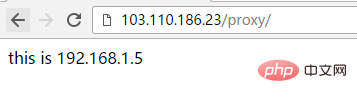
location /proxy/ {
proxy_pass http://192.168.1.5:8090/;
}
}[root@localhost conf.d]# curl http://192.168.1.23/proxy/ this is 192.168.1.5 [root@localhost conf.d]# curl http://192.168.1.23/proxy <html> <head><title>301 moved permanently</title></head> <body bgcolor="white"> <center><h1>301 moved permanently</h1></center> <hr><center>nginx/1.10.3</center> </body> </html>
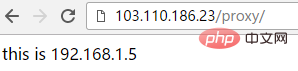
[root@localhost conf.d]# cat test.conf
server {
listen 80;
server_name localhost;
location / {
root /var/www/html;
index index.html;
}

location /proxy/ {
 proxy_pass http://192.168.1.5:8090;
}
}
[root@localhost conf.d]# service nginx restart
redirecting to /bin/systemctl restart nginx.service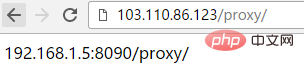
[root@localhost conf.d]# cat test.conf
server {
listen 80;
server_name localhost;
location / {
root /var/www/html;
index index.html;
}

location /proxy/ {
 proxy_pass http://192.168.1.5:8090/haha/;
}
}
[root@localhost conf.d]# service nginx restart
redirecting to /bin/systemctl restart nginx.service
[root@localhost conf.d]# curl http://192.168.1.23/proxy/
192.168.1.5 haha-index.html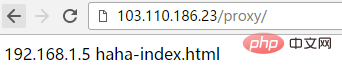
[root@localhost conf.d]# cat test.conf
server {
listen 80;
server_name localhost;
location / {
root /var/www/html;
index index.html;
}

location /proxy/ {
 proxy_pass http://192.168.1.5:8090/haha;
}
}
[root@localhost conf.d]# service nginx restart
redirecting to /bin/systemctl restart nginx.service
[root@localhost conf.d]# curl http://192.168.1.23/proxy/index.html
192.168.1.5 hahaindex.html同理,訪問http://192.168.1.23/proxy/test.html就會被代理到http://192.168.1.5:8090/hahatest.html
[root@localhost conf.d]# curl http://192.168.1.23/proxy/index.html
192.168.1.5 hahaindex.html

上面四種方式都是符合的path路徑後面加上"/",下面說下path路徑後面不帶"/"的情況:
[root@localhost conf.d]# cat test.conf
server {
listen 80;
server_name localhost;
location / {
root /var/www/html;
index index.html;
}

location /proxy {
 proxy_pass http://192.168.1.5:8090/;
}
}
[root@localhost conf.d]# service nginx restart
redirecting to /bin/systemctl restart nginx.service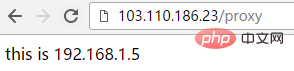
[root@localhost conf.d]# cat test.conf
server {
listen 80;
server_name localhost;
location / {
root /var/www/html;
index index.html;
}

location /proxy {
 proxy_pass http://192.168.1.5:8090;
}
}
[root@localhost conf.d]# service nginx restart
redirecting to /bin/systemctl restart nginx.service
[root@localhost conf.d]#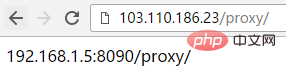
[root@localhost conf.d]# cat test.conf
server {
listen 80;
server_name localhost;
location / {
root /var/www/html;
index index.html;
}

location /proxy {
 proxy_pass http://192.168.1.5:8090/haha/;
}
}
[root@localhost conf.d]# service nginx restart
redirecting to /bin/systemctl restart nginx.service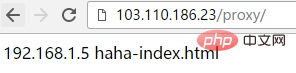
[root@localhost conf.d]# cat test.conf
server {
listen 80;
server_name localhost;
location / {
root /var/www/html;
index index.html;
}

location /proxy {
 proxy_pass http://192.168.1.5:8090/haha;
}
}
[root@localhost conf.d]# service nginx restart
redirecting to /bin/systemctl restart nginx.service
以上是nginx proxy_pass反向代理程式設定實例分析的詳細內容。更多資訊請關注PHP中文網其他相關文章!


